- How to get ubuntu linux
- 2. Requirements
- 3. Boot from DVD
- 4. Boot from USB flash drive
- 5. Prepare to install Ubuntu
- 6. Allocate drive space
- 7. Begin installation
- 8. Select your location
- 9. Login details
- 10. Background installation
- 11. Installation complete
- Ubuntu downloads
- Ubuntu Desktop ›
- Ubuntu Server ›
- Ubuntu Cloud ›
- Ubuntu flavours ›
- Ubuntu for IoT ›
- Professional support for Ubuntu
- How to get ubuntu linux
- 2. Requirements
- 3. Enable WSL
- 4. Install Ubuntu for Windows 10
- 5. Launch Ubuntu on Windows 10
- First launch
- 6. Getting help
- How to get ubuntu linux
- D.4.1.В Getting Started
- D.4.2.В Install debootstrap
- D.4.3.В Run debootstrap
- D.4.4.В Configure The Base System
- D.4.4.1.В Configure Apt
- D.4.4.2.В Install additional packages
- D.4.4.3.В Create device files
How to get ubuntu linux
The Ubuntu desktop is easy to use, easy to install and includes everything you need to run your organisation, school, home or enterprise. It’s also open source, secure, accessible and free to download.

In this tutorial, we’re going to install Ubuntu desktop onto your computer, using either your computer’s DVD drive or a USB flash drive.
2. Requirements
You’ll need to consider the following before starting the installation:
- Connect your laptop to a power source.
- Ensure you have at least 25 GB of free storage space, or 5 GB for a minimal installation.
- Have access to either a DVD or a USB flash drive containing the version of Ubuntu you want to install.
- Make sure you have a recent backup of your data. While it’s unlikely that anything will go wrong, you can never be too prepared.
See Installation/System Requirements for more specific details on hardware requirements. We also have several tutorials that explain how to create an Ubuntu DVD or USB flash drive.
3. Boot from DVD
It’s easy to install Ubuntu from a DVD. Here’s what you need to do:
- Put the Ubuntu DVD into your optical/DVD drive.
- Restart your computer.
As soon as your computer boots you’ll see the welcome window.

From here, you can select your language from a list on the left and choose between either installing Ubuntu directly, or trying the desktop first (if you like what you see, you can also install Ubuntu from this mode too).
Depending on your computer’s configuration, you may instead see an alternative boot menu showing a large language selection pane. Use your mouse or cursor keys to select a language and you’ll be presented with a simple menu.

Select the second option, ‘Install Ubuntu’, and press return to launch the desktop installer automatically. Alternatively, select the first option, ‘Try Ubuntu without installing’, to test Ubuntu (as before, you can also install Ubuntu from this mode too).
A few moments later, after the desktop has loaded, you’ll see the welcome window. From here, you can select your language from a list on the left and choose between either installing Ubuntu directly, or trying the desktop first.
If you don’t get either menu, read the booting from the DVD guide for more information.
4. Boot from USB flash drive
Most computers will boot from USB automatically. Simply insert the USB flash drive and either power on your computer or restart it. You should see the same welcome window we saw in the previous ‘Install from DVD’ step, prompting you to choose your language and either install or try the Ubuntu desktop.
If your computer doesn’t automatically boot from USB, try holding F12 when your computer first starts. With most machines, this will allow you to select the USB device from a system-specific boot menu.
F12 is the most common key for bringing up your system’s boot menu, but Escape, F2 and F10 are common alternatives. If you’re unsure, look for a brief message when your system starts — this will often inform you of which key to press to bring up the boot menu.
5. Prepare to install Ubuntu
You will first be asked to select your keyboard layout. If the installer doesn’t guess the default layout correctly, use the ‘Detect Keyboard Layout’ button to run through a brief configuration procedure.
After selecting Continue you will be asked What apps would you like to install to start with? The two options are ‘Normal installation’ and ‘Minimal installation’. The first is the equivalent to the old default bundle of utilities, applications, games and media players — a great launchpad for any Linux installation. The second takes considerably less storage space and allows you to install only what you need.
Beneath the installation-type question are two checkboxes; one to enable updates while installing and another to enable third-party software.
- We advise enabling both Download updates and Install third-party software .
- Stay connected to the internet so you can get the latest updates while you install Ubuntu.
- If you are not connected to the internet, you will be asked to select a wireless network, if available. We advise you to connect during the installation so we can ensure your machine is up to date

6. Allocate drive space
Use the checkboxes to choose whether you’d like to install Ubuntu alongside another operating system, delete your existing operating system and replace it with Ubuntu, or — if you’re an advanced user — choose the ’Something else’ option.

Options related to side-by-side installation or erasing a previous installation are only offered when pre-existing installations are detected.
7. Begin installation
After configuring storage, click on the ‘Install Now’ button. A small pane will appear with an overview of the storage options you’ve chosen, with the chance to go back if the details are incorrect.
Click Continue to fix those changes in place and start the installation process.

8. Select your location
If you are connected to the internet, your location will be detected automatically. Check your location is correct and click ’Forward’ to proceed.
If you’re unsure of your time zone, type the name of a local town or city or use the map to select your location.

positive
: If you’re having problems connecting to the Internet, use the menu in the top-right-hand corner to select a network.
9. Login details
Enter your name and the installer will automatically suggest a computer name and username. These can easily be changed if you prefer. The computer name is how your computer will appear on the network, while your username will be your login and account name.
Next, enter a strong password. The installer will let you know if it’s too weak.
You can also choose to enable automatic login and home folder encryption. If your machine is portable, we recommend keeping automatic login disabled and enabling encryption. This should stop people accessing your personal files if the machine is lost or stolen.

: If you enable home folder encryption and you forget your password, you won’t be able to retrieve any personal data stored in your home folder.
10. Background installation
The installer will now complete in the background while the installation window teaches you a little about how awesome Ubuntu is. Depending on the speed of your machine and network connection, installation should only take a few minutes.

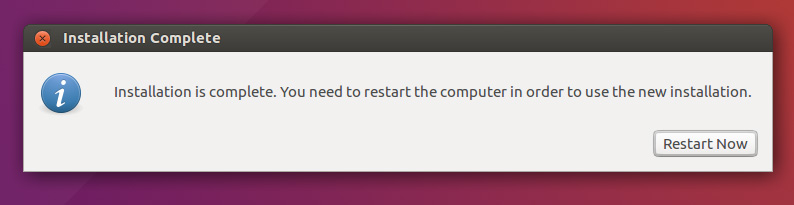
11. Installation complete
After everything has been installed and configured, a small window will appear asking you to restart your machine. Click on Restart Now and remove either the DVD or USB flash drive when prompted. If you initiated the installation while testing the desktop, you also get the option to continue testing.
Congratulations! You have successfully installed the world’s most popular Linux operating system!
Источник
Ubuntu downloads
Ubuntu Desktop ›
Download Ubuntu desktop and replace your current operating system whether it’s Windows or macOS or run Ubuntu alongside it.
Do you want to upgrade? Follow our simple guide


Ubuntu Server ›
Whether you want to configure a simple file server or build a fifty thousand-node cloud, you can rely on Ubuntu Server and its five years of guaranteed free upgrades.
Ubuntu Cloud ›
Ubuntu is the reference OS for OpenStack. Try Canonical OpenStack on a single machine or start building a production cloud on a cluster — just add servers.
Ubuntu flavours ›
Ubuntu flavours offer a unique way to experience Ubuntu with different choices of default applications and settings, backed by the full Ubuntu archive for packages and updates.
Ubuntu for IoT ›
Are you a developer who wants to try snappy Ubuntu Core? The new, transactionally updated Ubuntu for clouds and devices.
Professional support for Ubuntu
Get professional support for Ubuntu from Canonical. We help organisations around the world to manage their Ubuntu cloud, server and desktop deployments.
Источник
How to get ubuntu linux
Switch language: EN | ES
The wonderful Ubuntu terminal is freely available for Windows 10.
As any Linux user knows, it’s the command line terminal where the magic happens. It’s perfect for file management, development, remote administration and a thousand other tasks.
The Ubuntu terminal for Windows has many of the same features you’ll find using the terminal on Ubuntu:
- Unrivalled breadth of packages, updates and security features
- Bash, Z-Shell, Korn and other shell environments without virtual machines or dual-booting
- Run native tools such as SSH, git, apt and dpkg directly from your Windows computer
- A huge community of friendly, approachable users

Originally authored by Graham Morrison.
2. Requirements
You will need a x86 PC running Windows 10.
Windows 10 needs to be updated to include the Windows 10 Fall Creators update, released October 2017. This update includes the Windows Subsystem for Linux which is needed to run the Ubuntu terminal.

3. Enable WSL
To enable WSL 1 on Windows 10 Fall Creators update and newer run the following in PowerShell as Administrator:
To enable WSL 2 on Windows 10 May 2020 update and newer run the following in PowerShell as Administrator:
and then restart Windows 10.
4. Install Ubuntu for Windows 10
Ubuntu can be installed from the Microsoft Store:
- Use the Start menu to launch the Microsoft Store application or click here.
- Search for Ubuntu and select the first result, ‘Ubuntu’, published by Canonical Group Limited.
- Click on the Install button.
Ubuntu will be downloaded and installed automatically. Progress will be reported within the Microsoft Store application.

5. Launch Ubuntu on Windows 10
Ubuntu can now be launched in the same way as any other Windows 10 application, such as searching for and selecting Ubuntu in the Start menu.
First launch
When launched for the first time, Ubuntu will inform you that it’s ‘Installing’ and you’ll need to wait a few moments.
When complete, you’ll be asked for a username and password specific to your Ubuntu installation. These don’t need to be the same as your Windows 10 credentials. With this step complete, you’ll find yourself at the Ubuntu bash command line.

Congratulations! You have successfully installed and activated the Ubuntu terminal on Windows 10. You now have all the power of the command line at your fingertips.
6. Getting help
If you need some guidance getting started with the Ubuntu terminal, take a look at the community documentation, and if you get stuck, help is always at hand:
Источник
How to get ubuntu linux
This section explains how to install Ubuntu from an existing Unix or Linux system, without using the menu-driven installer as explained in the rest of the manual. This “ cross-install ” HOWTO has been requested by users switching to Ubuntu from Debian, Red Hat, Mandriva, and SUSE. In this section some familiarity with entering *nix commands and navigating the file system is assumed. In this section, $ symbolizes a command to be entered in the user’s current system, while # refers to a command entered in the Ubuntu chroot.
Once you’ve got the new Ubuntu system configured to your preference, you can migrate your existing user data (if any) to it, and keep on rolling. This is therefore a “ zero downtime ” Ubuntu install. It’s also a clever way for dealing with hardware that otherwise doesn’t play friendly with various boot or installation media.
As this is a mostly manual procedure, you should bear in mind that you will need to do a lot of basic configuration of the system yourself, which will also require more knowledge of Ubuntu and of Linux in general than performing a regular installation. You cannot expect this procedure to result in a system that is identical to a system from a regular installation. You should also keep in mind that this procedure only gives the basic steps to set up a system. Additional installation and/or configuration steps may be needed. In general, this method of installation is not recommended for casual or first time users.
D.4.1.В Getting Started
With your current *nix partitioning tools, repartition the hard drive as needed, creating at least one filesystem plus swap. You need around 506MB of space available for a console only install.
Next, create file systems on the partitions. For example, to create an ext3 file system on partition /dev/sda6 (that’s our example root partition):
To create an ext2 file system instead, omit -j .
Initialize and activate swap (substitute the partition number for your intended Ubuntu swap partition):
Instead of using a dedicated swap partition, you may omit the swap partition setup here and later just use a swap file instead.
Mount one partition as /mnt/ubuntu (the installation point, to be the root ( / ) filesystem on your new system). The mount point name is strictly arbitrary, it is referenced later below.
If you want to have parts of the filesystem (e.g. /usr) mounted on separate partitions, you will need to create and mount these directories manually before proceding with the next stage.
D.4.2.В Install debootstrap
The utility used by the Ubuntu installer, and recognized as the official way to install an Ubuntu base system, is debootstrap . It uses wget and ar , but otherwise depends only on /bin/sh and basic Unix/Linux tools [22] . Install wget and ar if they aren’t already on your current system, then download and install debootstrap . If these steps are executed under Ubuntu you can simply do this by apt install debootstrap .
If you have an RPM (Red Hat Package Manager) based system, you can use alien, which is available in the Debian repositories, to convert the .deb file to a useable .rpm file.
Or, you can use the following procedure to install it manually. Make a work folder for extracting the .deb into:
The debootstrap binary is located in the Ubuntu archive (be sure to select the proper file for your architecture). Download the debootstrap .deb from the pool, copy the package to the work folder, and extract the files from it. You will need to have root privileges to install the files.
D.4.3.В Run debootstrap
debootstrap can download the needed files directly from the archive when you run it. You can substitute any Ubuntu archive mirror for ports.ubuntu.com/ubuntu-ports in the command example below, preferably a mirror close to you network-wise. Mirrors are listed at http://wiki.ubuntu.com/Archive.
If you have an Ubuntu focal CD mounted at /cdrom , you could substitute a file URL instead of the http URL: file:/cdrom/ubuntu/
Substitute one of the following for ARCH in the debootstrap command: amd64 , arm64 , armhf , i386 , powerpc , ppc64el , or s390x .
D.4.4.В Configure The Base System
Now you’ve got a real Ubuntu system, though rather lean, on disk. chroot into it:
After chrooting you may need to set the terminal definition to be compatible with the Ubuntu base system, for example:
Depending on the value of TERM, you may have to install the ncurses-term package to get support for it.
If warnings occur like:
The required localization files need to be generated:
D.4.4.1.В Configure Apt
Debootstrap will have created a very basic /etc/apt/sources.list that will allow installing additional packages. However, it is suggested that you add some additional sources, for example for source packages and security updates:
Make sure to run apt update after you have made changes to the sources list.
D.4.4.2.В Install additional packages
Now it’s required to install some additionally required packages, like makedev (needed for the next section): apt install makedev
D.4.4.3.В Create device files
At this point /dev/ only contains very basic device files. For the next steps of the installation additional device files may be needed. There are different ways to go about this and which method you should use depends on the host system you are using for the installation, on whether you intend to use a modular kernel or not, and on whether you intend to use dynamic (e.g. using udev ) or static device files for the new system.
A few of the available options are:
create a default set of static device files using (after chrooting)
manually create only specific device files using MAKEDEV
bind mount /dev from your host system on top of /dev in the target system, like:
Note that the postinst scripts of some packages may try to create device files, so this option should only be used with care.
Источник


