- How to take and annotate screenshots on Windows 10
- Take a screenshot
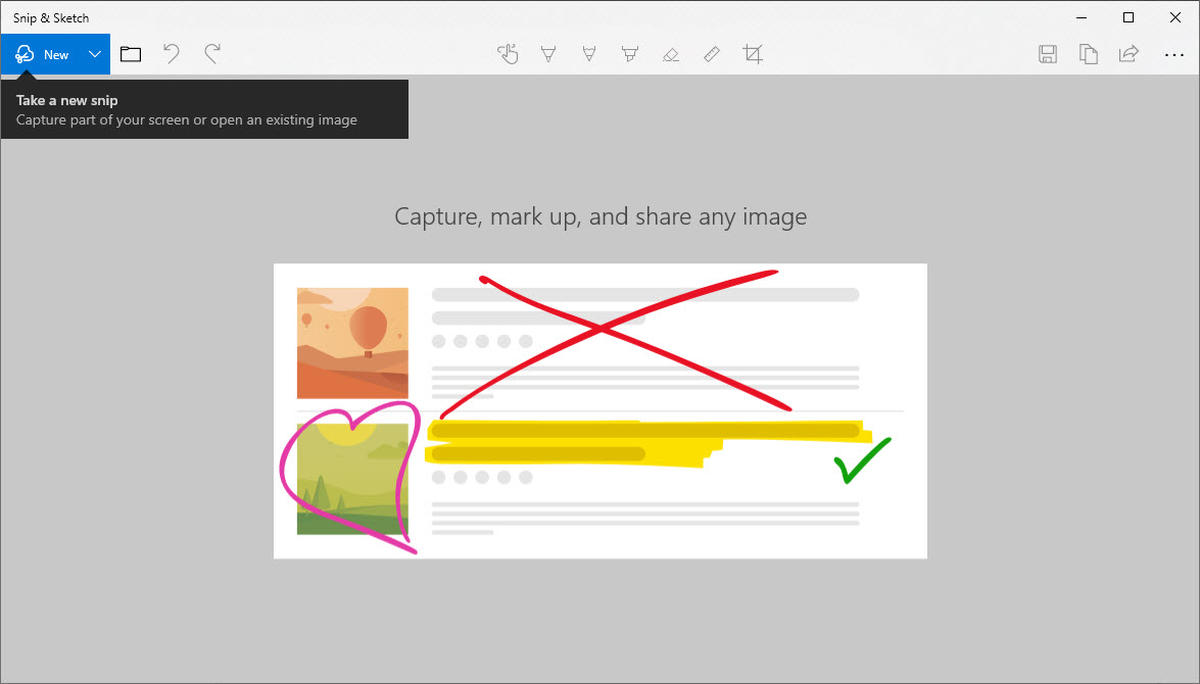
- Annotate snips with Snip & Sketch
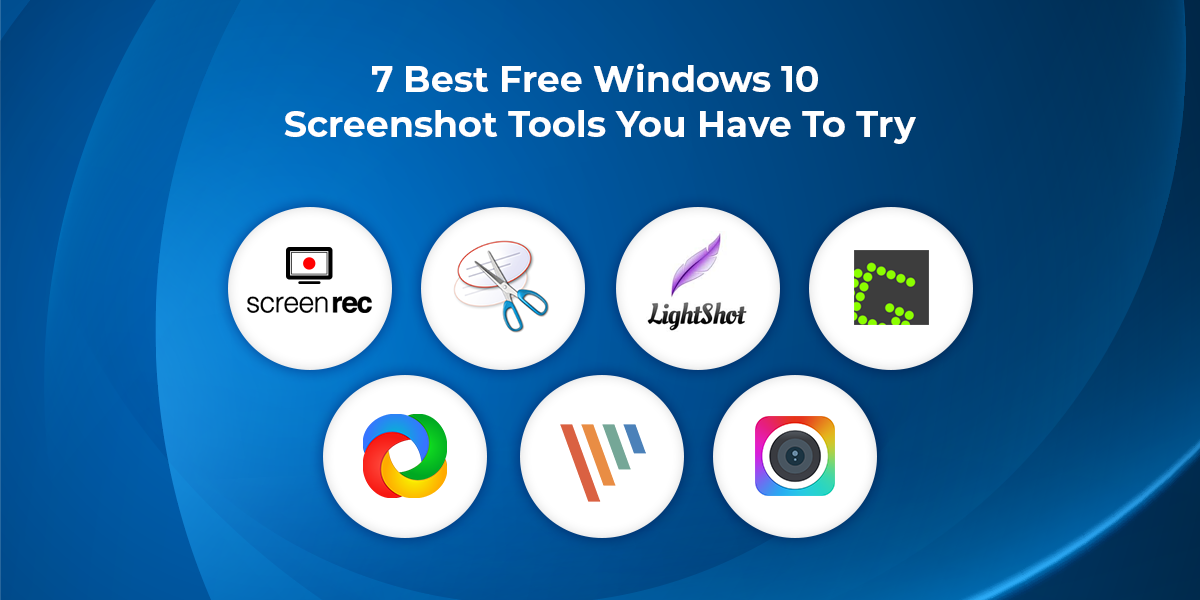
- 7 Best Free Windows 10 Screenshot Tools
- 1. ScreenRec
- Overview
- Why It’s Awesome
- Who’s It For
- 2. Windows Snipping Tool
- Overview
- Why It’s Awesome
- Who’s It For
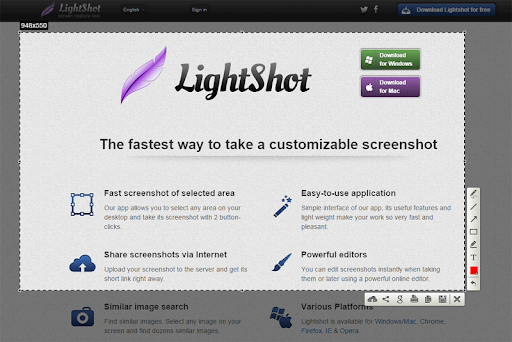
- 3. Lightshot
- Overview
- Why It’s Awesome
- Who’s It For
- 4. Greenshot
- Overview
- Why It’s Awesome
- Who’s It For
- 5. ShareX
- Overview
- Why It’s Awesome
- Who’s It For
- 6. PicPick
- Overview
- Why It’s Awesome
- Who’s It For
- 7. Awesome Screenshot
- Overview
- Why It’s Awesome
- Who’s It For
- Compare The Best Free Windows 10 Screenshot Tools
- And the Winner for Best Screenshot Software for Windows is…
How to take and annotate screenshots on Windows 10
Sometimes the easiest way to make a copy of something is to take a snapshot of your screen. While you can already capture your screen using your keyboard’s PrtScn button, you can now press Windows logo key + Shift + S to open the new modern snipping experience (also called the snipping bar), then drag the cursor over the area you want to capture.
Here are some common ways to take and annotate screenshots in Snip & Sketch on Windows 10.
Take a screenshot
Option 1: Using the Snip & Sketch app
Press the Start button and enter Snip & Sketch in the search field.
Press the New button to start snipping with the snipping bar.
The snipping bar allows you to capture the following types of snips:
Rectangular snip. Drag the cursor around an object to form a rectangle.
Free-form snip. Draw a free-form shape around an object.
Full-screen snip. Capture the entire screen.
Once you snip an area of your screen — the snipped image is added to your clipboard and you can paste it immediately in another app. A screen prompt will also allow you to annotate, save or share it using the Snip & Sketch app.
Option 2: With the Print Screen key
While the PrtScn key already captures your full screen and sends it to your clipboard, opening the snipping bar provides you with more snipping tools you can use for precise snipping. For better control of your screen capturing options, you can opt to have your PrtScn key open the new snipping bar instead of having to type Windows logo key + Shift + S.
To turn on the new snipping feature keyboard shortcut Select Start > Settings > Ease of Access > Keyboard
Option 3: With the Window logo key + Shift + S shortcut
Pressing the S key + Windows logo + Shift keys down initiates the snipping bar at any time.
Annotate snips with Snip & Sketch
Opening images for editing with Snip & Sketch
To open an image from Snip & Sketch, select Open File or drag and drop an image from apps like File Explorer or Photos in the Snip & Sketch window.
Annotating images with Snip & Sketch
Snip & Sketch provides a few tools for annotating images, namely pen, pencil and highlighter. Once you click a tool to select it, you can click it again to change its color or thickness.
The tools work better with a pen device, but they can also be used with mouse or touch if you select the Touch Writing button icon.
Use the Eraser tool to remove specific strokes or click it twice to get the option to erase all ink.
Use the ruler or protractor tools and draw straight lines or arches.
Press the ruler/protractor button again to hide the ruler/protractor
Reside or rotate the ruler/protractor by using two finger touch gestures (if the Touch Writing button is selected) or with the mouse wheel.
Use the crop tool to crop the annotated image.
To undo cropping, select the crop tool again and press Cancel to restore the image to its full original area.
Panning the view
Some of the images you annotate might be larger than the size of the Snip & Sketch window. You can use the scroll bars to pan the view, but you can also pan the view with touch input (if the Touch Writing button is not selected) or by dragging with your mouse button while holding the Ctrl key down.
Zoom in and out of screenshots to make them easier to mark up using the magnifying glass icon. You can also zoom in and out of screenshots by pressing the Ctrl key down and tapping the + or — buttons.
Sharing and saving snips
Snip & Sketch copies the annotated snip to your clipboard when you open it and every time you make edits. Snip & Sketch allows you to save the annotated image to a file, share it or open with another app, or print it on paper or to a pdf file.
Using keyboard in Snip & Sketch
While annotating is best done using a pen or mouse — Snip & Sketch provides a lot of keyboard shortcuts you can use. Access keys are activated if you press and hold the Alt key.
7 Best Free Windows 10 Screenshot Tools
Taking a screenshot on Windows 10 can be a bit frustrating. Granted, there are a few tricks you can use…
For example, you can press the Print Screen key and the Windows key which will save a screenshot directly to your Pictures folder. That’s nice, but when it comes to how to edit and annotate a screenshot, you’re on your own. Your other option is the Windows 10 Snipping Tool which is simple but, sometimes, too basic.
There’s got to be more to PC screen capturing than that, right?
Right. Actually, there is such an abundance of Windows 10 screenshot tools that you can easily feel overwhelmed when you try to pick just one. To help you save time, we’ve rounded up the top 7 print screen software (free and easy).
And, if you’re too busy to read a top 7, you can watch our top 3 video below.
1. ScreenRec
Overview
If you’re looking for a way to take an instant screenshot on Windows , you’ll love ScreenRec. Besides being the easiest and fastest screenshot program on this list, ScreenRec is actually full-featured free screen capture software. This means that you can also use it to record your PC screen.
Why It’s Awesome
There is a single hotkey to remember (Alt + S) to either screengrab or record and you can add annotations to your screenshots with a few mouse clicks.
But what’s best about ScreenRec is the ability to share your screen captures instantly and securely (via private URL). As soon as you’re done taking a screenshot or recording your desktop, a sharing link is copied to your clipboard. You can paste it in an email, a private message or wherever you like.
Press Alt + S -> Capture -> Grab sharing link. Screenrec is as simple as that.
Who’s It For
Anyone can benefit from using ScreenRec. Yet, business people stand to gain a lot in productivity when implementing ScreenRec into their daily routine. They can send video email, create tutorial videos, record Skype/Zoom meetings.
2. Windows Snipping Tool
Overview
We know. We said we’d venture beyond the Windows Snipping Tool, but Microsoft has made some changes to the built-in screenshot utility that are worth mentioning. If you want to avoid this program at all costs, continue reading or check out our list of Snipping tool alternatives
Why It’s Awesome
In the October 2018 update, Snip & Sketch replaced the Windows Snipping Tool which came with previous versions of Windows. The keyboard shortcut is Windows + Shift + S.
The annotation options in Snip & Sketch include more colors, writing tools, and even a ruler and a protractor. Another plus is that you can use Snip & Sketch on a Windows 10 tablet. Actually, it’s somewhat easier to use Snip & Sketch on a tablet than on a PC because it’s optimized for doodling rather than annotating with a mouse. But, if you need more editing options, you can open the snip in another app.
Who’s It For
Immediate sharing is still a pain in the butt, so we wouldn’t recommend this screenshot program for those who need easy and secure access to their captures. But, if you’re looking for a quick screen snip (especially if you want to do a free-form selection), this app will work just fine.
3. Lightshot
Overview
Offered by PrntScr.com, Lightshot is a screenshot app for PC that allows you to take quick snaps and edit them online or within the app.
Why It’s Awesome
With Lightshot, you have access to an online image editing tools by clicking a single button and uploading your images to their servers. Some people may find this problematic as there is no way to guarantee the privacy of your captures. Nonetheless, once your images are uploaded (and you’ve created an account), you have full access to your online gallery and Lightshot’s editor.
Who’s It For
Lightshot is for anyone looking to edit/share their screen snapshots publicly. Due to the general lack of security, we wouldn’t recommend uploading images that contain sensitive information. So, Lightshot may not be ideal for business people and companies.
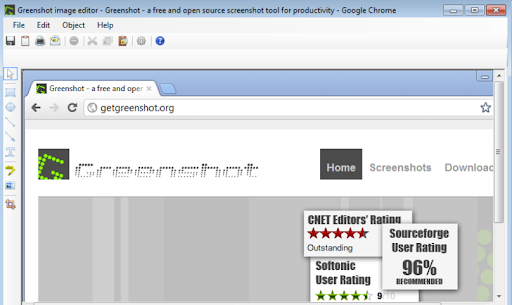
4. Greenshot
Overview
This open source screenshot app for Windows is perfectly suited for productivity while keeping things incredibly simple. Much like Gadwin Printscreen, Greenshot aims to make it easier to take screenshots and save them using the PrtScn key.
Why It’s Awesome
Greenshot requires no prior knowledge. In fact, it may be the most basic screenshot program available. And, by “basic” we mean this screen grab application has all of the necessary features (hotkey functions, annotation, built-in editor, upload/sharing options) without bells and whistles.
Who’s It For
If you just need to take a screenshot on Windows 10 and you don’t need a bunch of features, Greenshot is a good option. You can upload your captured images to file sharing sites or save them locally. Since Greenshot isn’t overly fancy, taking, editing, and sharing your screenshots is a breeze, saving valuable time.
5. ShareX
Overview
Ahh ShareX, the one with the most options… It does everything from capturing the active window or the active monitor, to uploading your content to dozens of predefined sites.
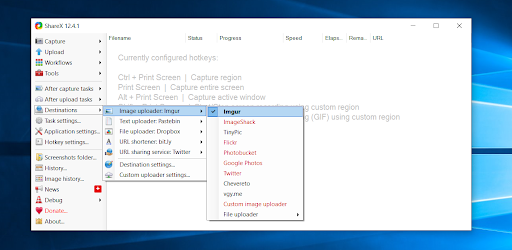
Why It’s Awesome
Like ScreenRec, ShareX has the ability to not only capture screenshots but also to record your screen. However, the long list of uploading options is worth mentioning. Pretty much every social media and file sharing site you can think of is available in the ShareX app. It certainly isn’t private sharing, but it is convenient.
Who’s It For
ShareX can be used by anyone who isn’t afraid to browse a ton of options and menus. Those who love to (or need to) share via social media will love this app.
6. PicPick
Overview
A buffet of features in a single app? Yes, please! PicPick is so full of various features that it’s more of a photo editor than a screenshot app. With its ability to capture scrolling screenshots when you need to snip entire webpages, this app is hard to ignore.
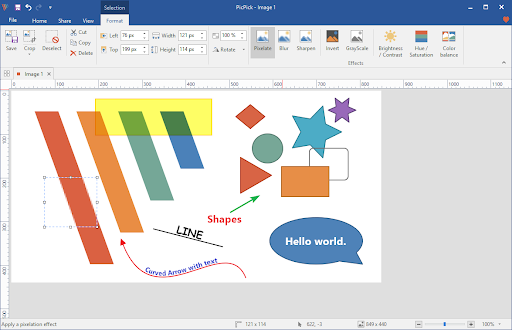
Why It’s Awesome
PicPick will require a bit of exploration first, but with a list of edit tools almost as big as Photoshop’s, it’s worth giving it a once-over. When you’re done editing your screenshot, you can save it as an image or upload it to a public sharing site such as imageshack.us. What’s more interesting about PicPick is that it is portable. You can move this print screen program onto a jump drive and open it up anywhere without needing to install it.
Who’s It For
PicPick is best suited for those who are looking for an advanced editor and a screen grab app rolled into one.
7. Awesome Screenshot
Overview
Awesome Screenshot is a browser extension that gives you everything an installed screenshot app offers. The downside? It could make your computer run slow.
Why It’s Awesome
Forget the downside for a moment. The upside is that, as long as you are signed in, you can use the app on any PC and upload your screen captures to Google Drive. This screenshot software can also capture web pages. Keep in mind, though, that you are allowed only 30 images per project and only 30 seconds of screen recording time.
Who’s It For
Anyone who is constantly on the go can benefit from using Awesome Screenshot. As long as you can log in to your personalized browser, you’re good to go.
Compare The Best Free Windows 10 Screenshot Tools
| Capture Full Screen | Capture Screen Area | Edit Screenshots (Annotation) | Automatic Upload | Instant Sharing | |
|---|---|---|---|---|---|
| Screenrec | Yes | Yes | Yes | Yes | Yes, 2 Gb free private cloud storage |
| Windows Snipping Tool | Yes | Yes | Yes | No | No |
| Lightshot | Yes | Yes | Yes | Yes | No |
| Greenshot | Yes | Yes | Yes | No | Yes, but not secure |
| ShareX | Yes | Yes | Yes | Yes | Yes, but not secure |
| PicPick | Yes | Yes | Yes | No | Yes, but not secure |
| Awesome Screenshot | Yes | Yes | Yes | No | Yes, if you’re connected to Google Drive |
And the Winner for Best Screenshot Software for Windows is…

In all seriousness, choosing the best app depends on what you need. In our opinion, ScreenRec works for anyone, no matter the requirements. If you’re looking to snap the full screen or just a section; ScreenRec has it covered. Want to record a video? ScreenRec can do that, too. What about editing and sharing securely? Only ScreenRec can do both. Let’s not forget that it’s completely free with an included 2 GB of free storage. Feel free to download it and check it out for yourself!
How to take a screenshot without using Print Screen?
To take a screenshot without using Print Screen, try a third-party app like ScreenRec. With ScreenRec in particular, you can take a screenshot, save it and share it by pressing a single hotkey Alt + S.
How to take a screenshot with high resolution quality?
To take a screenshot with high resolution, set your screen resolution as high as possible. This is done through the display settings.
What is the best free screen capture software for Windows?
The best free screen capture software is the one that fits your needs perfectly. We’d suggest ScreenRec because it’s super-fast, lightweight and gives you a sharing link instantly. It can take screenshots and record your screen. All screen captures are stored in your private cloud account (2Gb free storage included).


