- How to Upgrade 32 Bit to 64 Bit in Win10/8/7 without Data Loss [MiniTool Tips]
- Summary :
- Quick Navigation :
- Why Upgrade 32 Bit to 64 Bit in Windows 10/8/7
- How to Convert 32 Bit to 64 Bit Windows 7/8/10 without Data Loss
- Move 1: Make Sure Your Processor Is 64-Bit Capable
- Move 2: Ensure Your PC Hardware Has 64-Bit Drivers Available
- Move 3: Back up Your PC
- Move 4: Upgrade Windows to 64 Bit
- Bottom Line
- Upgrade Windows 10 32 Bit to 64 Bit FAQ
- ABOUT THE AUTHOR
- How to install 64 bit windows
- Microsoft Windows Installation (64-bit)
- System Requirements
- Installation Instructions
- 1. Check the download file size (Optional)
- 2. Run the JDK installer
- Installed Directory Tree
- JDK Silent Installation
- 3. If you want to run Netscape 7.x, Mozilla 1.x, or Firefox 1.x with Java Plugin, do this:
- 4. Update the PATH variable (Optional)
- Should I set the PATH variable?
- How do I set the PATH permanently?
- 5. Start using the JDK!
- Uninstalling the JDK
- Location of VM Library Files (jvm.dll)
- Troubleshooting the Installation
How to Upgrade 32 Bit to 64 Bit in Win10/8/7 without Data Loss [MiniTool Tips]
By Vera | Follow | Last Updated March 03, 2021
Summary :
Have a need to upgrade Windows to 64 bit from 32 bit in Windows 10/8/7 since your memory is not used? How to upgrade 32 bit to 64 bit? This post shows you some things that you should check out, as well as the way to perform Windows 64 bit upgrade.
Quick Navigation :
Why Upgrade 32 Bit to 64 Bit in Windows 10/8/7
Microsoft offers both 32-bit and 64-bit versions of Windows 10/8/7. The 32-bit version is also known as the x86 version while the 64-bit version is known as the x64 version.
When installing Windows 7, 8 or Windows 10, you can choose to install 32-bit or 64-bit version of Windows. But most of you may choose to install the 64-bit version instead of the 32-bit version. If you have installed a 32-bit operating system, you may change it to a 64-bit system.
Why change 32 bit to 64 bit of Windows OS? This is because the 32-bit version is limited to 4GB of RAM (Ramdon Access Memory), which is a small amount these days when PCs usually have 8GB or more. If you installed many applications at the same time, “your computer is low on memory” error message may appear.
If you want to actually use more than 4GB of RAM resources, probably you need a 64-bit version of Windows. With the additional access to memory, you can run more apps simultaneously and improve performance. And the system improves productivity with memory-intensive tasks, such as virtual machines, video editing, Office-working, and web browsing when dealing with a lot of open tabs.
What’s more, 64-CPU may have backward compatibility, allowing it to run 32-bit programs and may also support running 32-bit operating systems. In this aspects, 64-bit version of Windows may have more benefits than 32-bit.
Besides, it’s not surprising that many applications now require a 64-bit operating system due to that limitation. Moreover, you can run x64 and x86 applications on a 64-bit OS, but that is not possible on a 32-bit OS.
How to Convert 32 Bit to 64 Bit Windows 7/8/10 without Data Loss
In the following paragraphs, we will walk you through four steps to upgrade Windows to 64 bit.
- Make Sure Your Processor Is 64-Bit Capable
- Ensure Your PC Hardware Has 64-Bit Drivers Available
- Back up Your PC
- Upgrade 32 Bit to 64 Bit
Move 1: Make Sure Your Processor Is 64-Bit Capable
To do this work, go to Settings > Systems > About. On the right-hand side of the interface, navigate to the System type entry.
Then, you will see one of the following system type:
- 64-bit operating system, x64-based processor: Your CPU support 64-bit and you have already installed the 64-bit edition of Windows 10. So, you don’t need to upgrade to 64 bit.
- 32-bit operating system, x64-based processor: Your CPU supports 64-bit, but you have installed the 32-bit version of Windows.
- 32-bit operating system, x86-based processor: Your CPU supports 32-bit and you have installed the 32-bit version of Windows.
To be specific, if you see the second entry, you are in luck and you can move on to the next section to continue Windows 10 64 bit upgrade since your 64-bit Central Processing Unit can run a 64-bit version. But if you see the third entry, you cannot install a 64-bit OS since your CPU doesn’t support 64-bit.
Move 2: Ensure Your PC Hardware Has 64-Bit Drivers Available
In addition, you should check whether other components, for example, video and sound cards, can work properly with a 64-bit version of Windows 10. Simply speaking, 64-bit OS requires 64-bit hardware drivers and the 32-bit drivers won’t work.
Modern hardware should certainly offer 64-bit drivers but some old hardware may no longer support and manufacturers may haven’t offered 64-bit drivers. To check for this, please go to your manufacturer support website to see if 64-bit drivers are available for download.
Move 3: Back up Your PC
Since you are making major changes to your operating system, it is indispensable to make a full backup of Windows 10. When you upgrade 32 bit to 64 bit in Windows 10/8/7, your personal files, settings, and applications will be deleted. And the best thing is to back up all the affected files to your external storage devices or USB drive to avoid data loss.
To back up your important files, you need a free backup program to help you. Which one is worth recommending? MiniTool ShadowMaker, a piece of professional file backup software, will be a good option, coming with many powerful features.
With the help of this freeware, you can create an image file for files & folders, Windows operating system, disk or partition. Besides, it can help you to sync files to other locations for backup. Above all, automatic file backup, differential & incremental backup can be created.
Right now, before you free change 32 bit to 64 bit of Windows 10/8/7, get MiniTool ShadowMaker Trial Edition from the following button to back up your crucial files. Note that this edition only allows you to free use for 30 days. If you want to keep this software all the time, get its Pro Edition.
Step 1: Double-click on this program to open it.
Step 2: Which feature should you use to back up files, Backup or Sync? Both are available. And here, you take the first feature as an example.
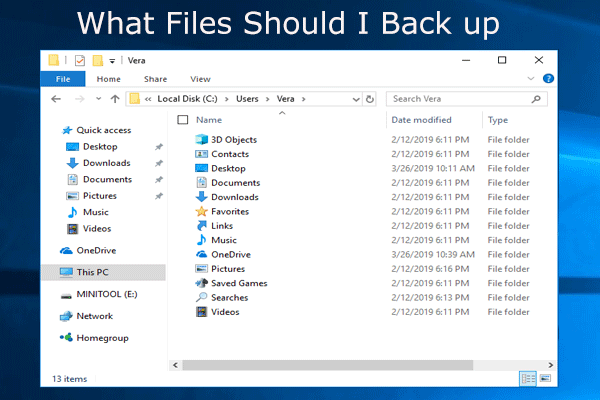
What do I need to back up my computer? What files should I back up? Now, get the answers to these two questions in this post.
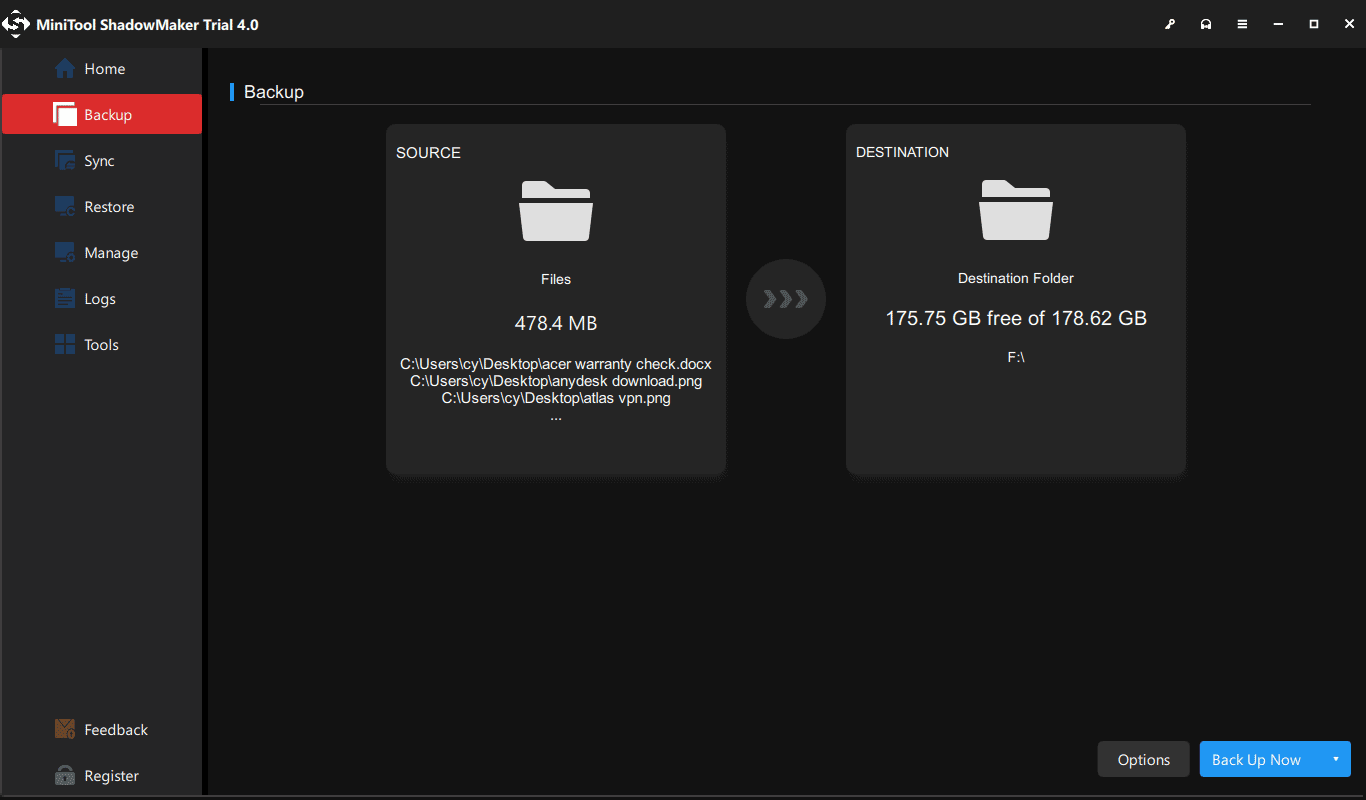
In the Backup window, you need to decide which files to back up and where to save the backup image file. Just go to the Source section and choose personal files you want to back up.
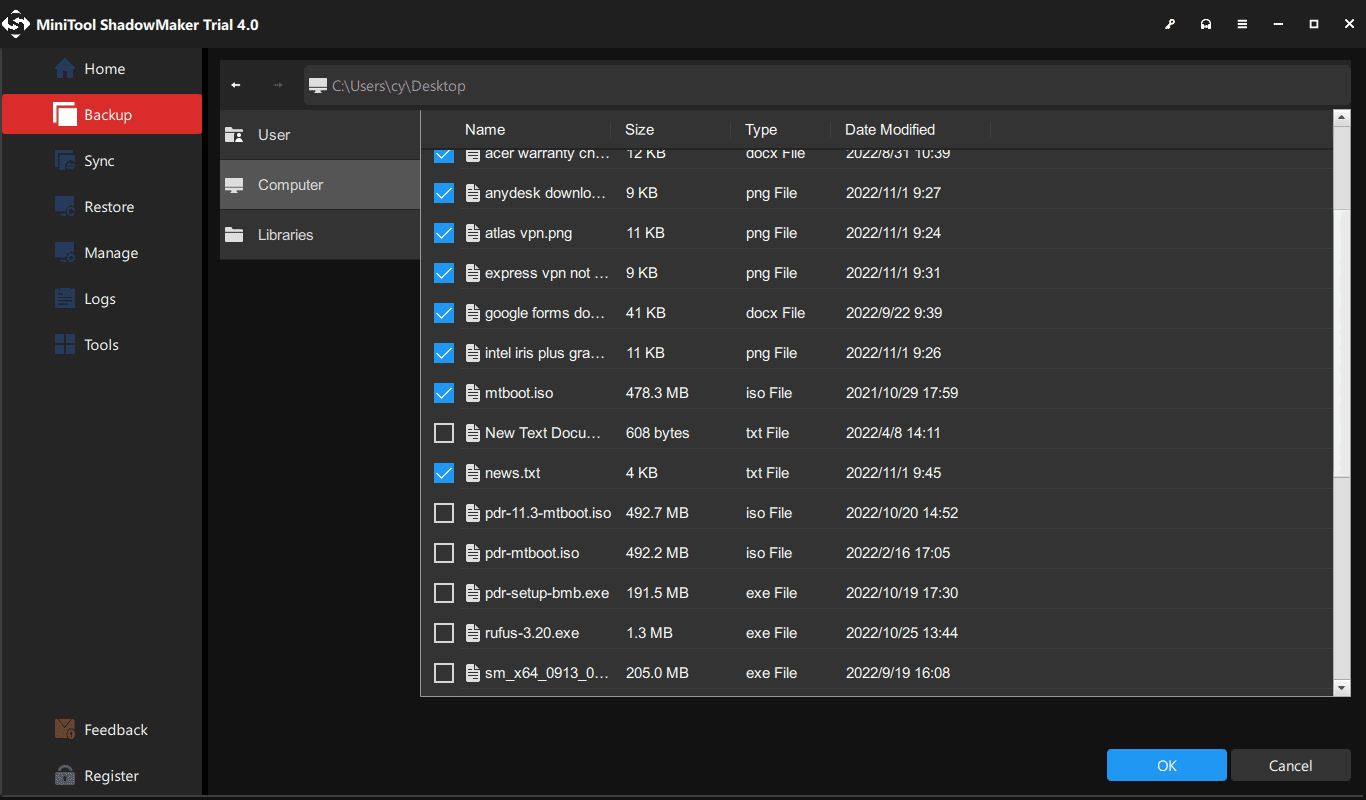
Then, go to the Destination section and choose an external hard drive, USB flash drive, or NAS as the storage path.
Step 3: Finally, start the full backup process of your important files by hitting the Back up Now button.
Now, all operations to back up files are told to you. If you are planning to convert 32 bit to 64 bit of Windows 10/8/7 operating system, don’t hesitate to free download this backup software to prevent your data from losing after upgrading to the 64-bit version of Windows.
Right now, the previous three steps are told to you. Reading here, it is time for you to take action to upgrade Windows 10 32 bit to 64 bit. Just go to the next move to follow the corresponding steps for Windows 10 64-bit version upgrade.
Move 4: Upgrade Windows to 64 Bit
How to convert 32 bit to 64 bit Windows 7/8/10? As mentioned above, performing an upgrade from 32-bit to 64-bit version of Windows is actually clean install. Now, follow the steps below to make a reinstallation.
Create a Bootable USB Drive
How can you create bootable USB from ISO in Windows 10 for a clean install? This post will show you the Windows 10 USB tool for ISO to USB.
Here, take Windows 10 64 bit upgrade as an example and we will show you the step-by-step instructions. Right now, insert your USB flash drive with at least 4GB of storage space to your device and to create the 64-bit Windows 10 installation media.
Step 1: Open the official web page to download Windows 10 Media CreationTool.
Step 2: Click Download tool now under Create Windows 10 installation media.
Step 3: Double-click on the MediaCreationTool.exe to run this utility and then accept the Microsoft terms.
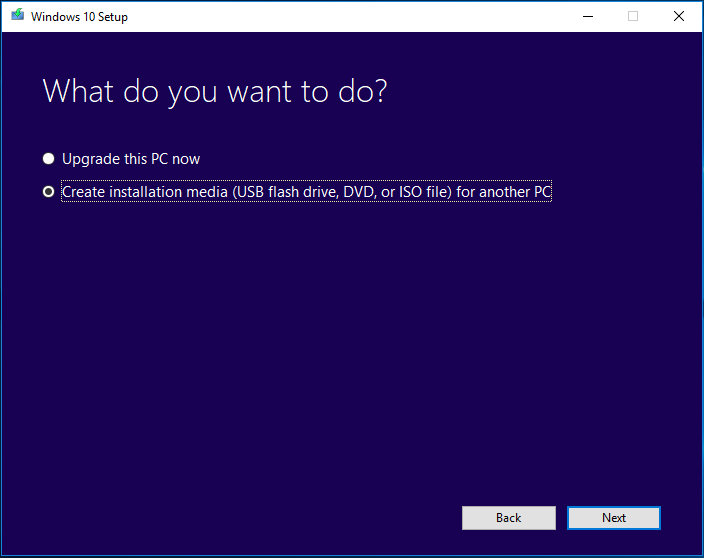
Step 4: There are two options. Check the option Create installation media (USB flash drive, DVD or ISO file) for another PC.
Step 5: Please choose language and edition. To upgrade Windows 10 to 64 bit, here please specify the 64-bit (x64) option for 64-bit Architecture.

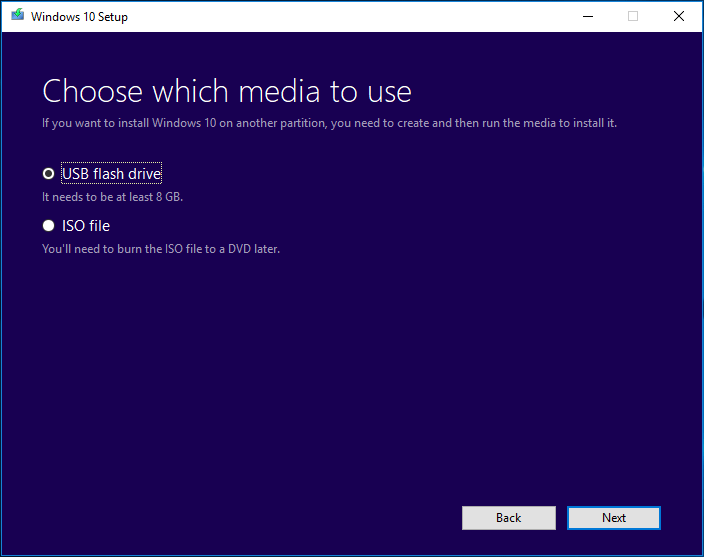
Step 6: Choose the USB flash drive option so as to create a bootable USB drive. Additionally, you can also check the option ISO file but you need to burn the file to a USB drive or CD/DVD. Here, we recommend the first one.
Step 7: Next, all your drives on your computer will be listed. Just choose the USB flash drive from the list to continue.
Step 8: Then, this tool will start downloading needed files and creating a bootable drive from ISO file that is compatible with Windows 10 64 bit. Wait for the process to be finished.
Install Windows 10 64 Bit from Scratch
How to upgrade Windows 7 32 bit to 64 bit without CD or upgrade Windows 8/10 to 64 bit without disk? Now, restart your computer with the bootable USB drive and then follow these steps:
Step 1: After booting your PC from the USB drive, choose language, time and currency format and keyboard.
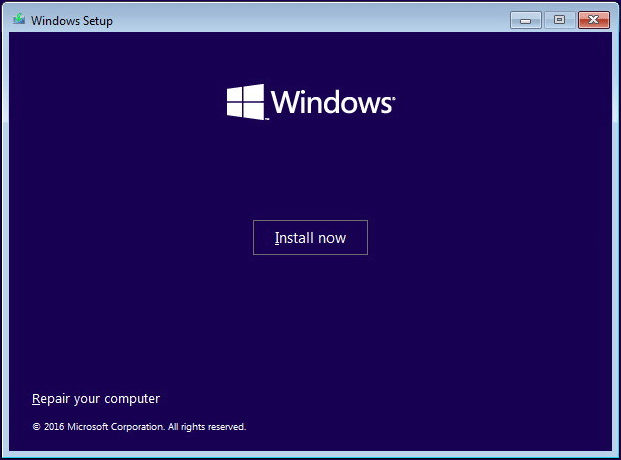
Step 2: Click Install now to continue.
Step 3: Your purpose is to upgrade 32 bit to 64 bit for Windows 10, so you should click the I don’t have a product key link (assuming your PC has been already properly activated).
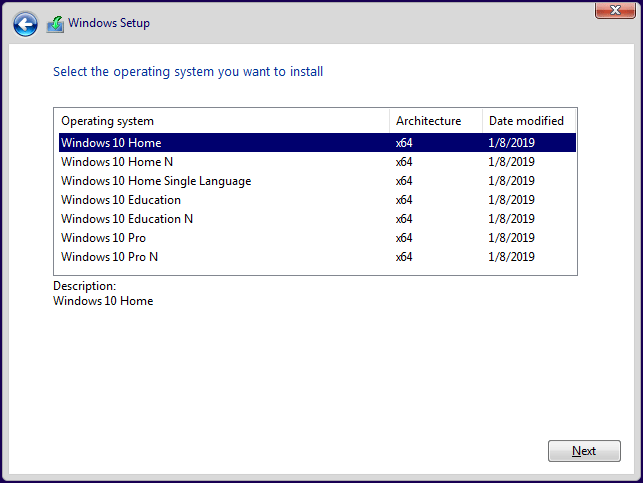
Step 4: Choose the edition of Windows 10 to go on.
Step 5: Accept the license terms. To upgrade Windows 10 32 bit to 64 bit, please choose Custom: Install Windows only (advanced).

Step 6: You may ask: how to upgrade 32 bit to 64 bit Windows 7/8/10 without formatting? Actually, it is easy. In the following drive list option page, choose the partition(s) with the current installation of Windows, and click the Delete button instead of formatting operation to remove it from the hard drive.
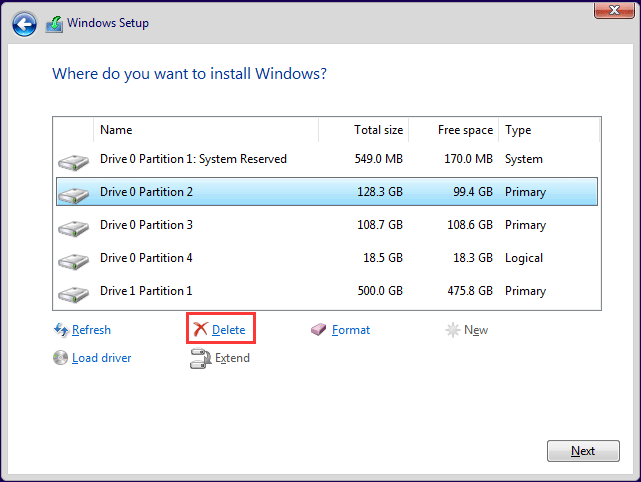
Step 7: Then, click the unallocated space to continue. Then, the setup will install the 64-bit version of Windows 10 on your computer. Later, you need to complete the Out-of-box experience (OOBE) setup the OS with your preferences by following the on-screen directions.
Bottom Line
Want to upgrade 32 bit to 64 bit? Here is the overview that you should do before the upgrade and how to convert 32 bit to 64 bit Windows 7/8/10. Just follow the above guides to start the upgrade operation.
Remember to leave a comment below or contact [email protected] if you have any different idea or question when you change 32 bit to 64 bit.
Upgrade Windows 10 32 Bit to 64 Bit FAQ
ABOUT THE AUTHOR

Position: Columnist
Vera is an editor of the MiniTool Team since 2016 who has more than 5 years’ writing experiences in the field of technical articles. Her articles mainly focus on disk & partition management, PC data recovery, video conversion, as well as PC backup & restore, helping users to solve some errors and issues when using their computers. In her spare times, she likes shopping, playing games and reading some articles.
How to install 64 bit windows
Your search did not match any results.
We suggest you try the following to help find what you’re looking for:
- Check the spelling of your keyword search.
- Use synonyms for the keyword you typed, for example, try “application” instead of “software.”
- Try one of the popular searches shown below.
- Start a new search.
Microsoft Windows Installation (64-bit)
System Requirements
See supported System Configurations for information about supported platforms, operating systems, desktop managers, and browsers.
The minimum physical RAM is required to run graphically based applications. More RAM is recommended for applets running within a browser using the Java Plugin. Running with less memory may cause disk swapping which has a severe effect on performance. Very large programs may require more RAM for adequate performance.
This installation requires Windows Installer 2.0 to be on your machine. For more details, see the Troubleshooting the Installation section .
For the amount of disk space required, see Windows Disk Space Requirements.
Note — The JDK has two version numbers — external version number (6) and an internal version number (1.6.0).
Note — Trying to install the JDK on a non-supported version of Microsoft Windows or on a machine that doesn’t have a sufficiently up-to-date Service Pack will cause the installer to generate this warning: «We recommend that you do not install this Java platform for the following reasons: This Java platform does not support the operating system or operating-system service pack on this machine.» See the system requirements above for information on supported configurations of Microsoft Windows.
Installation Instructions
In this procedure, you will run the self-installing executable to unpack and install the JDK software bundle. As part of the JDK, this installation includes an option to include the public Java Runtime Environment. (The JDK also contains a private JRE for use only by its tools.)
For issues related to Windows Online Installation and Java Update, see the Windows Online Installation and Java Update FAQ. See this note on Proxy Settings and Authentication.
Troubleshooting — If you have any difficulties, see the Troubleshooting section at the end of this document or submit a bug report for your installation problem.
Note — For any text on this page containing the following notation, you must substitute the appropriate update version number for the notation:
For example, if you were downloading the installer for update 1.6.0_01, the following file name:
1. Check the download file size (Optional)
If you save the self-installing executable to disk without running it from the download page at the web site, notice that its byte size is provided on the download page. Once the download has completed, check that you have downloaded the full, uncorrupted software file.
2. Run the JDK installer
Note — You must have administrative permissions in order to install the JDK on Microsoft Windows.
The file jdk-6u -windows-x64.exe is the JDK installer. If you downloaded it instead of running it directly from the web site, double-click on the installer’s icon. Then follow the instructions the installer provides. The installer may ask you to reboot your computer. When done with the installation, you can delete the download file to recover disk space.
Installed Directory Tree
The JDK has the option of installing public JRE and JavaDB. For more information on JRE installation see the JRE Installation page.
JDK Silent Installation
You can perform a silent JDK installation by using the command-line arguments. The following arguments install JDK silently and provide an option of installing public JRE and JavaDB.
JDK installs public jre and javadb in the silent mode.
Use the command jdk.exe /s
JDK does not install public jre, but installs javadb in the silent mode.
Use the command jdk.exe /s ADDLOCAL=»ToolsFeature,DemosFeature,SourceFeature,JavaDBFeature»
JDK does not install javadb, but installs public jre in the silent mode.
Use the command jdk.exe /s ADDLOCAL=»ToolsFeature,DemosFeature,SourceFeature,PublicjreFeature»
JDK does not install either javadb or public jre in the silent mode.
Use the command jdk.exe /s ADDLOCAL=»ToolsFeature,DemosFeature,SourceFeature»
Install public jre and javadb to the specified directories.
Use the command jdk.exe /s /INSTALLDIRPUBJRE=c:\test\ /INSTALLDIRJAVADB=c:\testdb\
Note — Some of the arguments work only with 6u15 and higher releases.
3. If you want to run Netscape 7.x, Mozilla 1.x, or Firefox 1.x with Java Plugin, do this:
- Exit the Netscape 7.x, Mozilla 1.x, or Firefox 1.x browser and all of its «objects» (Messenger, Composer . );
- If the Quick Launch feature is enabled, disable it;
- Then restart Netscape 7.x, Mozilla 1.x, or Firefox 1.x.
4. Update the PATH variable (Optional)
You can run the JDK without setting the PATH variable, or you can optionally set it as a convenience.
Should I set the PATH variable?
Set the PATH variable if you want to be able to conveniently run the JDK executables ( javac.exe , java.exe , javadoc.exe , etc.) from any directory without having to type the full path of the command. If you don’t set the PATH variable, you need to specify the full path to the executable every time you run it, such as:
C:> «\Program Files\Java\jdk1.6.0_ \bin\javac»
MyClass.java
It’s useful to set the PATH permanently so it will persist after rebooting.
How do I set the PATH permanently?
To set the PATH permanently, add the full path of the jdk1.6.0_ \bin directory to the PATH variable. Typically this full path looks something like C:\Program Files\Java\jdk1.6.0_ \bin. Set the PATH as follows on Microsoft Windows:
- Click Start > Control Panel > System on Windows XP or Start > Settings > Control Panel > System on Windows 2000.
- Click Advanced > Environment Variables.
- Add the location of bin folder of JDK installation for PATH in User Variables and System Variables. A typical value for PATH is:
Files\Java\jdk1.6.0_ \bin
- PATH environment variable is a series of directories separated by semi-colons (;) and is not case sensitive. Microsoft Windows looks for programs in the PATH directories in order, from left to right.
- You should only have one bin directory for a JDK in the path at a time. Those following the first instance are ignored. If one is already present, update it to jdk1.6.0_ \bin.
- If you are not sure where to add the path, add it to the right end of the PATH in the User Variables.
- The new path takes effect in each new command window you open after setting the PATH variable.
5. Start using the JDK!
Your computer system should now be ready to use the JDK. In this step, you’ll run some simple commands to make sure it is working properly.
If you are new to developing and running programs in the Java programming language, see The Java Tutorial online for some guidance. Note especially the tutorial trails under the heading Trails Covering the Basics.
You can also download the JDK documentation from the JDK download page.
Uninstalling the JDK
If you should ever want to uninstall the JDK, use the «Add/Remove Programs» utility in the Microsoft Windows Control Panel.
Location of VM Library Files (jvm.dll)
If you use the Invocation API to launch an application directly rather than using the Java application launcher, be sure to use the correct paths to invoke the Java HotSpot Client Virtual Machine (VM) or Java HotSpot Server VM, as desired. The path within the JDK to the Java HotSpot Client VM is:
jre/bin/client/jvm.dll (on x86)
The path to the Java HotSpot Server VM is:
jre/bin/server/jvm.dll (on x86)
jre/bin/server/jvm.dll (on IA64)
The corresponding locations in the Java SE Runtime Environment begin with jre1.6.0 instead of jre. The Exact VM and Classic VM are no longer part of the JDK, and existing code that uses the Invocation API to launch an application based on old paths to the Exact or Classic VMs will not work.
Troubleshooting the Installation
Below are some tips for working around problems that are sometimes seen during or following an installation. For more troubleshooting information, see the Java FAQ.
If you see the error message «config.nt. The system file is not suitable for running MS-DOS and Microsoft Windows Applications. « when you try to launch the installer on Microsoft Windows 2000 then there is a problem with the %SystemRoot%\System32\COMMAND.COM file.
If you see the error message «corrupt cabinet file» then the file you have downloaded is corrupted. Check the file size against the expected file size listed in these instructions. If they don’t match, try downloading the bundle again. A cabinet file contains compressed application, data, resource and DLL files.
If you see the error message «System Error during Decompression» then you might not have enough space on the disk that contains your TEMP directory.
If you see the error message «This program cannot be run in DOS mode.» then do the following:
- Open the MS-DOS shell or Command Prompt window.
- Right-click on the title bar.
- Select Properties.
- Choose the Program tab.
- Push the Advanced button.
- Make sure the item «Prevent MS-DOS-based programs from detecting Windows» is unchecked.
- Select OK.
- Select OK again.
- Exit the MS-DOS shell.
- Restart your computer.
Private vs. public JRE — Installing the JDK installs a private Java SE Runtime Environment (JRE) and optionally a public copy. The private JRE is required to run the tools included with the JDK. It has no registry settings and is contained entirely in a jre directory (typically at C:\Program Files\jdk1.6.0\jre ) whose location is known only to the JDK. On the other hand, the public JRE can be used by other Java applications, is contained outside the JDK (typically at C:\Program Files\Java\jre1.6.0 ), is registered with the Windows registry (at HKEY_LOCAL_MACHINE\SOFTWARE\JavaSoft), can be removed using Add/Remove Programs, might or might not be registered with browsers, and might or might not have java.exe copied to the Windows system directory (making it the default system Java platform or not).
Creating source files in Notepad — In Microsoft Windows, when you create a new file in Microsoft Notepad and then save it for the first time, Notepad normally adds the .txt extension to the filename. Therefore, a file you name Test.java is saved as Test.java.txt . It’s important to note that you cannot see the .txt extension unless you turn on the viewing of file extensions (in Microsoft Windows Explorer, uncheck «Hide file extensions for known file types» under Folder Options). To prevent the .txt extension, enclose the filename in quotation marks, such as «Test.java» , when typing it into the Save As dialog box.
On the other hand, Microsoft WordPad does not add a file extension if you provide one — you must save the file as «Text Document».
Choosing an installation path containing characters that are not part of the system code page — On Windows 2000, XP, and 2003, it is possible to name directories using characters that are not part of the system locale’s code page. If such a directory is part of the installation path, then generic error 1722 occurs, and installation is not completed. Error 1722 is an Install Shield error code. It indicates that the installation process has failed. The exact reason for this error is not known at this time.
To prevent this problem, make sure that the user and system locales are identical, and that the installation path only contains characters that are part of the system locale’s code page. User and system locales can be set in the Regional Options or Regional Settings control panel.


