- Как установить Arduino IDE в Ubuntu Linux
- Установка Arduino IDE с помощью скрипта
- Шаг 1: Убедитесь, что ваши системные пакеты Ubuntu обновлены:
- Шаг 2: Загрузка Arduino IDE и его извлечение
- Шаг 3: Извлеките файл tar.xz.:
- Шаг 4: Установка Arduino с помощью скрипта установщика
- Добавление пользователя в группу использования порта Arduino
- Запуск Arduino IDE в первый раз
- Установка Arduino IDE с помощью Snap
- Установка Arduino IDE в Linux с помощью Apt
- Заключение
- How to Install Arduino IDE on Ubuntu
- Download Arduino Software
- Install Arduino IDE
- Verify the Arduino installation
- Karim Buzdar
- How to Install Arduino Software (IDE) on Linux
- Installing Arduino IDE on Linux Systems
- Download the Arduino Software (IDE)
- Run Arduino IDE Install Script
- If You Appreciate What We Do Here On TecMint, You Should Consider:
- Downloading and installing the Arduino IDE 2.0
- Requirements
- The Arduino IDE 2.0
- Download the editor
- Installation
- Windows
- Mac OS X
- Linux
- More tutorials
Как установить Arduino IDE в Ubuntu Linux
Arduino IDE — это приложение с открытым исходным кодом предназначена для написания и загрузки кода на платы Arduino. Так же это кросс-платформенное приложение, которое работает на Windows, macOS и Linux. Arduino — это аппаратный язык программирования, в основном написанный на C и C++.
Эта статья покажет вам, как установить Arduino IDE на Ubuntu 20.04. Существует три различных способа установки Arduino на Ubuntu – с помощью официального сценария установки, с помощью пакета snap и apt.
Установка Arduino IDE с помощью скрипта
Это самый простой и рекомендуемый способ установки Arduino IDE в Ubuntu Linux.
Шаг 1: Убедитесь, что ваши системные пакеты Ubuntu обновлены:
$ sudo apt-get update
$ sudo apt-get upgrade
Шаг 2: Загрузка Arduino IDE и его извлечение
Загрузите последнюю версию Arduino IDE для Linux 64bit со страницы загрузки. Очень важно, чтобы вы выбрали правильную версию для своего дистрибутива Linux, которым в нашем случае является Ubuntu Linux 64bit.
Следующие команды загружают файл Arduino IDE версии 1.8.15 tar.xz во временный каталог с именем ‘arduino’:
$ mkdir arduino
$ cd arduino/
$ wget https://downloads.arduino.cc/arduino-1.8.15-linux64.tar.xz
Шаг 3: Извлеките файл tar.xz.:
Делается это командой
Шаг 4: Установка Arduino с помощью скрипта установщика
Измените каталог, а затем запустите установленный скрипт:
По умолчанию Arduino устанавливается в /usr/local/bin/arduino.
Вы должны найти новый значок на рабочем столе и в списке приложений:
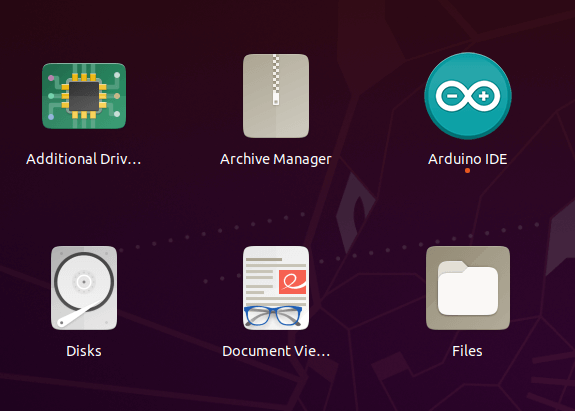 Arduino IDE – Иконка на рабочем столе
Добавление пользователя в группу использования порта Arduino
Чтобы избежать возможных проблем при использовании Arduino IDE, добавьте системного пользователя в группу dialout.
Это процедура доступа к последовательному порту из программного обеспечения Arduino (IDE), если вы получаете ошибку.
Может случиться так, что при загрузке эскиза вы получите следующую ошибку:
“Error opening serial port …” (Ошибка открытия последовательного порта …)
Если вы получаете эту ошибку, вам необходимо установить разрешения последовательного порта.
Введите в терминале следующую команду:
вы получите что-то вроде:
crw-rw— – 1 root dialout 188, 0 5 apr 23.01 ttyACM0
Данные, которые нам нужны, — это “dialout” (это владелец группы файла).
Теперь нам просто нужно добавить нашего системного пользователя в группу:
где ваше имя пользователя Linux. Вам нужно будет выйти из системы и снова войти в систему, чтобы это вступило в силу.
В моем случае это так:
$ sudo usermod -a -G dialout smilojkovic
После этой команды вы сможете нормально запустить IDE и загрузить код на свою плату или использовать последовательный монитор.
Запуск Arduino IDE в первый раз
Перед запуском IDE подключите плату Arduino к компьютеру с помощью USB-кабеля.
Arduino должен быть доступен в списке приложений – если нет, то его можно запустить из командной строки, написав команду arduino .
Если все было установлено и настроено правильно, мы должны увидеть главное окно редактора IDE.
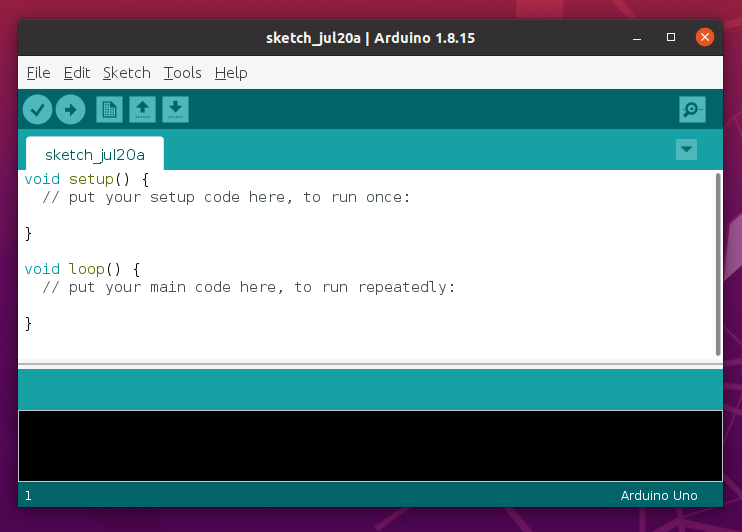 Окно редактора Arduino в Linux
Установка Arduino IDE с помощью Snap
Arduino IDE также доступна из пакетов Snap. Мы можем установить его с помощью следующей команды:
Ответ в терминале:
arduino 1.8.15 from Merlijn Sebrechts installed
Из этого мы видим, что пакет Snap — имеет самую последнюю версию Arduino IDE.
Установка Arduino IDE в Linux с помощью Apt
Arduino IDE доступен в репозиториях Ubuntu, вы можете установить его с помощью apt.
Репозиторию может потребоваться некоторое время, чтобы получить последнюю версию. Поэтому проверьте версию, доступную перед установкой.
arduino/focal,focal 2:1.0.5+dfsg2-4.1 all
AVR development board IDE and built-in libraries
Заключение
Из этой статьи вы узнали, как установить Arduino IDE на Ubuntu 20.04 LTS.
Для получения дополнительной помощи или полезной информации, мы рекомендуем вам проверить официальный сайт Arduino.
Источник
How to Install Arduino IDE on Ubuntu
The Arduino software or IDE (Integrated Development Environment) contains a text editor that is generally used for writing, compiling and uploading code in Arduino hardware. It helps to connect and communicate with the Arduino hardware. Arduino IDE can be run on all major operating system platforms like Linux, Windows, and Mac OS. It is available for both 32-bit and 64-bit OS platforms.
In this article, we will walk through the steps for installing the Arduino IDE on Ubuntu. I will use Ubuntu 18.04 LTS for describing the procedure. However, you can use the same procedure for installation in older releases of Ubuntu.
Download Arduino Software
First, you will need to download Arduino IDE package from the Download page of Arduino official website. Make sure to download the right version 32-bit or 64-bit depending upon your operating system. This is the official link of Arduino IDE downloads page:
Install Arduino IDE
Now you will need to install the Arduino IDE. To prepare for the installation, navigate to the Downloads folder. You will need to uncompress the downloaded Arduino archived folder. It can be done by launching the Terminal by pressing Ctrl+Alt+T key combinations then running the following command to navigate to Downloads folder:

To uncompress the archived folder, run the following command in Terminal:

Then run the following command in Terminal to navigate to the Arduino folder that you have just uncompressed:

You can type ls –l in Terminal to view the list of files in the Arduino folder and find out the install.sh installation file that we will be going to install.

Now we are prepared for installing Arduino. Run the following command in Terminal as sudo to install Arduino. Advertisement
Wait for a while until the installation completes.

Verify the Arduino installation
When the installation completes, look for Arduino IDE icon on Desktop. If it is there, your installation is completed. However, in some cases, you may notice a shortcut of Arduino IDE but not a proper icon and when you will try to open; it will not launch the application.
There is a way to get around that by running the below command as sudo in Terminal. It will change the ownership of the Arduino file on the desktop:

After running the above command, you will notice the proper Arduino icon on Desktop as shown in the below image.

You can also verify if the Arduino application has successfully installed, launch it via Desktop icon, Ubuntu Dash menu or from Application Launcher.

That was the simplest method using which you could install Arduino IDE on Ubuntu 18.04 LTS. Now you can configure and integrate it with your Arduino hardware.
Karim Buzdar
About the Author: Karim Buzdar holds a degree in telecommunication engineering and holds several sysadmin certifications. As an IT engineer and technical author, he writes for various web sites. You can reach Karim on LinkedIn
Источник
How to Install Arduino Software (IDE) on Linux
Arduino is a widely-used, open-source electronics platform used to create devices that interact with their environment using sensors and actuators. It consists of a programmable hardware board and a software (Integrated Development Environment(IDE)) for writing and uploading programs to the board.
Before you can start building projects using Arduino, you need to set up the IDE to program your boards. The Arduino (IDE) is a free open-source and cross-platform desktop application that allows you to write code and upload it to the board. It runs on Linux, Windows, and Mac OS X, and Linux.
In this article, we will explain how to install the latest version of the Arduino Software (IDE) on Linux machines.
Installing Arduino IDE on Linux Systems
The Arduino Software (IDE) is a package that does not require any particular process for the various Linux distributions. The only needed requirement is the 32-bit or 64-bit version of the operating system.
Download the Arduino Software (IDE)
Go to the download page and grab the latest version (1.8.12 at the time of writing) of Arduino Software (IDE) for your supported system architecture. You can choose between the 32-bit, 64-bit, and ARM versions, as it is very crucial to select the right version for your Linux distribution.
Alternatively, you can use the following wget command to download the Arduino Software (IDE) package directly on the terminal.
![]() Download Arduino IDE in Linux
Download Arduino IDE in Linux
Next, extract the downloaded archive file using the tar command.
![]() Extract Arduino IDE in Linux
Extract Arduino IDE in Linux
Run Arduino IDE Install Script
Now move into the extracted arduino-1.8.12 directory and run the installation script with root privileges as shown.
![]() Install Arduino IDE in Linux
Install Arduino IDE in Linux
Once the installation is done, a desktop icon will be created on your desktop, to launch the IDE, double click on it.
![]() Running Arduino IDE in Linux
Running Arduino IDE in Linux
It might happen that, you will get an error “Error opening serial port” while uploading a sketch after you have selected your board and the serial port. To fix this error, run the following command (replace tecmint with your username).
Besides, if you have a good internet connection, you can use the Arduino Web Editor (which has an up-to-date version of the IDE). The advantage with it is that it allows you to save your sketches in the cloud, and have them backed up, making them accessible from any device.
That’s it for now! For more information and advanced usage instructions, see the Arduino documentation. To reach us, use the feedback form below.
If You Appreciate What We Do Here On TecMint, You Should Consider:
TecMint is the fastest growing and most trusted community site for any kind of Linux Articles, Guides and Books on the web. Millions of people visit TecMint! to search or browse the thousands of published articles available FREELY to all.
If you like what you are reading, please consider buying us a coffee ( or 2 ) as a token of appreciation.

We are thankful for your never ending support.
Источник
Downloading and installing the Arduino IDE 2.0
In this tutorial, we will show how to download and installing the Arduino IDE 2.0 on your Windows or Mac computer.
You can easily download the editor from the Arduino Software page.
Requirements
- Windows — Win 10 and newer, 64 bits
- Linux — 64 bits
- Mac OS X — Version 10.14: «Mojave» or newer, 64 bits
The Arduino IDE 2.0
The Arduino IDE 2.0 is an open-source project, currently in its beta-phase. It is a big step from it’s sturdy predecessor, Arduino IDE (1.8.13), and comes with revamped UI, improved board & library manger, autocomplete feature and much more.
In this tutorial, we will go through step by step, how to download and install the software.
Download the editor
Downloading the Arduino IDE 2.0 is done through the Arduino Software page. Here you will also find information on the other editors available to use.
Installation
Windows
To install the Arduino IDE 2.0 on a Windows computer, simply run the file downloaded from the software page.
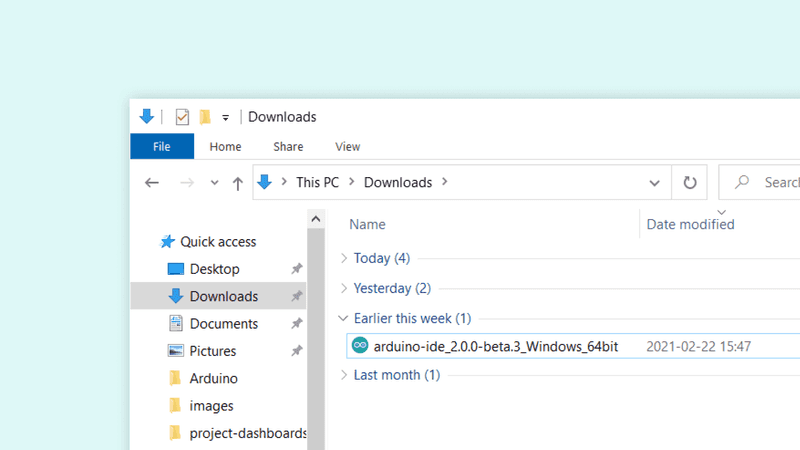
Follow the instructions in the installation guide. The installation may take several minutes.
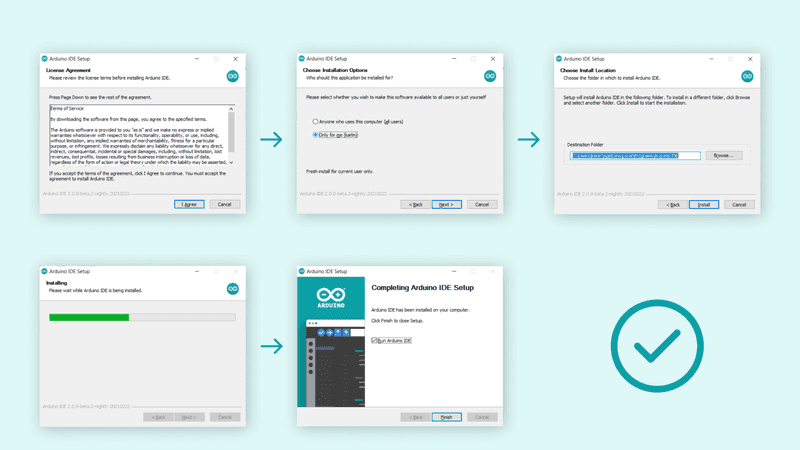
You can now use the Arduino IDE 2.0 on your Windows computer!
Mac OS X
To install the Arduino IDE 2.0 on a Mac OS X computer, simply copy the downloaded file into your application folder.
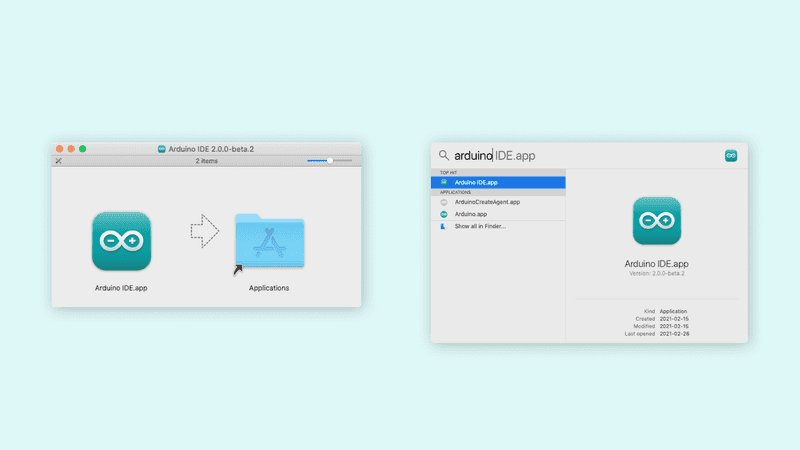
You can now use the Arduino IDE 2.0 on your Mac OS X computer!
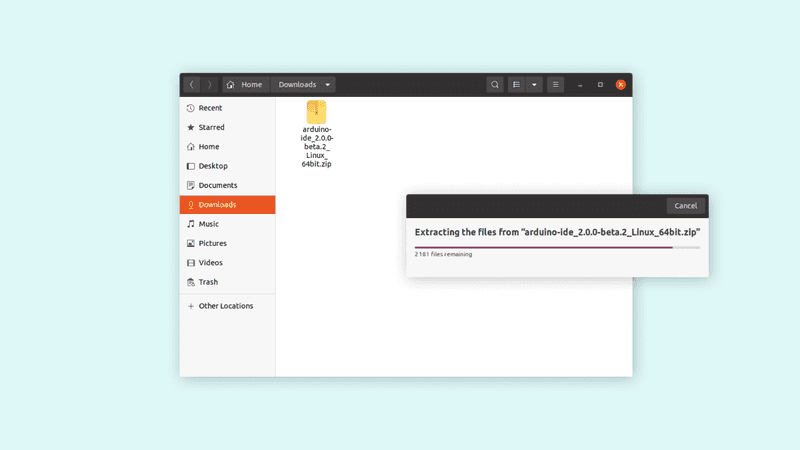
Linux
To install the Arduino IDE 2.0 on a Linux machine, simply extract the downloaded file to a suitable folder.
Now, go to the folder where you extracted the contents to, and look for the arduino-ide file, which will launch the IDE.
You can also run the file directly in the terminal, navigate to the folder, right click on it and select run in terminal.
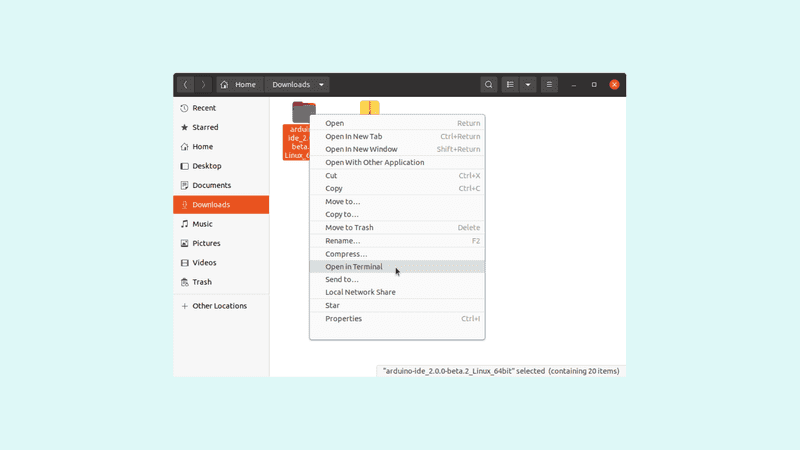
To launch the editor through the terminal, simply type:
More tutorials
Once you are finished with the download & installation, you can start using the Arduino IDE 2.0. Below are a collection of tutorials that will show you how to use the different features.
Источник


