- Installing Selenium and ChromeDriver on Windows
- Installing ChromeDriver
- STEP ONE: Downloading ChromeDriver
- STEP TWO: Unzipping ChromeDriver
- STEP THREE: Moving ChromeDriver somewhere sensible
- Installing Selenium
- Installing Chrome
- Test it
- Installing Selenium and Chromedriver on Windows
- Какую версию chromedriver установить?
- Скачать ChromeDriver для Linux, Windows и Mac
- Установка ChromeDriver под Linux, Windows и Mac
- How to install chromedriver windows
- Setup
- Sample test
- Controlling ChromeDriver’s lifetime
- Как установить ChromeDriver в Windows 10 и запустить тесты Selenium с Chrome?
Installing Selenium and ChromeDriver on Windows
Want to use Selenium to scrape with Chrome on Windows? Let’s do it!
We’ll need to install a couple things:
- Selenium, which allows you to control browsers from Python
- ChromeDriver, which allows software to control Chrome (like Selenium!)
Installing ChromeDriver
STEP ONE: Downloading ChromeDriver
First, download ChromeDriver from its terribly ugly site. It looks like a scam or like it was put together by a 12 year old, but I promise it’s good and cool and nice.
You’ll want chromedriver_win32.zip . That link should download 2.40 , but if you want something more recent just go to the page and download the right thing.
STEP TWO: Unzipping ChromeDriver
Extract chromedriver_win32.zip and it will give you a file called chromedriver.exe . This is the magic software!
STEP THREE: Moving ChromeDriver somewhere sensible
Now we need to move ChromeDriver somewhere that Python and Selenium will be able to find it (a.k.a. in your PATH ).
The easiest place to put it is in C:\Windows . So move it there!
If you can’t move chromedriver there, you can always just tell Python where it is when you’re loading it up. See Selenium snippets under “But Python can’t find chromedriver”
Installing Selenium
If you google about Selenium, a lot of the time you see things about “Selenium server” and blah blah blah — you don’t need that, you aren’t running a huge complex of automated browser testing machines. You don’t need that. We just need plain ol’ Selenium.
Let’s use pip3 to install Selenium for Python 3.
Installing Chrome
Oh, you also need to make sure you have Chrome (or Firefox) installed and it lives in one of the normal places applications do.
If Python can’t find Chrome/Firefox, you can always just tell Python where it is when you’re loading it up. See Selenium snippets under “But Python can’t find Chrome/Firefox”
Test it
Want to make sure it works? Run the following to pull all of the headlines from the New York Times homepage.
Want to hear when I release new things?
My infrequent and sporadic newsletter can help with that.
Hi, I’m Soma
I run a fake school in Brooklyn and a data journalism program at Columbia University’s Journalism School.
I also co-host talks about food science and culture in a semi-monthly lecture series called Masters of Social Gastronomy. We have a podcast that doesn’t get updated nearly often enough, too.
Sign up for my newsletter and I will definitely disappoint you.
Installing Selenium and Chromedriver on Windows
Jan 30, 2019 · 2 min read
If you want to use Selenium to scrape web sites with Chrome, just follow these steps!
This article assumes the reader knows the following:
- How to open a Python interpreter in a command prompt or how to run a Python script
- What ‘web scraping’ is
- Why a person would want to use Selenium and chromediver to accomplish their scraping task
Step 1: Download and install Google Chrome
You probably already have Chrome installed, but if you don’t, you can get it here.
Step 2: Download Chromedriver and store it somewhere
Chromedriver is produced by the team behind Chrome and allows Chrome to be automatically controlled by Selenium. This is the trickiest step.
- Get to the latest release of chromedriver by going to the official download page.
- Click through until you see a page that looks like this and click on your version to download it.

3. Unzip the downloaded file
4. Move the chromed r iver.exe file to a permanent home. It’s easiest to place it in c:\windows because that directory is already a part of the system path. If you choose to store it somewhere else (e.g. c:\selenium like I do), you’ll need to add that directory to your path. Here’s some instructions on how to do that.
Step 3: Install selenium using pip
- Open up your Windows Command Prompt (or cmder if you’re cool)
- If you’re using Conda or Virtualenv, fire up the environment you want to use (if you don’t know what this is, just skip it for now and do some googling later!)
- Run the following
Step 4: Test it out!
Here’s some Python code that you can run to make sure that your setup is working. It should pop up a Chrome window, take you to the NASA website, and then print out the headlines from that site.

Для запуска тестов Selenium в Google Chrome, помимо самого браузера Chrome, должен быть установлен ChromeDriver. Установить ChromeDriver очень просто, так как он находится в свободном доступе в Интернете. Загрузите архив в зависимости от операционной системы, разархивируйте его и поместите исполняемый файл chromedriver в нужную директорию.
Какую версию chromedriver установить?
Мы должны установить именно ту версия которая была бы совместима с установленным Google Chrome на нашем ПК или VDS. В случае, если версии не совпадают, то мы получим данную ошибку:
selenium.common.exceptions.SessionNotCreatedException: Message: session not created: This version of ChromeDriver only supports Chrome version 81
Введите в адресную строку Google Chrome данный путь:
У вас появится вот такое окно:
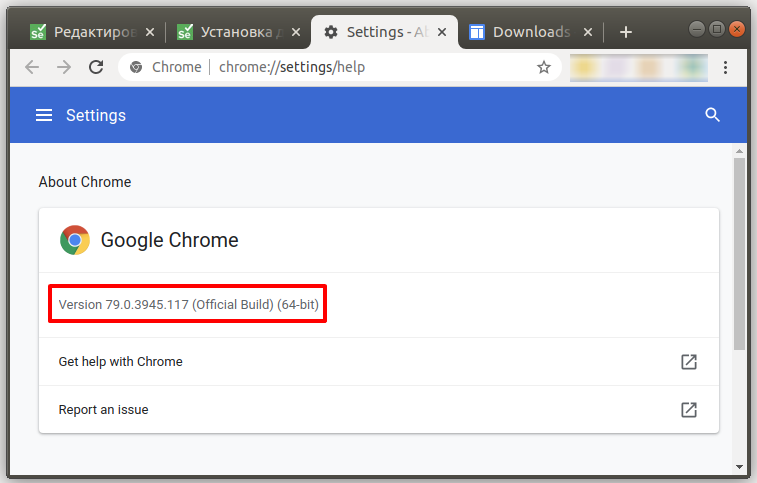
Рисунок 1 — Узнаем версию браузера Google Chrome
Скачать ChromeDriver для Linux, Windows и Mac
На данный момент актуальная версия драйвера 81.0.40 хотя у меня установлен более старый Google Chrome и последняя версия мне не подойдет. Как видно на рисунке выше, мне нужна версия 79.0.39 у вас может быть другая версия, нужно её скачать.
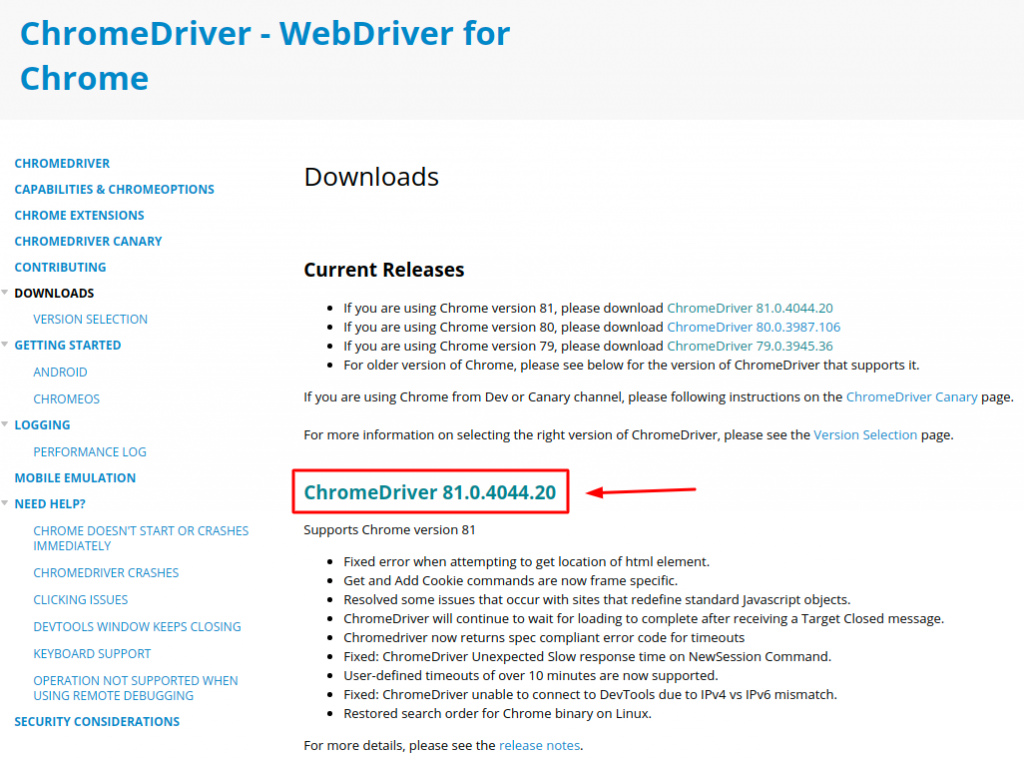
Рисунок 2 — Официальный сайт Google для загрузки драйвера chromedriver
На момент прочтения этой статьи версия может быть другой. Всегда выбирайте более новую версию, чтобы не поймать старые баги которые уже давно исправили в новой версии. НО! Помните, что вам нужно обновить и свой браузер Google Chrome если вы хотите работать с новой версией ChromeDriver.
Установка ChromeDriver под Linux, Windows и Mac
- Заходим на сайт https://chromedriver.storage.googleapis.com/index.html?path=79.0.3945.36/ (Проверьте сайт с Рис. 2 на обновления, тут версия: 79.0.3945);
- Скачиваем архив под вашу операционную систему;
- Распаковываем файл и запоминаем где находится файл chromedriver или chromedriver.exe (Windows).
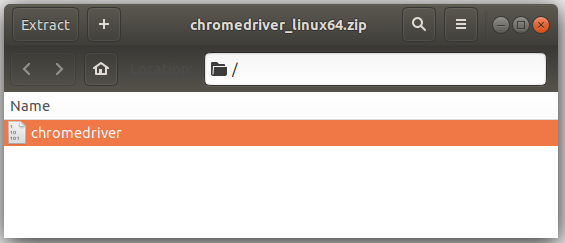
Рисунок 3 — Скаченный архив с ChromeDriver
Если у вас Linux дистрибутив или Mac, вам нужно дать файлу chromedriver нужные права на выполнения. Открываем терминал и вводим команды одна за другой.
How to install chromedriver windows
This page documents how to start using ChromeDriver for testing your website on desktop (Windows/Mac/Linux).
Setup
ChromeDriver is a separate executable that Selenium WebDriver uses to control Chrome. It is maintained by the Chromium team with help from WebDriver contributors. If you are unfamiliar with Selenium WebDriver, you should check out the Selenium site.
Follow these steps to setup your tests for running with ChromeDriver:
- Ensure Chromium/Google Chrome is installed in a recognized location
ChromeDriver expects you to have Chrome installed in the default location for your platform. You can also force ChromeDriver to use a custom location by setting a special capability.
- Download the ChromeDriver binary for your platform under the downloads section of this site
- Help WebDriver find the downloaded ChromeDriver executable
Any of these steps should do the trick:
- include the ChromeDriver location in your PATH environment variable
- (Java only) specify its location via the webdriver.chrome.driver system property (see sample below)
- (Python only) include the path to ChromeDriver when instantiating webdriver.Chrome (see sample below)
Sample test
Controlling ChromeDriver’s lifetime
The ChromeDriver class starts the ChromeDriver server process at creation and terminates it when quit is called. This can waste a significant amount of time for large test suites where a ChromeDriver instance is created per test. There are two options to remedy this:
1. Use the ChromeDriverService. This is available for most languages and allows you to start/stop the ChromeDriver server yourself. See here for a Java example (with JUnit 4):
2. Start the ChromeDriver server separately before running your tests, and connect to it using the Remote WebDriver.
Как установить ChromeDriver в Windows 10 и запустить тесты Selenium с Chrome?
У нас есть сервер Ubuntu, который мы используем для запуска тестов Selenium с Chrome и Firefox (я установил ChromeDriver), а также хочу запускать тесты локально на моем компьютере под управлением Windows 10. Я хочу, чтобы код Python был одинаковым для обоих компьютеров. Но я не узнал, как установить ChromeDriver в Windows 10? Я не нашел его в документации [1, 2].
Вот код, который запускает тест в Chrome:
Я также нашел Как запустить тестовые примеры Selenium WebDriver в Chrome?, но, похоже, это не в Python (язык программирования не отмечен, что это такое?)
Обновление # 1: Я нашел код Python в https://sites.google.com/a/chromium.org/chromedriver/getting-started, но где я могу поместить файл в Windows 10, если я хочу сохранить один и тот же код Python для обоих компьютеров?
Обновление # 2: Я загрузил и поместил chromedriver.exe в C:\Windows , и он работает, но я нигде не видел документально.
Как сказал Ури в вопросе, в разделе Обновить # 2, загрузка последней версии хромирования и размещение ее в C:\Windows исправляет проблему.
У меня была такая же проблема с зависанием Chrome, когда открывается окно браузера (рядом с окном командной строки).
Последние версии драйверов можно найти по адресу:
Версия в файле chromedriver_win32.zip работает над моей 64-разрядной системой.
Позвольте мне сначала изложить требования.
Здесь вы можете скачать хромированный веб-драйвер zip. https://chromedriver.storage.googleapis.com/index.html?path=2.33/
Извлеките файл и сохраните его в нужном месте.
Создайте новый проект в Eclipse и включите в свой класс следующий код.
Ключ по умолчанию и тот же для всех систем, значение – это местоположение вашего файла для удаления хромированных ребер.


