- Создание загружаемого установщика для macOS
- Что нужно для создания загружаемого установщика:
- Загрузка macOS
- Использование команды createinstallmedia в приложении «Терминал»
- How to install the driver manually on MAC OS?
- How to install the driver manually on MAC OS?
- Как вручную установить драйвер на MAC OS?
- How to reinstall macOS
- Start up from macOS Recovery
- Apple silicon
- Intel processor
- Reinstall macOS
- Other macOS installation options
Создание загружаемого установщика для macOS
В качестве загрузочного диска для установки операционной системы на компьютер Mac можно использовать внешний диск или дополнительный том.
Эти расширенные инструкции предназначены в первую очередь для системных администраторов и других пользователей, имеющих опыт работы с командной строкой. Загружаемый установщик не требуется для обновления macOS или переустановки macOS, но он может оказаться удобен, если требуется выполнить установку на несколько компьютеров, не загружая установщик заново каждый раз.
Что нужно для создания загружаемого установщика:
- USB-накопитель или другой дополнительный том, отформатированный в Mac OS Extended, на котором есть не менее 14 ГБ свободного пространства;
- загруженный установщик для macOS Big Sur, Catalina, Mojave, High Sierra или El Capitan.
Загрузка macOS
- Загрузка macOS Big Sur, macOS Catalina, macOS Mojave или macOS High Sierra
Эти элементы загружаются в папку «Программы» в виде приложения с именем «Установка macOS [ название версии ]». Если после загрузки запустится установщик, завершите его работу без продолжения установки. Чтобы получить подходящий установщик, выполняйте загрузку с компьютера Mac, на котором используется macOS Sierra 10.12.5 или более поздней версии либо El Capitan 10.11.6. Корпоративным администраторам следует производить загрузку с сайта Apple, а не с сервера обновления ПО, размещенного в локальной сети. - Загрузка OS X El Capitan
В результате этого действия загрузится образ диска с именем InstallMacOSX.dmg. На компьютере Mac, совместимом с El Capitan, откройте образ диска и запустите с него установщик с именем InstallMacOSX.pkg. Приложение с именем «Установка OS X El Capitan» будет установлено в папку «Программы». Загружаемый установщик создается именно из этого приложения, а не из образа диска или установщика .pkg.
Использование команды createinstallmedia в приложении «Терминал»
- Подключите USB-накопитель или другой том, используемый для загружаемого установщика.
- Откройте приложение «Терминал» в подпапке «Утилиты» папки «Программы».
- Введите или вставьте в приложение «Терминал» одну из следующих команд. Предполагается, что установщик находится в папке «Программы», а имя MyVolume обозначает USB-накопитель или другой используемый вами том. Укажите вместо MyVolume имя своего тома в следующих командах.
Big Sur*:
Catalina*:
Mojave*:
High Sierra*:
El Capitan:
* Если на компьютере Mac установлена операционная система macOS Sierra или более ранней версии, включите аргумент —applicationpath и путь установки аналогично тому, как это делается в случае команды для El Capitan.
После набора команды
- Нажмите «Ввод», чтобы ввести команду.
- При появлении запроса введите пароль администратора и нажмите клавишу «Ввод» еще раз. При вводе пароля приложение «Терминал» не отображает вводимые символы.
- При появлении запроса нажмите клавишу Y , чтобы подтвердить удаление всех данных на томе, затем клавишу «Ввод». Приложение «Терминал» показывает прогресс по мере стирания тома.
- После стирания тома может быть отображено предупреждение о том, что приложению «Терминал» требуется доступ к файлам на съемном томе. Нажмите «OK», чтобы продолжить копирование.
- Когда приложение «Терминал» сообщит о завершении процесса, имя тома будет совпадать с именем загруженного установщика, например «Установка macOS Big Sur». После этого можно закрыть приложение «Терминал» и извлечь том.


Источник
How to install the driver manually on MAC OS?
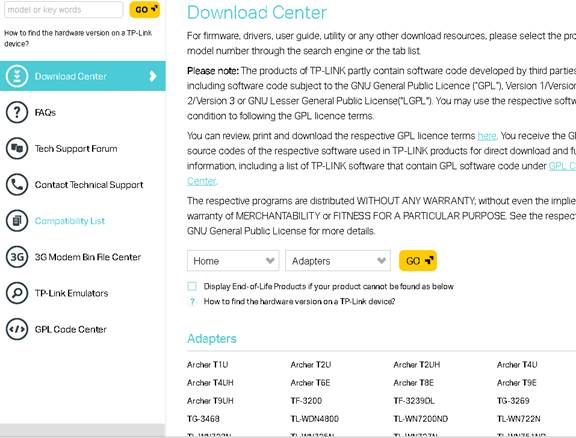
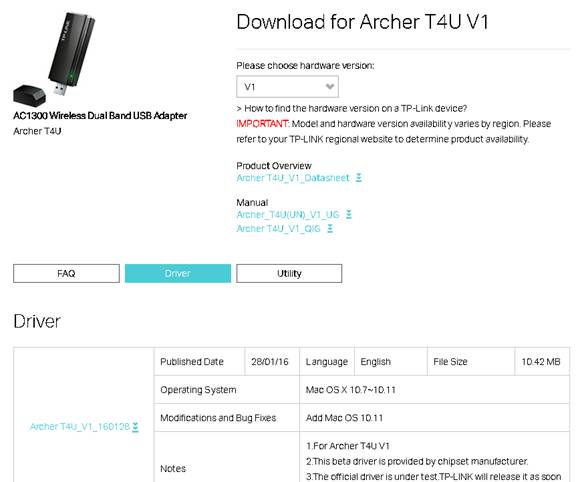
Before the installation, please go to Download Center to download the driver on the MAC, and plug the adapter into the computer.
Note: If there already is a driver but it’s not working, you need to uninstall it first before installing the new driver. (Finder》 download》open the old driver we download before》click the un-install apk and run it to uninstall the driver)
Let’s take Archer T4U for example.
Then please follow the steps below:
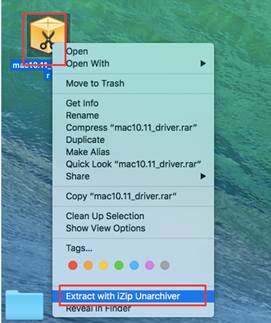
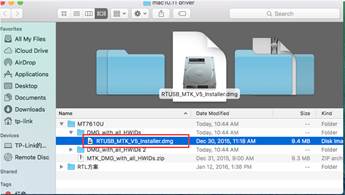
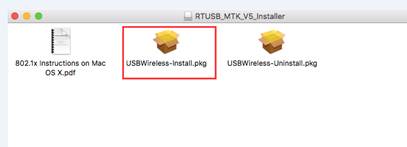
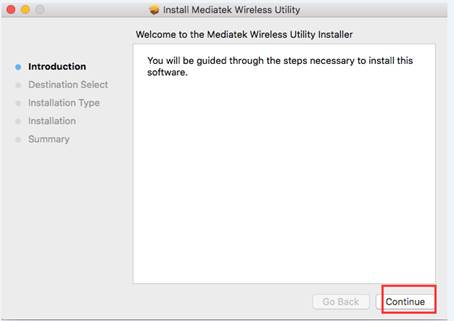
1.Please double click on the driver and extract it, then open the folder and run the pkg install file;
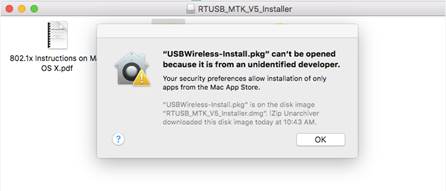
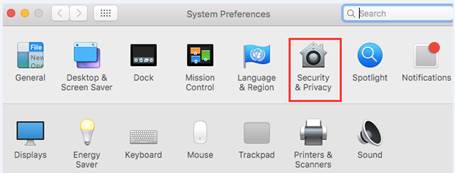
2.A warning message will pop up as the below. To solve this problem, please go to “System Preferences”, and “Security & Privacy”, then click “Open Anyway” to identify the driver.
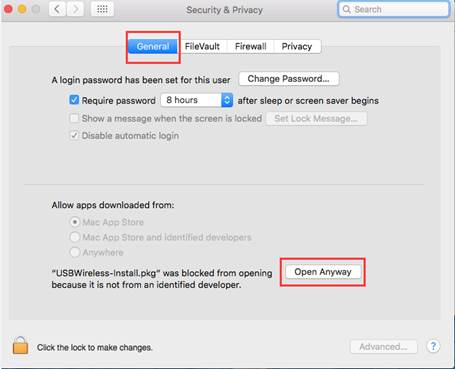
Note: if “Allow apps downloaded from” is “Anywhere”, the warning message won’t pop up.
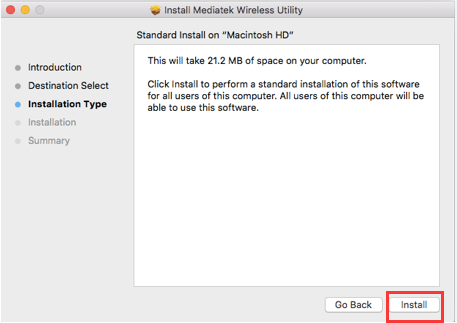
3.After the driver is being identified, it will be installed automatically. During the process, an authentication windows will pop up to ask for username and password, which is the administration account of your MAC (if you have no idea what it is or how to find it, please contact the Apple support for help.). Then please click “Install Software” to continue the process.

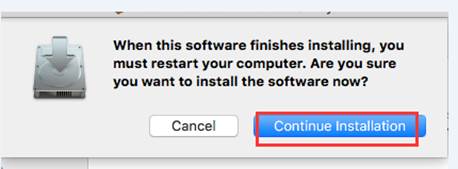
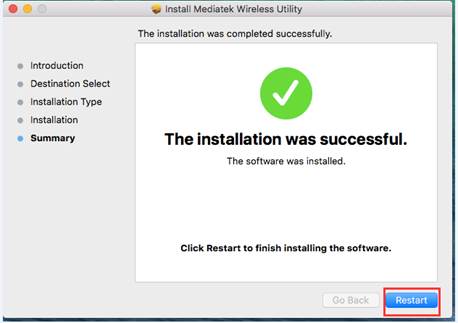
4.Now please click “Continue Installation” and “Restart” to finish the installation process.
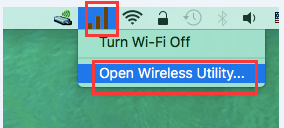
5.After MAC is rebooted, please click the Wi-Fi icon to “Open Wireless Utility”, then you can choose your Wi-Fi and connect it. (Note: it may take time for utility to search W i-Fi , please wait patiently for about 1 min.)
Источник
How to install the driver manually on MAC OS?
Before the installation, please go to Download Center to download the driver on the MAC, and plug the adapter into the computer.
Note: If there already is a driver but it’s not working, you need to uninstall it first before installing the new driver. (Finder》 download》open the old driver we download before》click the un-install apk and run it to uninstall the driver)
Let’s take Archer T4U for example.
Then please follow the steps below:
1.Please double click on the driver and extract it, then open the folder and run the pkg install file;
2.A warning message will pop up as the below. To solve this problem, please go to “System Preferences”, and “Security & Privacy”, then click “Open Anyway” to identify the driver.
Note: if “Allow apps downloaded from” is “Anywhere”, the warning message won’t pop up.
3.After the driver is being identified, it will be installed automatically. During the process, an authentication windows will pop up to ask for username and password, which is the administration account of your MAC (if you have no idea what it is or how to find it, please contact the Apple support for help.). Then please click “Install Software” to continue the process.
4.Now please click “Continue Installation” and “Restart” to finish the installation process.
5.After MAC is rebooted, please click the Wi-Fi icon to “Open Wireless Utility”, then you can choose your Wi-Fi and connect it. (Note: it may take time for utility to search W i-Fi , please wait patiently for about 1 min.)
Источник
Как вручную установить драйвер на MAC OS?
Перед установкой загрузите драйвер на ваш MAC и подключите адаптер к компьютеру.
Следуйте указанным ниже инструкциям:
1.Разархивируйте архив с драйвером и запустите установочный файл.
2.Появится предупреждающее сообщение (как на изображении ниже). Для решения проблемы перейдите в раздел «Системные настройки», выберите «Безопасность и конфиденциальность», затем нажмите кнопку «Открыть в любом случае» для идентификации драйвера.
Примечание: если у параметра «Разрешить приложения, загруженные из» стоит значение «отовсюду», предупреждающее сообщение не появится.
3.После идентификации драйвера последний будет установлен автоматически. Во время этого процесса появится окно авторизации учетной записи, введите имя пользователя и пароль, используемые в вашем компьютере MAC (если вы не знаете, что это такое и как их найти, обратитесь в службу поддержки компании Apple для получения помощи). После нажмите на кнопку «Установить программное обеспечение», чтобы продолжить процесс.
4.Теперь нажмите «Продолжить установку» и «Перезагрузка», чтобы завершить процесс установки.
5.После перезагрузки MAC нажмите на значок Wi-Fi «Открыть Wireless Utility», где вы можете выбрать свою Wi-Fi сеть и подключиться к ней. (Примечание: этот процесс может занять некоторое время, пожалуйста, ожидайте в течение примерно 1 мин.)
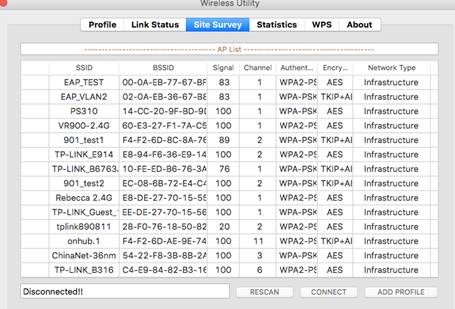
Теперь вы сможете воспользоваться сетью Wi-Fi.
Источник
How to reinstall macOS
Use macOS Recovery to reinstall the Mac operating system.
Start up from macOS Recovery
Apple silicon
Turn on your Mac and continue to press and hold the power button until you see the startup options window. Click the gear icon labeled Options, then click Continue.
Intel processor
Make sure that your Mac has a connection to the internet. Then turn on your Mac and immediately press and hold Command (⌘)-R until you see an Apple logo or other image.
If you’re asked to select a user you know the password for, select the user, click Next, then enter their administrator password.
Reinstall macOS
Select Reinstall macOS from the utilities window in macOS Recovery, then click Continue and follow the onscreen instructions.
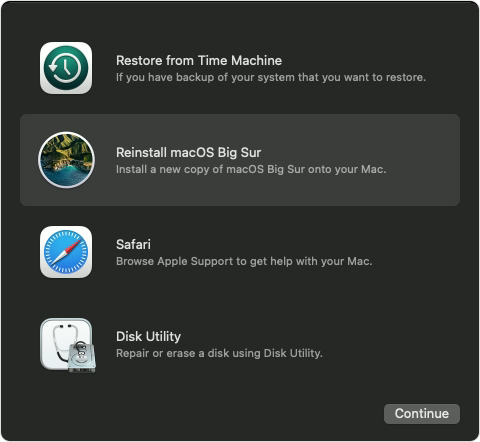
Follow these guidelines during installation:
- If the installer asks to unlock your disk, enter the password you use to log in to your Mac.
- If the installer doesn’t see your disk, or it says that it can’t install on your computer or volume, you might need to erase your disk first.
- If the installer offers you the choice between installing on Macintosh HD or Macintosh HD — Data, choose Macintosh HD.
- Allow installation to complete without putting your Mac to sleep or closing its lid. Your Mac might restart and show a progress bar several times, and the screen might be empty for minutes at a time.
After installation is complete, your Mac might restart to a setup assistant. If you’re selling, trading in, or giving away your Mac, press Command-Q to quit the assistant without completing setup. Then click Shut Down. When the new owner starts up the Mac, they can use their own information to complete setup.
Other macOS installation options
When you install macOS from Recovery, you get the current version of the most recently installed macOS, with some exceptions:
- On an Intel-based Mac: If you use Shift-Option-Command-R during startup, you’re offered the macOS that came with your Mac, or the closest version still available. If you use Option-Command-R during startup, in most cases you’re offered the latest macOS that is compatible with your Mac. Otherwise you’re offered the macOS that came with your Mac, or the closest version still available.
- If the Mac logic board was just replaced, you may be offered only the latest macOS that is compatible with your Mac. If you just erased your entire startup disk, you may be offered only the macOS that came with your Mac, or the closest version still available.
You can also use these methods to install macOS, if the macOS is compatible with your Mac:
- Use the App Store to download and install the latest macOS.
- Use the App Store or a web browser to download and install an earlier macOS.
- Use a USB flash drive or other secondary volume to create a bootable installer.
Источник


