- How to install GNOME desktop on Ubuntu 20.04/18.04 linux server
- Update and Upgrade packages
- Install Gnome Desktop GUI on Ubuntu Server
- Access Gnome on Ubuntu 20.4/18.04 Desktop
- 2nd Method to install Gnome Desktop using Tasksel
- Как установить Gnome 40 в Ubuntu
- Установка Gnome 40 в Ubuntu
- Что нового в Gnome 40
- Работа GNOME 40 в Ubuntu 21.04
- Выводы
- How To Install GNOME In Ubuntu Linux
- What is the difference between GNOME Shell and GNOME Desktop
- Installing GNOME in Ubuntu
- Switch to GNOME in Ubuntu
- Remove GNOME from Ubuntu
- How to Install GNOME on Linux Mint 20
- Prerequisites
- 1) Install GNOME on Linux MINT using apt
- 2. Install GNOME Desktop Using tasksel
- Remove GNOME on Mint
- Conclusion
How to install GNOME desktop on Ubuntu 20.04/18.04 linux server
If you are using the Ubuntu 20.04/18.04 LTS server without a Desktop environment, that means in the command line, then there is a simple way to install Gnome desktop GUI on it.
Gnome Desktop recently has launched 3.38 Orbis with some nice list of changes, however, yet, it is not available to install manually. However, we keep updating on that once it would be available on the official repo to install on Ubuntu servers. Although the Ubuntu Desktop Linux comes out of the box with the Gnome Desktop environment however with some customization. Therefore, if you want to have pure Gnome experience as it developed by its developers then here are the simple commands to follow.
Update and Upgrade packages
If you are on Desktop then open the command terminal, whereas server users are already there. First, we run commands to update and upgrade the existing packages. This will also rebuild the cache of repos to fetch the latest available packages,
Install Gnome Desktop GUI on Ubuntu Server
As I said the Gnome is already there with some customization, thus downloading and installing the Gnome Desktop on Desktop would not take much time. However, for Ubuntu Server, it would.
Once the installation is done, check the status of the Gnome Display Manager.
systemctl status gdm
Incase it is yet not activated then run;
systemctl start gdm
Reboot your system and you will have the Gnome on you Ubuntu Server.
Access Gnome on Ubuntu 20.4/18.04 Desktop
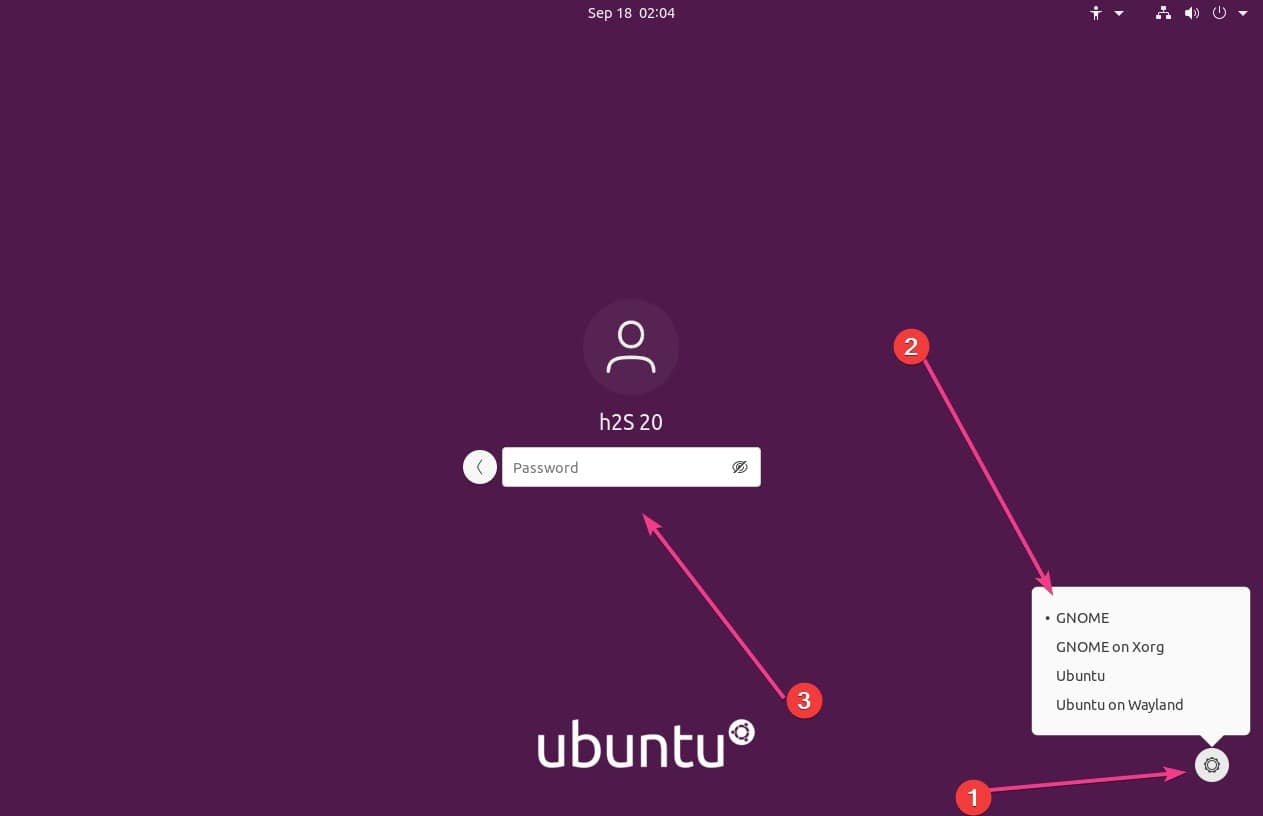
Those are already using a Graphical user interface, they need to select the Gnome Desktop after installation otherwise, they wouldn’t get the access. Therefore after the installation log out the current session.
While entering the user password, click on the Gear icon available at the right bottom side on the Ubuntu login screen. A pop-up will appear select Gnome.
2nd Method to install Gnome Desktop using Tasksel
There is one more method that not only lets you install Gnome Graphical user interface on Ubuntu, but also KDE, Mate, or Minimal Desktop version including tools like SSH, LAMP server, Print server, and more. The name of the tool that let all this happen is Tasksel.
Install Tasksel
Run Tasksel
Select Ubuntu Desktop
Use the keyboard arrow keys and select the Ubuntu-desktop or other available ones. To select any of the available options on the Tasksel you need to use “Space Bar ” on your keyboard.
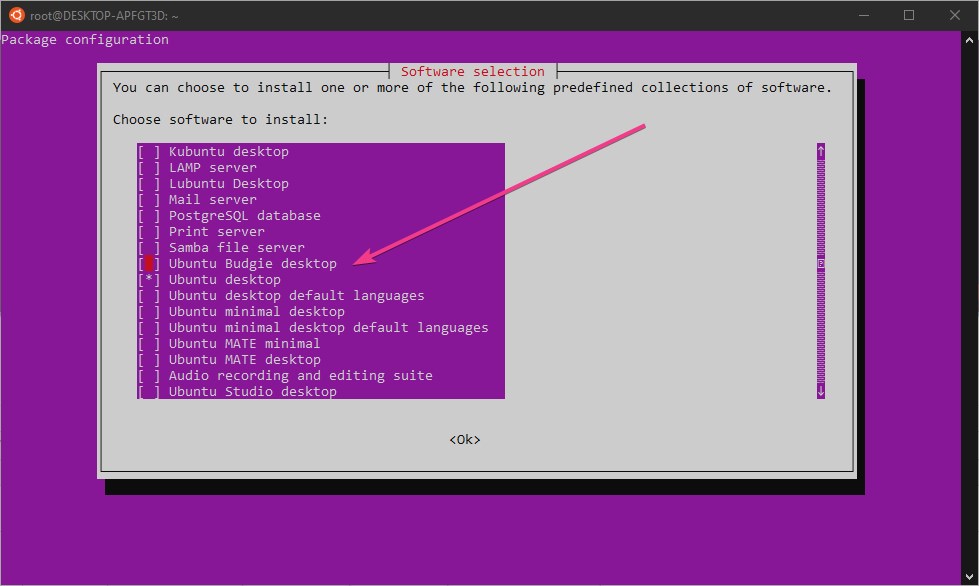
Once selected, use the Tab key to select the OK option and then hit the Enter key. This will automatically install the graphical user interface on your Ubuntu 20.04/18.04/16.04 LTS Server or Desktop Linux operating systems.
Источник
Как установить Gnome 40 в Ubuntu
Недавно оболочка GNOME получила большое обновление. Произошёл не только переход на библиотеки GTK4, изменению подвергся сам принцип работы с приложениями. В связи с этим было принято решение о новой нумерации: за 3.38 сразу следует 40-я версия.
На примере Ubuntu 21.04 мы рассмотрим нововведения GNOME 40, особенности работы оболочки на этом дистрибутиве, а также как установить Gnome 40 в Ubuntu.
Установка Gnome 40 в Ubuntu
Сразу необходимо предупредить о том, что рассматриваемая версия оболочки не является официальной и располагается в пользовательском репозитории PPA. Оболочку не стоит ставить на основную систему. Лучше всего для этого подойдёт виртуальная машина или система на втором диске.
Для установки GNOME 40 на Ubuntu 21.04 следует сначала добавить репозиторий и обновить список пакетов:
sudo add-apt-repository ppa:shemgp/gnome-40
sudo apt update
Теперь можно приступать к установке самой оболочки и сопутствующих утилит, после чего следует обновить текущие пакеты:
sudo apt install mutter gnome-session gnome-shell
sudo apt upgrade
После выполнения команд установка Gnome 40 Ubuntu будет завершена и потребуется перезагрузка компьютера.
Настоятельно рекомендуем переключиться на протокол X.11 (GNOME на Xorg). Wayland (GNOME) пока что имеет ряд проблем, среди которых частично или полностью неработающие приложения. Например, старые версии Electron не запустятся с новым протоколом, а из архиватора File-Roller не получится перетащить файлы в проводник Nautilus.
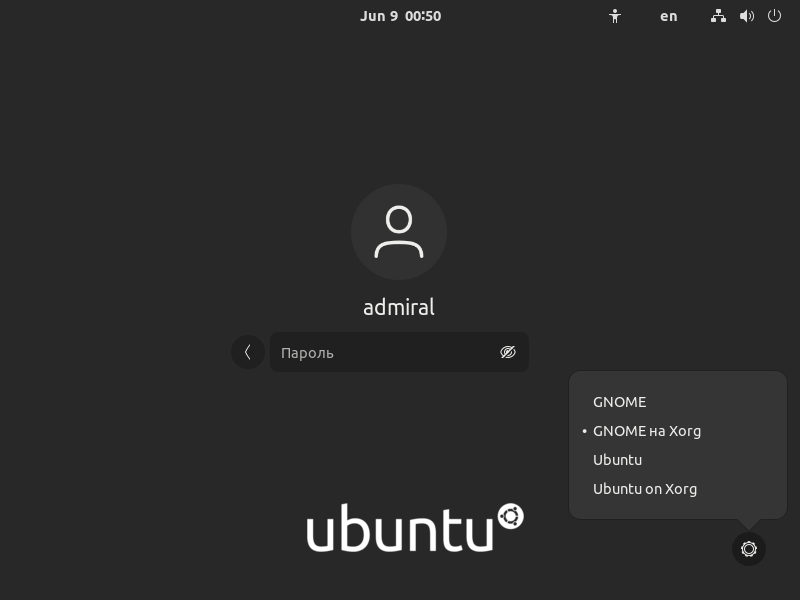
Старый протокол X.11 пока что более стабилен
Что нового в Gnome 40
Оболочка использует библиотеки GTK4, которые, в свою очередь, перешли на новый движок NGL. Это позволило более эффективно использовать ресурсы компьютера даже при выборе программного рендера.
Но главные отличия произошли в интерфейсе оболочки. В GNOME 3 уже были рабочие столы, вызываемые кнопкой Обзор, никак не связанные с меню Приложения.
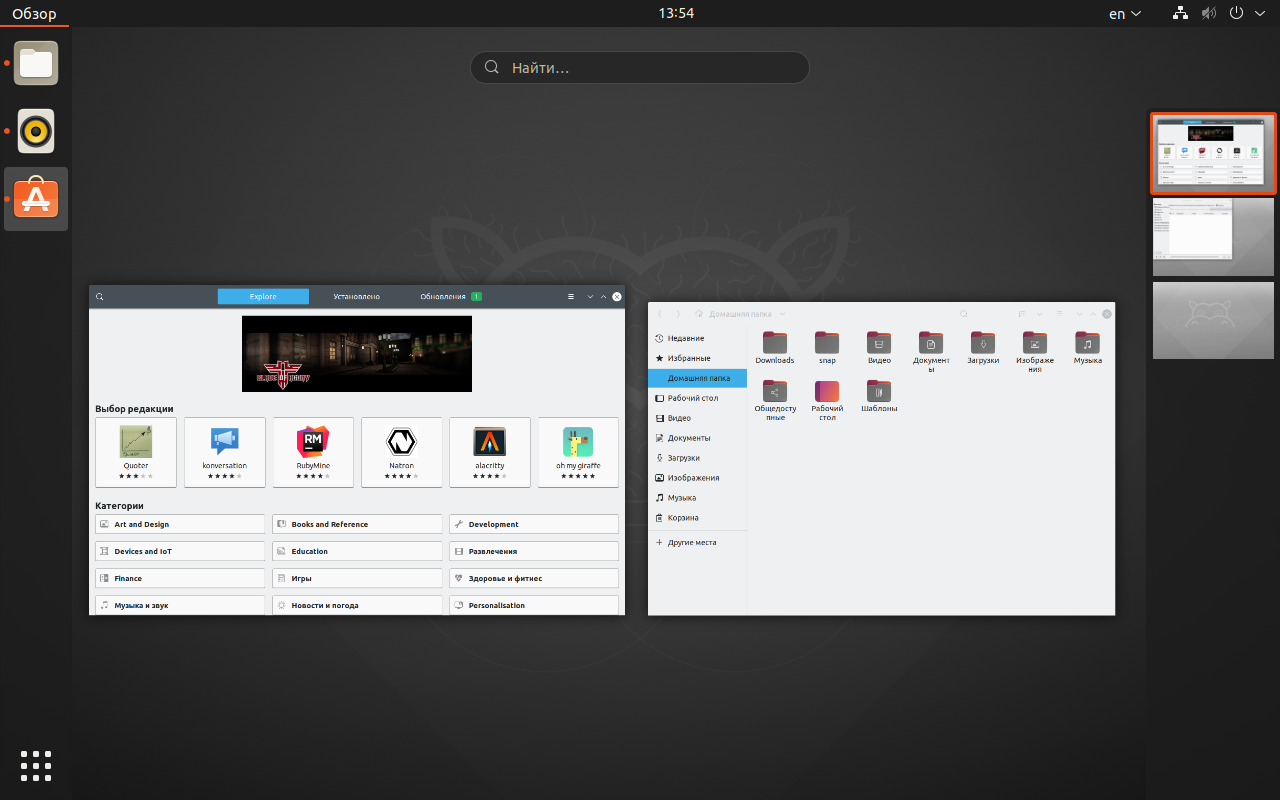
В GNOME 40 после входа в систему, пользователя встречает переосмысленный Обзор. Теперь рабочие столы расположены горизонтально. А также стоит отметить, что док переместился в нижнюю часть.
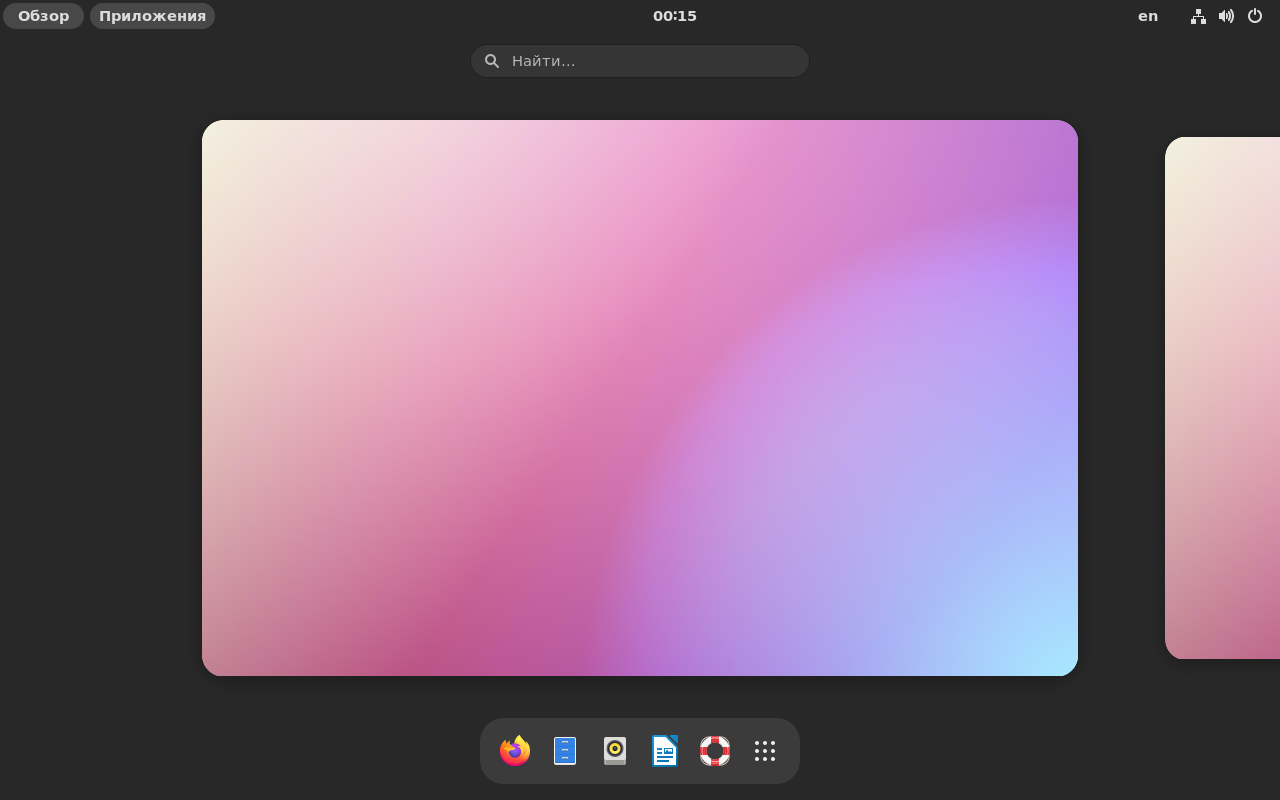
Приложения и Обзор теперь представляют единое целое. Концепция, заложенная ещё в GNOME 3, когда намеренно отказались от кнопок Развернуть и Свернуть, стала оправдывать себя. Рабочие столы рассматривают не как полноценные окружения, а как пространства под различные задачи.
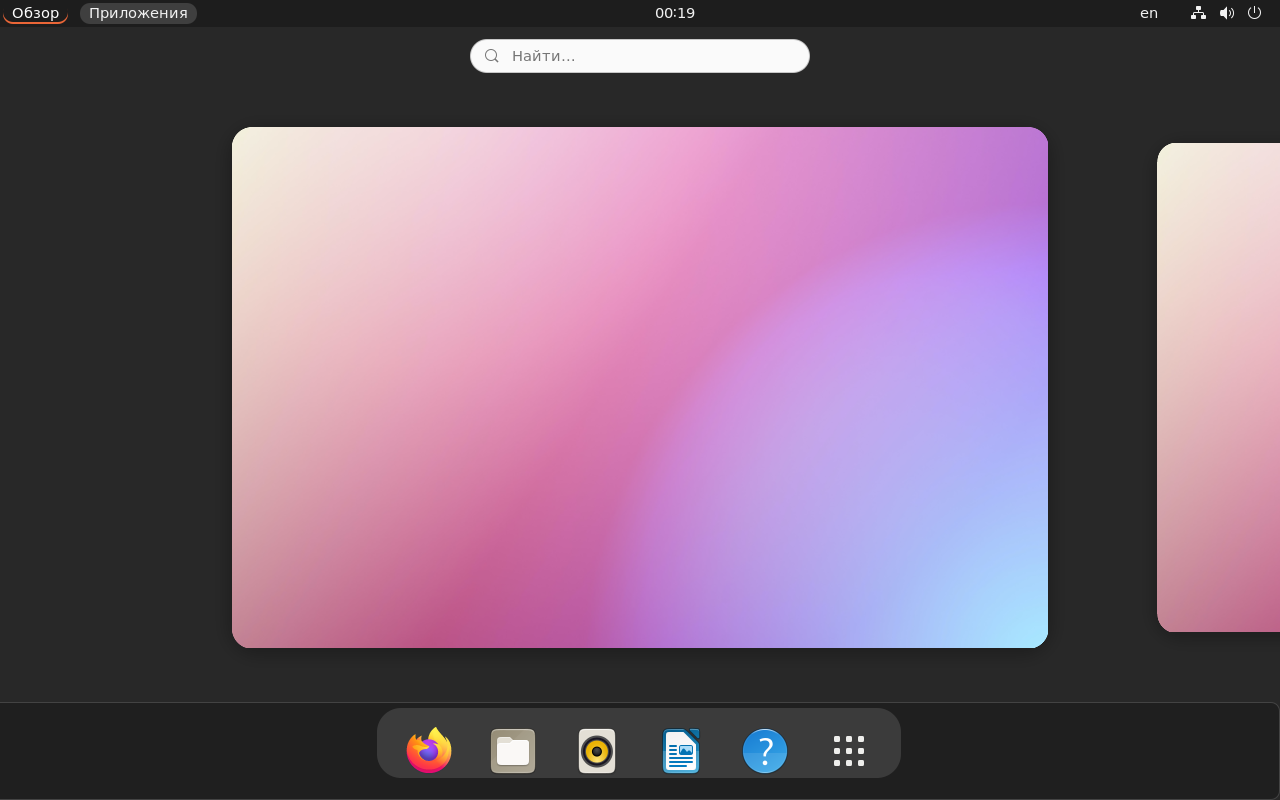
Переключение между Обзор и Приложения
Док получил разделительную черту, отделяющую избранные приложения. Однако нельзя понять, к какому рабочему столу относится приложение. Рабочих столов несколько, а док – один.
Предполагается, что одним из способов взаимодействия с рабочими столами станет перетаскивание иконок на нужные столы.
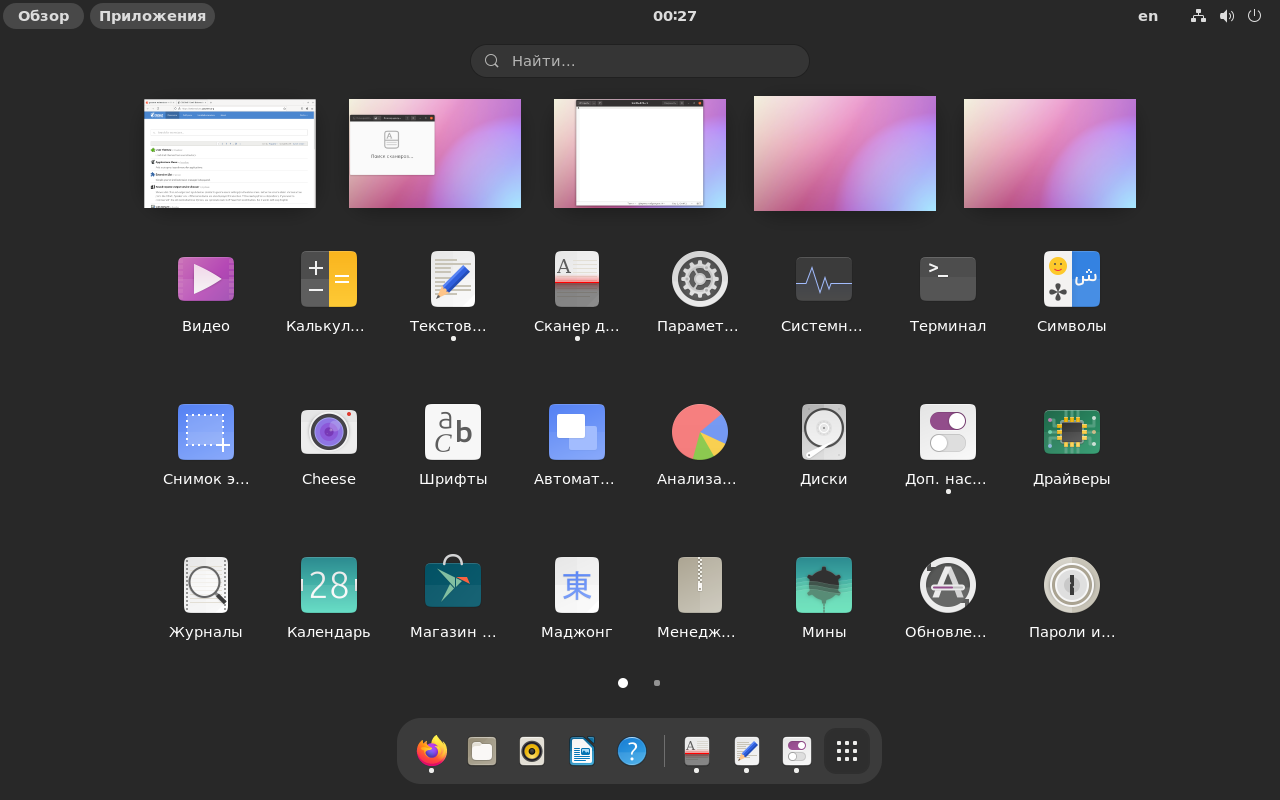
Обновлённый док и Приложения в GNOME 40
Некоторые приложения тоже обновились, но назвать изменения существенными нельзя. Было переработано несколько пунктов настроек, параметры проводника теперь расположены в одной вкладке, а не в нескольких. Погода стала одним из немногих приложений для новой оболочки с адаптивной вёрсткой.
Работа GNOME 40 в Ubuntu 21.04
На текущий момент оболочка работает нестабильно. Зависают не только сторонние приложения, но и родные, обновлённые до 40-й версии.
Gnome Tweak Tool устанавливается и позволяет включить кнопки окон (Развернуть, Свернуть) и настроить внешний вид. Yaru, фирменная тема Ubuntu, поддерживается, равно как и другие на GTK3, но вёрстка местами «съезжает», так как не прописаны параметры для новых элементов интерфейса.
Тема Yaru работает, но портит вёрстку дока
С расширениями дела обстоят гораздо сложнее. Менее 20% для GTK3 получили 40-ю версию. Например, есть возможность вернуть иконки на рабочий стол, но док-панель пока что не обновилась. Как вариант, можно использовать Plank, но он часто зависает и не работает с Wayland.
Но не может не радовать то, что стали появляться расширения именно для GNOME 40. Например, No overview at start-up отключает запуск в режиме обзора, а Gesture improvements расширяет список жестов.
Ubuntu 21.04 с оболочкой GNOME 40 c твиками и расширениями
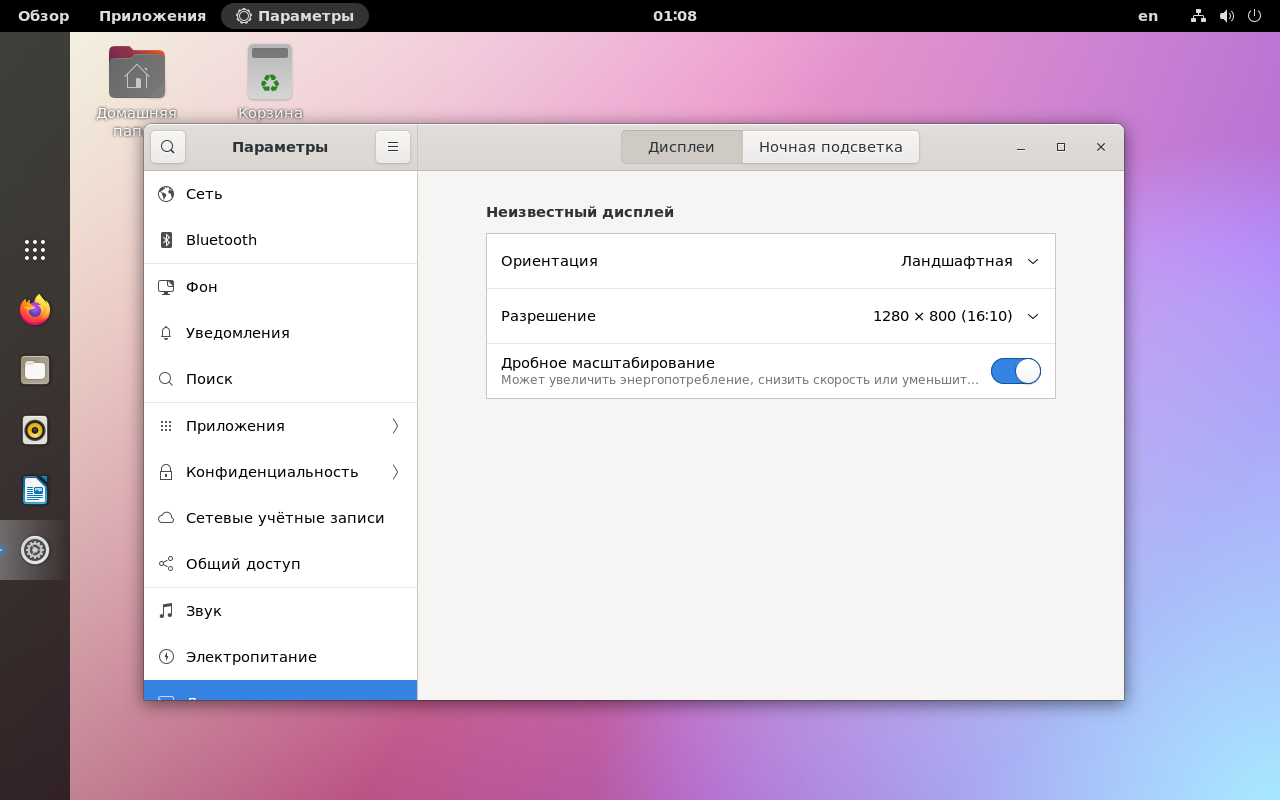
Обратите внимание на то, что оконный менеджер Mutter не поддерживает масштабирование с X.11, оно доступно только с протоколом Wayland.
Выводы
Теперь вы знаете как установить Gnome 40 в Ubuntu. Оболочка GNOME 40 весьма навязчиво предлагает использовать концепцию рабочих столов. Однако, в отличие от 3-й версии, идея приобрела законченный вид: меню Приложения теперь неразрывно связано с рабочими столами, а в частности, с меню Обзор.
Конечно, подобное решение может понравиться далеко не всем, оно по-прежнему больше подходит для сенсорного управления. И пользователей можно понять. Нам уже 10 лет навязывают новый интерфейс, но при этом приложения практически не адаптируют под сенсорное управление. Хорошим примером могла бы послужить Windows 10 — интерфейс Windows 8 никуда не делся, он просто был вынесен в режим планшета.
Что касается текущего состояния оболочки и расширений для неё, то разработчикам Ubuntu придётся изрядно потрудиться, чтобы повысить удобство её использования. Даже свежий релиз Fedora 34 на GNOME 40 не отличается стабильностью и требует многочисленных улучшений.
Источник
How To Install GNOME In Ubuntu Linux
Last updated December 5, 2017 By Abhishek Prakash 31 Comments

A quick tutorial to show you how to install GNOME in Ubuntu 14.04, 16.04 and other versions.
In the series to install various desktop environment other than the default Unity, we have already seen:
Of course, the above two tutorials also contains the instructions to remove those desktop environments. Continuing the series, we shall see how to install GNOME Shell or GNOME desktop in Ubuntu.
Before we proceed to see the installation instructions, let’s first see the difference between GNOME Shell and GNOME Desktop.
What is the difference between GNOME Shell and GNOME Desktop
GNOME Shell is simply a desktop environment which changes the user interface. GNOME Desktop, on the other hand, has a lot more than GNOME Shell. Think of GNOME Desktop as a superset of GNOME shell. It contains GNOME Shell and various Gnome specific applications, packages along with gnome-session.
If you are wondering about whether you should install GNOME Shell or Desktop, I would suggest installing GNOME Shell. It will give you a feel of GNOME and you can easily remove it as well.
Installing GNOME in Ubuntu
GNOME is already included in Ubuntu software repository. All you have to do is to open a terminal (Ctrl+Alt+T) and use the following command to install GNOME Shell in Ubuntu 14.04:
Similarly, to install GNOME Desktop, use the following command:
Remember to choose LightDM when prompted for it during the installation. Use Tab to move between the choices and Enter to confirm your selection.

Switch to GNOME in Ubuntu
Once installed, log out of the system and click on the Ubuntu icobesidees the login field. Choose GNOME from the drop down:

This is what GNOME Shell looks like on my system:

Looks nice isn’t it?
Remove GNOME from Ubuntu
If you did not like GNOME and want to get rid of it, you can simply remove it using the following command if you installed GNOME Shell:
and this command if you installed GNOME Desktop:
I hope this tutorial helped you to install GNMOE in Ubuntu . Since you have installed it, you should also consider to give it a different look and install themes in GNOME Shell with some of the best GNOME Shell themes. If you faced any issues, feel free to ask in the comment section. Ciao 🙂
Like what you read? Please share it with others.
Источник
How to Install GNOME on Linux Mint 20

Installing an additional desktop environment allows more user experience without installing another Linux distro. Gnome is the default desktop environment for many Linux distributions. Gnome is based on GTK+ and has a new release every 6 months.
Linux Mint by default supports Cinnamon, MATE, or Xfce desktop environment. Cinnamon and Mate are a fork of GNOME with a codebase of GNOME 3 and GNOME 2 respectively. Switching desktop
In this article, I will guide how to install the GNOME 3 (gnome-shell) desktop in your Linux Mint 20.
Prerequisites
- Linux Mint installed ( Cinnamon, MATE, or Xfce)
1) Install GNOME on Linux MINT using apt
First, you need to upgrade all packages in the Linux Mint system. So, open the terminal and issue the following command.
Get a list of all available packages and their versions:
Now install all packages that have new versions:
In order to install the Gnome environment, you need to install gnome-session and gdm3. Use apt to install them.
Just accept the message information. Click on ok
Again another screen prompt, choose either gdm3 or lightdm. Gdm3 is GNOME display manager that provides graphical login and handles user authentication. It uses a minimal version of gnome-shell due to which you will feel GNOME3 session. Similarly, lightdm is a cross-desktop display manager which is lightweight and supports different display technologies.
Here, I’m going to choose gdm3.
It can take some time to install all the dependencies and packages. When everything finishes, reboot your system.
When the login screen appears, choose Gnome and enter your password.
Your desktop should be changed as shown in the below picture.

To check gnome version go to Settings and open Details/About panel. From the repository, it has installed Gnome 3.36.8 version.

To check version from the terminal, type:
2. Install GNOME Desktop Using tasksel
An alternative way to install Gnome is by using tasksel. If tasksel is not installed on your system, first install it using:
Now, to install Ubuntu desktop (gnome 3), type:
Remove GNOME on Mint
If you want to remove GNOME from Mint 20 then follow the procedure.
- Log in to another desktop environment.
- Issue following command to remove GNOME package.
Conclusion
Many Linux distributions such as Ubuntu, Fedora, Debian, POP OS use GNOME by default. You can easily install Gnome if it doesn’t come with the distribution.
In this article, we learned how to install Gnome on Mint Linux 20. Please feel free to comment on your experience and give us valuable feedback.
Источник


