- How to Install Minecraft PE Maps for Minecraft: Windows 10 Edition
- Text Guide
- How to Install Minecraft PE Addons / Mods for Windows 10 Edition
- Minecraft Windows 10 Edition
- Starting Minecraft
- New features and capabilities
- Fun world-building and adventure game
- How to Update Minecraft Windows 10 Edition — 2021 Guide
- Update your Minecraft Windows 10 edition
- Minecraft Windows 10 edition won’t update
- Fix 1: Reset Minecraft
- Fix 2: Reinstall Minecraft
- Bonus tip: Update your drivers
How to Install Minecraft PE Maps for Minecraft: Windows 10 Edition
Text Guide
Some maps (or worlds) in Minecraft are downloaded as a .mcworld / .mcpack file. To install such files go to your Downloads folder. Find the file and double-click it to install it and it will be automatically imported to your game. It might ask you to select an app to open it with. Just select to open it with Minecraft: Windows 10 Edition Beta.
However, most maps are downloaded as a .ZIP or .RAR file. Use the following tutorial if that’s what you downloaded:
1. Begin by downloading a map of your by clicking here. In this tutorial we decided to download The Relic of Riverwood which is a fun adventure map.
2. The download will include a zip (or a rar file). It is a compressed file which needs to be extracted before we can use its contents. To do this we will use WinRAR. Go ahead and download it if you don’t already have it installed on your computer.
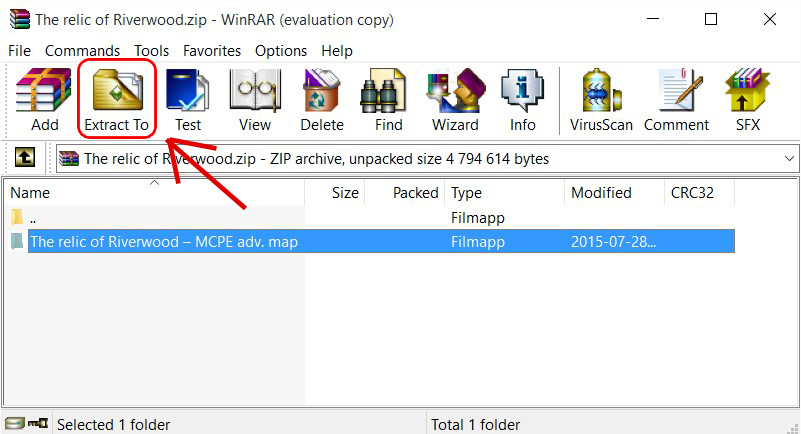
3. Open the downloaded zip using WinRAR. In the zip file is the world folder of the map which you downloaded. In our case it’s named The relic of Riverwood — MCPE adv. map.
Click on it once to select it and then click on the Extract To button.
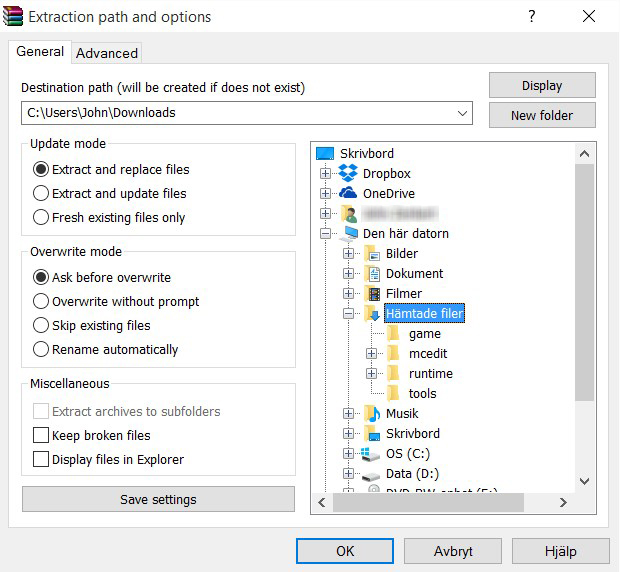
4. A new window will pop up. Here you can select where you want the folder to be extracted. Personally, I think it’s best to use the Downloads folder for this which in my case is called «Hämtade filer» but you can use any location you want as long you know how to find it. Click OK when you have selected a location.
5. Worlds in Minecraft: Windows 10 Edition are stored in the following location:
To open this location copy the location above to your clipboard (CTRL + C). Then press the Windows Start button in the bottom-left corner of your screen. Then click File Explorer.
Paste (CTRL + V) the location into the area marked with red in the image below and press enter.
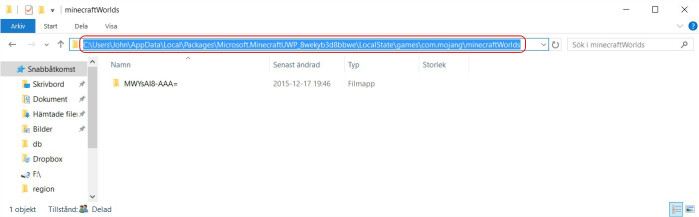
Alright, now you’ve located where all your worlds (also known as maps) in Minecraft: Windows 10 Edition are stored. Don’t close this window, we’ll head back here very soon.
6. The next thing you want to do is to locate the folder where you previously chose to extract the folder. In our case, we chose to use the Downloads folder.
Let’s open the Downloads folder, select the downloaded map and copy (CTRL + C) the folder.

7. Get back to the window where all your Minecraft: Windows 10 Edition worlds are saved. Paste (CTRL + V) your map in this folder.
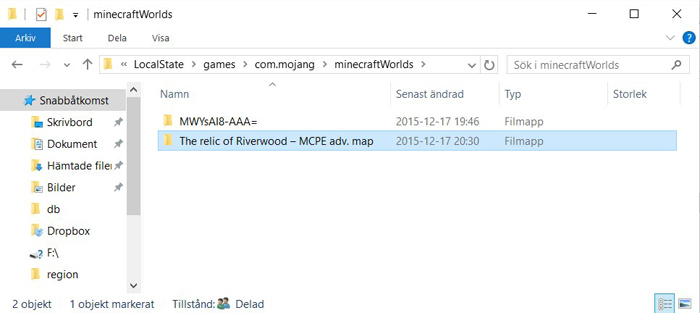
8. You are now finished! Make sure to restart Minecraft if it was open during the installation.
How to Install Minecraft PE Addons / Mods for Windows 10 Edition
In this tutorial we are going to show you how to install add-ons for Minecraft: Windows 10 Edition Beta. Add-ons were first introduced in version 0.16.0!
There are two ways to install add-ons. Some add-ons download as a .mcworld / .mcpack. To install it you need to go to your Downloads folder. Double-click on the file and it will automatically be imported to your game. It might ask you to select an app to open it with. Just select to open it with Minecraft: Windows 10 Edition Beta.
If you downloaded a .ZIP or .RAR file then use the following tutorial:
1. Begin by browsing our add-ons section and find one which you want to download. In this case we are going to try the More Chairs Add-on.
2. The download usually includes either a .ZIP or .RAR file. It’s a compressed file which you need to extract using a program such as 7-Zip or WinRAR. We recommend using 7-Zip as it’s completely free and really easy to use.
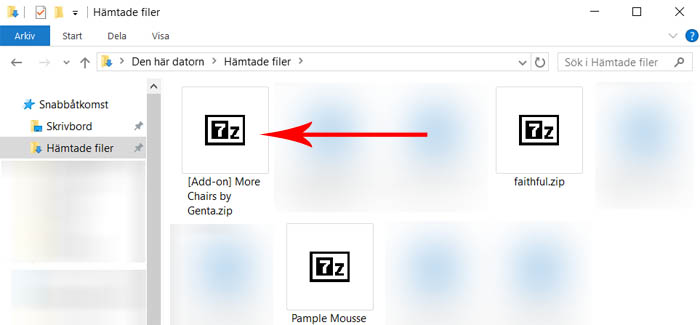
3. Find the [Add-on] More Chairs By Genta.zip file on your computer. Normally it is found in your downloaded files. Double-click the zip file (or right-click it and select «Open with. » and select 7-Zip) to open it.
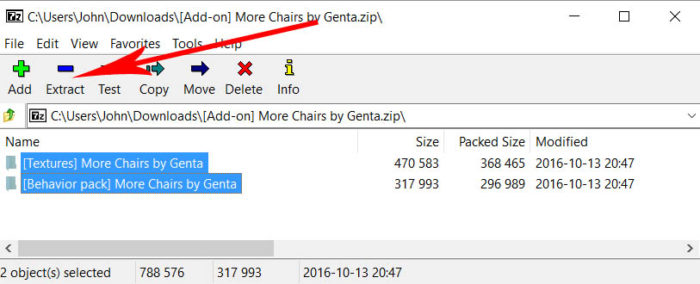
4. Select both of the two folders and then click «Extract».
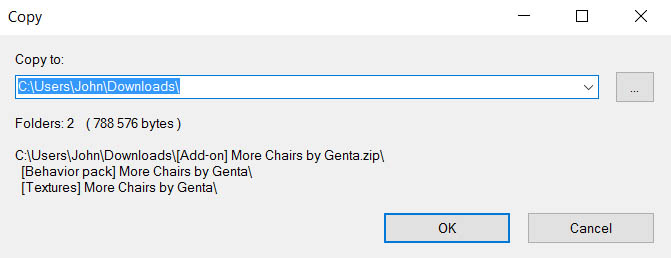
5. Select the location where you want to extract the two folders or use the default one. Then click «OK».
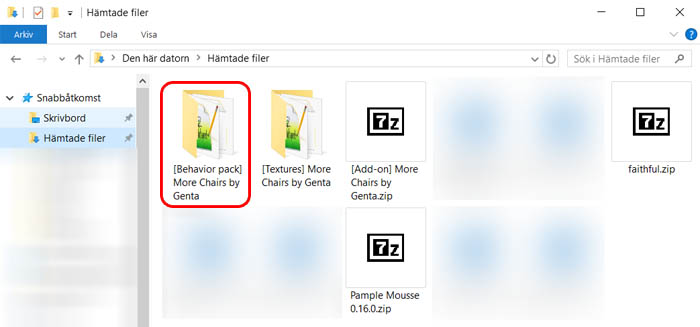
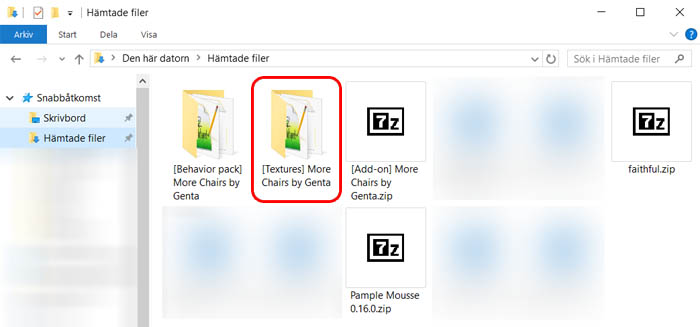
6. Open your «Downloads» folder or wherever you selected to extract the folders.
Each add-on is usually a bit different from the other. Sometimes there is just one folder which you need to install and sometimes (as in this case) there are multiple.
Let’s begin by installing the behavior pack folder: [Behavior pack] More Chairs by Genta. Select the folder and press CTRL + C (or right-click it and copy it).
7. Once you’ve copied the folder go to the following location on your computer using the file explorer:
Here you will find two new folders
- behavior_packs (usually for textures)
- resource_packs (usually for behaviors, e.g. json files)
Open the behavior_packs folder and press CTRL + V (or right-click somewhere in that folder and press «Paste»).
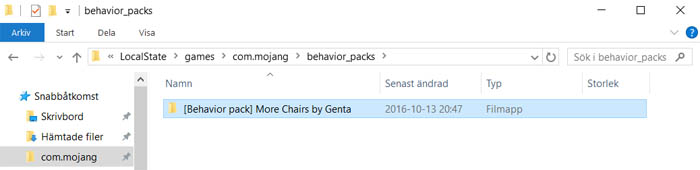
You’ve now installed the behavior pack.
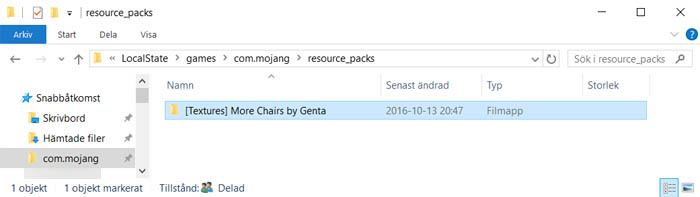
8. Open up your «Downloads» folder again and find the [Textures] More Chairs by Genta folder. Select it and press CTRL + C (or right-click it and select «Copy»).
9. Open the com.mojang folder again and then open the resource_packs folder:
Paste the folder here by pressing CTRL + V (or by right-clicking in the folder and click «Paste»).
10. To use it in-game there are still some things left to do. Start Minecraft: Windows 10 Edition Beta.
Create a new world (or edit an existing world). In this case, we will create a new world.
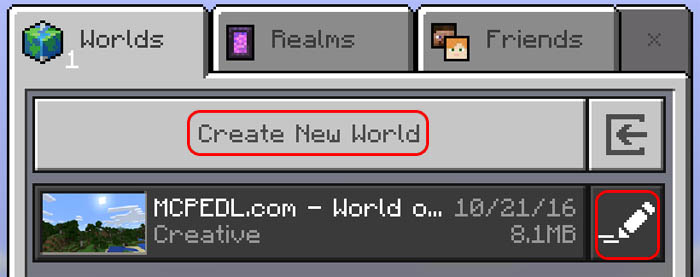
11. Add (or edit) all the settings you want for your world and then scroll down in the left sidebar to find two tabs/buttons for Resource Packs and Behavior Packs.
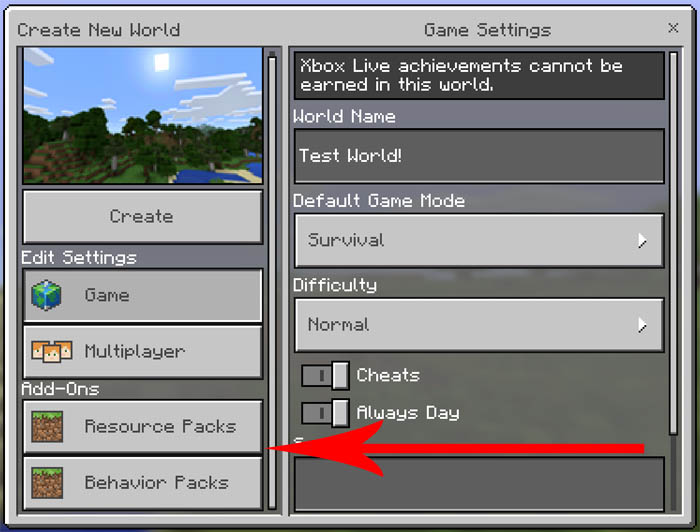
12. Select Resource Packs and add the More Chairs addon from the list.
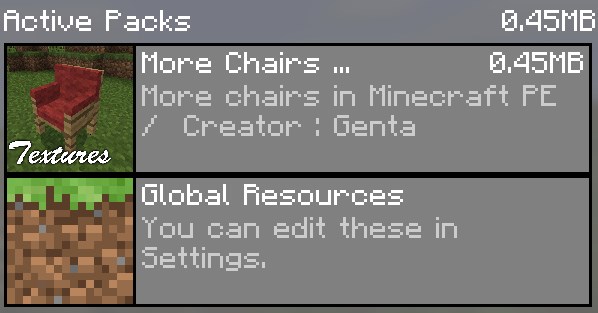
13. Then do the same thing for Behavior Packs.

14. Enter the new world and you will find some new items in your inventory. Use them to spawn the chairs! This same tutorial works of course for any other add-on!
Minecraft Windows 10 Edition
User rating User Rating


Minecraft Windows 10 is a Windows-compatible version of the original sandbox video game developed by Mojang. Formally known as the Bedrock Edition, this version of Minecraft allows you to play with either a game controller, a touch screen, or Microsoft HoloLens. It is also the first edition to fully abandon Java. Although the game has been configured for newer hardware, it maintains the same game mechanic: build your own world. The game’s open-ended model allows you to create houses, builds, and other structures on various maps or servers. You can do all these activities in Minecraft for Windows as a solo player or with a group.
Starting Minecraft
As seen in the name, the main activity of Minecraft is mining and crafting. The items you will be mining are gold which can then be used to purchase supplies needed to craft a tool, a home, some weapons, etc. With the game’s vast environment, there are a few activities you can start with. The first activity and most important activity is collecting logs.
You can collect logs from trees by approaching the tree and clicking it with your left mouse button. This is a recurring activity as logs are the base of the most valuable tools such as Torches, Crafting Tables, and Chests. Another valuable source is Bedrock. There are unbreakable blocks that are used to prevent intruders from approaching you. You can create a shovel and dig up 4 layers off the ground.
An optional but highly-rewarding activity is heading to the cave mines. Here, you find coal and iron that you can use to add to your inventory. While it is not necessary to prepare your exploration, it will be worthwhile to bring torches, a sword, and a suit of armor. The most important of the three are torches. As with real mines, there is no defined entrance or exit so it will help to mark your path with torches
New features and capabilities
The Windows 10 Edition of Minecraft comes with more features that can enhance your world-building experience. The most notable one is multiplayer gameplay which allows you and three other friends to play on a local server. Another new feature is customization tools for skins. This changes the appearance of the game’s default characters, Steve and Alex, to one that meets your preferences.
Should you be an avid player of the game, Minecraft: Windows 10 offers an offline mode. There will be some features that are not available offline such as in-game purchases and leaderboard updates. It’s also important to know that only Single-player and Multiplayer via LAN supports offline playing. Any achievements, on the other hand, will automatically sync to your account next time you sign-in to your device.
Fun world-building and adventure game
Minecraft is a suitable game for players that want to go at their own pace. This means there is no pressure to unlock modes, meet scores, or finish quests. The game’s mechanics are extremely generous and allows a lot of space for creativity. The Windows 10 Edition of Minecraft is good for both beginners and fans of the franchise. It does not deviate from the original game, and has added features that make crafting a more social experience.
How to Update Minecraft Windows 10 Edition — 2021 Guide
Last Updated: 4 months ago
Minecraft is a famous game around the world. Game developers keep releasing new editions, normally the game will update itself. But you can also update the game manually. This post will guide you.
Before updating the Minecraft Windows 10 edition, you need to update your Windows 10 to the latest version.
If you’ve already done it, skip to update steps.
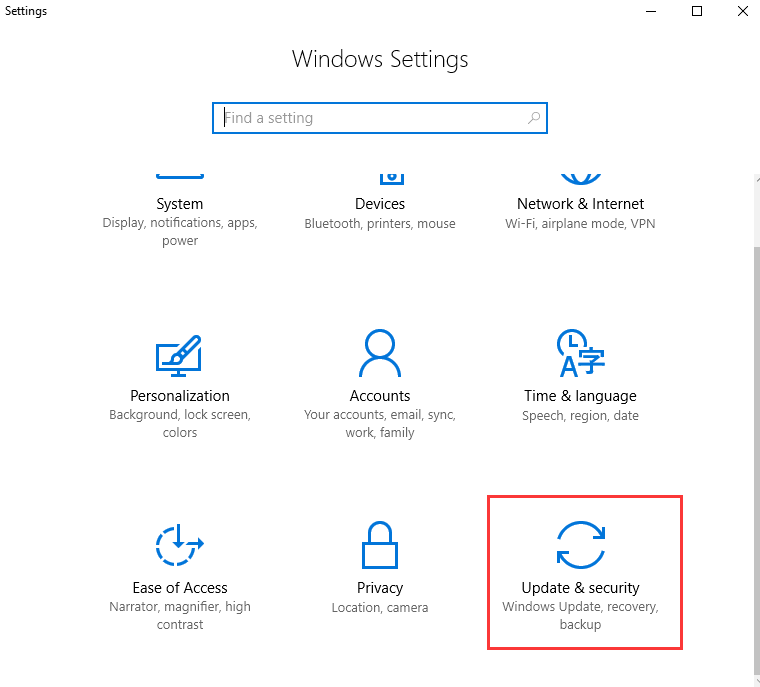
- Press the Windows logo key + I together and click Settings.
- Click Update & Security.

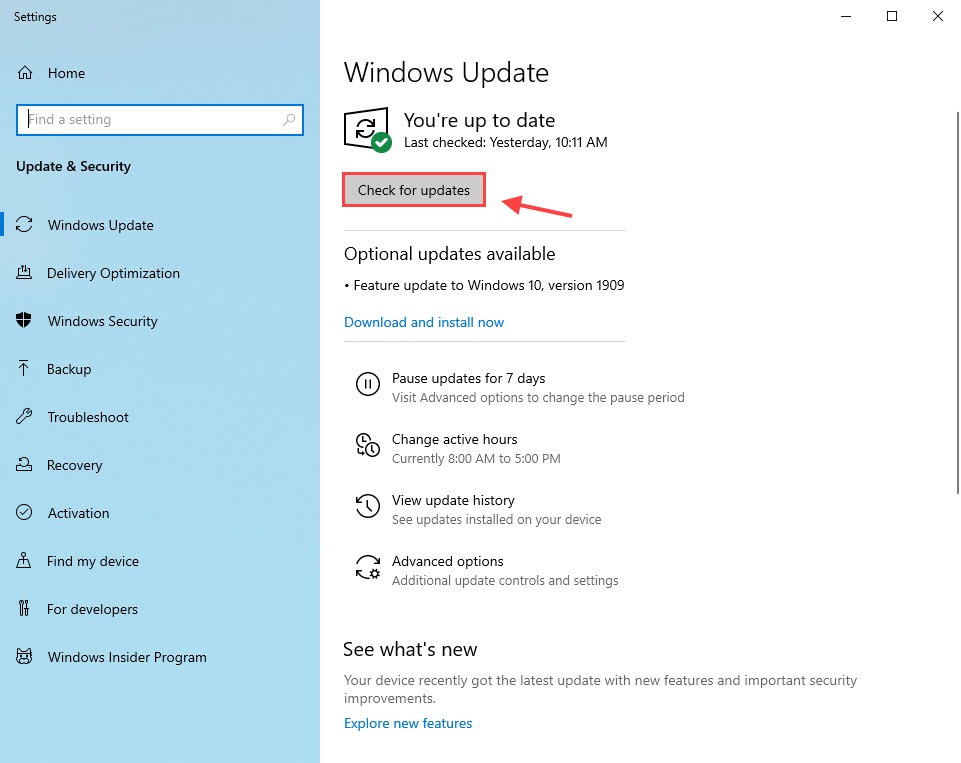
- Choose the Windows Update tab on the left and click Check for updates.
Update your Minecraft Windows 10 edition
To update your Minecraft Windows 10 edition, just follow the steps below:
- Run the Microsoft Store.
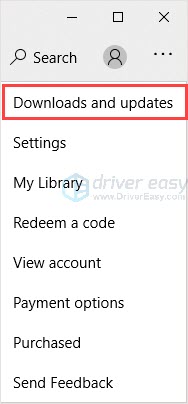
- Click the three dots on the top right corner and select Downloads and updates.
- Click Get updates.
After doing this, Microsoft Store will check and install the latest updates for all the apps you have through the store, including Minecraft.
What to do if your Minecraft windows 10 edition won’t update? Read on to find how.
Minecraft Windows 10 edition won’t update
If your Minecraft won’t update, you can try the 2 fixes to fix the issue.
Fix 1: Reset Minecraft
- Press the Windows logo key + I together and click Settings.
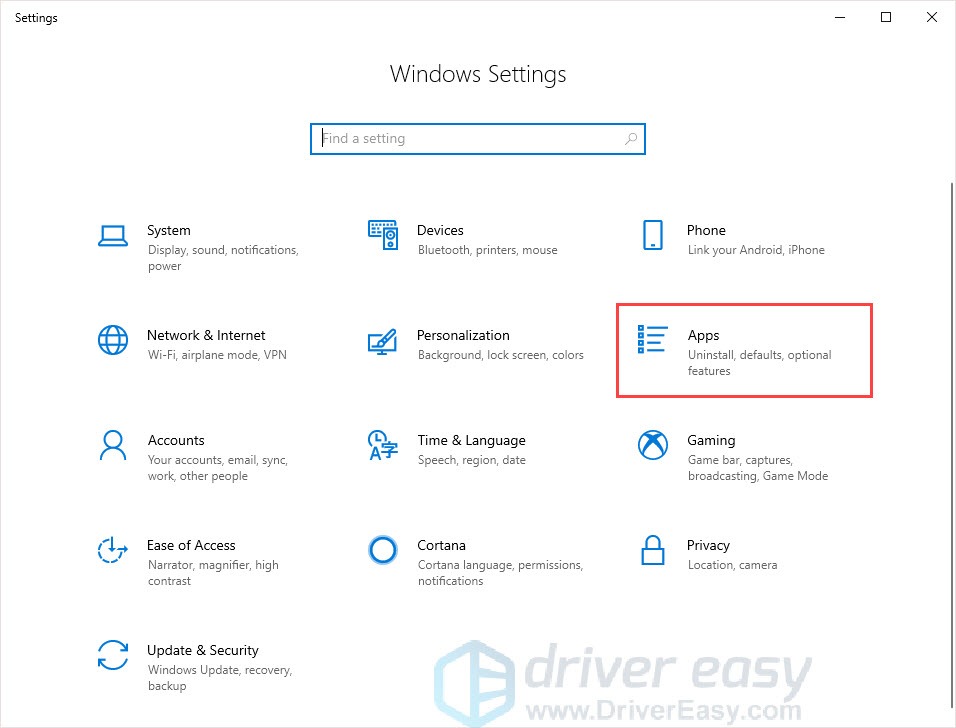
- Click Apps.
- Choose the Apps & features tab on the left.
- In the right panel, scroll down and find Minecraft.
- Click Minecraft and click Advanced options.
- Click Reset.
- Go to Microsoft Store and check for updates.
Fix 2: Reinstall Minecraft
If this method doesn’t work, you can reinstall the Minecraft to fix the issue.
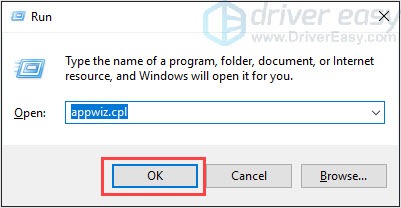
- Press the Windows logo key + R.
- Type appwiz.cpl and press Enter.
- Right-click on Minecraft and click Uninstall.
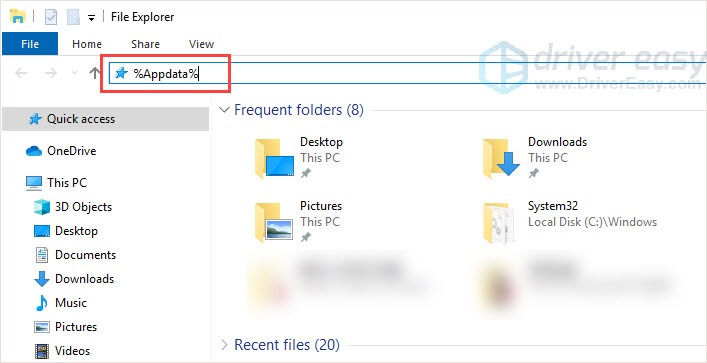
- Press the Windows logo key + E to open File Explorer.
- Type %Appdata% in the address bar and press Enter.
- Find the Minecraft folder and delete it.
- Go to Minecraft official website to download the latest version.
- Install and run the program to check.
Bonus tip: Update your drivers
To get a better gaming experience, it’s recommended to update your drivers. Take graphics card as an example.Graphics card manufacturers like Nvidia, AMD and Intel constantly release new graphics drivers to fix bugs and improve the gaming performance and experience.
If the graphics driver on your PC is outdated or corrupted, you may not be able to enjoy the optimal gaming experience, and sometimes you may run into the Control crash issue.
To prevent and fix issues, you’d better update your drivers.
There are two ways you can update your drivers:
Manual driver update – You can update your graphics drivers manually by going to the manufacturer’s website for your graphics card, and searching for the most recent correct driver. Be sure to choose only drivers that are compatible with your Windows version.
Automatic driver update – If you don’t have the time, patience or computer skills to update your video and monitor drivers manually, you can, instead, do it automatically with Driver Easy.
Driver Easy will automatically recognize your system and find the correct drivers for your exact graphics cards, and your Windows version, and it will download and install them correctly:
- Download and install Driver Easy.
- Run Driver Easy and click Scan Now. Driver Easy will then scan your computer and detect any problem drivers.
- Click Update All to automatically download and install the correct version of all the drivers that are missing or out of date on your system. You need the Pro version of Driver Easy to do this, so you’ll be prompted to upgrade.

Don’t worry; it comes with a 30-day money-back guarantee, so if you don’t like it you can get a full refund, no questions asked.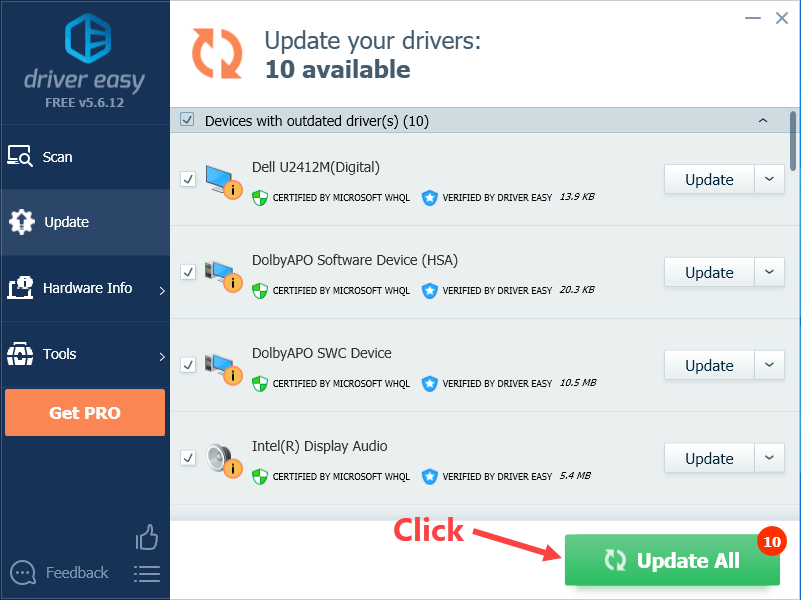
(Alternatively, if you’re comfortable manually installing drivers, you can click ‘Update’ next to each flagged device in the free version to automatically download the correct driver. Once it’s downloaded, you can manually install it.)
Hope this post could meet your need. If you have any questions or suggestions, please leave your comments below. We’ll try our best to help.


