- Installing Node.js® and NPM on Mac
- What’s Node.js® and NPM?
- Prerequisites
- Installation Overview
- Installation Steps
- Test it!
- How to Update Node and NPM
- How to Uninstall Node and NPM
- Как установить Node.js и NPM в Mac OS
- Как установить Node.js и NPM через Homebrew
- Как установить Node.js и NPM через установщик
- Как узнать, установлены ли NPM и Node.js на Mac
- Как проверить работу Node.js
- Node.js Installation on MacOS
- Why Node?
- Different editions
- Long Term Support
- N|Solid
- StrongLoop to IBM
- io.js is gone
- Which version of what?
- Choose among alternatives
- Verify Install
- Does node REPL work?
- Node Versions Installed
- NPM Packages
- NVM Install
- Upgrade NVM
- Use NVM to install Node
- Available to install
- Clear NPM Cache
- Install latest version
- Uninstall Node version
- Install node and .npm-packages without npm
- Uninstall default Brew install
- Create .npm-packages folder
- Define NODE_PATH
- Verify Node Version
- Brew standard install
- C: Download and Install Manually
- Install Node packages
- Alternate folder
- Code Node JavaScript
- Nodemon
- Bower Install of GUI apps
- Project Bower Install
- Node modules
- Yarn Install
- Grunt
- LearnNode Programming Tutorial
- How NPM works
- Additional topics
- Resources
Installing Node.js® and NPM on Mac
What’s Node.js® and NPM?
Node.js® is a JavaScript-based environment which you can use to create web-servers and networked applications. You can also use it to perform helpful tasks on your computer such as concatenating and minifying JavaScript files and compiling Sass files into CSS.
NPM is a “package manager” that makes installing Node “packages” fast and easy. A package, also called a module, is just a code library that extends Node by adding useful features. For example, the “request” module simplifies the process of making HTTP requests so you can easily get web resources from other sites.
NPM is installed when you install Node.js®
Although there is a Mac installer program on the Node website, we recommend using Homebrew to install and update Node.
Prerequisites
- You should have some familiarity with the Mac Terminal application since you’ll need to use it to install and test Node and NPM. You’ll also need the Terminal to use Node.js and NPM. The Terminal application is located in the Utilities folder in the Applications folder.
- Dependencies. Although you can install Node in other ways, we recommend using Homebrew. Homebrew lets you avoid possible security problems associated with using the sudo command to install software like Node and Node modules.
- Install Homebrew. Follow the steps on the How to Install Homebrew on a Mac instruction guide to install Homebrew.
Installation Overview
Installing Node.js® and NPM is pretty straightforward using Homebrew. Homebrew handles downloading, unpacking and installing Node and NPM on your system. The whole process (after you have Homebrew installed) should only take you a few minutes.
Installation Steps
- Open the Terminal app and type brew update . This updates Homebrew with a list of the latest version of Node.
- **Type brew install node .
- Sit back and wait. Homebrew has to download some files and install them. But that’s it.
Test it!
Make sure you have Node and NPM installed by running simple commands to see what version of each is installed:
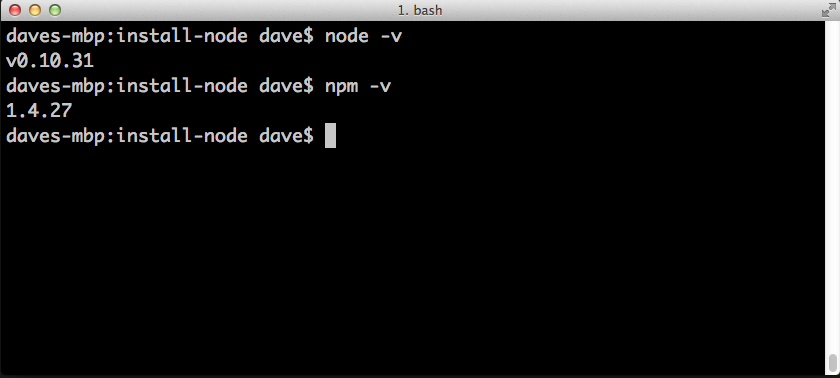
- Test Node. To see if Node is installed, type node -v in Terminal. This should print the version number so you’ll see something like this v0.10.31 .
- Test NPM. To see if NPM is installed, type npm -v in Terminal. This should print the version number so you’ll see something like this 1.4.27
How to Update Node and NPM
New versions of Node and NPM come out frequently. You can use Homebrew to update the software it installs.
- Make sure Homebrew has the latest version of the Node package. In Terminal type brew update
- Upgrade Node: brew upgrade node
How to Uninstall Node and NPM
You can use Homebrew to uninstall packages that it installed:
Источник
Как установить Node.js и NPM в Mac OS
Node JS – популярная платформа Javascript, которая широко используется разработчиками, а npm – это аккомпанирующий её менеджер пакетов. Когда вы установите Node.js, npm установится автоматически. Соответственно, если вам нужен npm, придётся установить и NodeJS.

Есть несколько способов установить Node.js и NPM на Mac, включая использование установщика и использование Homebrew. В данной статье мы расскажем об обоих способах, которые должны работать во всех современных версиях MacOS.
Как установить Node.js и NPM через Homebrew
Самый простой способ установить node.js и npm – через утилиту командной строки Homebrew. Естественно, для этого у вас должен быть установлен менеджер пакетов Homebrew. Кроме того, не помешает обновить программу перед тем, как приступать к инструкции. Выполните следующую команду:
После этого в программе Terminal выполните такую команду, чтобы установить сразу Node.js и npm:
Данный способ самый простой из всех, и с его помощью node.js и npm легко обновлять. Кроме того, удалить их будет так же просто.
Как установить Node.js и NPM через установщик
Если вы по какой-то причине не хотите использовать Homebrew, можете использовать установщик с сайта nodejs.org:
Запустите установщик, как любую другую программу на Mac.
Как узнать, установлены ли NPM и Node.js на Mac
Вы можете узнать, установлены ли node.js и npm на вашем компьютере, использовав следующие команды:
Как проверить работу Node.js
Когда программная платформа node.js будет установлена, вы можете проверить его работу, создав простой сервер. Создайте файл с названием «app.js» со следующим кодом:
Сохраните файл app.js, а затем запустите сервер следующей командой:
Затем откройте браузер и перейдите по этой ссылке:
Вы должны увидеть сообщение « Hello from Node.js».
Это самый простой веб-сервер, созданный с помощью node.js. Вы также можете установить программу Grunt CLI для тестирования node и npm с помощью такой команды:
После этого запустите в командной строке «grunt».
Выше мы рассказали о самых простых способах установить NodeJS и npm на Mac. Надеемся, они вам помогут.
Источник
Node.js Installation on MacOS
How to switch among versions of JavaScript using nvm and npm
The objective of this tutorial is to spare you the pain and confusion around installing, updating, and uninstalling the various editions and versions of Node (aka NodeJs, with Js for JavaScript).
Why Node?
Popularity is manifested in the number of new modules being contributed. And Node is fast. It’s portable. What’s not to like?
Different editions
Installing Node has become complex due to the drama behind different editions and versions of Node with different mechanisms for managing updates, each with permissions issues.
For these reasons, many instructions on the internet are outdated, contradictory, or plain wrong.
Node.js was started as an open-source project in 2009 by Ryan Dahl. Its second contributor was Isaac Schlueter who now leads the project. The project had a total of 447 core contributors as of 2016. Dahl was employed by Joyent.com during much of Node’s development, and Joyent continues to sponsor Node. Joyent has raised in the neighborhood of $100 million in venture capital and has an employee headcount in excess of 120. Joyent as a cloud computing company was purchased in 2015 by Samsung (Korea).
Long Term Support
Long Term Support releases, introduced Fall, 2015, are actively developed for 18 months, then maintained for a further 12 months. This means a particular LTS release stays in production for 30 months with bug and security fixes.

PROTIP: Odd numbered versions are not destined for active status, unstable development versions.
There are two versions active at the same time.
N|Solid
N|Solid from NodeSource is a “fully compatible Node.js runtime enhanced to address the needs of enterprise production support.”
Their disto provides a GUI and a way to pull telemetry for V8 process monitoring.
Again, this is a licensed product. I’ve heard that they provide support at $1,000 per developer per month ($12,000 per year).
StrongLoop to IBM
A VentureBeat article in 2013 writes “Two programmers named Ben Noordhuis and Bert Belder have founded a new company called StrongLoop. And they’re apparently attempting to hijack the Node brand and community for themselves.” Strongloop supports Express and LoopBack frameworks. On 10 Sep 2015, StrongLoop was acquired as IBM API Connect, which focuses on the API lifecycle.
io.js is gone
In 2013 iojs.org, a fork of Node.js was formed by several core committers frustrated by Joyant.
Then on September, 2015, io.js merged with the Node.js project again under new nodejs.org/en/foundation governance.
Which version of what?
QUESTION: What are the install instructions If you’re an enterprise user paying for LTS?
Instead of using an internet browser to download an installer from
https://nodejs.org/en/download/releases/
consider these:
nvm (node version manager) is a shell function that downloads and upgrades versions of node.js. It’s not needed unless you want to keep and upgrade multiple versions of Node.js. But you will eventually will need to.
npm (node package manager) installs JavasSript packages such as Express.js.
Ideally, we would have both nvm and npm on the same machine, each configured the way we want for maximum productivity.
However, there is a conflict between the ideal way of installing npm with how nvm works.
The ideal way to install most applications is to NOT need to use the sudo prefix command to temporarily elevate permissions.
On a Mac, by default, npm is installed in the .npm folder.
To make it work, we install it in the .npm-packages folder by placing a configuration setting.
However, nvm does not recognize that configuration setting and thus only works with plugins installed in the default .npm folder.
Yes, why can’t people from nvm and npm get together and work things out?
Thus, a choice needs to be made.
Choose among alternatives
Click on one of the mutually exclusive variations of installing Node for additional information and instructions:
A: Brew install node WITHOUT npm, then install .npm-packages with no nvm.
“Node.js version management: no subshells, no profile setup, no convoluted API, just simple.”
Installing Node automatically installs NPM.
CAUTION: Even though pricing for NodeSource is NOT published on the website doesn’t mean it’s free. I’ve heard pricing for both Joyant and NodeSource start at around $1,000 per month per developer.
Verify Install
These instructions are used when both verifying a new setup and when obtaining facts when troubleshooting an established setup.
Return here after installation.
PROTIP: Before you speak to someone about this, provide them your operating system facts, obtained using instructions here:
Operating system information:
uname -a
On my machine, the response:
Obtain node version:
node -v
At time of writing, the response for the most recent version:
If you get an error such as this, verify your installation:
Obtain npm version:
npm -v
At time of writing, the response (for the Node version obtained above):
echo $NODE_PATH
The response if installed by NVM or by downloaded installer:
The response if installed using brew:
Regardless of how you installed node, before discussing your installation, obtain and present the facts above.
From any folder, for just a simple list of package names:
ls `npm root -g`
PROTIP: npm itself is a Node package.
Alternately, list global npm packages installed as a tree:
npm list -g --depth=0
The response is a list with version numbers:
Note the first line in the response shows the folder.
List what modules are installed in the traditional location for Node:
ls /usr/local/lib/node_modules
- bower
- firebase-tools
- generator-karma
- grunt
- grunt-cli
- http-server
- gatsby
- iothub-explorer
- mocha
- yo
- traceur
- serverless
- npm
QUESTION: When Node is installed using Homebrew, same location?
Does node REPL work?
Initialize the Node command-line:
The response is simply a > character.
Type this command:
console.log(‘Node is running’);
The response should reflect what is in the command.
From inside REPL, get a list of commands (with a leading dot):
PROTIP: Node interactive commands begin with a dot.
To get out gracefully:
Alternately, you can (crudely) press control+C to abort the process.
Node Versions Installed
Traditionally, NVM (Node Version Manager) installs multiple versions of Node.
List what versions of Node are installed:
nvm ls
PROTIP: Most don’t need multiple versions of Node at once.
PROTIP: Using NVM conflicts with Homebrew. Since many prefer to use Homebrew for everything else, it’s annoying to remember such exceptions.
NPM Packages
The installer of Node also installs NPM (Node Package Manager) which manages installation of Node packages.
List EVERY versions of NPM available for install from the internet:
nvm ls-remote
At time of this writing, there were 376 versions.
List what modules are available for install from the internet:
List files in the traditional location when NPM installs Node packages:
ls /usr/local/lib/node_modules/npm/node_modules
NVM (Node Version Manager) downloads and installs multiple versions of Node.js, then enables using a specific version of Node, using a command such as this (after installation and cd to your node app folder):
nvm run 4.5.0 app.js
The above is for the LTS (Long Term Support) version.
If instead you want to run the latest versions of Node:
PROTIP: Remember that there is no “v” to specify a version, unlike the install command:
nvm install v4.5.0
To do the above, you first have to install NVM and Node, described in the steps below.
NVM Install
brew install nvm
If you’ve installed another way before, make sure that if you have an
/.npmrc file, it does not contain any prefix settings (which is not compatible with nvm):
PROTIP: This file is used by “Option A” above, thus the mutually exclusive options.
Install C++ Compiler.
NVM uses a C++ compiler installed with Apple’s stand-alone Command Line Tools also within Apple’s XCode application.
The README at https://github.com/creationix/nvm notes that it uses a C++ compiler installed with Apple’s stand-alone Command Line Tools also within Apple’s XCode application.
Agree to Apple’s license:
sudo xcodebuild -license
Type in your root password, hold down Enter until it stops, then type agree and Enter.
Install NVM using wget:
wget -qO- https://raw.githubusercontent.com/creationix/nvm/v0.31.6/install.sh | bash
PROTIP: The instructions say either curl or wget, but I prefer using wget because it is not installed by default, and nvm requires it. So if you don’t have wget, better to know it sooner than later.
The command installs to hidden folder
/.nvm and looks into the
/.bashrc file used by Linux machines. More on this soon.
If you see this instead:
CAUTION: NVM does not recognize the PREFIX used in the Alternate folder technique. So we would need to live with just elevated permissions.
What the above does is equivalent to:
git clone http://github.com/creationix/nvm.git .nvm
So the command above is what some recommend to fix issues with nvm install.
nvm --version
If you get a version code such as the below (25 August 2016), proceed to use NVM.
TROUBLESHOOTING: If instead of the version code, this message appears:
Edit the file that Mac uses to initiate Terminal, using atom or other editor (vi, nano, etc.)
Add to the bottom of the file:
## Export the NVM path and run its shell:
export NVM_DIR=”$HOME/.nvm”
[ -s “$NVM_DIR/nvm.sh” ] && . “$NVM_DIR/nvm.sh” # This loads nvm
Restart Terminal so it takes:
To verify that nvm has been installed:
command -v nvm
NOTE: nvm is a shell script, not an executable, so the usualy where command does not work.
The response should be:
To verify that nvm has been installed:
echo $NVM_DIR
The response should be (where “mac” is substituted with your own user id):
For a list of commands, type nvm by itself:
PROTIP: Widen the screen to avoid text wrapping.
Upgrade NVM
To download, compile, and install the latest v5.0.x release of node:
nvm install
Use NVM to install Node
To list what versions of Node.js are installed:
nvm ls
The response is like this:
Available to install
To list what versions of Node.js are available to install:
nvm ls-remote
Scroll to “(Latest LTS: Argon)”, such as:
The latest version is at the bottom of the list, such as:
Clear NPM Cache
Install latest version
Install the latest version of Node.js:
nvm install node
Notice that there is specific version of npm to support each version of Node.
TROUBLESHOOTING: If these message also appear:
As this advises, get rid of those messages on the Mac by going to Terminal > Preferences > Advanced tab to uncheck “Set locale environment variables on startup”:
Exit Terminal to activate it or you’ll see the message again.
Uninstall Node version
Installing does not automatically uninstall previous versions.
To uninstall a version:
nvm uninstall v6.4.0
Install the most recent LTS version of Node according to nvm ls-remote:
nvm install v4.5.0
Install node and .npm-packages without npm
Uninstall default Brew install
If node was previously installed, uninstall it:
No damage is done if this command is run even though brew is already uninstalled.
If node was previously installed, these folders have been known to block re-install, so remove them by using the code below:
Supply your password when prompted.
Remove locations where Node can be installed:
Create .npm-packages folder
mkdir “$
To avoid permission issues:
Provide your password when prompted.
Indicate to npm where to store globally installed packages by adding a line at the bottom of the
echo prefix=
WARNING: NVM does not support this, which is OK since we are doing this to get away from using it anyway.
Install node without default NPM:
brew install node --without-npm -g
Alternately, install npm for global use:
If you also get this message:
Define NODE_PATH
/.bash_profile to insert these lines:
/.bash_profile on Mac is equivalent to the .bashrc file used in Linux systems.
To ensure npm will find installed binaries and man pages, add a NPM_PACKAGES environment variable containing the path to npm-installed packages into the system PATH variable:
Use of $
Save the file and make sure the changes run fine:
Make sure that the Mac’s executable search PATH contains the node executable is in the PATH:
echo $PATH
If not add it to the system PATH:
Verify Node Version
verify whether the node program works:
node --version
The response should be its version, such as:
To identify where node executables are installed:
which node
See that Node is one among many other programs at:
ls /usr/local/bin | grep node
BTW, an alternative to NVM is “N” from https://github.com/tj/n. However, I never got it to work for me.
Brew standard install
If you have already followed instructions at my Homebrew installation tutorial to install Homebrew:
WARNING: Homebrew installs Node to a different location than other ways.
Be aware of your present current directory:
CAUTION: Without specifying the -g in the next command, installation is whatever is the current folder.
Install node globally using Homebrew:
brew install node -g
The initial response at time of writing (August 2017):
PROTIP: Homebrew downloads installers to
/Library/Caches/Homebrew/ and looks for installers there to avoid downloading again.
PROTIP: Notice the bottle is specific to the version on your operating system (such as “sierra”).
You should now see something like this:
If you get this error message between the two messages above:
Run the command.
If you get this error message between the two messages above:
Following the advice above:
brew link node
If you see this:
NOTE: By default, when node is installed, it installs npm, the Node Package Manager, a node package to install additional packages.
Identify which folder npm is obtained:
which npm
The response for default installations:
List npm global modules installed on the default global module folder:
ls /usr/local/lib/node_modules
The response contains npm plus firebase-tools, http-server, gatsby, iothub-explorer, serverless
C: Download and Install Manually
- Download installer from http://nodejs.org
- Use the Mac Finder to navigate to the file in your Downloads folder.
- Unzip the file downloaded.
- Execute the file.
- Respond to the prompts.
- Skip to Verify the install
Install Node packages
The current global location:
npm config get prefix
The answer (where “mac” is substituted with your user name):
The command to install a package without additional parameters is, for example:
pwd
npm install serverless
This installs the node packages locally within whatever folder is the present working directory, revealed by the pwd command.
However, we usually need node packages to be installed globally for access from any present directory by any user on the machine.
This location is one MacOS requires sudo (super user do) permission elevation. For example:
sudo npm install serverless -g
Without sudo, an error would occur from the above command such as:
This is because the default npm folder is managed at the system level, not user level.
To avoid these permission issues, some recommend higher permissions to folders, as in:
sudo chown -R $USER:$GROUP
/.npm
sudo chown -R $USER:$GROUP
This may not be enough to address installation issues when using Homebrew such as when upgrading with command:
npm update npm -g
Alternate folder
We can install the folder under a user’s HOME folder, which is defined by the $
The alternative npm folder name established by convention is:
To achieve this, we first need to uninstall the default install:
rm -rf /usr/local/lib/node_modules
brew uninstall node
All of Node needs to be uninstalled because it installed npm which uses the system folder.
To install node for global use, we can invoke
Code Node JavaScript
To enable publication on NPM and Bower, packages such as Datatables contain extensions and styling options in well defined CommonJS and AMD loaders. This also opens options to use other tools such as Browserify and WebJars.
Others who have blogged about this include:
Make a folder containing Node application files, and go to it:
Install the express package and its dependencies:
npm install express -g
Use a text editor to create file index.js containing “Hello World” code in JavaScript:
NOTE: Semicolons and carriage returns serve the same purpose in JavaScript. You only need semicolons if you are concatenating code together in a single line.
Start the Node server running the default index.js program:
node index.js
The window remains open and accept no other commands until you press control+C to escape the process.
Switch to an internet browser to open the Node Express web server running locally at port 3000:
If you get “TypeError: res.json is not a function” …
Nodemon
npm install nodemon -g # -g installs globally as system command.
nodemon index.js # watch for changes and kill server when needed
Restart your node server specified in a coffee-script:
nodemon server.coffee
Bower Install of GUI apps
Bower is similar to NPM, but for front-end GUI applications.
Any frameworks or 3rd-party libraries that need to be accessible in the user’s browser will be managed by bower.
Similarly to NPM, bower tracks dependencies in a file called bower.json.
Install bower globally via npm:
npm install -g bower
Running bower install will resolve, download, and install them.
Project Bower Install
cd to the project’s folder.
Install the project’s bower components using bower:
bower install
Install http-server using npm:
npm install -g http-server
Fire up the server at default port 8080:
http-server client/
npm ls
http-server client/
Node modules
A module is a single JavaScript file.
A package is a directory containing modules.
A list of shorthands for the NPM command
https://docs.npmjs.com/misc/config
Famous Node modules are listed below.
Yarn Install
An alternative to NPM is yarn, which uses Node to generate software.
Yarn is used by https://github.com/dancancro/great-big-example-application
To install it on a machine with NPM already installed:
Install using Homebrew:
PROTIP: Using Brew means that you don’t need to setup path yourself.
BTW, A search of all files that mention “yarn” yielded this list:
Verify that Yarn is installed by running:
At time of writing in 2021, the version was:
There is a more precise version:
ls /usr/local/Cellar/yarn
Verify the yarn command works:
At time of writing in 2021, the response was:
Grunt
npm install -g grunt-cli
LearnNode Programming Tutorial
The classic interactive tutorial introducing Node.Js was created on:
To install it we reference its npm package on npm.org:
Run npm install learnyounode -g
Notice the -g can go before or after the module being installed.

NOTE: Use keyboard up/down arrows to select option. This is not a GUI interface.
The tutorial consumes a Terminal window process.
To exit, press control/command + C to close the process.
When you’re done, run npm uninstall learnyounode .
How NPM works
HEADS UP! This article was written for an older version of node. More up-to-date information may be available elsewhere. https://howtonode.org/introduction-to-npm
I use Node.js (via browserify) for each of my web apps, all of which have some dependencies in common and others specific to themselves. Each of these apps has a package.json file that specifies which versions of which modules it needs.
Yes, that is what npm install does. In node.js code, the require algorithm has a particular sequence of places it looks, including walking up the filesystem. However, npm install doesn’t do that. It just installs in place. The algorithms it uses are all constrained to just a single node_modules directory under your current directory and it won’t touch anything above that (except for with -g).
Right now, I have a /node_modules directory in the parent folder of my apps for modules that they all need to reference, and then I put app-specific modules in a node_modules folder in that app’s directory. This works fine in the short term, since my require() statements are able to keep looking upward in the file structure until they find the node_modules directory with the correct app in it.
Where this gets tricky is when I want to go back to an old project and run npm install to make sure it can still find all the dependencies it needs. (Who knows what funny-business has occurred since then at the parent directory level.) I was under the impression that npm install did this:
When I run npm install inside an app folder, however, it appears to install everything locally regardless of where else it may exist upstream. Is that the correct behavior? (It’s possible there’s another reason, like bad version language in my package.json). If this IS the correct behavior, is there a way for me to have npm install behave like the above?
It’s not a big deal to widely replicate the modules inside every app, but it feels messy and prevents me from make small improvements to the common modules and not having to update every old package.json file. Of course, this could be a good thing…
Yeah basically you’re doing it wrong. The regular workflow scales well to the Internet. For your use case it creates some extra tedious work, but you can also just use semantic versioning as intended and specify “mylib”: “^1.0.0” in your package.json for your apps and be OK with automatically getting newer versions next time you npm install.
If installed using homebrew so it’s done on every shell session: Add to
Additional topics
source $(brew –prefix nvm)/nvm.sh
Resources
Several blogs addresses issues related to this topic:
Источник


