- Installing Python Modules
- Key terms
- Basic usage
- How do I …?
- … install pip in versions of Python prior to Python 3.4?
- … install packages just for the current user?
- … install scientific Python packages?
- … work with multiple versions of Python installed in parallel?
- Common installation issues
- Installing into the system Python on Linux
- Pip not installed
- Installing binary extensions
- Installing Packages
- Requirements for Installing Packages
- Ensure you can run Python from the command line
- Ensure you can run pip from the command line
- Ensure pip, setuptools, and wheel are up to date
- Optionally, create a virtual environment
- Creating Virtual Environments
- How to install Python on Linux?
- Getting started with Python
- What if Python already exists? Let’s check
- Download and Install Python:
Installing Python Modules
As a popular open source development project, Python has an active supporting community of contributors and users that also make their software available for other Python developers to use under open source license terms.
This allows Python users to share and collaborate effectively, benefiting from the solutions others have already created to common (and sometimes even rare!) problems, as well as potentially contributing their own solutions to the common pool.
This guide covers the installation part of the process. For a guide to creating and sharing your own Python projects, refer to the distribution guide .
For corporate and other institutional users, be aware that many organisations have their own policies around using and contributing to open source software. Please take such policies into account when making use of the distribution and installation tools provided with Python.
Key terms
pip is the preferred installer program. Starting with Python 3.4, it is included by default with the Python binary installers.
A virtual environment is a semi-isolated Python environment that allows packages to be installed for use by a particular application, rather than being installed system wide.
venv is the standard tool for creating virtual environments, and has been part of Python since Python 3.3. Starting with Python 3.4, it defaults to installing pip into all created virtual environments.
virtualenv is a third party alternative (and predecessor) to venv . It allows virtual environments to be used on versions of Python prior to 3.4, which either don’t provide venv at all, or aren’t able to automatically install pip into created environments.
The Python Package Index is a public repository of open source licensed packages made available for use by other Python users.
the Python Packaging Authority is the group of developers and documentation authors responsible for the maintenance and evolution of the standard packaging tools and the associated metadata and file format standards. They maintain a variety of tools, documentation, and issue trackers on both GitHub and Bitbucket.
distutils is the original build and distribution system first added to the Python standard library in 1998. While direct use of distutils is being phased out, it still laid the foundation for the current packaging and distribution infrastructure, and it not only remains part of the standard library, but its name lives on in other ways (such as the name of the mailing list used to coordinate Python packaging standards development).
Changed in version 3.5: The use of venv is now recommended for creating virtual environments.
Basic usage
The standard packaging tools are all designed to be used from the command line.
The following command will install the latest version of a module and its dependencies from the Python Package Index:
For POSIX users (including macOS and Linux users), the examples in this guide assume the use of a virtual environment .
For Windows users, the examples in this guide assume that the option to adjust the system PATH environment variable was selected when installing Python.
It’s also possible to specify an exact or minimum version directly on the command line. When using comparator operators such as > , or some other special character which get interpreted by shell, the package name and the version should be enclosed within double quotes:
Normally, if a suitable module is already installed, attempting to install it again will have no effect. Upgrading existing modules must be requested explicitly:
More information and resources regarding pip and its capabilities can be found in the Python Packaging User Guide.
Creation of virtual environments is done through the venv module. Installing packages into an active virtual environment uses the commands shown above.
How do I …?
These are quick answers or links for some common tasks.
… install pip in versions of Python prior to Python 3.4?
Python only started bundling pip with Python 3.4. For earlier versions, pip needs to be “bootstrapped” as described in the Python Packaging User Guide.
… install packages just for the current user?
Passing the —user option to python -m pip install will install a package just for the current user, rather than for all users of the system.
… install scientific Python packages?
A number of scientific Python packages have complex binary dependencies, and aren’t currently easy to install using pip directly. At this point in time, it will often be easier for users to install these packages by other means rather than attempting to install them with pip .
… work with multiple versions of Python installed in parallel?
On Linux, macOS, and other POSIX systems, use the versioned Python commands in combination with the -m switch to run the appropriate copy of pip :
Appropriately versioned pip commands may also be available.
On Windows, use the py Python launcher in combination with the -m switch:
Common installation issues
Installing into the system Python on Linux
On Linux systems, a Python installation will typically be included as part of the distribution. Installing into this Python installation requires root access to the system, and may interfere with the operation of the system package manager and other components of the system if a component is unexpectedly upgraded using pip .
On such systems, it is often better to use a virtual environment or a per-user installation when installing packages with pip .
Pip not installed
It is possible that pip does not get installed by default. One potential fix is:
There are also additional resources for installing pip.
Installing binary extensions
Python has typically relied heavily on source based distribution, with end users being expected to compile extension modules from source as part of the installation process.
With the introduction of support for the binary wheel format, and the ability to publish wheels for at least Windows and macOS through the Python Package Index, this problem is expected to diminish over time, as users are more regularly able to install pre-built extensions rather than needing to build them themselves.
Some of the solutions for installing scientific software that are not yet available as pre-built wheel files may also help with obtaining other binary extensions without needing to build them locally.
Источник
Installing Packages
This section covers the basics of how to install Python packages .
It’s important to note that the term “package” in this context is being used to describe a bundle of software to be installed (i.e. as a synonym for a distribution ). It does not to refer to the kind of package that you import in your Python source code (i.e. a container of modules). It is common in the Python community to refer to a distribution using the term “package”. Using the term “distribution” is often not preferred, because it can easily be confused with a Linux distribution, or another larger software distribution like Python itself.
Requirements for Installing Packages
This section describes the steps to follow before installing other Python packages.
Ensure you can run Python from the command line
Before you go any further, make sure you have Python and that the expected version is available from your command line. You can check this by running:
You should get some output like Python 3.6.3 . If you do not have Python, please install the latest 3.x version from python.org or refer to the Installing Python section of the Hitchhiker’s Guide to Python.
If you’re a newcomer and you get an error like this:
It’s because this command and other suggested commands in this tutorial are intended to be run in a shell (also called a terminal or console). See the Python for Beginners getting started tutorial for an introduction to using your operating system’s shell and interacting with Python.
If you’re using an enhanced shell like IPython or the Jupyter notebook, you can run system commands like those in this tutorial by prefacing them with a ! character:
It’s recommended to write
Due to the way most Linux distributions are handling the Python 3 migration, Linux users using the system Python without creating a virtual environment first should replace the python command in this tutorial with python3 and the python -m pip command with python3 -m pip —user . Do not run any of the commands in this tutorial with sudo : if you get a permissions error, come back to the section on creating virtual environments, set one up, and then continue with the tutorial as written.
Ensure you can run pip from the command line
Additionally, you’ll need to make sure you have pip available. You can check this by running:
If you installed Python from source, with an installer from python.org, or via Homebrew you should already have pip. If you’re on Linux and installed using your OS package manager, you may have to install pip separately, see Installing pip/setuptools/wheel with Linux Package Managers .
If pip isn’t already installed, then first try to bootstrap it from the standard library:
If that still doesn’t allow you to run python -m pip :
Run python get-pip.py . 2 This will install or upgrade pip. Additionally, it will install setuptools and wheel if they’re not installed already.
Be cautious if you’re using a Python install that’s managed by your operating system or another package manager. get-pip.py does not coordinate with those tools, and may leave your system in an inconsistent state. You can use python get-pip.py —prefix=/usr/local/ to install in /usr/local which is designed for locally-installed software.
Ensure pip, setuptools, and wheel are up to date
While pip alone is sufficient to install from pre-built binary archives, up to date copies of the setuptools and wheel projects are useful to ensure you can also install from source archives:
Optionally, create a virtual environment
See section below for details, but here’s the basic venv 3 command to use on a typical Linux system:
This will create a new virtual environment in the tutorial_env subdirectory, and configure the current shell to use it as the default python environment.
Creating Virtual Environments
Python “Virtual Environments” allow Python packages to be installed in an isolated location for a particular application, rather than being installed globally. If you are looking to safely install global command line tools, see Installing stand alone command line tools .
Imagine you have an application that needs version 1 of LibFoo, but another application requires version 2. How can you use both these applications? If you install everything into /usr/lib/python3.6/site-packages (or whatever your platform’s standard location is), it’s easy to end up in a situation where you unintentionally upgrade an application that shouldn’t be upgraded.
Or more generally, what if you want to install an application and leave it be? If an application works, any change in its libraries or the versions of those libraries can break the application.
Also, what if you can’t install packages into the global site-packages directory? For instance, on a shared host.
In all these cases, virtual environments can help you. They have their own installation directories and they don’t share libraries with other virtual environments.
Currently, there are two common tools for creating Python virtual environments:
venv is available by default in Python 3.3 and later, and installs pip and setuptools into created virtual environments in Python 3.4 and later.
virtualenv needs to be installed separately, but supports Python 2.7+ and Python 3.3+, and pip , setuptools and wheel are always installed into created virtual environments by default (regardless of Python version).
Источник
How to install Python on Linux?
Before we start with how to install Python3 on Linux, let’s first go through the basic introduction to Python. Python is a widely-used general-purpose, high-level programming language. Python is a programming language that lets you work quickly and integrate systems more efficiently. There are two major Python versions- Python 2 and Python 3. Both are quite different.
Getting started with Python
Python is a lot easier to code and learn. Python programs can be written on any plain text editor like notepad, notepad++, or anything of that sort. One can also use an online IDE for writing Python codes or can even install one on their system to make it more feasible to write these codes because IDEs provide a lot of features like intuitive code editor, debugger, compiler, etc.
To begin with, writing Python Codes and performing various intriguing and useful operations, one must have Python installed on their System. This can be done by following the step by step instructions provided below:
Attention geek! Strengthen your foundations with the Python Programming Foundation Course and learn the basics.
To begin with, your interview preparations Enhance your Data Structures concepts with the Python DS Course. And to begin with your Machine Learning Journey, join the Machine Learning — Basic Level Course
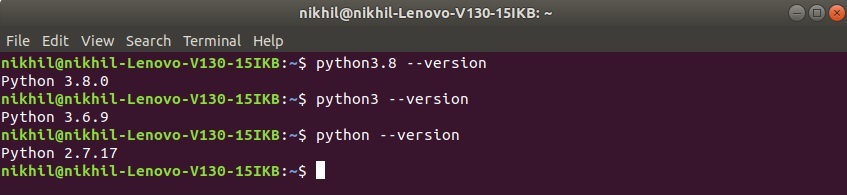
What if Python already exists? Let’s check
Most of the Linux OS has Python pre-installed. To check if your device is pre-installed with Python or not, just go to terminal using Ctrl+Alt+T
Now run the following command:
For Python2
For Python3.x
If Python is already installed, it will generate a message with the Python version available.
Download and Install Python:
Before starting with the installation process, you need to download it. For that all versions of Python for Linux are available on python.org.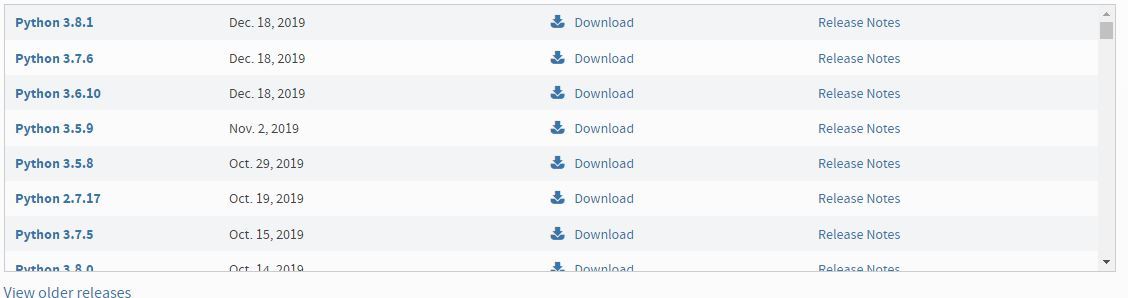
Download the required version and follow the further instructions for the installation process.
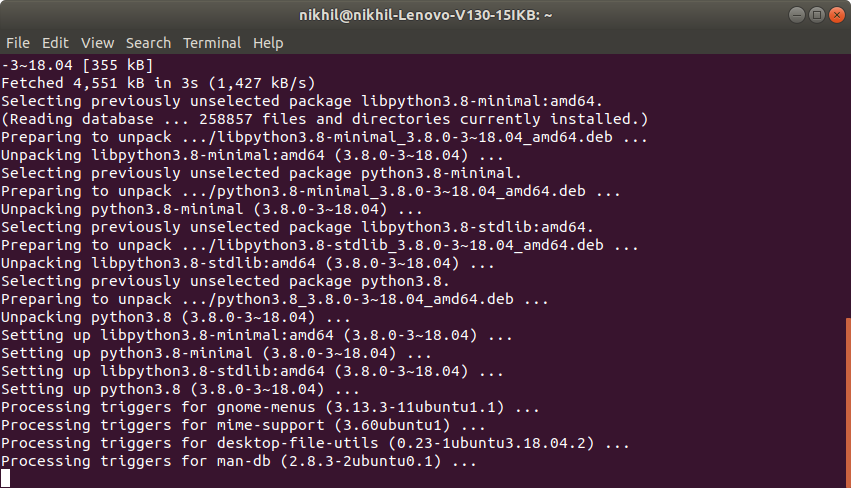
Beginning the installation.
For almost every Linux system, the following command could be used to install Python directly:
- Getting Started:

- Assigning DiskSpace:
- Fetching and Installing Packages:
- Getting through the installation process:
- Finished Installation:


To verify the installation enter the following commands in your Terminal.

Let’s consider a simple Hello World Program.
Источник


