- Как установить Tor Browser на Linux Mint 20
- Как установить Tor Browser на Linux Mint 20
- Как установить Tor Browser на Linux Mint 20
- Шаг 1. Перед запуском приведенного ниже руководства важно убедиться, что ваша система обновлена, выполнив следующие apt команды в терминале:
- Шаг 2. Установка Tor Browser на Linux Mint 20.
- Шаг 3. Создайте ярлык на рабочем столе для Tor Browser.
- Шаг 4. Доступ к Tor Browser в Linux Mint.
- Как установить Tor Browser на Linux Mint 19 / Ubuntu 18.04
- Шаг 1: Добавить репозиторий Tor
- Шаг 2: Установка Tor на Linux Mint 19 / Ubuntu 18.04
- Шаг 3: Установка Tor Browser в Linux Mint 19 / Ubuntu 18.04
- How to install Tor Browser on Ubuntu 20.04
- Step 1: Add the tor browser launcher PPA repository
- Step 2: Update Repository
- Step 3: Install Tor browser launcher
- Step 4: Launch Tor browser launcher
- Step 5: Download and install the Tor browser-related dependencies
- Uninstalling Tor browser
- Conclusion
- About the author
- Kamran Sattar Awaisi
- How to install Tor Browser on Linux Mint
- Linux Mint: Steps to install Tor Browser
- Step 1: Open Linux Terminal
- Step 2: Update the system
- Step 3: Add https protocol support to install Tor browser
- Step 4: Add Tor Project Repository
- Step 5: Add the gpg key used to sign the packages
- Step 6: Update and install Debian keyring
- Step 7: Install Tor on Linux Mint
- Step 8: Install Tor Browser Launcher
- Step 9: Launch the browser
- Download Tor Browser
- How to install Tor Browser on Linux (Ubuntu, Mint, RHEL, Fedora, CentOS)
- Install Tor browser
- Ubuntu & Mint
- CentOS/Fedora/RHELX
- Configuring Tor Browser
Как установить Tor Browser на Linux Mint 20
Как установить Tor Browser на Linux Mint 20
В этом руководстве мы покажем вам, как установить Tor Browser на Linux Mint 20. Для тех из вас, кто не знал, Tor Browser — это открытая сеть и бесплатный веб-браузер, который помогает пользователям защищаться от анализа трафика, своего рода сетевое наблюдение, которое угрожает личной жизни и свободе, конфиденциальным деловым отношениям, деятельности и государственной безопасности.
В этой статье предполагается, что у вас есть хотя бы базовые знания Linux, вы знаете, как использовать оболочку, и, что наиболее важно, вы размещаете свой сайт на собственном VPS. Установка довольно проста и предполагает, что вы работаете с учетной записью root, в противном случае вам может потребоваться добавить ‘ sudo ‘ к командам для получения привилегий root. Я покажу вам пошаговую установку анонимного веб-серфинга Tor Browser на Linux Mint 20 (Ульяна).
Как установить Tor Browser на Linux Mint 20
Шаг 1. Перед запуском приведенного ниже руководства важно убедиться, что ваша система обновлена, выполнив следующие apt команды в терминале:
Шаг 2. Установка Tor Browser на Linux Mint 20.
Теперь мы запускаем следующую команду, чтобы установить установщик Tor Browser с официальной страницы:
Затем извлеките файл Tar из загружаемого браузера Tor:
Шаг 3. Создайте ярлык на рабочем столе для Tor Browser.
Создайте ярлык на рабочем столе для своего браузера, используя следующую команду:
Добавьте следующую строку:
После этого сделайте ярлык исполняемым. Вы увидите ярлык на рабочем столе, щелкните его правой кнопкой мыши и выберите «Свойства». Затем на вкладке «Разрешения» установите флажок « Разрешить выполнение файла как программы » и затем закройте его.
Шаг 4. Доступ к Tor Browser в Linux Mint.
После успешной установки просто дважды щелкните ярлык браузера Tor на рабочем столе, когда захотите его использовать.
Поздравляю! Вы успешно установили Tor Browser . Благодарим за использование этого руководства для установки последней версии анонимного веб-серфинга Tor Browser в системе Linux Mint. Для получения дополнительной помощи или полезной информации мы рекомендуем вам посетить официальный сайт Tor Browser .
Источник
Как установить Tor Browser на Linux Mint 19 / Ubuntu 18.04

Как установить Tor Browser на Linux Mint 19? Или Как установить Tor Browser на Ubuntu 18.04. Вы боитесь, что плохие парни узнают, какие сайты вы посещаете, или какие-либо другие формы сетевого наблюдения, которые угрожают конфиденциальности и личной свободе?
Сеть Tor обслуживается тысячами добровольцев по всему миру, основная задача которых — защищать вас, направляя ваши коммуникации по распределенной сети ретрансляторов.
Это руководство покажет вам, как установить последнюю версию Tor и Tor Browser на Linux Mint 19 / Ubuntu 18.04. Мы не будем использовать стандартные репозитории Ubuntu для Tor, поскольку они содержат более старую версию Tor.
Шаг 1: Добавить репозиторий Tor
Чтобы получить последнюю версию Tor, установленную в Linux Mint 19 / Ubuntu 18.04, мы будем использовать официальный репозиторий Tor Apt. Добавьте их в свой Ubuntu 18.04 / Linux Mint 19, используя команды ниже.
После добавления репозитория импортируйте ключ GPG, используемый для подписи пакетов.
Шаг 2: Установка Tor на Linux Mint 19 / Ubuntu 18.04
Обновите свой индекс пакетов Apt и установите браузер Tor.
Для обмена мгновенными сообщениями, IRC, Jabber и т. Д. Tor использует SOCKS напрямую. Вы можете направить свои приложения прямо на Tor, который слушаетна localhost:9050 , и порт 9150 для браузера Tor.
Обратитесь к документации Tor How To для получения дополнительных примеров конфигурации.
Шаг 3: Установка Tor Browser в Linux Mint 19 / Ubuntu 18.04
Рекомендуется использовать браузер Tor для анонимного просмотра веб-страниц. Tor Browser предварительно настроен для защиты вашей конфиденциальности и анонимности в Интернете, пока вы просматриваете с помощью Tor Browser.
Выполните команды ниже, чтобы установить Tor Browser на Linux Mint 19 / Ubuntu 18.04.
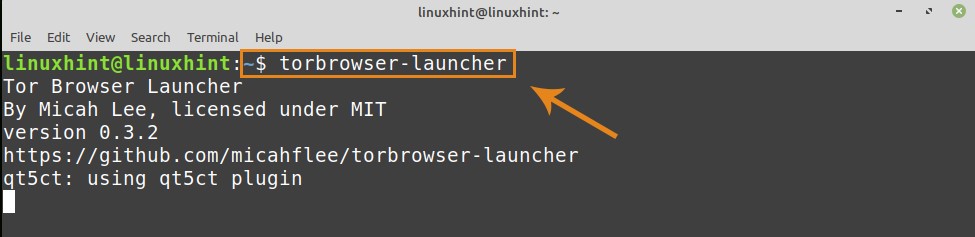
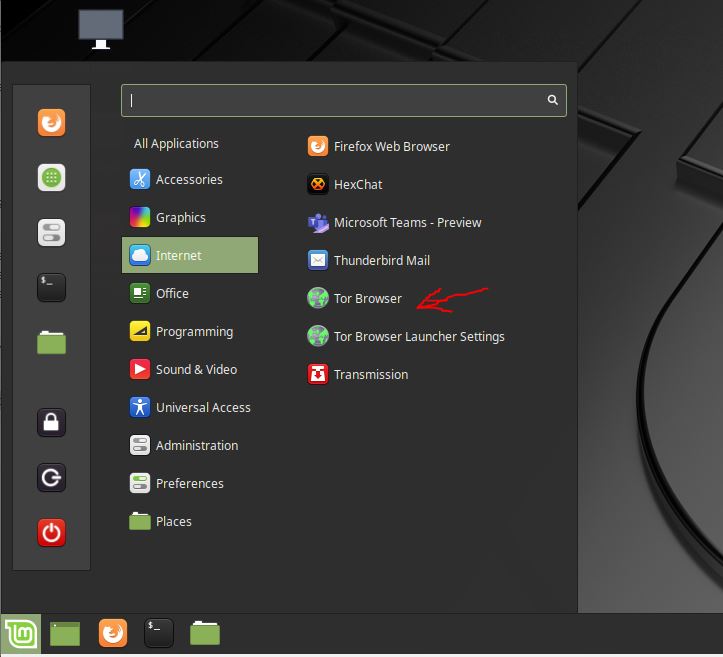
Вы можете запустить браузер Tor из терминала
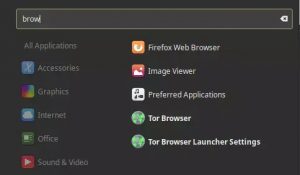
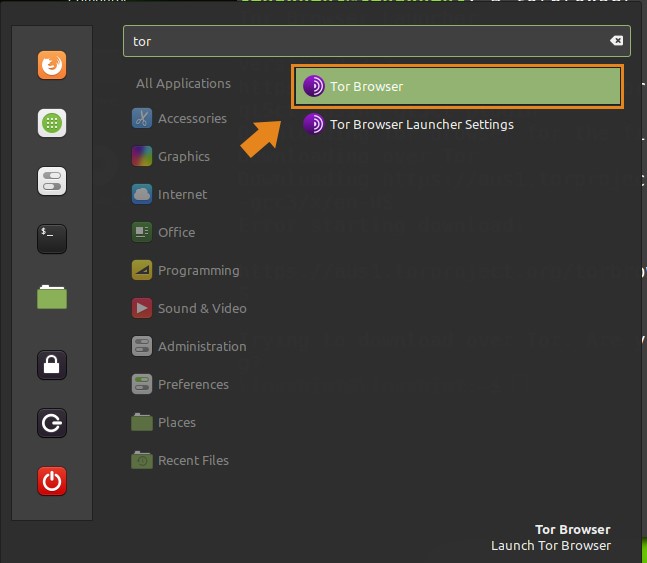
Или из раздела поиска приложений в вашей рабочей среде.
Подключитесь к сети Tor, чтобы начать пользоваться анонимностью в Интернете.
Источник
How to install Tor Browser on Ubuntu 20.04
Privacy is the biggest concern nowadays. Tor browser is on priority for those users who want to preserve their privacy and want to remain anonymous on the web. By routing all your traffic via the tor network, the Tor browser protects your privacy.
This article briefly describes all the steps to install the Tor browser on Ubuntu and Linux Mint system.
Step 1: Add the tor browser launcher PPA repository
The latest version of Tor Browser is not directly available from the Ubuntu, and Linux Mint repositories. The latest version of the Tor Browser can be downloaded and installed on Ubuntu and Linux Mint through the Tor browser launcher script.
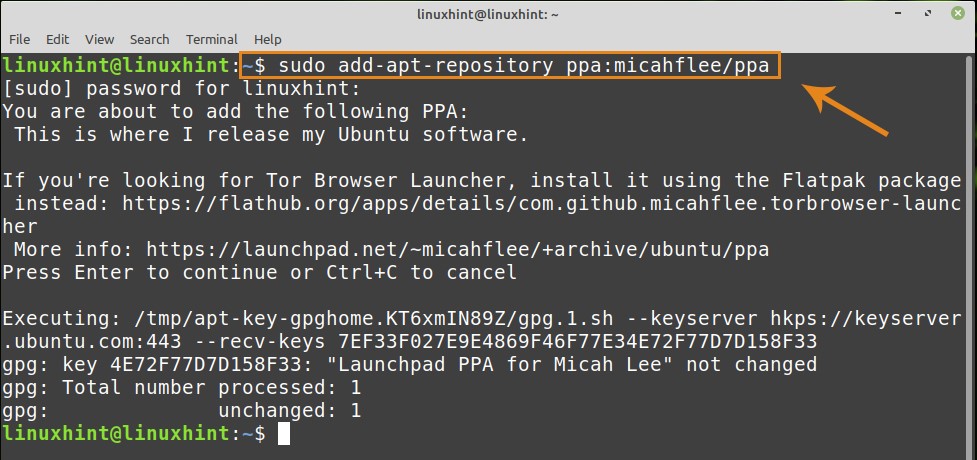
We will be needing a launcher script to ensure the installation of the Tor browser and for that, we need to add a PPA repository:
Step 2: Update Repository
After successfully adding PPA, now you want to update your repository:

Step 3: Install Tor browser launcher
Now we are ready to install the Tor browser launcher from the repository:

Step 4: Launch Tor browser launcher
Once the Tor browser launcher is downloaded and installed successfully, you can either use the command line or the application menu to launch the tor browser launcher.
To start the Tor browser launcher from the command line, run the following command:
To start the tor browser launcher from the application menu, click on the application icon and search “Tor browser launcher”.
Step 5: Download and install the Tor browser-related dependencies
To download and install the Tor browser-related dependencies, open the Tor browser launcher.
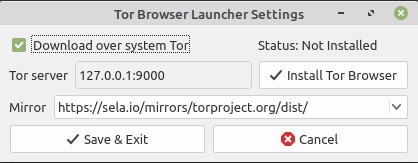
Click on “Install Tor Browser” and it will download and install all the related dependencies automatically.
Uninstalling Tor browser
At any point, if you want to uninstall the Tor browser, run the following command to do so:
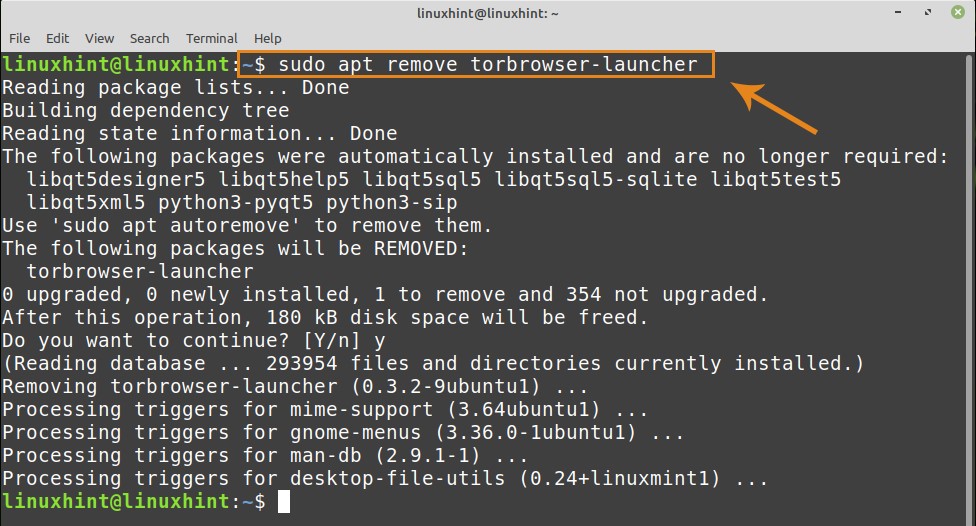
The above-given command will uninstall the Tor browser successfully.
Conclusion
This article briefly explained how to install Tor browser on Ubuntu 20.04 and Linux Mint 20. We used Linux Mint 20 to prepare this guide and execute the commands.
About the author

Kamran Sattar Awaisi
I am a software engineer and a research scholar. I like to write article and make tutorial on various IT topics including Python, Cloud Computing, Fog Computing and Deep Learning. I love to use Linux based operating systems.
Источник
How to install Tor Browser on Linux Mint
Are you looking for commands to install Tor browser on Linux Mint 19 or Ubuntu 18/18.10, then here are those…
We can easily install Tor browser Project on Linux Mint, which runs the Tor anonymization network, is considering as a browser to increase privacy online. It uses a network of computers called Tor network in which a user’s communication is routed through the computers of several other users and is only forwarded to the open Internet via an exit node after several intermediate points. From the last point, the communication of various other users comes into the network. This is intended to disguise who originally sent the data packets.
Linux Mint: Steps to install Tor Browser
So, if you are using Linux Mint or Ubuntu then here are the steps to follow for the installation of Tor Browser.
Note: I recommend using the second method because most of the time torbrowser-launcher gives a Signature not verified error.
#Method 1: Using official repos
Step 1: Open Linux Terminal
Simply go to the start button which represents by the Linux Mint icon, click and search for Terminal. Alternatively, you can also use the Terminal icon given on the Taskbar to run it.
Step 2: Update the system
Run system update command to make sure all the installed packages on the system are up to date.
Step 3: Add https protocol support to install Tor browser
To use source URL with HTTPS in sources.list execute the below command:
Step 4: Add Tor Project Repository
Although, you can directly install the Tor from the default repository of Linux Mint, however, the Tor packages that reside in it usually are not up to date. Thus, it is better to get the latest Tor browser packages directly from the source.list. Use the below command to add the Tor project repository. However, for Ubuntu 18.10 or 19 you don’t need this.
The below given is the single command and you have to copy it whole:
cat
deb https://deb.torproject.org/torproject.org bionic main
deb-src https://deb.torproject.org/torproject.org bionic main
EOF
cat
deb https://deb.torproject.org/torproject.org focal main
deb-src https://deb.torproject.org/torproject.org focal main
EOF
Step 5: Add the gpg key used to sign the packages
It is necessary to get the key used to sign the Tor packages otherwise our system won’t be able to authenticate the genuine source and give the error.
Step 6: Update and install Debian keyring
Update the system, so that system can recognize the added repos and also install a Debian package that will help to keep the signing key to the latest.
Step 7: Install Tor on Linux Mint
Finally, issue this installation command
Step 8: Install Tor Browser Launcher
It is created to easily install, manage, and use this browser on the Linux operating systems.
Step 9: Launch the browser
Either type: torbrowser-launcher on Command terminal to launch the browse or simply go to Application and use the GUI.
Install Tor browser on Linux systems
#2nd Method: Using Tarball Packages
Download Tor Browser
Instead of using the command terminal, directly visit the official website of the browser, here is the link: www.torproject.org and click on the Linux and download the Tor browser package. You can use the default firefox of Linux Mint to open it.
After that go to the home or file manager and click on the Download folder.
Right-click on the downloaded package tor-browser-linux64-xx_en-US and Extract it using the “Open with Archine Manager” option.
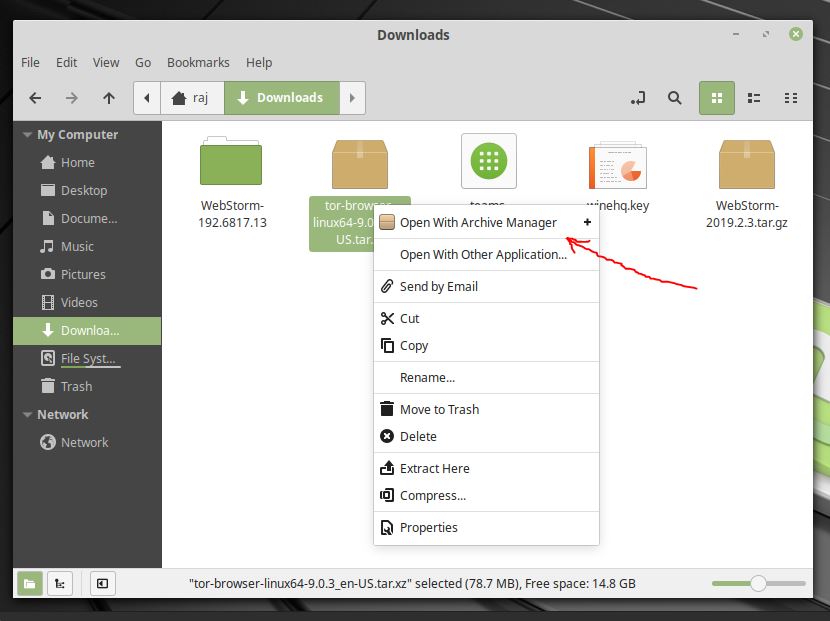
Extract Tor Tarball file GUI
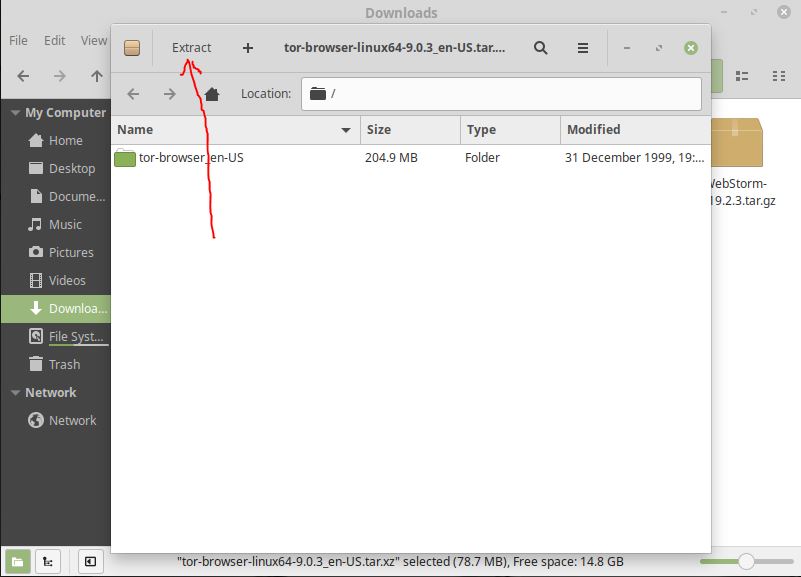
Open the extracted folder.
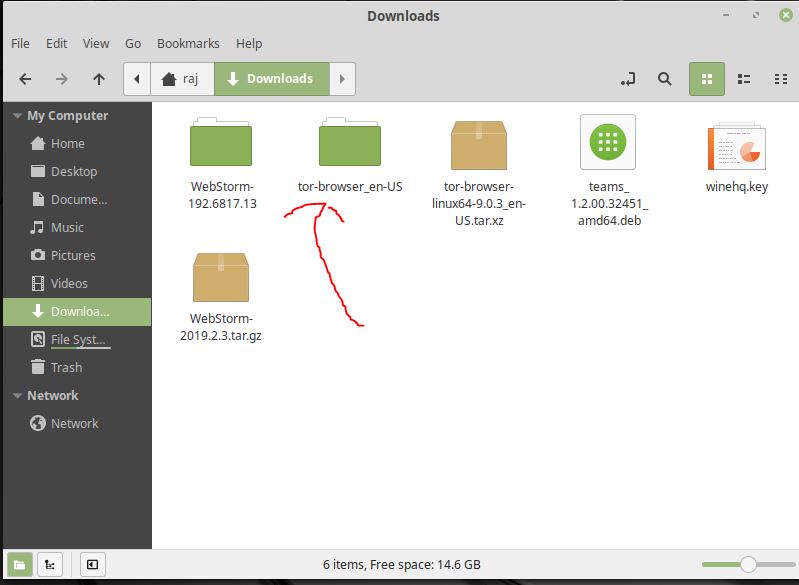
Open tor-browser folder
Open command Terminal and type
cd Downloads
cd tor-browser_en-US
./start-tor-browser.desktop
Double-click on the Tor Browser setup icon and in few seconds the browser will start. If you want to create a Desktop shortcut icon for the Tor browser then simply Drag and drop the same icon on Desktop and after that, you can access it directly from there.
Источник
How to install Tor Browser on Linux (Ubuntu, Mint, RHEL, Fedora, CentOS)
Tor browser let us to browse the internet anonymously , it conceals the user identity & physical location by encyrpting the traffic & randomly bouncing it across a network of relays, which are run by volunteers from around the world.
Tor Browser is based on modified Mozilla Firefox ESR web browser, the TorButton, TorLauncher, NoScript, and HTTPS Everywhere Firefox extensions and the Tor proxy. It can be used from a Windows machine, Linux or Mac machine. Apps are also available for mobile devices.
In this tutorial, we will learn to install Tor Browser on various Linux operating systems, starting with Ubutu & Linux Mint…
Install Tor browser
Ubuntu & Mint
Process for installing tor browser is same on both Ubuntu & Linux Mint. We need to add a repository on the system & than use it to install Tor browser. To add the repository, open terminal & execute the following command,
$ sudo add-apt-repository ppa:webupd8team/tor-browser
Next, run update & install the browser,
$ sudo apt-get update
$ sudo apt-get install tor-browser
After the command completes, we will have tor browser installed on our machines. We can than open the browser either from menu or from terminal with the following command,
$ tor-browser-en.sh
Configurations to use Tor-browser are mentioned below.
CentOS/Fedora/RHELX
Installation of Tor Browser on CentOS/Fedora/RHEL, requires us to compile the browser from source. First download the source file with the following command,
$ wget https://dist.torproject.org/torbrowser/8.0.3/tor-browser-linux32-8.0.3_en-US.tar.xz
Next, extract it,
$ tar -xvJf tor-browser-linux64-7.0.8_en-US.tar.xz
Enter the extracted folder,
$ cd tor-browser_en-US
Now start the Tor browser using,
$ ./start-tor-browser.desktop
Remember, you need to this as local user & not as root user. Now let’s start with Tor Browser configurations.
Configuring Tor Browser
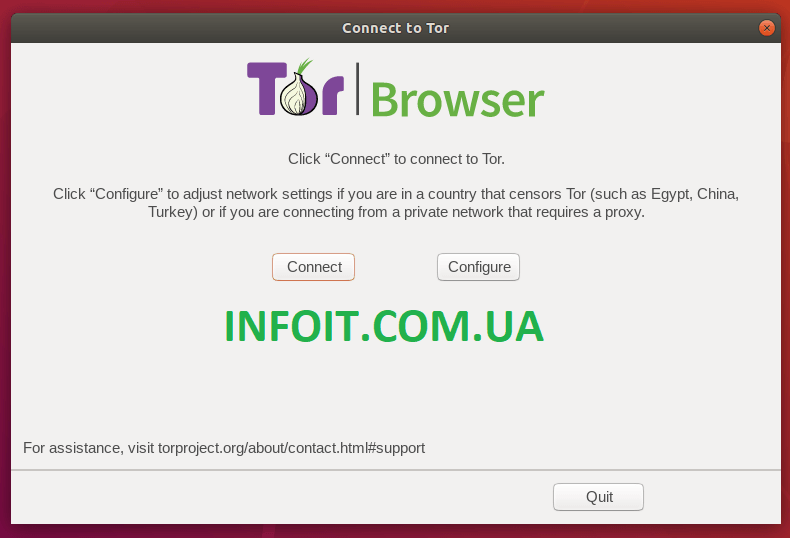
As soon as you start the browser, you will be presented with the following screen,
![]()
In most of the situations , you can simply press on ‘Connect’ & than can enjoy the anonymity offered by tor network. But if that does not work for you & you have some network restrictions, than click to ‘Configure’.
On next screen select ‘No’ & than ‘Next’ if you ISP has not placed any blocks, you will than be forwarded to ‘Local Proxy’ config screen or press ‘Yes’ & ‘Next’ to configure the ‘Tor Bridges’, if ISP has placed some blocks on the network,
![]()
So to configure the bridge, you can use one of the available from the menu or you can provide me a custom one. Once done, press ‘Next’
![]()
If you have a local proxy configured on your network, configure it by selecting ‘Yes’ & ‘Next’ on the following screen or if no proxy is configured, select ‘No’ & press ‘Connect’
![]()
Once connected we can than use the tor browser to access the internet anonymously.
![]()
This completes our tutorial on how to install Tor Browser , we will also discuss about Tor network & how we can use it to secure communications on various applications like chat & email etc , in our future tutorials.
You can send in your queries or questions using the comment box below. ADIOS .
If you think we have helped you or just want to support us, please consider these :-
Donate us some of you hard earned money: [paypal-donation]
Linux TechLab is thankful for your continued support.
Источник


