- How to install the Linux Mint Cinnamon desktop environment on Ubuntu
- Installing Cinnamon desktop on Ubuntu
- Removing Cinnamon desktop environment from Ubuntu
- Change Linux Mint to Ubuntu
- 3 Answers 3
- LinuxMint MATE 18.3 (Sylvia) -> Ubuntu Xenial Xerus 16.04 LTS
- LinuxMint MATE 19 (Tara) -> Ubuntu Bionic Beaver 18.04 LTS
- LinuxMint MATE 20 (Ulyana) -> Ubuntu Focal Fossa 20.04 LTS
- Переход с Ubuntu Linux на Mint без переустановки
How to install the Linux Mint Cinnamon desktop environment on Ubuntu
If you have finally taken your decision of switching from Windows to Linux, and made the move to Ubuntu, for its widespread popularity, that’s great! But after being a Windows user for quite some time, there are chances you will feel homesick for not getting the start menu at its place, and the overall user interface, which is quite different on Ubuntu, which runs the Unity desktop. But, being a new user on Linux, you will need support in almost every stage, and the large online community using Ubuntu will surely help you with most issues that you will come across.
Unlike Windows computers, you can change the complete desktop environment on a Linux distribution, to make everything look exactly the way you want. There is a handful of Linux desktop environments, which come with something similar to the start menu on Windows computers. One of them is the Cinnamon desktop environment which comes with the Linux Mint distribution of Linux. As Linux is open-source, you can simply download the Cinnamon desktop environment on your Ubuntu computer to get the user interface you are looking for without ditching Ubuntu altogether, where you can get support for all the simple problems that you will come across. So, installing the Cinnamon desktop environment on Ubuntu will bring the best of both worlds.
Now, without any further delay, let’s get started with how you can install the Cinnamon desktop environment on your computer running Ubuntu.
Installing Cinnamon desktop on Ubuntu
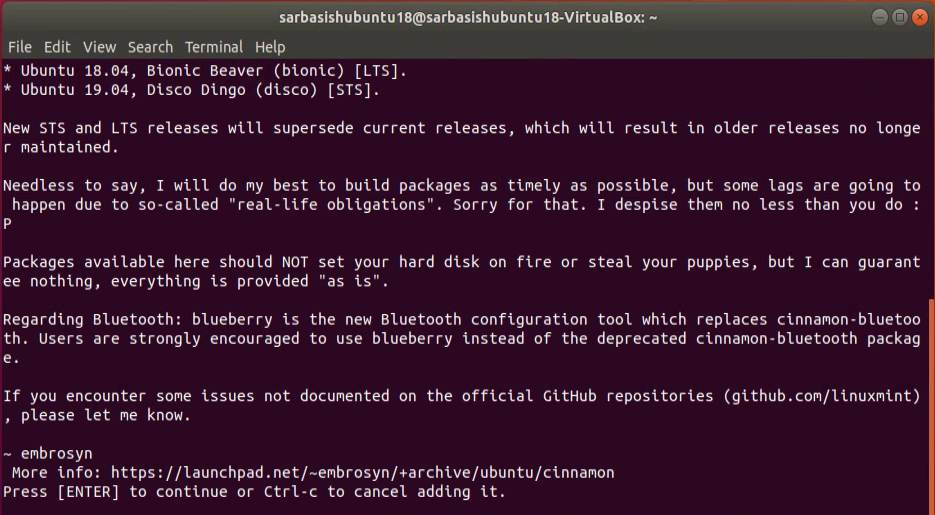
Step 1: The first step will be to add the repository download and install the Cinnamon desktop environment using the PPA. Just enter the following command after opening a Linux terminal and hit the enter key.

Step 2: This will start adding the repository on your computer running Ubuntu, and you will have to allow the process of adding the repository by hitting the enter key when you are prompted to do so.
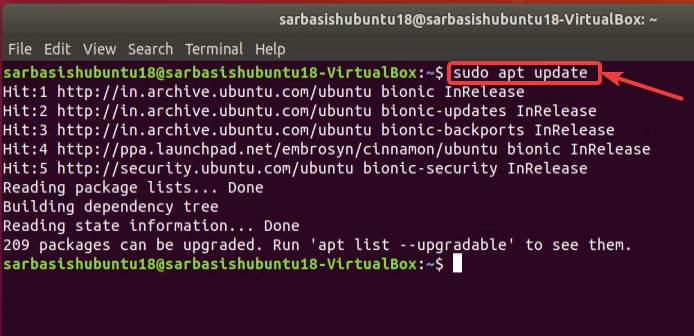
Step 3: After the repository is added, you should update the repository by typing the following command and by hitting the enter key.
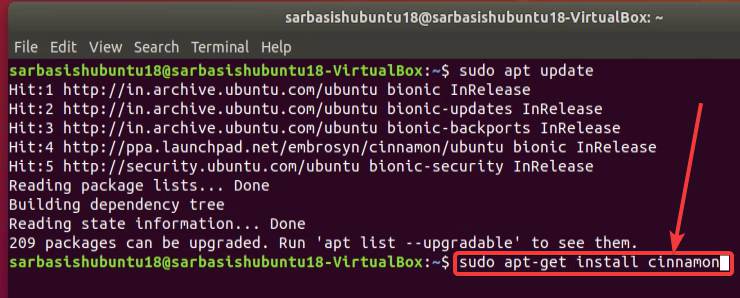
Step 4: Once the execution is complete, you should finally execute the final command to start the installation of the Cinnamon desktop environment on your computer running Ubuntu. Just type in the following command and hit the enter key to start the installation of the Cinnamon desktop environment.
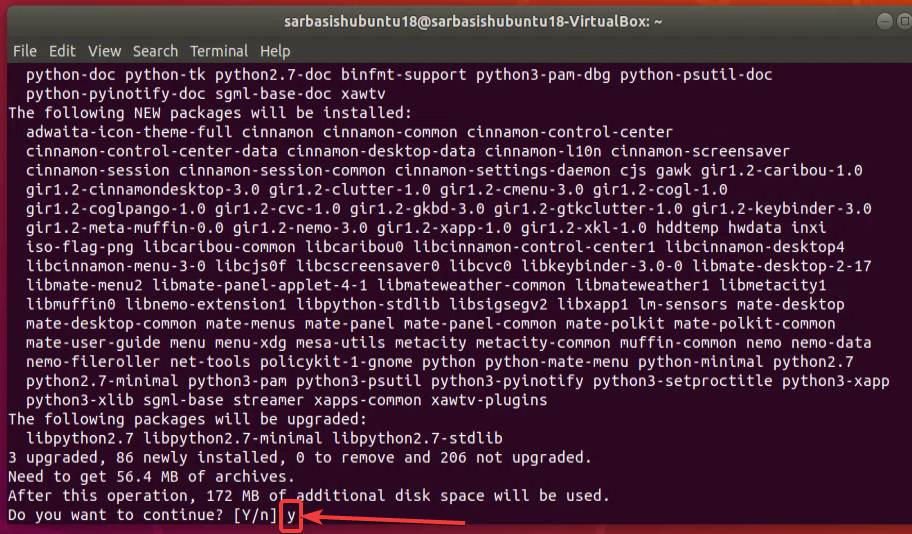
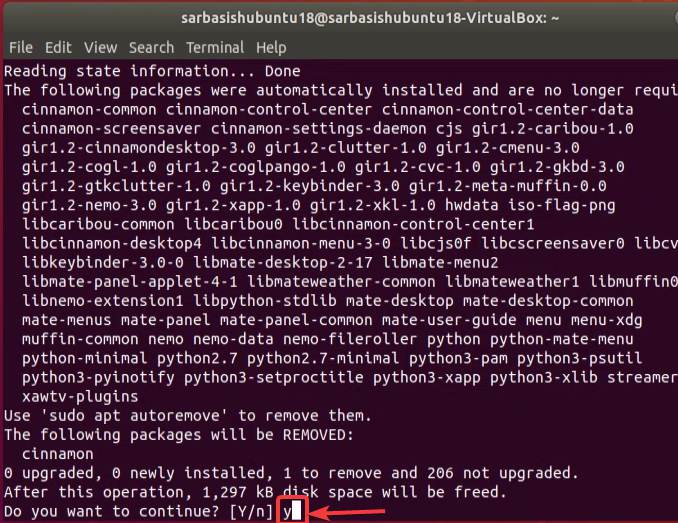
Step 5: The installation starts, just like the installation of most other desktop environments and packages from the official repository, you will be displayed with a list of dependencies, and the amount of space that will be consumed after installation is complete. If you agree with everything, just type in ‘ y ‘, and hit the enter key to carry on with the installation of the desktop environment.
The installation of the Cinnamon desktop environment will take quite some time, and once the installation is complete, exit the terminal window, and restart your computer. However, you can even log out and log in again, but it didn’t work for me.
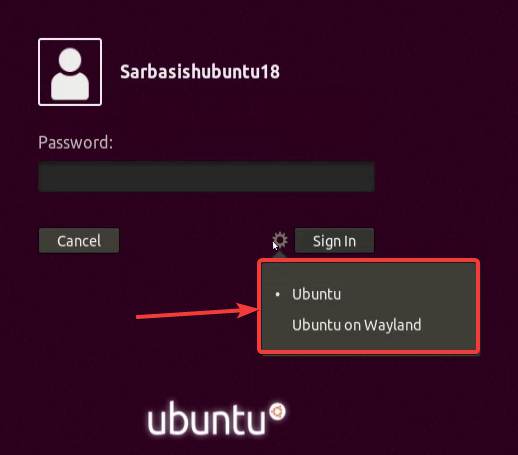
So I will recommend you to restart your computer and once the login screen appears, click on the small gear icon, and then click on ‘Cinnamon’ .
Step 6: Now, just log in with existing credentials and you should now automatically land on the Cinnamon desktop environment on Ubuntu.

Here are a few screenshots of Ubuntu 18.04 LTS running the Cinnamon desktop environment.

I know, if you have switched from Windows, this can be a big relief for you if you are always looking for the start button to search for the smallest of things.
Even though the alternative to start-menu that is available on the Cinnamon desktop environment is not exactly similar to the start button available on Windows computers, but it should work almost the same way, to search for programs, and open the most important utilities.
However, if you have made your decision to remove the Cinnamon desktop environment for any reason the steps are quite easy as well.
Removing Cinnamon desktop environment from Ubuntu
Just log out from your Cinnamon desktop session, and choose any other desktop environment, or the default desktop environment by clicking on the gear icon, and log in to your user account with existing credentials.
Step 1: Now, type in the following command and hit enter key to start the removal of the Cinnamon desktop environment from your computer running Ubuntu.

Step 2: After the process of removal starts, just type in ‘ y ‘ and hit the enter key, after the details about which files will be deleted, are displayed to you.
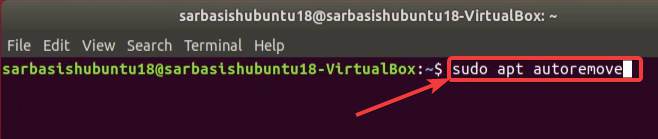
Step 3: The execution of this command is complete, you will have to type in the following command and hit the enter key again to complete the process of the removal of the Cinnamon desktop environment from your computer.
To start the execution, you have to type in ‘ y ‘, and hit the enter key, when the details about which files will be deleted are displayed to you.

Now, just restart your computer by exiting your terminal window, after the execution of the following commands are complete and the next time you log in, you can find, the Cinnamon desktop environment is missing from the gear icon. If you have no other desktop environment installed, you will only find the default environment, which came with Ubuntu.
So, that was all about how you can install the Cinnamon desktop environment at the Linux Mint desktop environment on Ubuntu. Even though I tried it on Ubuntu 18.04 LTS, it should work on the newer versions of Ubuntu, as the PPA is available in the newer versions, as well.
At the time of executing any of the steps, you might have to enter the admin password multiple times. I just showed you how to remove the Cinnamon desktop environment, but the PPA is still there, which can be useful if you again want to download the Cinnamon desktop environment later on.
So, that was all about how you can install the Cinnamon desktop environment on Ubuntu and remove the same if you don’t need it anymore. Do you have any questions? Feel free to comment on the same below.
Источник
Change Linux Mint to Ubuntu
I have installed Linux Mint and now I want to change it to Ubuntu but I have a lot of apps and information on it.
Is there any way to get Ubuntu without losing data? Or how to back up my information and apps, then install a fresh Ubuntu and copy the backup on it?
3 Answers 3
TL;DR It is possible, but very difficult.
The method below is presented without any warranty. Use it on your own risk.
LinuxMint MATE 18.3 (Sylvia) -> Ubuntu Xenial Xerus 16.04 LTS
I have had installed LinuxMint MATE 18.3 (Sylvia). I asked myself a question — is it possible to convert it to normal Ubuntu Xenial Xerus 16.04 LTS without reinstallation?
I found great answer with script for listing packages from known repository. I adapted it to my situation:
Then ran it to find Mint packages and remove them:
Then rebooted and launched Aptitude with sudo aptitude .
Set all packages from Obsolete and Locally Created Packages section to purge.
And checked locally installed package with:
So I reinstalled two packages listed here — bash and base-files from xenial-updates repository from terminal:
Then purged all packages that does not have ii state (such as rc ) with:
Remove Mint files from home directory:
Check system integrity with debsums :
Then I checked system for files, that are not from Ubuntu repositories:
Removed the following objects:
And finally installed Ubuntu MATE desktop:
Reboot and I have nearly normal Ubuntu Xenial 16.04 LTS 🙂
LinuxMint MATE 19 (Tara) -> Ubuntu Bionic Beaver 18.04 LTS
Warning: this method was not tested. Based on 18.3 -> 16.04 LTS above.
Let’s do a listing of packages from known repository:
Find Mint packages and remove them:
Launch Aptitude with sudo aptitude .
Set all packages from Obsolete and Locally Created Packages section to purge.
Check locally installed packages with:
Reinstall two (maybe more!) packages listed here — bash and base-files from bionic-updates repository from terminal:
Then purge all packages that does not have ii state (such as rc ) with:
Remove Mint files from home directory:
Check system integrity with debsums :
Then check system for files, that are not from Ubuntu repositories:
Remove the following objects (may be other!):
And finally install Ubuntu MATE desktop:
Reset MATE desktop settings to the defaults:
Install MATE Welcome and Software Boutique as Snaps:
Reboot and have nearly normal Ubuntu Bionic 18.04 LTS 🙂
LinuxMint MATE 20 (Ulyana) -> Ubuntu Focal Fossa 20.04 LTS
Let’s do a listing of packages from known repository:
Find Mint packages and remove them:
Launch Aptitude with sudo aptitude .
Set all packages from Obsolete and Locally Created Packages section to purge.
Check locally installed packages with:
Reinstall two (maybe more!) packages listed here — bash and base-files from focal-updates repository from terminal:
Then purge all packages that does not have ii state (such as rc ) with:
Remove Mint files from home directory:
Check system integrity with debsums :
Then check system for files, that are not from Ubuntu repositories:
Remove the following objects (may be others!):
And finally install Ubuntu MATE desktop on first login:
Reset MATE desktop settings to the defaults:
Install MATE Welcome and Software Boutique as Snaps:
Reboot and have nearly normal Ubuntu Focal 20.04 LTS 🙂
1) Backup to an external drive your applications to a list in a text file which you’ll need later, and follow this method when it comes to restoring them on Ubuntu.
2) Backup to an external drive your data using rsync, or it’s GUI equivalent Grsync command.
3) Back up to an external drive your home directory (again with rsync ). This is more tricky to restore on Ubuntu as you’ll need to find the UUID after Ubuntu installation and ensure it’s correctly entered in the fstab file, or it won’t mount at boot-up.
4) You can also back up all Debian repositories. I understand Mint uses the same ones as Ubuntu (except Canonical). These will be restored in the /etc/apt folder .
5) Install Ubuntu from Live UFD, making partitions for home, swap, and root. Restore home folder contents to newly made home partition and check UUID configuration in fstab as in 3). You will likely have to make a new entry for it. Restore apps and data files as in 1 — 2.
Источник
Переход с Ubuntu Linux на Mint без переустановки
3 867 просмотров
До недавнего времени в качестве основной рабочей системы я использовал Ubuntu Linux, но в последнее время предпочитаю Mint – та же пакетная база, а вот стабильность выше.
Вторая причина – из графических окружений я предпочитаю Cinnamon, который в Mint Linux идёт по умолчанию. Кто не к курсе, напомню: Cinnamon создан был именно разработчиками Mint Linux, как ответвление от GNOME 3. Вначале это был просто пакет расширений к GNOME 3, но потом разработчики устали от необходимости постоянно обновлять расширения только для поддержания совместимости с новыми версиями и решили создать своё окружение.
Учитывая, что пакетная база этих дистрибутивов одинаковая (не считая одного дополнительного репозитория в Mint Linux), часто можно обновиться без переустановки системы. Но сразу сделаю одну оговорку – все выпуски Mint Linux базируются на версиях Ubuntu только с длительной поддержкой (LTS), соответственно, беспроблемное обновление возможно только с таких версий (14.04, 16.04).
Если у вас версия 16.04 – идеальный вариант, с него обновиться проще всего. Если более ранняя – обновите до 16.04 (но ни в коем случае не до последней – на момент написания это 17.10). Если более поздняя – увы, но без переустановки обойтись будет очень сложно (хотя и не говорю, что нереально).
В первую очередь в версии 16.04 обновите все пакеты:
Затем создаём файл /etc/apt/sources.list.d/official-package-repositories.list со следующим содержимым:
Чтобы не мучиться с добавлением ключа от репозитория, поступим проще. Вначале выполним обновление:
Система заругается на то, что репозиторий без подписи – всё нормально, так и должно быть. Далее установим в первую очередь ключ:
Система выскажет замечание, что устанавливаемый пакет не подписан, подтверждаем его установку. И снова делаем обновление:
Теперь мы видим, что всё обновилось нормально, система в порядке. Устанавливаем приложения от Mint Linux:
Также при желании можно добавить темы minx-x и mint-y, обои mint-backgrounds и общие пакеты для оформления mint-artwork.
После установки перезагружаем систему (не обязательно, но лучше сделать) и смотрим файл /etc/lsb-release, содержащий информацию о версии дистрибутива. В нём система указана как Mint Linux.
Также при желании (но не обязательно) можно установить менеджер дисплеев от Mint:
В процессе установки будет предложено выбрать менеджер дисплеев по умолчанию, выбираем mdm. Если он Вам не понравится, всегда можно будет вернуться к старому:
Система отобразит список всех установленных менеджеров дисплеев и предложит выбрать нужный.
Источник


