- How to make boot usb linux
- 2. Requirements
- 3. USB selection
- 4. Boot selection and Partition scheme
- 5. Select the Ubuntu ISO file
- 6. Write the ISO
- 7. Additional downloads
- 8. Write warnings
- 9. Writing the ISO
- 10. Installation complete
- How to make boot usb linux
- 2. Requirements
- 3. Launch Startup Disk Creator
- 4. ISO and USB selection
- 5. Confirm USB device
- 6. Installation complete
- Make a bootable flash drive from an ISO image
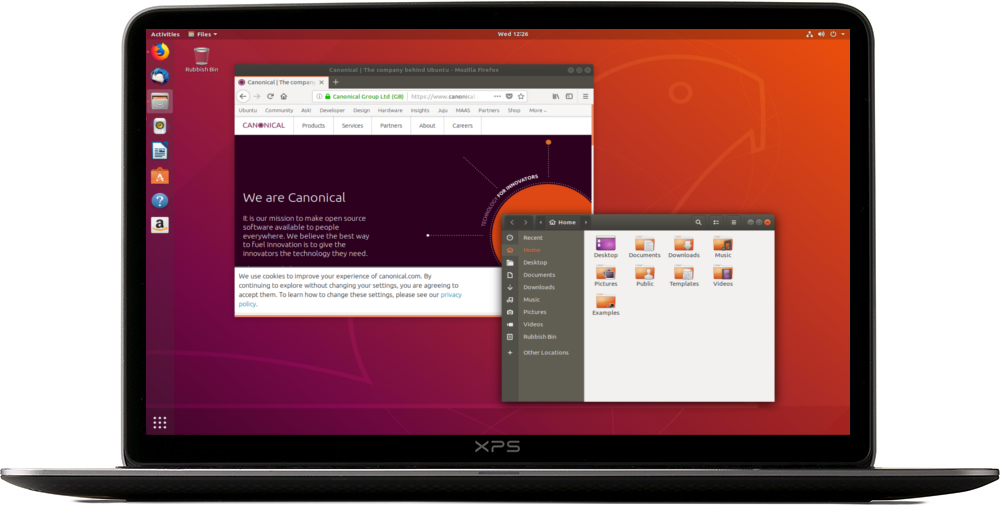
How to make boot usb linux
With a bootable Ubuntu USB stick, you can:
- Install or upgrade Ubuntu
- Test out the Ubuntu desktop experience without touching your PC configuration
- Boot into Ubuntu on a borrowed machine or from an internet cafe
- Use tools installed by default on the USB stick to repair or fix a broken configuration
Creating a bootable Ubuntu USB stick from Microsoft Windows is very simple and we’re going to cover the process in the next few steps.
Alternatively, we also have tutorials to help you create a bootable USB stick from both Ubuntu and Apple macOS.

2. Requirements
- A 4GB or larger USB stick/flash drive
- Microsoft Windows XP or later
- Rufus, a free and open source USB stick writing tool
- An Ubuntu ISO file. See Get Ubuntu for download links

Take note of where your browser saves downloads: this is normally a directory called ‘Downloads’ on your Windows PC. Don’t download the ISO image directly to the USB stick! If using Windows XP or Vista, download version 2.18 of Rufus.
3. USB selection
Perform the following to configure your USB device in Rufus:
- Launch Rufus
- Insert your USB stick
- Rufus will update to set the device within the Device field
- If the Device selected is incorrect (perhaps you have multiple USB storage devices), select the correct one from the device field’s drop-down menu

You can avoid the hassle of selecting from a list of USB devices by ensuring no other devices are connected.
4. Boot selection and Partition scheme
Now choose the Boot selection. Choices will be Non bootable and FreeDOS. Since you are creating a bootable Ubuntu device select FreeDOS.
The default selections for Partition scheme (MBR) and Target system (BIOS (or UEFI-CSM)) are appropriate (and are the only options available).

5. Select the Ubuntu ISO file
To select the Ubuntu ISO file you downloaded previously, click the SELECT to the right of “Boot selection”. If this is the only ISO file present in the Downloads folder you will only see one file listed.
Select the appropriate ISO file and click on Open.

6. Write the ISO
The Volume label will be updated to reflect the ISO selected.
Leave all other parameters with their default values and click START to initiate the write process.

7. Additional downloads
You may be alerted that Rufus requires additional files to complete writing the ISO. If this dialog box appears, select Yes to continue.

8. Write warnings
You will then be alerted that Rufus has detected that the Ubuntu ISO is an ISOHybrid image. This means the same image file can be used as the source for both a DVD and a USB stick without requiring conversion.
Keep Write in ISO Image mode selected and click on OK to continue.

Rufus will also warn you that all data on your selected USB device is about to be destroyed. This is a good moment to double check you’ve selected the correct device before clicking OK when you’re confident you have.

If your USB stick contains multiple partitions Rufus will warn you in a separate pane that these will also be destroyed.
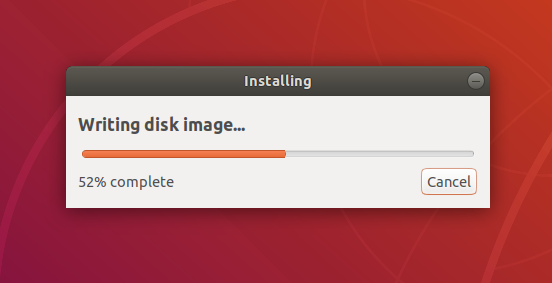
9. Writing the ISO
The ISO will now be written to your USB stick, and the progress bar in Rufus will give you some indication of where you are in the process. With a reasonably modern machine, this should take around 10 minutes. Total elapsed time is shown in the lower right corner of the Rufus window.

10. Installation complete
When Rufus has finished writing the USB device, the Status bar will be green filled and the word READY will appear in the center. Select CLOSE to complete the write process.

Congratulations! You now have Ubuntu on a USB stick, bootable and ready to go.
If you want to install Ubuntu, take a look at our install Ubuntu desktop tutorial.
Источник
How to make boot usb linux
With a bootable Ubuntu USB stick, you can:
- Install or upgrade Ubuntu
- Test out the Ubuntu desktop experience without touching your PC configuration
- Boot into Ubuntu on a borrowed machine or from an internet cafe
- Use tools installed by default on the USB stick to repair or fix a broken configuration
Creating a bootable Ubuntu USB stick is very simple, especially from Ubuntu itself, and we’re going to cover the process in the next few steps.
Alternatively, we also have tutorials to help you create a bootable USB stick from both Microsoft Windows and Apple macOS.
2. Requirements
- A 4GB or larger USB stick/flash drive
- Ubuntu Desktop 14.04 or later installed
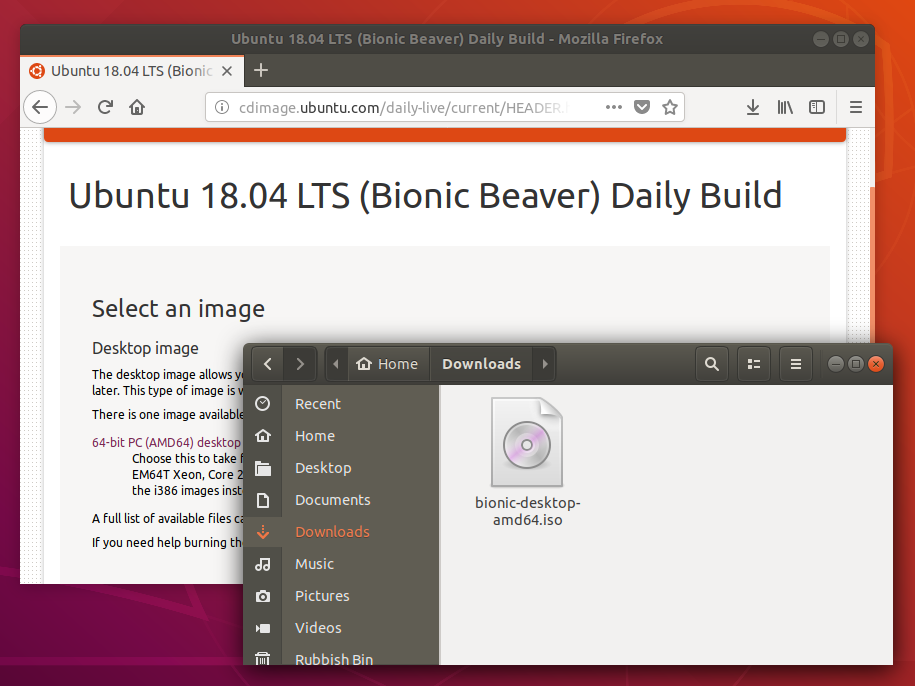
- An Ubuntu ISO file. See Get Ubuntu for download links
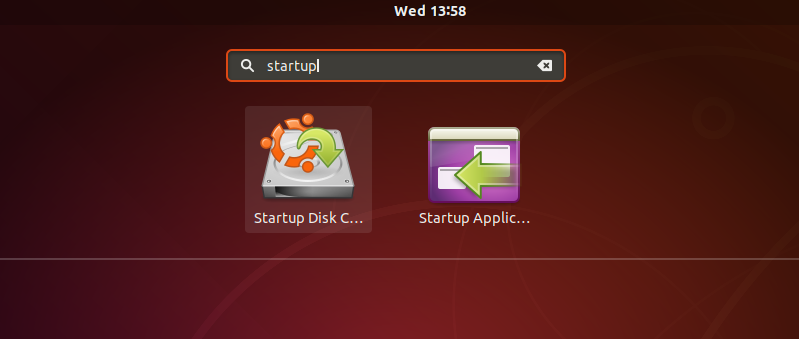
3. Launch Startup Disk Creator
We’re going to use an application called ‘Startup Disk Creator’ to write the ISO image to your USB stick. This is installed by default on Ubuntu, and can be launched as follows:
- Insert your USB stick (select ‘Do nothing’ if prompted by Ubuntu)
- On Ubuntu 18.04 and later, use the bottom left icon to open ‘Show Applications’
- In older versions of Ubuntu, use the top left icon to open the dash
- Use the search field to look for Startup Disk Creator
- Select Startup Disk Creator from the results to launch the application
4. ISO and USB selection
When launched, Startup Disk Creator will look for the ISO files in your Downloads folder, as well as any attached USB storage it can write to.
It’s likely that both your Ubuntu ISO and the correct USB device will have been detected and set as ‘Source disc image’ and ‘Disk to use’ in the application window. If not, use the ‘Other’ button to locate your ISO file and select the exact USB device you want to use from the list of devices.
Click Make Startup Disk to start the process.
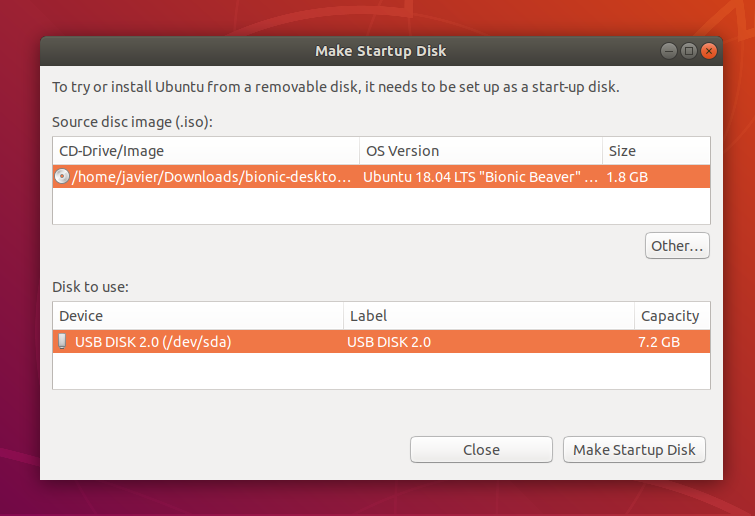
5. Confirm USB device
Before making any permanent changes, you will be asked to confirm the USB device you’ve chosen is correct. This is important because any data currently stored on this device will be destroyed.
After confirming, the write process will start and a progress bar appears.
6. Installation complete
That’s it! You now have Ubuntu on a USB stick, bootable and ready to go.
If you want to install Ubuntu, take a look at our install Ubuntu desktop tutorial.
Источник
Make a bootable flash drive from an ISO image

We all know that installing an operating system from a USB drive is much faster than installing from DVD. In this article we will look at several ways to create a bootable USB drive.
Before describing how to create a bootable USB drive read the article How to correctly format the USB stick in Linux Mint. In some cases described below, it is desirable to have already formatted the USB flash drive in FAT32 format.
1. LinuxLive USB Creator (only for Windows users)
If you are a user of the Windows operating system and want to make a bootable USB flash drive with a Linux distribution – this program is for you.
It is very simple, select the USB flash drive, please specify the iso image will be copied, turn on the option to format the USB stick and click on the lightning.
You can download the program on the official developer’s website http://www.linuxliveusb.com/en/download.

Rufus is a utility that helps format and create bootable Flash/Pen/Key drives, memory cards, etc.
Rufus will be especially useful in cases where:
-you need to create a bootable USB disk from a bootable ISO image (Windows, Linux, UEFI, and others)
-need to work on systems that have no OS installed
-you need to flash a BIOS or other firmware from DOS
-you need to run a low-level utility
-Despite its small size, Rufus knows how to do everything!

3. UNetbootin (for Linux, Windows, Mac users)
A very common program. The principle of operation is the same as the previous program. Select the image, select the flash drive, and click OK. For details, see the screenshots below.
Installation latest version into Linux Mint 14/15/16/17/17.1:


4. LiveUSB MultiSystem (for Linux users) -To create a bootable USB flash drive with multiple operating systems (windows or linux) read article Create your LiveUSB MultiBoot very simple in Linux Mint.
5. Either – program to burn the iso image with the distro on a USB flash drive or micro SD card (Windows, MacOS and Linux) read article Either – program to record the iso image on a USB flash drive
6. YUMI – Multiboot USB Creator (for Linux, Windows users)
YUMI (Your Universal Multiboot Integrator), is the successor to our MultibootISOs. It can be used to create a Multiboot USB Flash Drive containing multiple operating systems, antivirus utilities, disc cloning, diagnostic tools, and more. Contrary to MultiBootISOs which used grub to boot ISO files directly from USB, YUMI uses syslinux to boot extracted distributions stored on the USB device, and reverts to using grub toBoot Multiple ISO files from USB, if necessary.
Important Note : YUMI was intended to be used to try to run various “LIVE Linux” Operating Systems from USB. Installing Linux from the YUMI created USB Drive to a Hard Drive is not officially supported. If the installer portion of any Live Linux distro does work, consider it a bonus.
Installation latest version into Linux Mint 14/15/16/17/17.1:
Download DEB package “YUMI for Ubuntu Linux” from website

7. USB image writer (for Linux users)
Linux Mint have default utility USB image writer. One time I used this program, but personally I have not always made a bootable USB flash drive.
Locate menu, the program will run. Select the image, select the USB drive and click Write.


Multiboot USB flash drive designed for loading and installing operating systems Windows/Linux and restoration-resuscitation tools directly from the USB drive.
9. WinUSB – Create Windows Usb stick
is a simple tool that allows you to create your own Windows installation on USB stick from an ISO image or DVD disk in Linux Mint.
10. Using the terminal (in my opinion the best 100% of the way)
As is known, the terminal is installed in any Linux distribution by default, so install additional software is not required.
The terminal command to write the iso image, the distribution is as follows:
Where instead of /home/USER/linuxmint.iso you need to specify the path to the iso file. sdb in the end, it’s a stick on which is written the way.
To determine your flash drive, run in terminal:

And if you stick decided differently, change in the command.
To be entered correctly in the command path to the file, open the folder with the file, open next to the terminal and drag the file into the terminal:

Now we are ready to start. I got the command:
The cursor of the terminal is blinking and it seems that nothing happens, but actually being recorded. Wait for the image capture and at the end you should see in the terminal like this:
Источник


