- How to create an icon in Windows 10 [Full Guide]
- How to make a custom icon in Windows 10?
- 1. Create an icon with Paint 3D
- Design the icon
- Customize your icon with stickers
- Customize your icon with 3D objects
- 2. How do I convert a JPEG to an icon in Windows 10?
- 3. How to add new icons to the desktop
- How to make an icon for Windows 10
- How to make an icon for Windows 10
- 1] Paint 3D
- 2] ICO Convert
- 3] X-Icon Editor
- 4] Junior Icon Editor
- 5] Quick Any2Ico
How to create an icon in Windows 10 [Full Guide]

- Adding your own unique icon designs to the desktop is a great way to customize Windows 10 .
- This article provides guidelines for designing your own desktop icons with Paint 3D.
- Our Graphics & Design section includes a plethora of graphics design software guides.
- Look no further than our How-To Hub for many more Windows 10 software guides.
Windows 10 displays shortcuts on its desktop with icons, which are a big aspect of the platform’s themes.
If you fancy giving Windows a bit of a makeover, customizing desktop icons is a good way to do it. You can create your own custom icons for desktop shortcuts.
All you’ll need to set up your own icons is one art (or graphic) design application.
Windows 10 includes the Paint and Paint 3D design apps. You can set up new icons with either software. However, Paint 3D is the better-equipped package as it enables users to add 3D shapes and stickers to their icons.
How to make a custom icon in Windows 10?
1. Create an icon with Paint 3D
Set up the canvas
- First, click the Start button.
- Click Paint 3D on the Start menu’s software index.
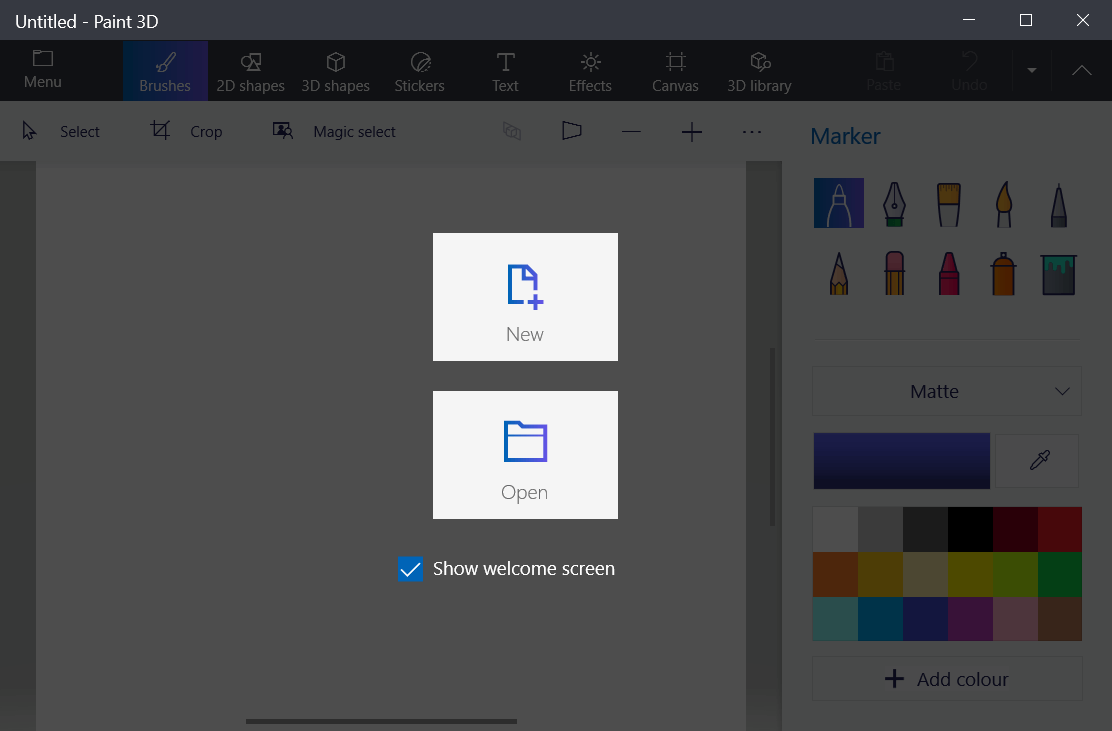
- Click New in Paint 3D.

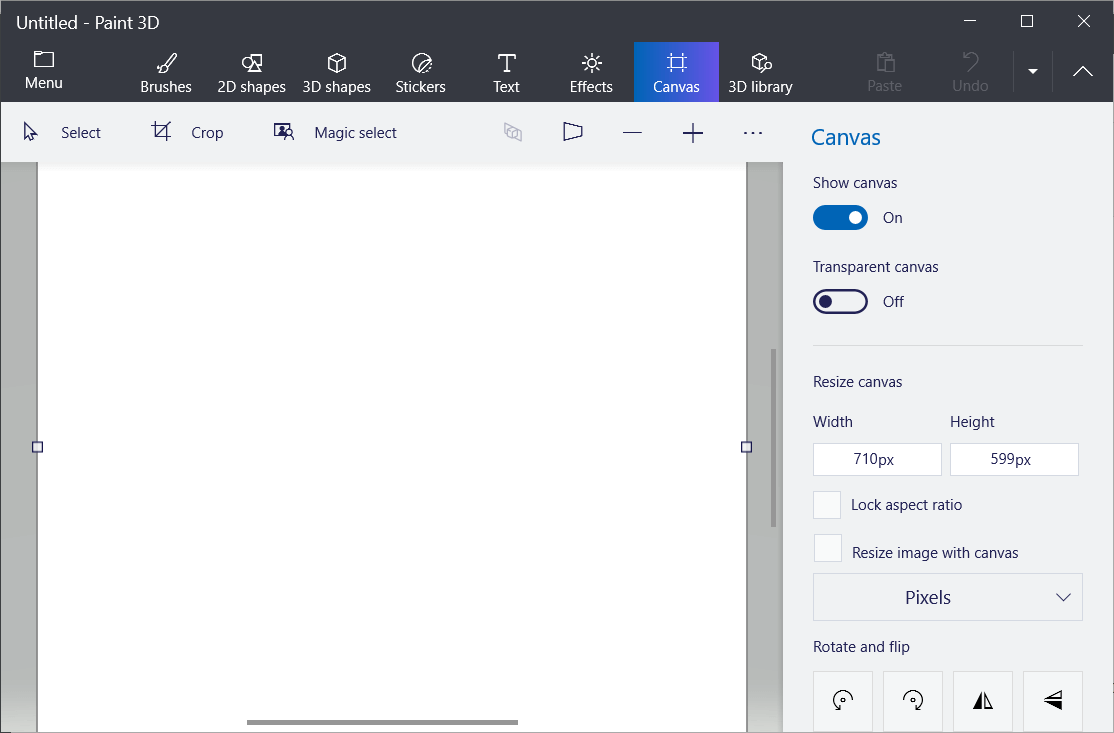
- Select Canvas to open the options shown directly below.
- Enter 32 in both the Width the Height boxes to resize the canvas to 32 x 32.
- Roll your mouse wheel to zoom in on, and expand the canvas.
- Toggle the Transparent canvas option on.
Design the icon
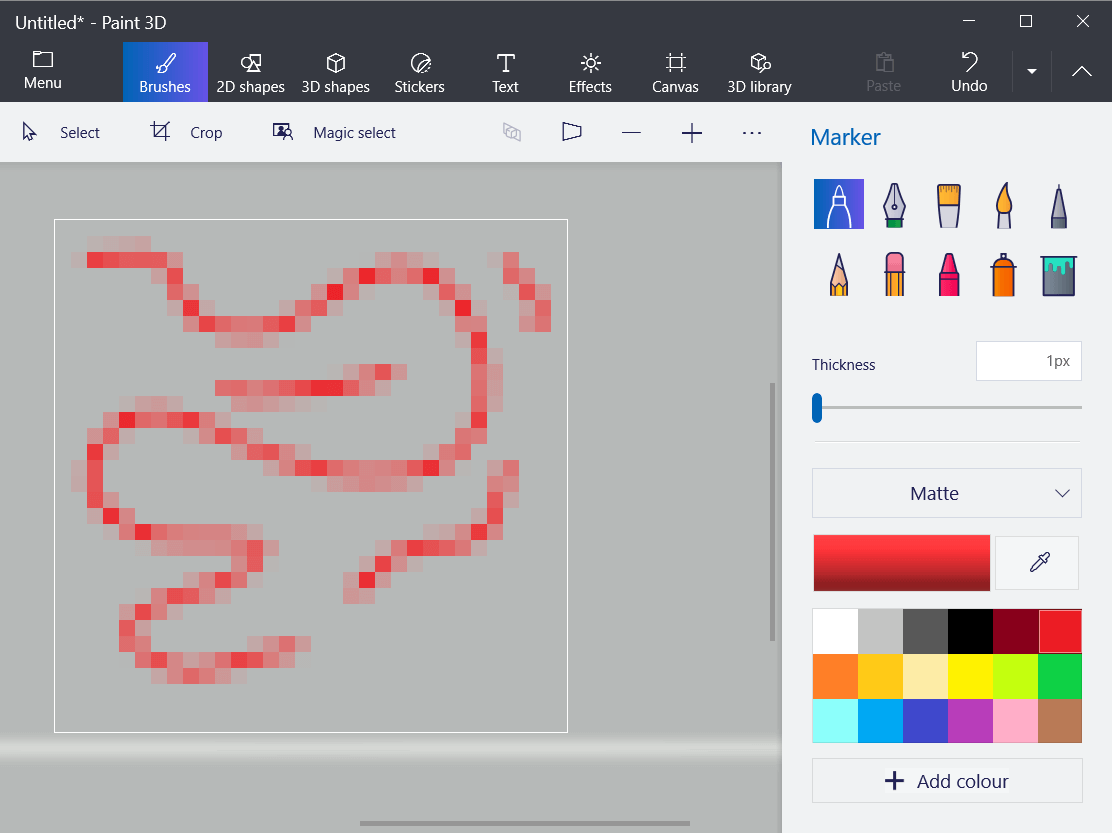
- You can draw a picture on your icon’s canvas by selecting Brushes. You’ll need to select Marker or Pixel Pen at a 1 px weighting.
- To add lines and two-dimensional shapes, select the 2D shapes tab. Then select a line, curve, or shape option there.
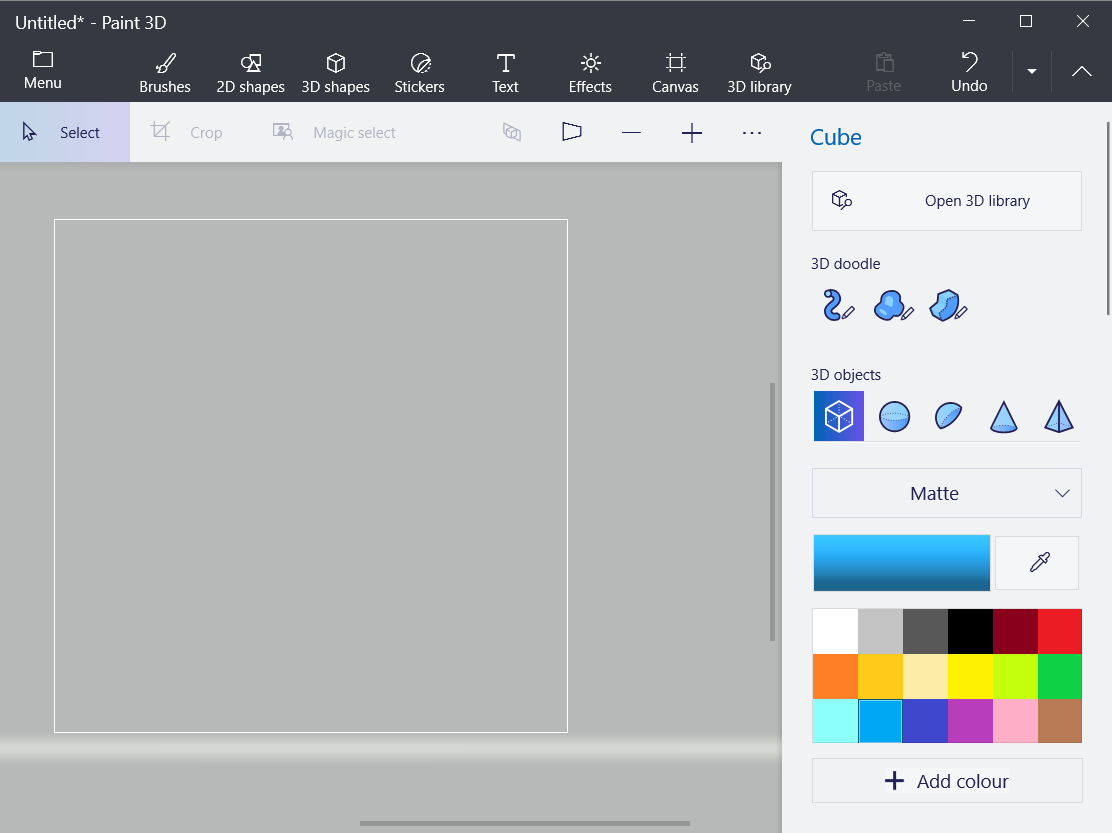
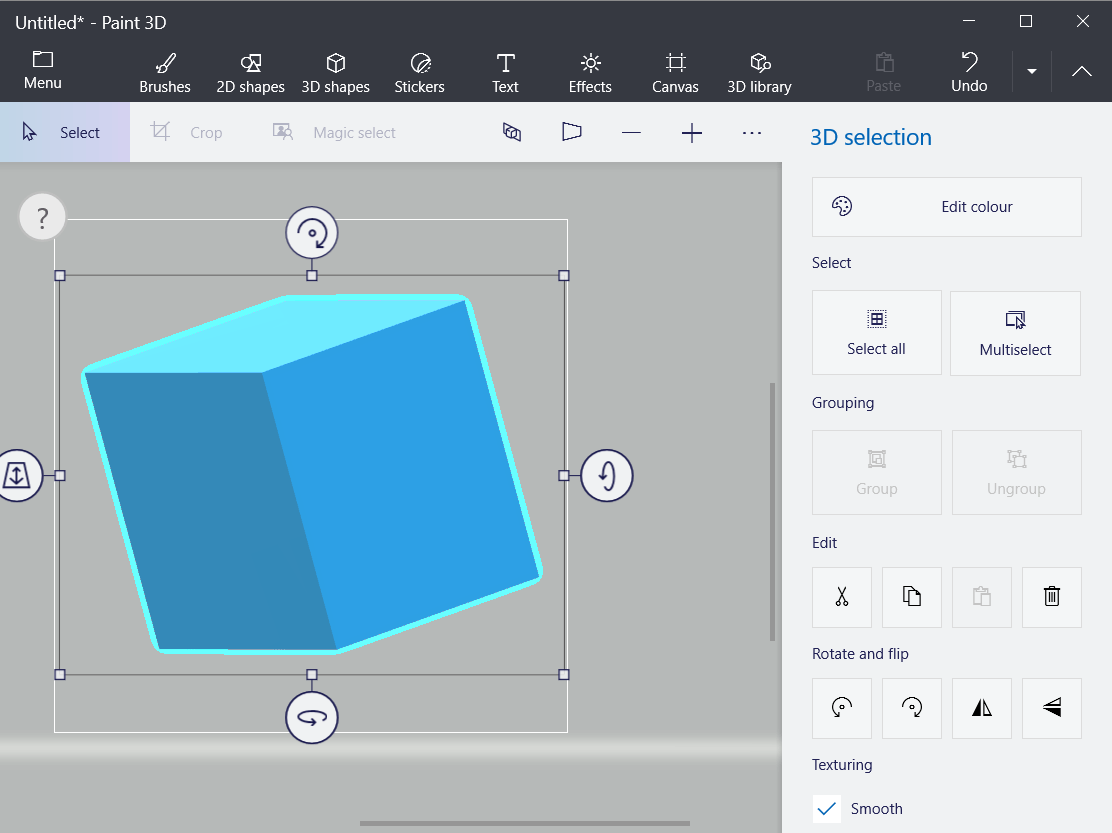
- Paint 3D’s 3D shapes tab includes a variety of options for adding three-dimensional shapes and models to your icon. Click 3D shapes to open that tab.
- Select a 3D object or model option on the sidebar. Then hold the left mouse button and drag the cursor right to expand the selected shape so it fits within your icon’s canvas.
- Click the shape on the canvas to open its rotation options as in the shot directly below.
Customize your icon with stickers
- Paint 3D also includes a relatively small collection of stickers you can utilize for icons. Click the Stickers tab.
- Select a sticker for the icon.
- Click outside the icon‘s canvas area on the left of the window to add the selected sticker.
- Left-click the top right corner of the sticker, and drag the mouse left to shrink the picture to fit within the canvas.
- Select the image and hold the mouse button to drag it into the canvas.
- Press the Make 3D button to apply a 3D effect. You can rotate the sticker much the same as 3D shapes.
- You can click Custom stickers >Add stickers to select downloaded clip art for your icons.

Customize your icon with 3D objects
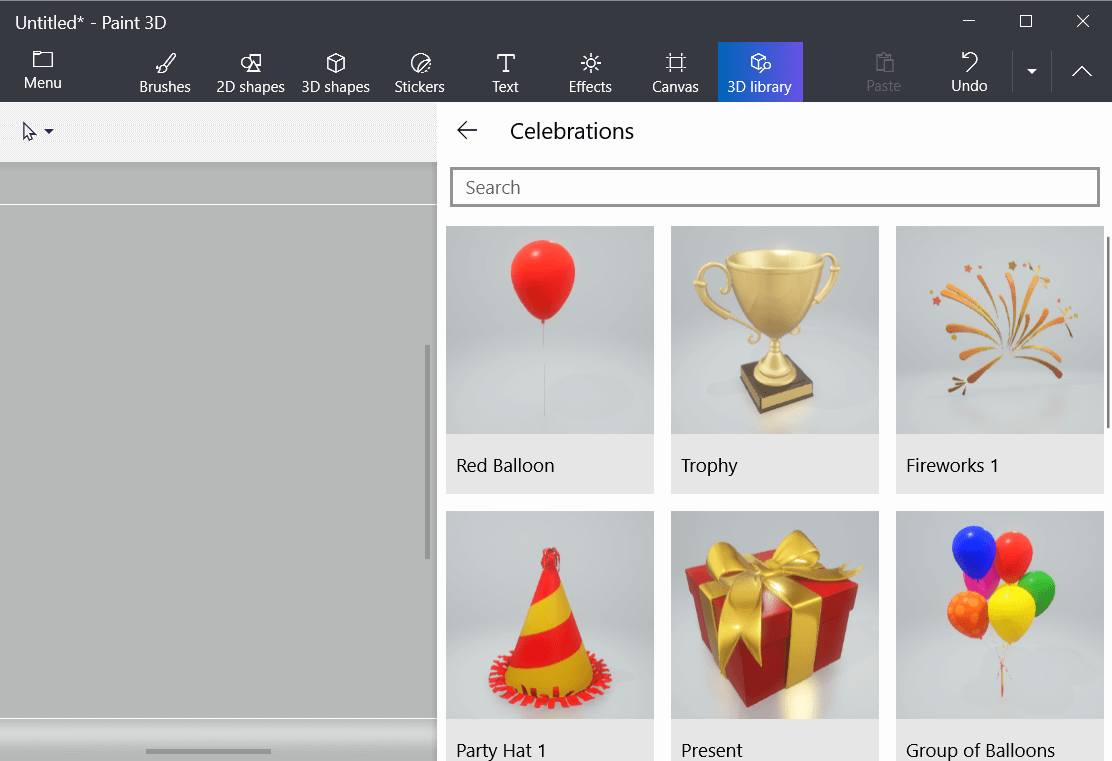
- Paint 3D also has a collection of 3D images you can add to your icons. Click 3D library to browse through the various image categories.
- Click an image to add it to your canvas.
- You’ll probably need to greatly scale down the selected image to fit it within your icon’s canvas. To scale down an image, click its top right corner, hold the left mouse button, and drag the cursor left.
Save the icon design as an image
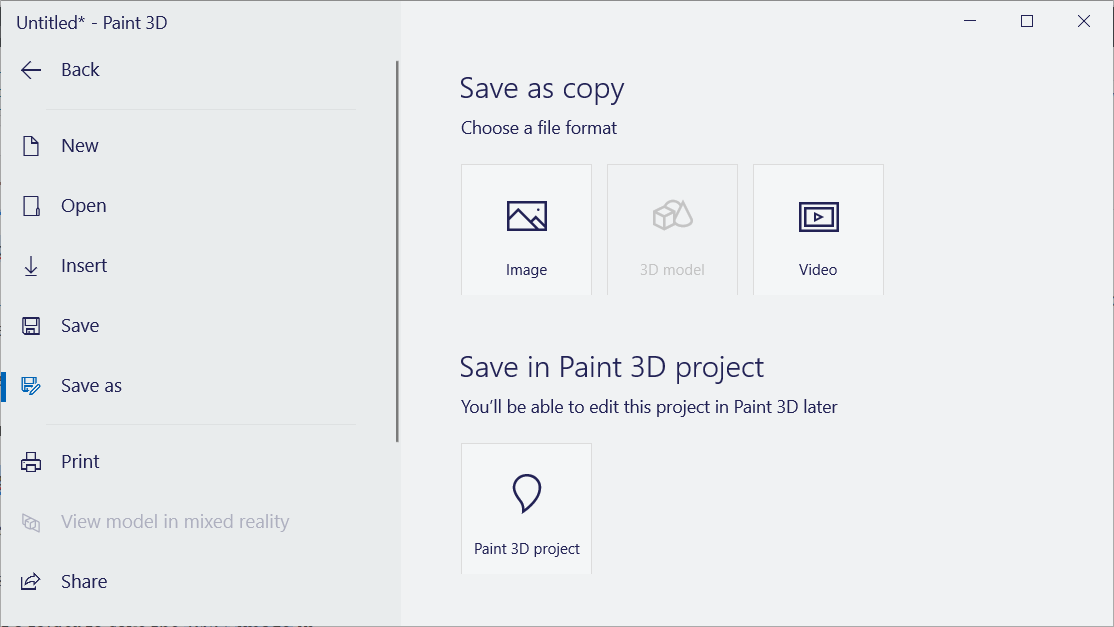
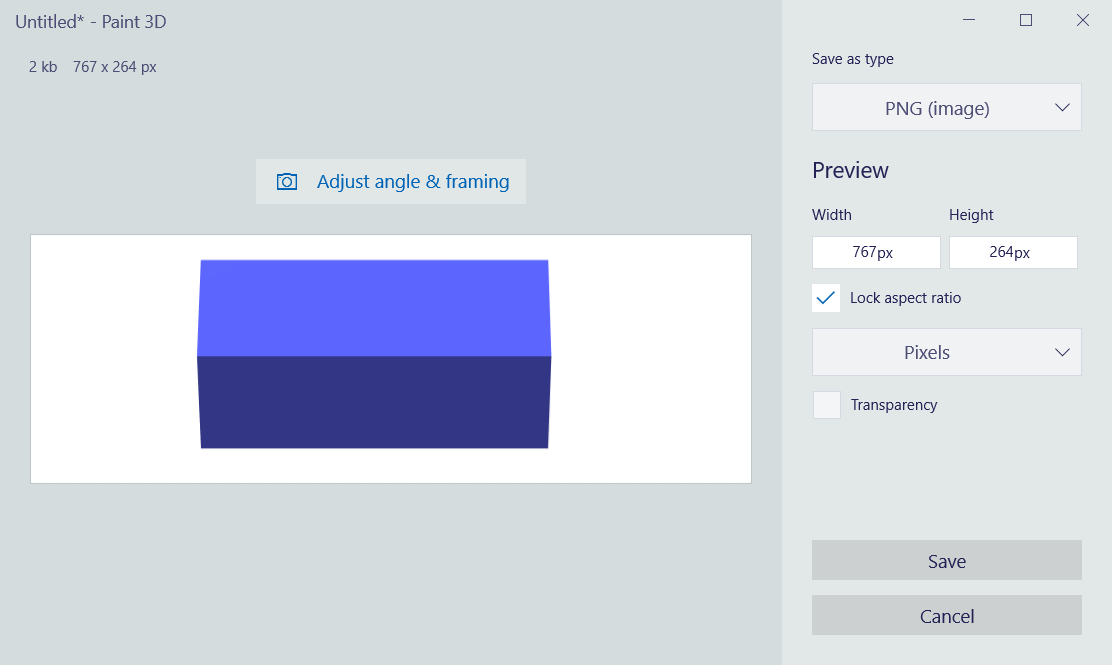
- When you’ve finished your icon design, click Menu >Save As >Image.
- If you added a 3D model to your icon, an image preview will open as in the snapshot directly below. Select PNG on the Save as type menu.
- Press the Save button.
- Select a folder to save the PNG image in.
- Select 2D – PNG as the file format.
- Enter a title for the image, and click the Save option.
2. How do I convert a JPEG to an icon in Windows 10?
- You can convert PNG, JPEG, and JPG files to icons at the Online-Convert website. So, open that website’s Online image convert page in a browser.
- Click Choose files to select the icon PNG you set up in Paint 3D.
- Press the Start conversion button.
- Then click the Download button.

3. How to add new icons to the desktop
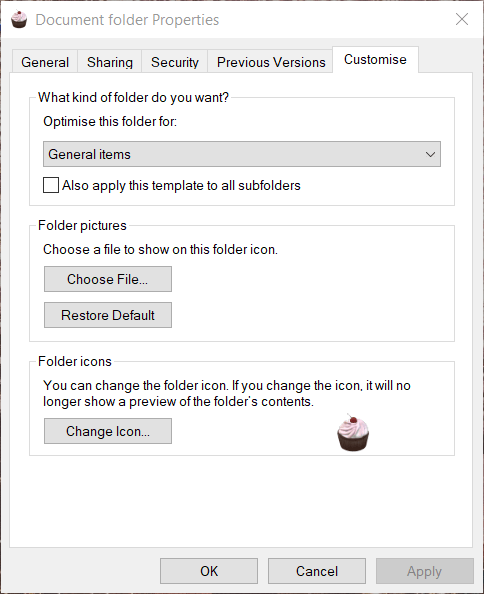
- Now you can add your new icon to the Windows 10 desktop. To do so, right-click a shortcut icon already on the desktop and select Properties.
- Select the Customize tab on the window that opens.
- Press the Change Icon button.
- Click the Browse button on the Change Icon window.
- Then select your ICO file in the folder it downloaded to.
- Click the Open button.
- Click OK on the Change Icon window.
- Finally, select the Apply option.
- Click OK to exit the window.
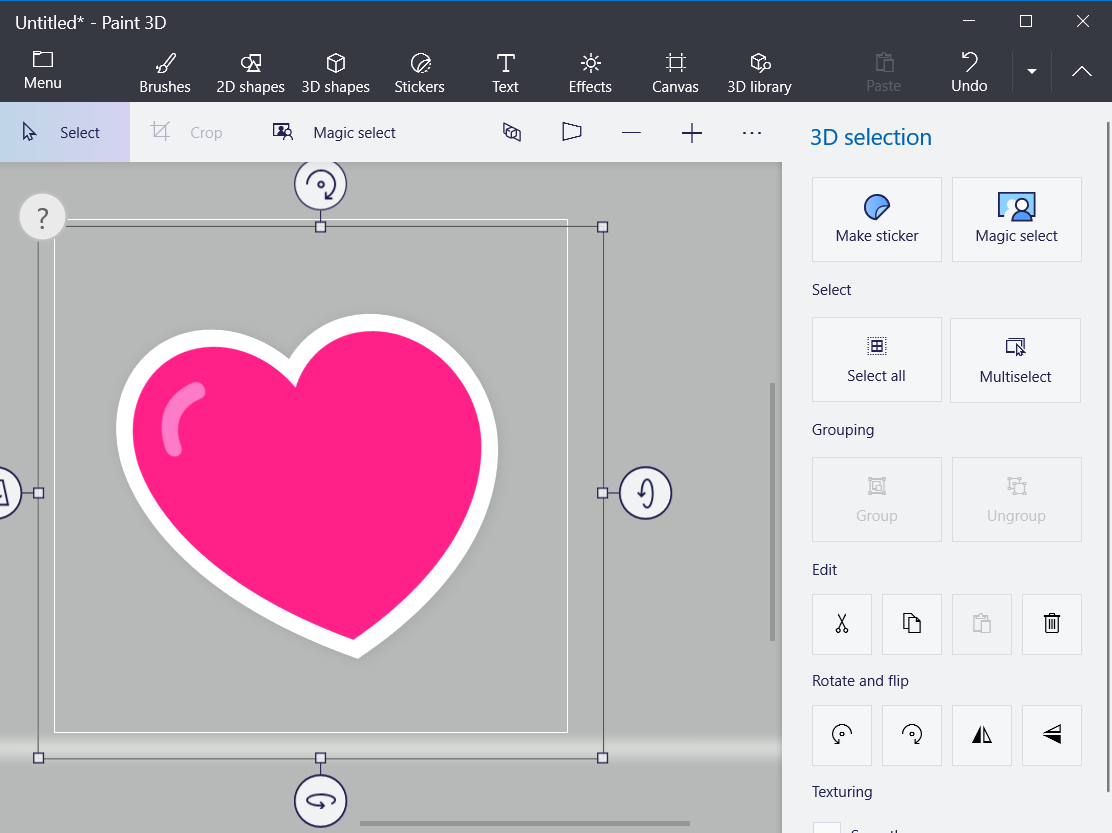
- Now your custom icon will have replaced the original one on the desktop. The heart icon in the snapshot below was one set up with Paint 3D.
So, that’s how you can set up your own custom icons with Paint 3D.
You can also design your own icon sets with numerous icon maker software.
Our icon maker guide provides details for Windows 10’s best icon maker software.
How to make an icon for Windows 10
In this post, we will show you how to create an icon in Windows using Microsoft Paint 3D, or any of the free icon maker software or online tools. You can even convert a picture into an icon. Create as many icons as you want. When the icons are ready, you can change icons for desktop shortcuts, folders, etc.
How to make an icon for Windows 10
While some options help you create an icon from scratch, other options covered on this post can convert an image to icon directly. The icon maker software and services covered are:
- Paint 3D.
- ICO Convert.
- X-Icon Editor.
- Junior Icon Editor.
- Quick Any2Ico.
Let’s check how to make an icon for Windows 10 using them.
1] Paint 3D
Paint 3D is a built-in application and one of the best options to create icons for Windows 10. The best part that I like is it lets you add 3D shapes to create an icon. You can use its 3D Library to find and insert 3D shapes and create a beautiful icon. Apart from that, it has 2D shapes, different brushes, cool stickers, a text tool, etc. Other than these features, it is also helpful to remove background image in Windows 10, save your drawing as GIF or video, convert 2D shapes to 3D objects, and more.
To create an icon using Paint 3D in Windows 10, launch it using the Start menu or search box. After that, create a new project using Menu. When the project is created, use the available tools visible on the top part of its interface. You can also insert an image (PNG, JPG, ICO, BMP, TIFF, etc.) from PC and use drawing tools to create your icon.
For each of the selected tool, there are multiple options visible on the right side. For example, if you have selected text tool, then you can use options like add text in 2D or 3D shape, change text font, text color, fill the background, make text italic, bold, underline, etc. In a similar way, if you have selected the Brushes tool, then you can use Marker, Calligraphy pen, Crayon, Pixel pen, Spray can, etc. Thickness and color for the selected option can also be set using the sidebar.
Just select a tool and options for the selected tool are visible on the right sidebar. Show your creativity and enhance your icon.
When the final icon is ready, use Save as option under Menu, and then select Image option. Now, set the custom width and height for the output icon. You can also select the output format- PNG, GIF, TIFF, JPG, or BMP.
This is the last step. Press the Save button and save your icon to any folder on your PC.
2] ICO Convert
ICO Convert is handy when you already have some image in PNG, BMP, or JPG format that you want to convert into an icon file. However, it is not just an icon converter service. There are some interesting features like crop image, use different shapes (or styles), and size to get the icon. All such features make it a good icon maker service.
This link will open its homepage. Upload a supported format image (up to 50 MB). When the image is uploaded, crop the image to a selected area or use the entire image. After that, select the available styles. There are 10+ styles such as heart shape, square, round, etc. Select styles or simply ignore them.
Now you need to select the output format- PNG or ICO. Also, there is a Custom Sizes option to select any of the given sizes for the icon file. It has 192*192, 16*16, 64*64, 128*128, and other sizes. Select a size.
Finally, use the Convert ICO button. You will get the zip file that you can download to save icons available in different styles.
3] X-Icon Editor
X-Icon Editor service provides three ways to make an icon. You can import an existing image and convert image to icon, create an icon from scratch, and create an icon along with the uploaded image and icon maker tools. It provides text, pencil, brush, eyedropper, line, rectangle, circle, and eraser tools. You can create an icon in four sizes- 32*32, 24*24, 16*16, and 64*64. After that, you can save icons in ICO format one by one.
To create an icon using this service, open its homepage. After that, import an image or start making your icon using the available tools. You can also change icon background using any of the four available backgrounds. The icon preview is visible on the center part of its interface to help you see if the output is coming good. When you’ve done everything, use the Export button to download your icon.
4] Junior Icon Editor
Junior Icon Editor software has some interesting features that make it a good icon maker software. You can open different tabs to create separate icons on a single interface. It also lets you add an existing image and edit it to create icon or make an icon from the beginning. It has a color picker, eraser, filled rounded rectangle, ellipse, rectangle, airbrush, pencil, text, curved line, and other tools to create the icon. You can also choose any of your favorite colors for making the icon.
To create an icon, download this software. After installation, open its interface and use File menu to open a new icon file or insert an image. It supports ICO, PNG, XPM, BMP, and PNG format images.
When the new file is created, use Tools menu on the left sidebar to start making your icon. The right-hand side menu helps to pick colors, set background opacity, foreground opacity, and preview the icon. Show your creativity and make a beautiful icon. To save the final output, use Save as option in the File menu.
5] Quick Any2Ico
Quick Any2Ico is another good icon maker software. You can add a JPG, PNG, or BMP image and convert it to icon file in ICO or PNG format. Apart from this, it has two unique features that make it a bit special. It lets you extract icon from an opened application and binary files (DLL, EXE, etc.). Also, if the source image is not squared for output, it lets you set the image to crop, stretch, or center mode so that you will have a better icon file.
Its download link is here. This is a portable software so you won’t need to install it. Just execute its EXE and its interface will open. There you will have three options- add an image file to convert it to icon, add a binary file, or extract icon from an application window. Use any option to add the input image.
When image is fetched from the source, select the output folder. By default, it will generate an icon in ICO format. If you want, you can change it to PNG format by selecting Save as PNG instead of ICO option. After that, select the icon size. 512*512, 16*16, 256*256, 24*24, 64*64, and other sizes are available.
This is the last step. Press Extract it! button and it will save icon in the folder set by you.
Here I close this list that shows how to make an icon for Windows 10. The best and quickest way is to convert an image to an icon. If you want to make an icon from the beginning, then Microsoft Paint 3D is probably the best option.


