- Modify a Windows image using DISM
- Make your image ready for modification
- Mount an image
- Apply an image
- Modify an image
- View and modify an image
- Add and remove drivers
- Add and remove packages
- Add or remove languages
- Upgrade to a higher Windows edition
- Reduce the size of an image
- Commit changes to an image
- Mounted image
- Applied image
- Unmounting an image
- Troubleshooting
- How to Modify the Operating Systems Associated With an Existing Windows Installer File
- How to edit & modify the Windows Registry OFFLINE
- How to modify Windows Registry OFFLINE
- Method 1: Modify Registry OFFLINE using Windows Installation DVD.
- Method 2: Modify Registry OFFLINE using Hiren’s BOOTCD.
- Step 1. Download Hiren’s BootCD
- Step 2: Burn Hirens BootCD into an optical disk.
- Note: If you don’t have a CD/DVD drive on your computer (e.g. if you own a netbook) then follow this guide: How to put Hirens BootCD into a USB stick.
- Step 3: Boot with Hirens.BootCD.
- Step 4. Modify Remote Registry.
Modify a Windows image using DISM
You can make changes to offline mounted or applied Windows images without booting into the operating system you’re going to modify.
Mounted images are WIM, VHD, or FFU files that have their contents mapped to a folder. Changes to mounted images are made from either a Windows 10 technician PC, or from WinPE. You run run DISM commands against a mounted image, as well as run common file operations such as copying, pasting, and renaming on a mounted image. To save changes you make to the image, use the /commit option when you use DISM to unmount the image. To make changes to a mounted image, use DISM /image: .
Applied images are WIM, VHD, or FFU image files that have been applied to a specified partition. Offline changes to an applied image are usually performed from WinPE. To make changes to an applied image, use DISM /image: .
When you apply an image that you’re going to recapture, apply the image to the root folder of a drive. If you recapture an image that wasn’t applied to the root of a drive, the image will inherit the parent folder’s security descriptors and might not be the same as what would be captured if the image was applied to the root of a drive. See Applying an image to learn how to apply an image.
You can mount and modify multiple images on a single computer. For more information, see Deployment Image Servicing and Management (DISM) Best Practices.

Make your image ready for modification
Before you can make changes to your image, you’ll have to mount or apply the image depending on your scenario.
Mount an image
You can mount an image using the /optimize option to reduce initial mount time. However, when using the /optimize option, processes that are ordinarily performed during a mount will instead be completed the first time that you access a directory. This may increase the time that’s required to access a directory the first time after mounting an image using the /optimize option.
Open a command prompt with administrator privileges.
If you are using a version of Windows other than WindowsВ 8 or Windows 10, use the Deployment Tools Command Prompt that gets installed with the ADK.
Use DISM to mount the image
To mount a Windows image from a VHD or FFU file, you must specify /index:1 .
For more information about the options available for the /Mount-Image option in DISM, see DISM Image Management Command-Line Options.
Apply an image
See Apply an image to learn how to an apply an image.
Modify an image
You can use DISM to modify a mounted or applied image. You can add and remove drivers, packages, language packs, enumerate drivers and packages, modify configuration settings, and more.
View and modify an image
You can create, view, and edit files on a mounted image, just as you would any other file on your PC. When you modify the files in a mounted image, those file changes get saved in the image. Note that although you can add application files and folders, you can’t install applications directly into a mounted image in the same way that you would on a running PC. If you must add an application or a device, verify that you included all of the required files.
Add and remove drivers
See Add and remove drivers to an offline Windows image to learn how to work with drivers. Note that the DISM driver commands will only run against an offline image.
Add and remove packages
See Add or remove packages offline using DISM to learn how to work with packages.
Add or remove languages
Upgrade to a higher Windows edition
Any changes you make to a mounted image are also applied to each potential target edition of Windows. Each target edition is staged in the image. The changes will not be lost when you upgrade to a higher edition of Windows.
Reduce the size of an image
You can use DISM to reduce the footprint of a Windows image by cleaning up superseded components and resetting the base of the superseeded components.
At an elevated command prompt, run the following command to reduce the size of the image file:
Commit changes to an image
Mounted image
You can commit changes to an image without unmounting the image.
At the administrator command prompt, type:
Use /CheckIntegrity to detect and track .wim file corruption when you commit changes to the image. When you apply or mount the image, use /CheckIntegrity again to stop the operation if file corruption was detected. /CheckIntegrity cannot be used with virtual hard disk (VHD) files.
Applied image
Changes to applied images are saved, and you don’t need to take any steps to commit the changes you’ve made.
Unmounting an image
This only applies to mounted images. Applied images don’t need to be unmounted.
After you modify a mounted image, you must unmount it. If you mounted your image with the default read/write permissions, you can commit your changes. This makes your modifications a permanent part of the image.
If you modified an applied image, you don’t have to do anything else. You’ll see any changes you made when you boot the PC.
Open a command prompt or the Deployment and Imaging Tools Environment with administrator privileges.
Unmount the image.
where C:\test\offline is the location of the mount directory. If you do not specify the parameters to unmount, this option lists all of the mounted images but does not perform the unmount action.
You must use either the /commit or /discard argument when you use the /unmount option.
Troubleshooting
If the DISM commands in this topic fail, try the following:
Make sure that you are using the WindowsВ 10 version of DISM that is installed with the WindowsВ ADK.
Don’t mount images to protected folders, such as your User\Documents folder.
If DISM processes are interrupted, consider temporarily disconnecting from the network and disabling virus protection.
If DISM processes are interrupted, consider running the commands from the Windows Preinstallation Environment (WinPE) instead.
How to Modify the Operating Systems Associated With an Existing Windows Installer File
Use the following procedure to modify the operating system versions associated with an existing Windows Installer (MSI) file that was created by using the App-V Sequencer.
To modify the operating systems of an existing Windows Installer file
Install the App-V Sequencer on a computer in your environment that has only the operating system installed. Alternatively, you can install the Sequencer on a computer running a virtual environment—for example, Microsoft Virtual PC. This method is useful because it is easier to maintain a clean sequencing environment that you can reuse with minimal additional configuration. For more information about installing the App-V Sequencer, see How to Install the Sequencer.
Copy the entire virtual application package that contains the Windows Installer file you want to modify to the computer running the Sequencer.
To modify the Windows Installer file, open the Sequencer console, select Package / Open, and then browse to the location where the virtual application package associated with the Windows Installer file is saved.
To add or remove operating systems, select the Deployment tab in the Sequencer console. To specify additional operating systems that will be associated with the Windows Installer file, select the desired operating system, and then click the arrow that points to the Selected operating system list control.
To remove an operating system association, select the operating system you want to remove, and then click the arrow that points to the Available operating system list control.
To create a new Windows Installer that will be associated with the virtual application package, select Generate Microsoft Windows Installer (MSI) Package. Alternatively, you can select Tools / Create MSI.
NoteВ В If you select Tools / Create MSI to create a new Windows Installer file, you can skip Step 6 of this procedure.
To save the virtual application package, select Package / Save.
How to edit & modify the Windows Registry OFFLINE
Last updated on March 11th, 2015
If your system is no longer bootable due to a virus attack or for some other reason (e.g. after you change SATA controller mode in BIOS or Motherboard) then you have to use an offline registry editor to make the appropriate modifications in Windows registry in order to boot Windows normally. This article contains detailed instructions on how to load and edit Windows registry without booting to Windows (Unbootable Windows system).
How to modify Windows Registry OFFLINE
To modify Registry offline you need an OFFLINE registry Editor. For this task, I prefer to use two offline registry editors. One of them can be found in the Windows Recovery Environment on any Windows 7 or Windows Vista installation DVD and the other can be found on the Hiren’s boot CD. So let’s start.
Method 1: Modify Registry OFFLINE using Windows Installation DVD.
1. Place the Windows Installation DVD on your CD/DVD drive and boot your computer from the Windows installation DVD.
Notice: In order to boot from the DVD, you must set the CD/DVD device as the first boot device in BIOS settings. To do that:
- Power On your computer and press «DEL» or «F1» or «F2» or «F10» to enter BIOS (CMOS) setup utility.
(The way to enter into BIOS Settings depends on the computer manufacturer). - Inside BIOS menu, find the «Boot Order» setting.
(This setting is commonly found inside «Advanced BIOS Features» menu). - At “Boot Order” setting, set the CD/DVDRW device as the first boot device.
- Save and exit from BIOS settings.
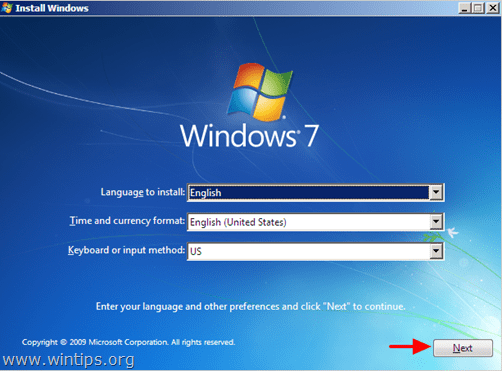
2. At the first screen press Next.
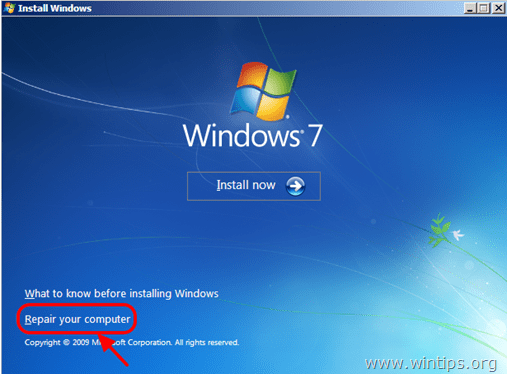
3. At the next screen, select «Repair your computer«.
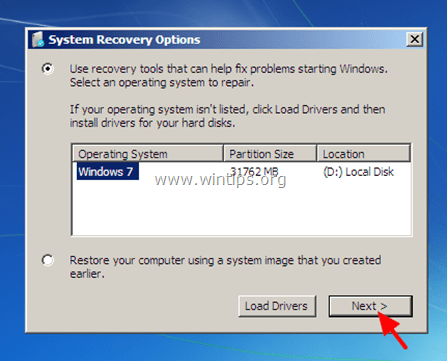
4. At System Recovery Options (1st screen) click Next.
5. At Choose a recovery tool screen, choose Command Prompt.
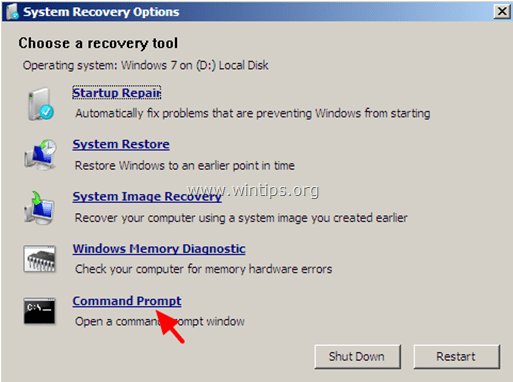
6. At command window, type «regedit» (without quotes) & press Enter.

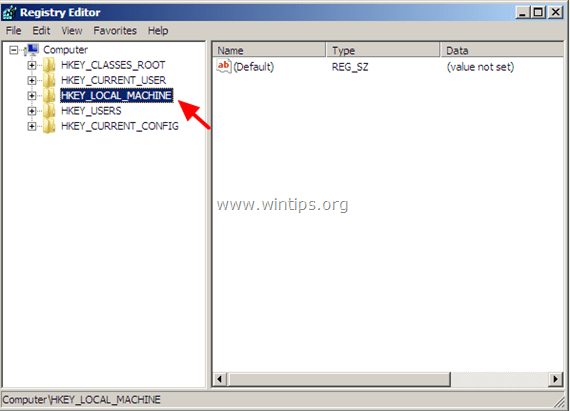
In Registry Editor:
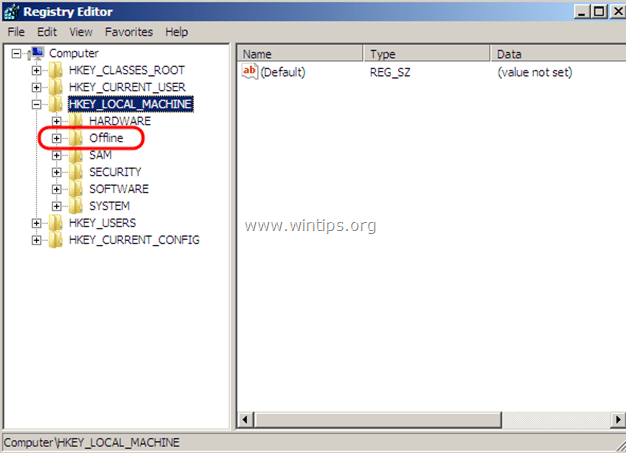
7. Highlight the HKEY_LOCAL_MACHINE key.
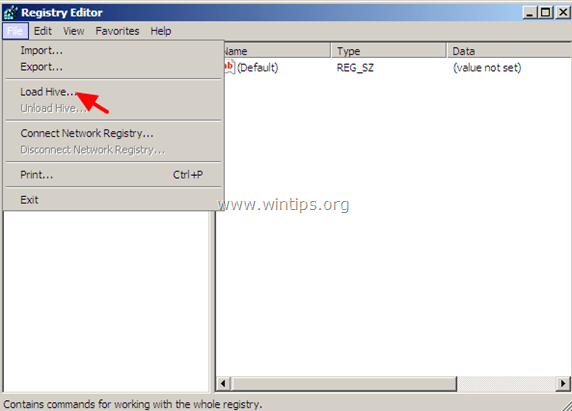
8. From File menu, select Load Hive to load the offline registry file you need.
HKEY_LOCAL_MACHINE \SAM > %windir%\system32\config\SAM
HKEY_LOCAL_MACHINE \SYSTEM > %windir%/system32/config/system
[HKEY_LOCAL_MACHINE \SOFTWARE > %windir%/system32/config/software
HKEY_USERS \.Default] > %windir%/system32/config/default
HKEY_CURRENT_USER > %userprofile%/ntuser.dat
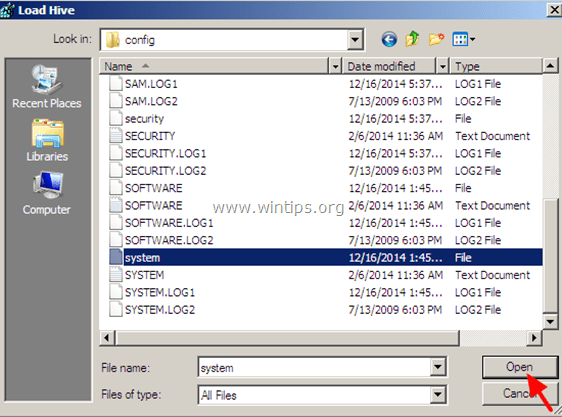
e.g. If you want to modify the SYSTEM registry database then navigate to the disk where Windows installed on (commonly on disk «C:») and open the system file found in «%Windir%\system32\config» directory. (e.g. «C:Windows\system32\config\system»)
9. Then type a Key Name for the offline registry database (e.g. «Offline«) and press OK.
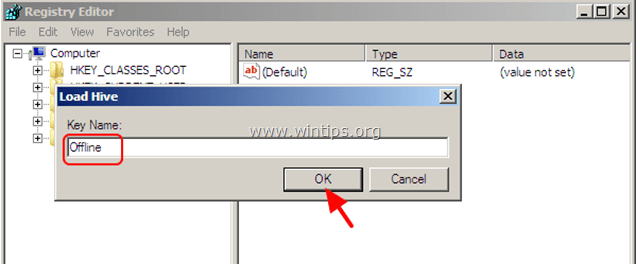
10. Now under the HKEY_LOCAL_MACHINE key, you should have a new key, named after the name you typed previously (e.g. ‘Offline» in this example).
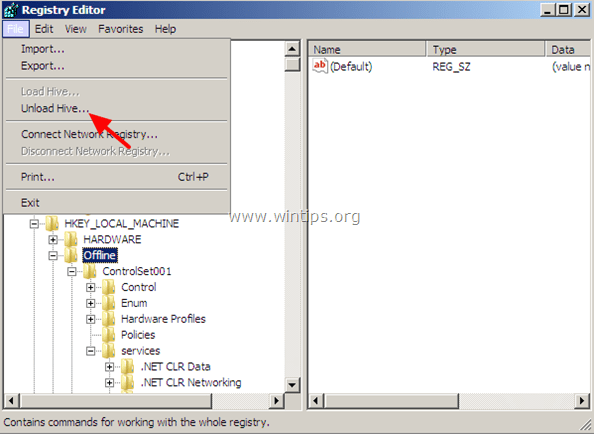
11. Now perform all the modifications you want under this key. When you finish with the modifications, highlight the key you created previously (e.g. the «Offline«key ) and from the File menu, choose Unload Hive to write back the changes you made to the offline Registry.
12. Close the Registry editor, the Command prompt window and Restart the computer.
13. Remove the Windows Installation DVD from the CD/DVD drive and let Windows start normally.
Method 2: Modify Registry OFFLINE using Hiren’s BOOTCD.
Step 1. Download Hiren’s BootCD
1. Download Hiren’s BootCD to your computer.*
Scroll the page down and click on “Hirens.BootCD.15.2.zip” )

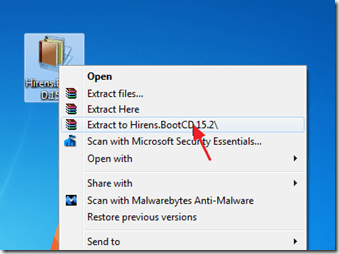
2. When the Download is complete, right-click on “Hirens.BootCD.15.2.zip” file to extract it.
Step 2: Burn Hirens BootCD into an optical disk.
Note: If you don’t have a CD/DVD drive on your computer (e.g. if you own a netbook) then follow this guide: How to put Hirens BootCD into a USB stick.
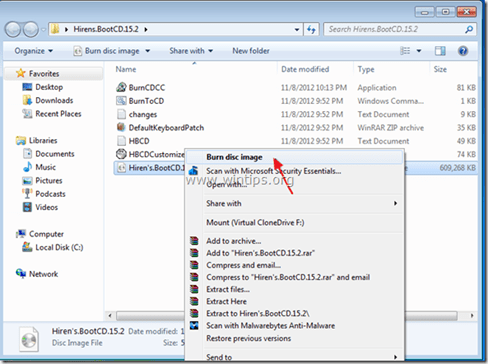
1. In “Hirens.BootCD.15.2” folder, find the “Hiren’s.BootCD.15.2.ISO” disc Image file and burn it to a CD.
Step 3: Boot with Hirens.BootCD.
1. First, make sure that your DVD/CDROM Drive is selected as first boot device in BIOS (CMOS) Setup. To do that:
- Power On your computer and press «DEL» or «F1» or «F2» or «F10» to enter BIOS (CMOS) setup utility.
(The way to enter into BIOS Settings depends on the computer manufacturer). - Inside BIOS menu, find the «Boot Order» setting.
(This setting is commonly found inside «Advanced BIOS Features» menu). - At “Boot Order” setting, set the CD-ROM drive as first boot device.
- Save and exit from BIOS settings.
2. Put the Hirens Boot CD on the infected computer’s CD/DVD drive in order to boot from it.
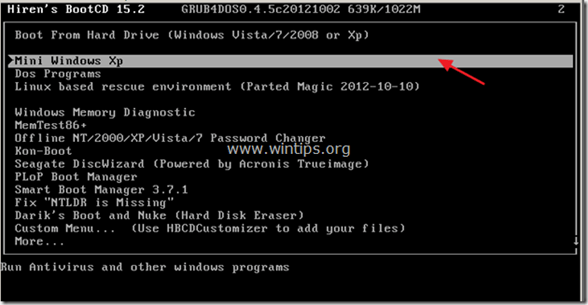
3. When the «Hiren’s BootCD” menu appears on your screen, use your keyboard arrows keys to highlight the “Mini Windows Xp” option and then press «ENTER«
Step 4. Modify Remote Registry.
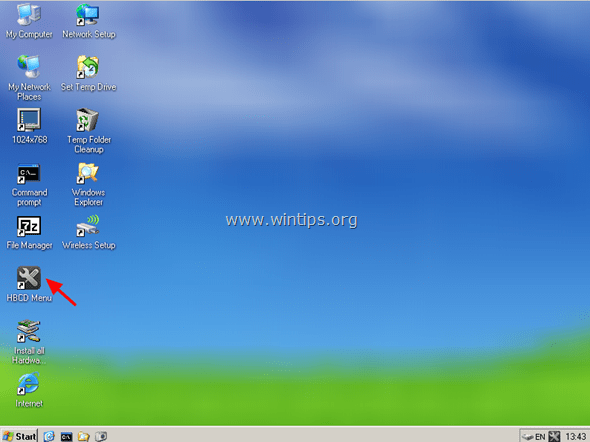
1. From “Mini Windows XP” desktop, double-click at HBCD menu icon.
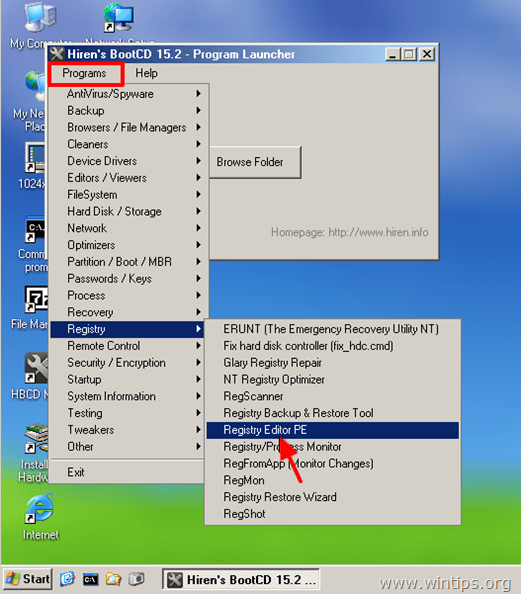
2. From Programs menu, select Registry > Registry Editor PE.
3. At Browse for folder screen, select the Windows directory where Windows are installed in (usually «C:\Windows») and choose OK.

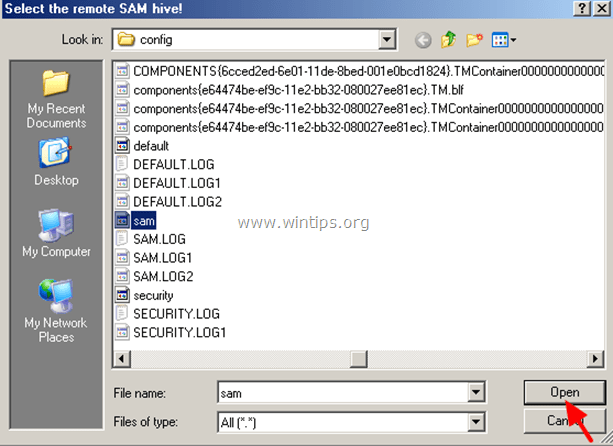
4. Select the related registry hive in each window appears on the screen and then press Open. (You have to do that for all registry hives: SAM, SYSTEM, SOFTWARE & SECURITY).
e.g. to select the SAM hive select the «sam» file under «%windir%\system32\config\»directory and press Open. (e.g. C:\Windows\System32\config\sam)
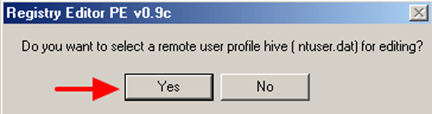
5. If you want to edit a remote user profile (HKEY_CURRENT_USER) then you have to choose Yes at the following screen (otherwise select No).
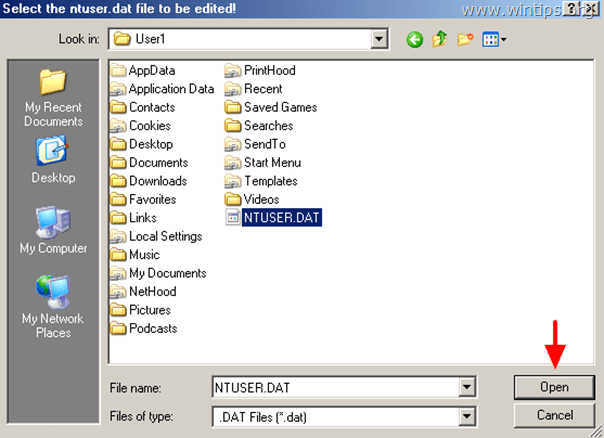
6. Then select the NTUSER.DAT file found under the user profile directory (%userprofile%/ntuser.dat ) of the user that you want to edit. (Usually the full path is: C:\Users\%Username%\ntuser.dat in Windows 7 or C:\Documents and Settings\Username\ntuser.dat in Windows XP.)
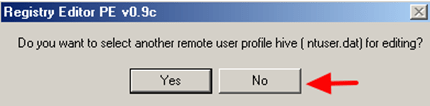
7. If you want to select another remote profile to edit press Yes otherwise press No to continue.
8. At the Registry Editor PE’s information window, press OK.
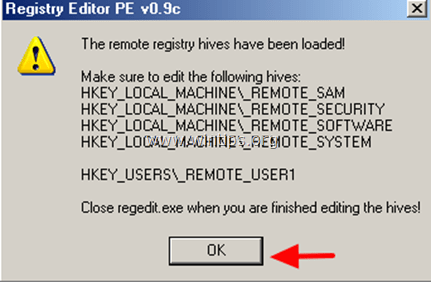
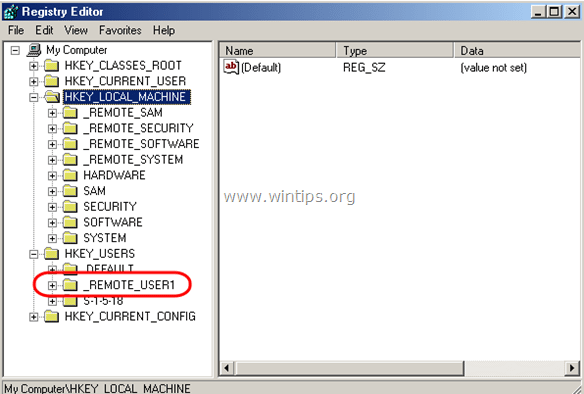
9. Double click to expand the HKEY_LOCAL_MACHINE key and you should see four (4) folders marked with the _REMOTE_ prefix on their name. These _REMOTE_ keys contains the remote registry settings so expand them and make all the modifications you want.

10. In the same way you can edit the remote user profile settings, found under HKEY_USERS key, with the prefix _REMOTE_.
11. Finally when you finish with the modifications, close the registry editor and the modifications will be uploaded automatically to the remote registry.


