How to Mount IMG Files in Linux
ISO images are often used to contain CD-ROM or DVD data, but Linux users will occasionally find themselves working with IMG files instead. These contain direct disk images, which can be worked with in a similar way. At one point these were generally used for writing an entire file system directly to a discrete diskette, but few people would ever wish to do that in today’s world. There are two major reasons modern Linux users would need to work with them, however. One is if an IMG file was used to distribute a driver or other piece of an operating system that needed to be restored. The IMG file can be mounted and the individual file from inside of it’s contained system could then be copied over to a booted file structure. The other reason, which is becoming extremely popular, is for working with virtual machines and other forms of hardware virtualization.
Linux provides several different ways to work with these contained structures. Depending on your distribution, you might be able to work with them in a purely graphical environment. The same CLI tools that mount ISO images could also mount IMG if this isn’t possible for you, however.
Method 1: Mount With Graphical Menus
If you’re using PCManFM or another file manager that supports mounting an image directly via the /media folder with a menu driven system such as some versions of Nautilus, then you should hold launch your manager to start. You’ll either need to launch this from the Panel Menu in LXDE or from the Applications menu in GNOME. Once you’re open, navigate to the Downloads folder by clicking the link in the left panel and then right click on the disk image you downloaded. It’s generally smart to have ensured that your browser didn’t detect any malware before proceeding.
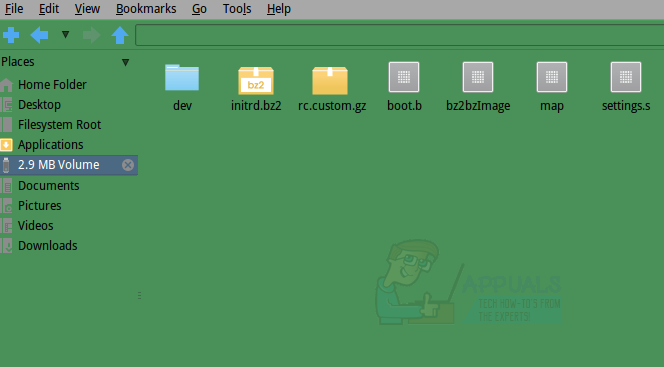
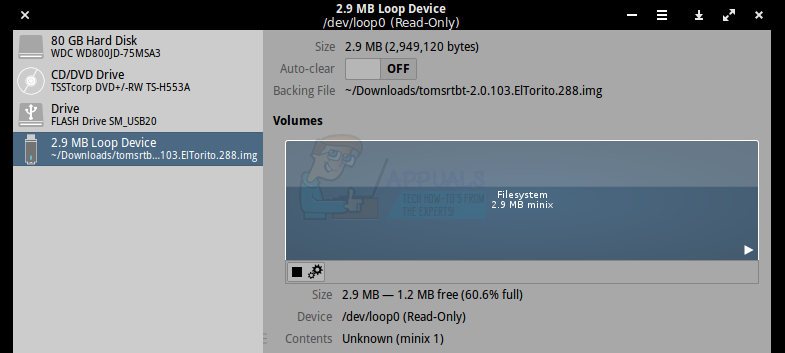
Once the context menu appears, select the “mount disk image” option. The label for this command will change depending on your particular distribution. The image will automatically mount at /media/USERNAME/disk, with USERNAME being replaced with your actual user name. Click on the left panel of the file manager where it reads the size of the image in question. In our example we used an image of an older Linux distribution called tomsrtbt (pronounced Tom’s Root Boot), which fit an entire operating system in less than three megabytes. Hence the “2.9 MB Volume” label refers to the image in question.
You may now drag or right click and copy any of these files to any other section of your file system for safekeeping. When you’re done you can click on the X logo next to the label to close it. If you’re using a file manager that doesn’t support this method of unmounting an image, then start the GNOME Disks utility from the Panel Menu or the Applications tab. Click on the device that has the same name as the label from the file manager and then click on the square stop button to close down the file system.
Method 2: Via the Loopback Device
Disk images could be mounted via the loopback device as well, in much the same way as ISO images can be. This technique will be necessary if you use Thunar, Konqueror or any other file manager that doesn’t support direct mounting via graphical techniques. If you haven’t been able to mount an image graphically, then hold down CTRL, ALT and T at the same time. Type ls /mnt to make sure your /mnt directory is empty. If it’s not or if you don’t feel comfortable using it directly, then you can use sudo mkdir /mnt/toms to create a mountable directory. You could theoretically call the directory whatever you’d like. Type sudo mount -o loop tomsrtbt-2.0.103.ElTorito.288.img /mnt and press enter. You will be prompted to enter your password, which you will be required to do. The /mnt directory can then be explored via the CLI or the file manager you prefer. Naturally you’ll need to replace tomsrtbt-2.0.103.ElTorito.288.img with the image you’re using and /mnt with the directory tree segment you’re using.
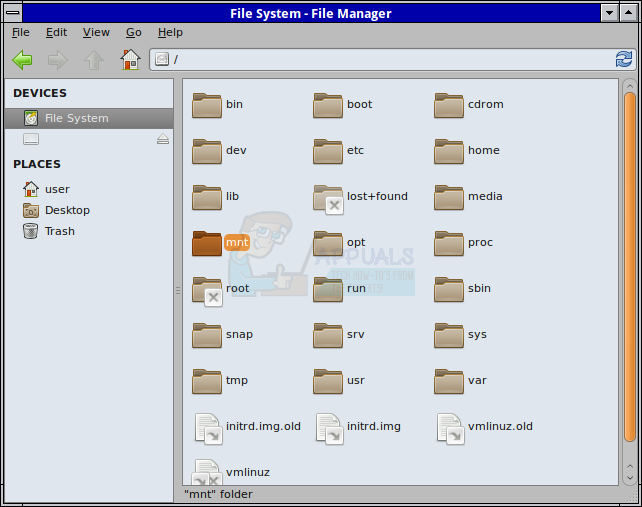
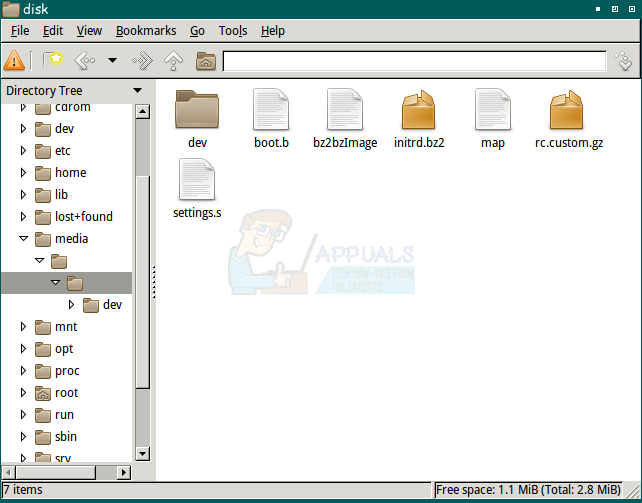
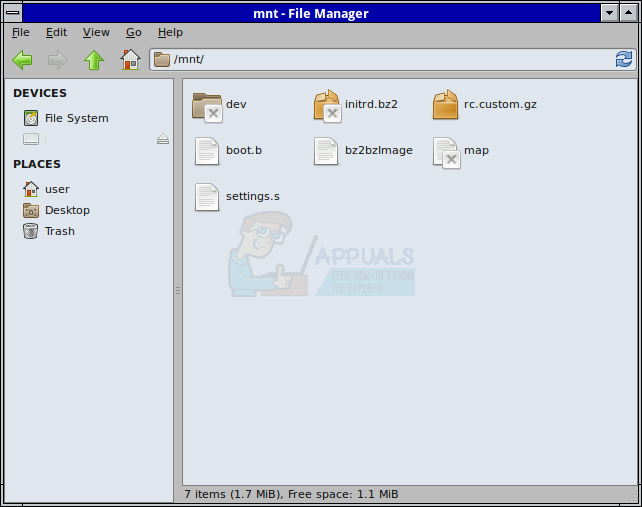
Hold down CTRL and E to open your graphical manager or start it from the Applications or Whisker menu depending on which desktop environment you are using. Select the File System option from the left pain, navigate to /mnt and then select the /mnt folder. You’ll now be able to examine the contents of the image file.
At the CLI type sudo umount /mnt and press enter to umount the image. You would need to substitute whatever mount point you used for /mnt when you do so.
Источник
andremiller.net
A while ago I thought it would be a good idea to make a backup of my Linux server by just dumping the complete disk to a file. In retrospect, it would have been much easier had I just dumped the individual filesystems.
When I finally got around to using this backup, long after the 10GB disk had perished I realized that to use the loopback device to mount a filesystem it actually needs a filesystem to mount. What I had was a disk image, including partition table and individual partitions. To further complicate matters the data partition was also not the first partition inside this image.
For reference, I created this image using the Unix ‘dd’ tool:
I followed the instructions on http://www.trekweb.com/
jasonb/articles/linux_loopback.html to try and mount the partitions inside the disk image, but ran into two problems.
To mount a partition inside the disk image you need to calculate the offset of where the partition starts. You can use fdisk to show this information to you, but you need to specify the number of cylinders if you are using a disk image.
You then also need to multiply the start and end numbers with the calculated sectors to get a byte offset.
I found another tool more useful for this task, called parted. If you are using Ubuntu, you can install it with ‘apt-get install parted’
Now we have the offsets and we can use those to mount the filesystems using the loopback device:
That mounted the first partition, the ‘boot’ partition, but this didn’t have the data on it that I was looking for. Lets try to mount partition number 3.
Oops, that doesn’t look right. According the article referred to above if you are using a util-linux below v2.12b then you cannot specify an offset higher than 32bits. I’m using util-inux 2.13 which shouldn’t have that problem, and besides, my offset is well below the 32bit limit.
The article also offers an alternative loopback implementation that supports mounting partitions within an image, but that requires patching and recompiling your kernel which I would rather not do.
Instead I decided to extra ct the filesystem from the image which would then allow me to mount it without specifying an offset.
Doing this is quite straightforward with ‘dd’. You need to give ‘dd’ a skip count, or, how far into the source to start copying, and a count, how much to copy.
Here you can either use the single byte offsets retrieved with parted or divide them by 512 and let ‘dd’ use 512 byte blocks. Copying just one byte at a time takes a very long time, so I suggest using a larger block size.
Here is the command I used to extract my filesystem. Skip is 2313360 (1184440320/512) and Count is 17719695 (9072483840/4)
After extracting the filesystem I was able to mount it without any problems.
Источник
Tutorial: How to mount raw images (.img) images on Linux
If you have a few .img files coming as disk images from devices like floppies, CDs, DVDs, SD cards, etc, you will realize that you cannot mount the in Linux, because they contain a file system that has to be mounted.
In linux you would need to use the mount command as for any physical device, however you need to know the correct syntax that is based on understanding the information related to the partition(s) available in the image.
First step is to read the partition Start point using fdisk:
In the terminal type:
sudo fdisk -l imgfile.img
You will see an output similar to the one below:
Device boot Start End Blocks Id System
imgfile.img1 * 63 266544 722233 C W95 FAT32 (LBA)
imgfile.img2 25679 25367890 245667890+ 83 Linux
As you can see there are two partitions, one that is FAT32 and the other one that it’s ExtFS. This means that to mount the first partition we have to tell Linux that we need to start at the sector 63. The standard sector size is 512 bytes, however there are other possibilities like 128 or 1024. Assuming that the place from where you are downloading the image doesn’t specify any sector size, we can type in the terminal:
sudo mount -t vfat -o loop,offset=$((63 * 512)) imgfile.img /mnt/disk
To mount the second partition, as you can imagine:
mount -t ext4 -o loop,offset=$((25679 * 512)) imgfile.img /mnt/disk1
It’s important to copy the “Start” sector number correctly, otherwise you’ll get an error message like:
mount : wrong fs type, bad option, band superblock on /dev/loop,
missing codepage or helper proggram, or other error
In some cases useful info is found in syslog – try
dmesg | tail or so
One last thing, the standard sector size for CDs and DVDs is 2352 instead of 512. If you are opening such image, you’ll have to use this value instead of 512.
Источник
How to mount the android img file under linux? [closed]
Want to improve this question? Update the question so it’s on-topic for Stack Overflow.
Closed 5 years ago .
Recently, I’m interest in the android rom, I want to change and rebuild them.
So, I did some test on my XOOM, it’s very easy to flash something into the machine.
I got some ROM from MOTOROLA (http://developer.motorola.com/products/software/), they are some img file, and I want to know what’s inside, I hope to unpack them.
I tried the unyaffs, it said broken img file .
I try to mount them, it works great on the system.img, and I can get the file inside.
When I want to mount userdata.img by mount -o loop userdata.img /mnt/userdata (the same as system.img ), it tells me mount: you must specify the filesystem type so I try the mount -t ext2 -o loop userdata.img /mnt/userdata , it said mount: wrong fs type, bad option, bad superblock on.
So, how to get the file from the inside of userdata.img ?
5 Answers 5
First you need to «uncompress» userdata.img with simg2img , then you can mount it via the loop device.
I have found a simple solution: http://andwise.net/?p=403
Quote
(with slight adjustments for better readability)
This is for all who want to unpack and modify the original system.img that you can flash using recovery. system.img (which you get from the google factory images for example) represents a sparse ext4 loop mounted file system. It is mounted into /system of your device. Note that this tutorial is for ext4 file system. You may have system image which is yaffs2, for example.
The way it is mounted on Galaxy Nexus:
- Linux box or virtual machine
- simg2img and make_ext4fs binaries, which can be downloaded from the linux package android-tools-fsutils
Place your system.img and the 2 binaries in one directory, and make sure the binaries have exec permission.
Part 1 – mount the file-system
Then you have your system partition mounted in ‘sys/’ and you can modify whatever you want in ‘sys/’. For example de-odex apks and framework jars.
Part 2 – create a new flashable system image
Источник
Монтирование iso, nrg, mdf, bin, img образов в Linux
Дата добавления: 21 мая 2010
-Эти команды смотрируют образ имя_образа в каталог /mnt/ (стандартный каталог для примонтированных устройств).
Для просмотра и работы с содержимом можно использовать команду:
cd /mnt && ls
Или зайти в коренная папка -> mnt через графический файловый менеджер. Также в качестве последнего аргумента команды mount можно указать свой путь для монтирования.
Монтируем nrg
Если у вас образ nrg, то рекомендую переконвертировать его в iso и смонтировать способом для iso, либо воспользоваться утилитой AcetoneISO.
Для переконвертирования в iso необходимо установить пакет (должен присутствовать в репозитории) nrg2iso .
После этого можно использовать эту утилиту в терминале:
nrg2iso имя_образа.nrg имя_переконвертированного_образа.iso
AcetoneISO — монтирование практически всех образов через графический интерфейс.
AcetoneISO предоставляет графический интерфейс для монтирования или создания образов.
Для получения программы установите пакет acetoneiso .
Программа проста в работе и не требует пояснений.
С ее помощью можно монтировать ISO BIN NRG MDF IMG.
Gmountiso
Также есть более легковесная утилита gmountiso которая позволяет монтировать iso образы через графический интерфейс.
P.S AcetoneISO на Qt; Gmountiso на GTK.
Автор: Sveolon, дата: 29 мая 2010 , время: 09:23:01 (MSK).
nrg можно смонтировать или сконвертить в iso безо всяких утилит.
mount -t udf,iso9660 -o loop,ro,offset=307200 file.nrg /каталог/монтирования
dd if=[твой .nrg образ] of=[выходной .iso образ] skip=307200 bs=1
Автор: mi, дата: 03 июня 2017 , время: 17:55:15 (MSK).
Чему вы учите людей? Бездумному тупому запоминанию никому непонятных символов?
что значит «-о», что значит «-t» может как-то будете разъяснять что это, что бы люди ронимали что это и зачем?
Источник


