- How to Open Device Manager in Windows 10
- How can the Device Manager be Accessed?
- Method 1: Opening the Device Manager through the Start menu search
- Method 2: Accessing the Device Manager through the Quick Access Menu
- Method 3: Opening the Device Manager through the Run dialog box
- Method 4: Accessing the Device Manager through the Command Prompt
- Method 5: Opening the Device Manager through the System Properties
- Method 6: Accessing the Device Manager by the Manage menu
- Method 7: Using the Control Panel to access the Device Manager
- Method 8: Access the Device Manager by using the Windows PowerShell
- How To Open Settings In Windows 10
- Open Settings with a keyboard shortcut
- Open Settings from Win + X menu
- Open Windows 10 settings from Start
- Launch Settings app from the search
- Quickly open personalization section of Settings
- Open Settings app from the Action Center
- Pin Settings app to the taskbar for quick access
- Add Settings to the desktop
- File sharing over a network in Windows 10
How to Open Device Manager in Windows 10
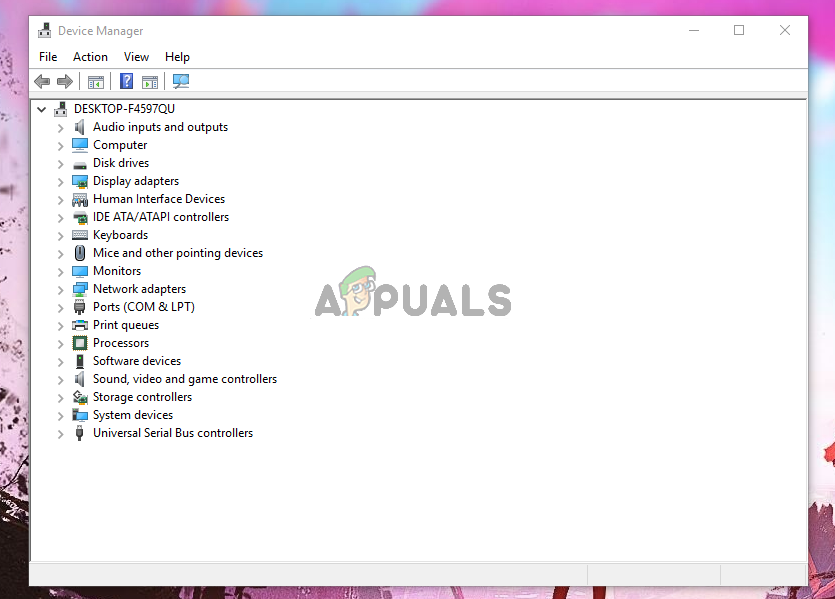
Device Manager is a tool provided in every version of Windows, its main purpose is to identify all the connected devices. It allows the user to perform managerial tasks related to hardware drivers. You can use it to install/uninstall device driver, you can also add a hardware device, and enable/disable a device. The Device Manager can also be used to view vital information about all the known connected devices.
 Device Manager
How can the Device Manager be Accessed?
There are a number of ways you can access the Device Manager, here are the most common ones.
- Through the start search: You can easily open the Device Manager through the search bar located under the start menu.
- Through the Quick Access menu: You can also access the Device Manager through the right-click menu.
- By the Run dialog box: The Run dialog box also allows the user to open the Device Manager.
- Through the Command Prompt: The command prompt also enables the user to run the Device Manager tool.
- Through the system properties: The system properties have a shortcut that leads to the Device Manager’s menu.
- By the Manage menu: The manage menu can also be used to open the Device Manager.
- Inside the Control panel: you can also open the Device Manager by accessing the control panel.
- Through the Windows PowerShell: You can also use the Windows PowerShell to open the Device Manager.
Method 1: Opening the Device Manager through the Start menu search
You can easily use the Start menu search to open the Device Manager.
-
- Open the Start menu by clicking on the Start button on the lower-left corner.
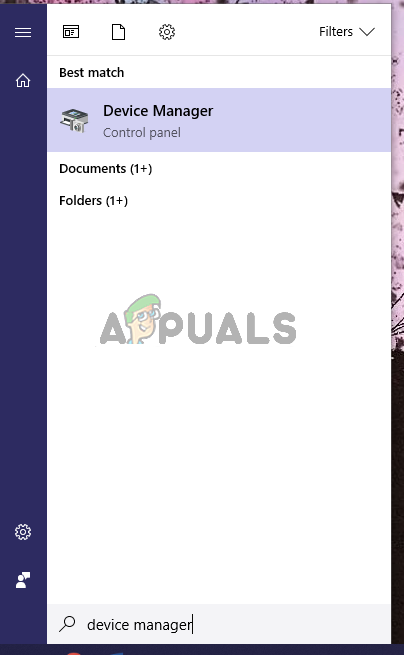
- Now Type device manager into the search bar and press Enter, if there is no search bar then just start typing and the bar will appear. This will open the Device Manager tool.
 Search for the Device Manager
 Search for the Device Manager
Method 2: Accessing the Device Manager through the Quick Access Menu
This is the only method that will allow you to open Device Manager with elevated administrative privileges.
-
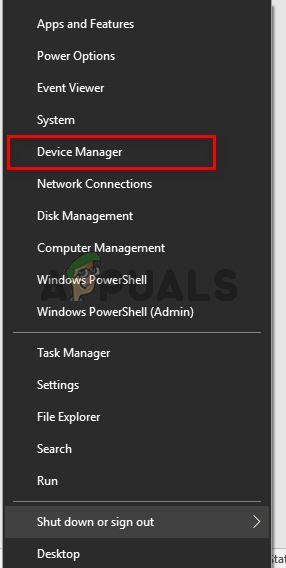
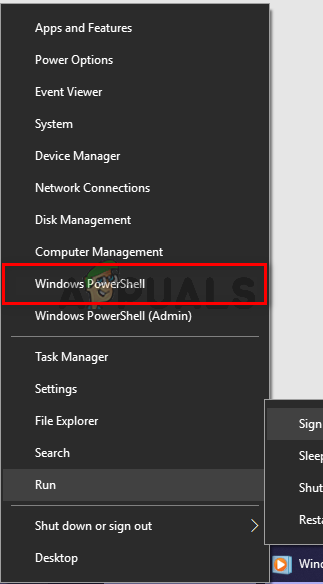
- To open the Quick Access menu on your Windows, you could either right-click on the Start button or you could press Windows + X
- Now Hold the Shift + Ctrl keys and click on Device Manager to open it with administrative privileges. Opening the Device Manager through the Quick Access menu
 Opening the Device Manager through the Quick Access menu
Method 3: Opening the Device Manager through the Run dialog box
The Run dialog box could also be used to open different directories and different applications. Same can be done for the device manager.
-
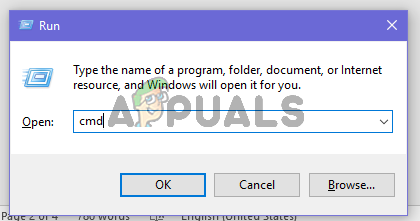
- On your keyboard, press Windows + R keys and then type devmgmt.msc and then press Enter. This will launch the device manager. Opening Device Manager through the Run dialog box
- On your keyboard, press Windows + R keys and then type devmgmt.msc and then press Enter. This will launch the device manager.
 Opening Device Manager through the Run dialog box
Method 4: Accessing the Device Manager through the Command Prompt
CMD also has the ability to open the Device Manager.
- On your keyboard, press Windows + R keys and then type CMD and press the Enter This will open the Command Prompt. Opening CMD through the Run dialog box
- Once the Command Prompt is on the screen, type devmgmt.msc and press Enter to open the Device Manager. Type devmgmt.msc in CMD
 Opening CMD through the Run dialog box
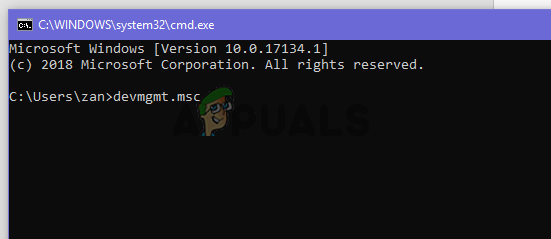 Type devmgmt.msc in CMD
Method 5: Opening the Device Manager through the System Properties
-
- Open the Start Menu, and type This PC, then press the Enter key to open it.
- Now right-click anywhere and then click on the Properties button to open the properties of the system.
- Now find the Device Manager option which is located in the left panel of the system properties. Click on it to open the Device Manager tool. Opening Device Manager through the system properties
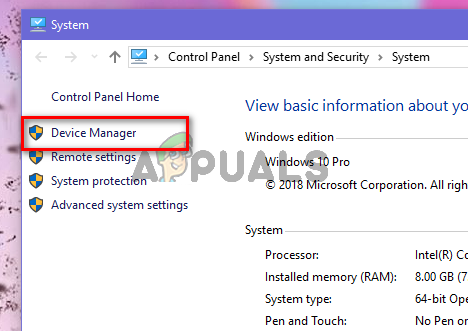 Opening Device Manager through the system properties
Method 6: Accessing the Device Manager by the Manage menu
The manage menu can easily provide access to the Device Manager.
- Right-click on This PC shortcut on your desktop. Now click on Manage.
- Now find and click on the Device Manager button located in the left panel. This will open the Device Manager. Opening Device Manager through the Computer Management
 Opening Device Manager through the Computer Management
Method 7: Using the Control Panel to access the Device Manager
You can also access the Device Manager through the Control Panel.
- Open the Start menu by clicking on the Start button and then type control panel, then press Enter key to open it.
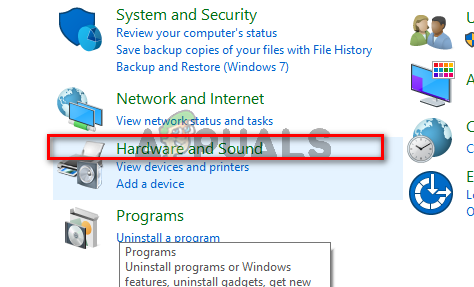
- Now once the control panel is opened, click on the Hardware and Sound menu.
- Now click on the Device Manager option under the Devices and Printers This will give you access to the Device Manager.
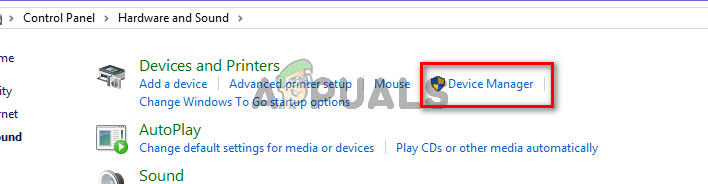 Select Device Manager
Method 8: Access the Device Manager by using the Windows PowerShell
When all other options are not working then the last resort is to use the Windows PowerShell application to open the Device Manager, this is how to get it done.
- Right Click on the Start button and then click on the Windows PowerShell button through the quick access menu. Open PowerShell through the Quick Access menu
- Once the PowerShell window is on the screen, type devmgmt.msc and then press Enter to open the Device Manager. Type devmgmt.msc in the PowerShell
 Open PowerShell through the Quick Access menu
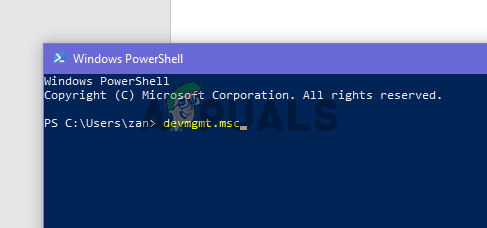 Type devmgmt.msc in the PowerShell
How To Open Settings In Windows 10
Last Updated on November 27, 2019 by admin 17 Comments
PC Settings, introduced first with Windows 8, has been rebranded as Settings in Windows 10. Microsoft has completely overhauled the Settings app to make it easier to use and include new settings.
While the classic Control Panel is still part of Windows 10 and we need to navigate to the Control Panel to access some settings, most of the Settings can be found under the Settings app. In fact, many of the newly added settings and options are available only in the Settings app.
Settings to personalize the Start menu or screen, lock screen, and many other options are available in the Settings app only. Additionally, the Settings app allows you to pin your favorite settings or settings that you need to access very often to the Start menu or screen.

The design language of the Settings app goes very well with the overall design of Windows 10. All settings and options have been placed into nine different categories: System, Devices, Network and Internet, Personalization, Accounts, Time and Language, Ease of Access, Privacy and Update, and security. Navigate to the category to view sub-categories.
In fact, in many ways, the Settings app is much easier to use and navigate than the classic Control Panel.
Although the Settings app icon is pinned to the left of the Start menu or screen by default for quick access, the following are some of the lesser-known ways to open the Settings app in Windows 10.
NOTE: If the Settings app fails to open or closes automatically soon after launching it, refer to our fix to Settings app not opening in Windows 10 guide.
Method 1 of 8
Open Settings with a keyboard shortcut
This is the easiest way to launch the Settings app in Windows 10.
Step 1: Simultaneously press the Windows logo and I keys (Windows + I) to quickly open Settings in Windows 10.
Method 2 of 8
Open Settings from Win + X menu
Step 1: Perform a right-click on the Start button on the taskbar and then click Settings to open the same.

Method 3 of 8
Open Windows 10 settings from Start
Step 1: Reveal the Start menu or screen by pressing the Windows logo key or clicking (tap if you’re on a touch device) the Start button on the extreme left of the taskbar.
Step 2: On the left side of the Start, simply click or tap the Settings or gear icon to launch the same.

Method 4 of 8
Launch Settings app from the search
Step 1: Open Start menu or screen.
Step 2: In the search box, type Settings and then press Enter key.

Method 5 of 8
Quickly open personalization section of Settings
Step 1: Right-click on the desktop to open the desktop context menu.

Step 2: Click or tap Personalize option to open the personalization section of Settings.

Method 6 of 8
Open Settings app from the Action Center
Step 1: Click on the Action Center icon in the taskbar and then click All Settings tile to open Settings.

Method 7 of 8
Pin Settings app to the taskbar for quick access
Step 1: Launch the Start menu or screen by either clicking the Start (Windows icon) button on the taskbar or pressing the Windows logo key on the keyboard.
Step 2: Right-click on the Settings icon in the Start menu/screen, and then click Pin to taskbar option. That’s it!
Method 8 of 8
Add Settings to the desktop
If you would like to have the Settings app shortcut on the desktop as well, there is a way to get it on the desktop. Refer to our add Settings app to Windows 10 desktop guide for directions.
If you have issues with opening Settings, refer to our Settings not opening in Windows 10 guide.
File sharing over a network in Windows 10
In Windows 10, some features of file and folder sharing over a network have changed, including the removal of HomeGroup. Read on for answers to common questions about other changes to file and folder sharing in Windows 10.
To share a file or folder in File Explorer, do one of the following:
Right-click or press a file, select Give access to > Specific people.

Select a file, select the Share tab at the top of File Explorer, and then in the Share with section select Specific people.

If you select multiple files at once, you can share them all in the same way. It works for folders, too—share a folder, and all files in it will be shared.
To stop sharing in File Explorer, do one of the following:
Right-click or press a file or folder, then select Give access to > Remove access.

Select a file or folder, select the Share tab at the top of File Explorer, and then in the Share with section select Remove access.

File Explorer shows the «Remove access» option («Stop sharing» in older versions of Windows 10) for all files, even those that aren’t being shared over a network.
Open File Explorer, then type \\localhost into the address bar.
Note: When you’ve shared a file from a folder in your user profile and you go to \\localhost, you’ll see your user profile and all its files there. This doesn’t mean that all of your files are shared—just that you have access to all your own files.
If you open File Explorer, go to Network, and see an error message («Network discovery is turned off….»), you’ll need to turn on Network discovery to see devices on the network that are sharing files. To turn it on, select the Network discovery is turned off banner, then select Turn on network discovery and file sharing.

To troubleshoot problems with sharing files or folders, follow the steps below on all computers from which you’re trying to share.
Make sure the computers are on the same network. For example, if your computers connect to the internet through a wireless router, make sure they all connect through the same wireless router.
If you’re on a Wi-Fi network, set it to Private. To find out how, read Make a Wi-Fi network public or private in Windows 10.
Turn on network discovery and file and printer sharing, and turn off password protected sharing.
Select the Start button, then select Settings > Network & Internet , and on the right side, select Sharing options.
Under Private, select Turn on Network discovery and Turn on file and printer sharing.
Under All Networks, select Turn off password protected sharing.
Make sharing services start automatically.
Press the Windows logo key + R.
In the Run dialog box, type services.msc, and then select OK.
Right-click each of the following services, select Properties, if they’re not running, select Start, and next to Startup type, select Automatic:


