- how to remove keyboard layout on Windows 10?
- How to Remove the Windows 10 Search Box from the Taskbar
- Windows 10 Search Box
- Hide the Windows 10 Search Box
- So, How Do I Search Windows 10?
- How to remove Black Bars from Games in Windows 10
- Remove Black Bars from Games on Windows 10
- Use native resolution
- Update your graphics card driver
- Have a look at the graphics settings
- Windowed Full-screen mode
- Press Ctrl+Alt+F11
- Run Troubleshooter
- iStart Search Bar
- iStart
- The iStart Virus
- iStart Webssearches
- Remove iStart Search Bar
- Remove iStart Search Bar from Firefox:
- Remove iStart Search Bar from Chrome:
how to remove keyboard layout on Windows 10?
Original Title: how to permanent remove keyboard layout?
I am French, living in Germany, but prefer to use Windows in English US. Tired of different keyboard layouts, I also have now only keyboard with US layout. So I removed French and German keyboard layouts, but Windows somehow kept them and KEEP switching back to a German layout anytime I come back from the lock screen.
I disabled the quick layout shortcut, I don’t want any, just the US layout.
So just US layout for my physical keyboard on my desktop (USB) and tablet (Bluetooth), both having a full up to date Windows 10 10586.218 (x64 on desktop, 32bits on tablet).
On the same live account, I am also using a Windows 10 Mobile device (Nokia 730) on which I only use touch keyboard and thus need all 3 layouts (French, English, German). I hope my account settings are not mixing up with the windows settings!!
Here a screenshot on my tablet: for each of the 3 languages, only the US keyboard layout is configured, but on the langage list, I also get the French and German keyboards.
How can I get rid of them for good?? This is particularly annoying since the German keyboard is set back as default at any windows lock screen!!
![]()
We regret the inconvenience caused.
The above issue might occur due to the following reasons:
- Country & Region settings not enabling you to delete the keyboard language set on the PC.
- Not choosing appropriate default keyboard layout.
Before we assist you further, I would like to ask you a few questions:
- Did you try removing the keyboard layouts from Settings page?
- If yes, does the issue persists even after removing the keyboard layout?
By removing the Keyboard layout from system Settings page, the language will be removed from the PC. However, if needed, you can download the same from system Settings page and check if the changes made are effective.
You can remove the keyboard layout either from system Settings page or Control panel. Follow either of the steps below to remove the keyboard layout and check if the issue is resolved.
Step 1 : System Settings window.
- Press Windows logo + I keys on the keyboard to open Settings page.
- Click on Time & language from the options and select Region & language from the left side panel of the window.
- Click on the keyboard language you want to remove under Languages and click on Remove.
- Close the window and check if the changes are effective.
Step 2 : Control panel.
- Press Windows logo + X keys on the keyboard and click on Control panel from the context menu.
- Click on View by option located at the top right corner of the window and select Large icons from the dropdown bar.
- From the panel, click on Language.
- Under Change your language preferences click on the keyboard layout to remove and click on the Remove button which will now be available to use.
- Close the window and check if the changes are effective.
Write to us with the status of the issue on the keyboard layout language removed from the PC for further assistance. Your reply is most important for us to ensure we assist you accordingly.
How to Remove the Windows 10 Search Box from the Taskbar

One of the features that came to Windows 10 starting a few builds ago is a Windows Search box where Cortana used to live. And it takes up a good chunk of space on the taskbar. If you would rather have more room on the taskbar for icons, you can get rid of it. Here’s how.
Windows 10 Search Box
If you’re new to Windows 10 or have been using it for a while now, you will like this trick. It makes more room for other items you might want on the taskbar.
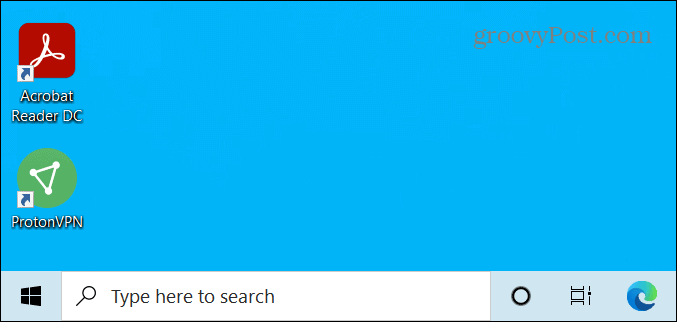
The Windows Search box lives next to the Start button. But it takes up a lot of room on the taskbar.
When you search for an app, file, or other items, a search results box will pop up with the best matches. It also includes features at the top that allow for more in-depth and specific searches if you need them.
Hide the Windows 10 Search Box
To remove the search box you have a couple of options. Right-click in the box or an empty area next to it on the taskbar. From the menu go to Search and you can choose to just Show search icon or select Hidden.
First, here’s a look at showing only the search icon – it looks like a magnifying glass and is just a button. You can still click on it to do a search, but it frees up a good chunk of space on the taskbar.
In the following example, I completely disabled it — all gone. This gives you a nice and clean look to the taskbar and easy access to the Start button.
If you want to make even more room, you can get rid of the Cortana and Task View buttons, too. Right-click the taskbar and uncheck them from the menu.

Here is how it looks with Search, Cortana, and Task View buttons removed. Only the Start button remains and you can move right over to your apps on the taskbar.

So, How Do I Search Windows 10?
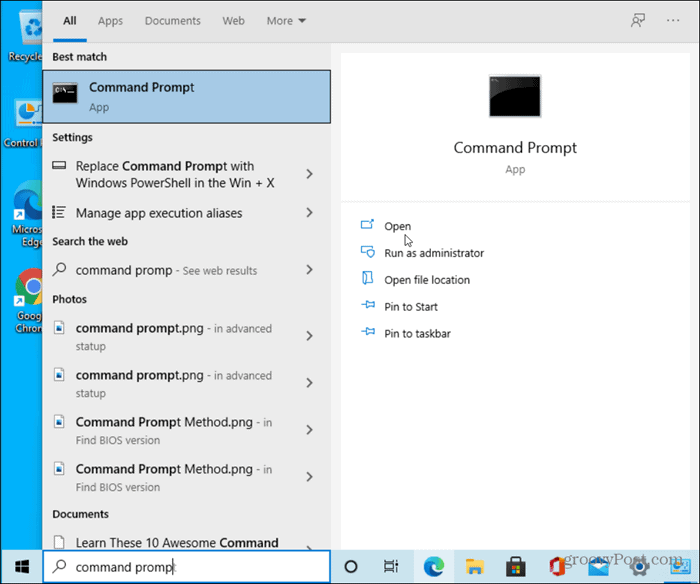
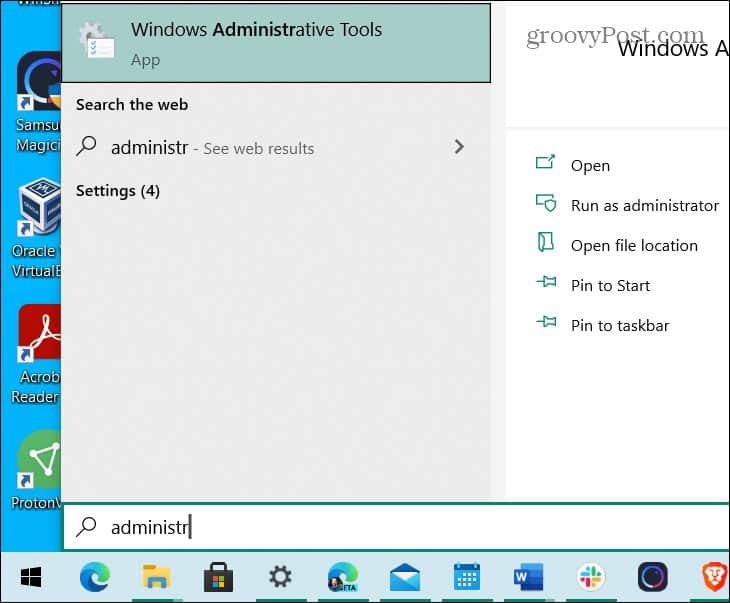
So now you might be wondering how to search Windows 10 with the search box and button removed? It’s simple. Hit the Windows Key on your keyboard and start typing in your query. When you start typing the Windows Search Box will come up. For example, here I just hit the Windows key and started typing my search for Windows Administrative Tools.
That’s all there is to it. Whether or not you want to remove the Search button entirely, let alone the Task View and/or Cortana buttons, just getting rid of the full box saves plenty of space for other items.
It’s worth noting that the Task View button will bring up the Windows Timeline feature. If you don’t use that feature it’s fine to go ahead and remove the button. And I don’t know of many people who use Cortana on their PCs anyway — so removing that button just gives you more room on the taskbar.
How to remove Black Bars from Games in Windows 10
If you want the best gaming experience, you’ll need a PC that is powered by Windows 10. It’s the best place to play, and a lot of folks know this. If you want to take advantage of what DirectX 12 has to offer, then Windows 10 is your only option.
Despite all the good things the Microsoft brings to the table, it doesn’t give a perfect experience. You see, from time-to-time, folks may come across black bars when playing their favorite video games.
Remove Black Bars from Games on Windows 10
If you are seeing Black Bars in the middle, bottom or on the side of your screen or monitor, when playing games in Windows 10/8/7, then you need to update NVIDIA drivers, check your graphics settings, run the Troubleshooter, use windows full-screen mode, use native resolution, etc. It’s a strange problem, but there are ways to rectify this issue without having to reinstall Windows 10.
Use native resolution
Video games and other content may show a black bar if your computer is not set to its native resolution and screen format.
If you want to check if you’re on the right track, go to Settings > Display, and choose the recommended resolution and orientation. Bear in mind for most cases; the orientation should be set to Landscape.
Finally, restart your computer and check if the issue has been fixed. In most situations, there should be no need to restart the computer.
Update your graphics card driver
Many video game related problems are easily fixed with an update of the graphics card or the game itself.
You need to update your graphics driver. You could also venture off to the graphics card manufacturers website to see if there’s a new update, and download it. Next, check if there’s a newer version of the game, download, and install.
These practices are tedious for sure, but it is what it is in the world of PC gaming.
Have a look at the graphics settings
Most of the time, issues with a video game has much to do with the graphics card or the graphics settings. For this problem, we recommend checking the graphics settings from within the game.
What you want to do is make sure that the screen orientation and resolution settings are similar to that of the system settings. That should usually do the trick, but if it fails to work, the following might help.
Windowed Full-screen mode
Bear in mind that with this method, users are required to revert the changes back to their original setting after every play session.
To jump into the windowed full-screen mode, simply travel to the Control Panel, select your graphic card software, and change the resolution to 4:3 resolution. Now, just the start the game with the black bar issue, go the video settings and change it to windowed mode.
Press Ctrl+Alt+F11
We’ve come to find out that pressing Ctrl+Alt+F11 during a game will remove all black bars. However, doing this changes the resolution on the entire system and not just the game. It means when you’re done playing, press Ctrl+Alt+F11 again to revert to the normal resolution.
Run Troubleshooter
From the Winx Menu, open the Run box and execute the following command:
The Hardware Troubleshooter will open. Run it. It troubleshoots problems related hardware and access devices connected to the computer.
iStart Search Bar
iStart
iStart is a software application that targets Windows browsers, causing them to open advertising sites without user permission. iStart also changes a number of browser settings in order to generate more ads and to keep tabs on the user’s online activities.
If your browser has recently been infected by this browser-hijacking app, you are advised to remove it as soon as possible. iStart itself is probably not going to cause any damage or corruption to your system or data, but its presence in the browser could potentially result in security weaknesses that may lead to attacks from hackers and more dangerous forms of malware (Trojans, Spyware, Ransomware viruses, and more).
The iStart Virus
Some of the most obvious signs that the iStart virus is attached to your Chrome, Safari, or Edge browser are the unauthorized replacement of elements such as the default homepage address or the search engine tool your browser normally uses. In addition, you may notice that the iStart virus new toolbar buttons have been added without your permission and that aggressive and questionable popups and banners oftentimes get generated on your screen even when you aren’t on a site that is typically known for such adverts.
Of course, all of this could make browsing the Internet quite the frustrating and unpleasant experience. For most users, this intrusiveness alone is enough to try to remove the iStart or the Dorputolano hijacker. However, even if you think that you can put up with the ads, the browser changes, and the automatic page redirects, it would still be in your best interest if you uninstall this invasive browser-redirecting app. The reason for that has to do with the potential security weaknesses this app might result in if it is allowed to stay in your browser for long.
iStart Webssearches
The iStart Webssearches browser hijacker app is mostly harmless on it own – even if some researchers refer to it as malware, the truth is that the iStart Webssearches hijacker app typically lacks any real damaging abilities. After all, the goal of applications like iStart Webssearches is to profit their creators through paid ads and site promotions that users are supposed to interact with. There’s no point in harming the user’s computer.
![]() The iStart Webssearches virus
The iStart Webssearches virus
However, this doesn’t mean that it is perfectly safe to keep iStart attached to your browser. The main security problem here is that the content normally promoted by software apps of the hijacker variety tends to be questionable or, at times, misleading. It is, therefore, not excluded that you may end up landing on a site that offers low-quality downloads disguised as useful programs. It’s even possible that some of the ads displayed on the sites you get redirected to could try to trick you into downloading the software they offer by outright lying to you. For example, you may get shown a warning about hidden malware on your machine that can only be removed if you download the promoted software. Needless to say, you must not trust such sketchy online warnings – it is far more likely to get your computer infected by some nasty Trojan or Ransomware virus if you download what’s offered on such sites rather than if you close the site and never visit it again.
If you want to stop all the aggressive adverts and page redirects, follow the iStart removal instructions below and you should be able to easily and quickly remove th e hijacker.
SUMMARY:
| Name | iStart Search Bar |
| Type | Browser Hijacker |
| Detection Tool | Some threats reinstall themselves if you don’t delete their core files. We recommend downloading SpyHunter to remove harmful programs for you. This may save you hours and ensure you don’t harm your system by deleting the wrong files. Remove iStart Search BarA quick way to remove iStart Search Bar from your browser is to go to its Settings, open More Tools/Add-ons, and then select the Extensions tab. Once you get there, search for any iStart Search Bar-related extensions and remove them by clicking on the Trash bin icon or the Remove button that is next to them. If that doesn’t resolve the problem and the browser hijacker keeps disturbing you, then please follow the detailed steps in the removal guide below: For the smooth completion of the steps in this guide, we highly recommend that you boot your computer in Safe Mode. Before you do so, however, first Bookmark this page so you can load it quickly after the reboot. WARNING! READ CAREFULLY BEFORE PROCEEDING! More information on SpyHunter, steps to uninstall, EULA, Threat Assessment Criteria, and Privacy Policy. Browser Hijackers like iStart Search Bar may run one or more processes related to their activity in the Windows Task Manager. To find these processes and stop them, first, p ress CTRL + SHIFT + ESC together and click on the Processes Tab ( t he “Details” Tab on Win 8 and 10 ) . Then, look carefully at the list of processes and try to locate the ones that are related to the browser hijacker. When you find a process that you believe is linked to iStart Search Bar, right-click on it and tap on Open File Location. After that, drag and drop the files from that location in the free online virus scanner that is available here and run a scan:
End the right-clicked processes if its files turn out to be malicious and d elete their folders from the file location. Next, type Control Panel in your Windows search field and navigate to Programs>>>Uninstall a program. Once you get there, search for suspicious entries in the list of programs and Uninstall them if they appear to be questionable or seem to be related to iStart Search Bar. After that, close the Control Panel and head to the Windows Search Field. Type msconfig in it and press enter. After that, select the Startup tab and see if iStart Search Bar has added some entries there. If you find any, remove their checkmark and click OK. Pay extra attention to entries with Unknown Manufacturer and remove their checkmark as well if they seem to be unwanted or dangerous. More information on SpyHunter, steps to uninstall, EULA, Threat Assessment Criteria, and Privacy Policy. Next, open the Registry Editor by typing Regedit in the windows search field and clicking OK. In it, press CTRL and F keyboard keys simultaneously and type the Name of the problematic browser hijacker in the Find box that pops up on the screen. Click on Find Next and if the find function detects entries with that name in the Registry, right-click on them and delete them. If no entries are detected in this way, go manually to these directories and delete/uninstall them:
When you remove the iStart Search Bar-related traces from the Registry, close it and go to your desktop. Press the Start and R keyboard keys together and copy this in the Run box that pops up: notepad %windir%/system32/Drivers/etc/hosts Next, click OK and you should see a Hosts file open on your screen. Scroll down and find Localhost. If your computer is hacked, you will see suspicious IPs below Localhost, just as explained in the image below: If you see dangerous IPs below “Localhost” in your Hosts file, write to us in the comments. If you see nothing suspicious, move to the next step. Next, click on the Windows Start button and navigate to Network Connections. Once in it follow these instructions:
The instructions in this step will help you remove iStart Search Bar from the most commonly used web browsers. Make sure that you apply these instructions in all browsers that have been affected in order to get rid of the browser hijacker completely. Note: For demonstration purposes, below we are showing the instructions in Google Chrome but you can apply the same for Firefox, IE or any other browser that you are using. Right-click on the browser’s shortcut icon and select Properties. Once you get inside the Properties window, tap on the Shortcut tab at the top. Then, find where it writes Target, and remove everything that has been added after .exe. Click OK to save the changes.
Launch the Internet Explorer browser and click Find the iStart Search Bar-related add-ons (it could be one or more) and Disable it/them . After that g o back to |


