Remove Homegroup on Windows 10 [STEP-BY-STEP GUIDE]

If you have two or more computers, you can use Homegroup to connect them in order to share file between them. This is a great feature, but sometimes you need to stop and disable file sharing between the PCs in your network.
To do that, you need to remove Homegroup, and today we’re going to show you how to do it on Windows 10.
How can I remove the Homegroup on Windows 10?
Homegroup is a feature first introduced in Windows 7. Due to simplicity of this feature, it remained a part of all future versions of Windows. Homegroup allows you to easily share files between the PCs in your home network.
You don’t need to enter any passwords, and all that you have to do is to join a Homegroup and you’ll be able to share files instantly. As you can see, this is a great feature, but sometimes users want to remove the Homegroup and stop file sharing.
Solution 1 – Leave Homegroup and disable its services
Creating Homegroup is quite simple, but removing it is simple as well. To do that, you just have to enter HomeGroup settings and choose the option to remove the Homegroup. To do that, follow these steps:
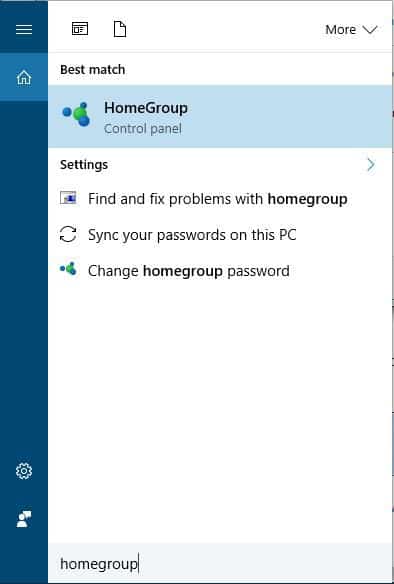
- Press Windows Key + S and enter homegroup. Choose Homegroup from the list of results.

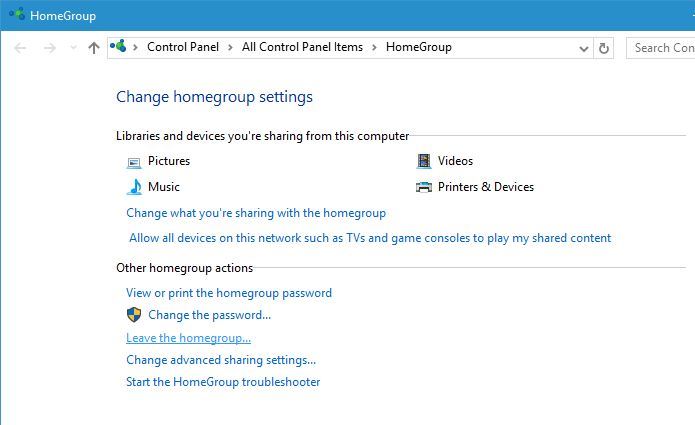
- When Homegroup window opens, scroll down to the Other homegroup actions section and click the Leave the homegroup option.
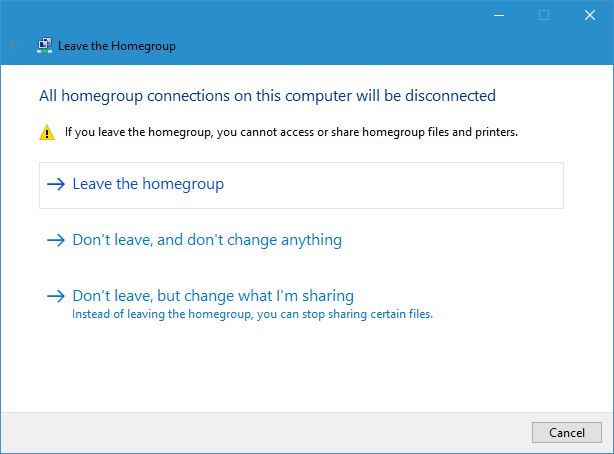
- You’ll see three options available. Choose Leave the homegroup option to leave the Homegroup.
- Wait for few seconds while you leave the Homegroup.
Leaving the Homegroup is simple, but even if you leave it, you’ll still have Homegroup icon available in Navigation Panel in File Explorer. This isn’t a major problem, but if you want to remove it you can do so by following these steps:
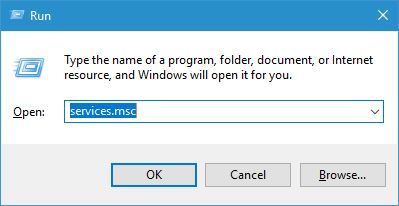
- Press Windows Key + R and enter services.msc. Press Enter or click OK.
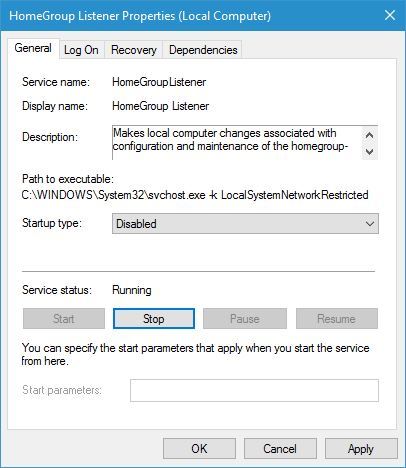
- When Services window opens, locate HomeGroup Listener and double click it to open its properties.
- Set the Startup type to Disabled and click the Stop button to stop the service.
- Click Apply and OK to save changes. Repeat the same steps for HomeGroup Provider service.

After disabling HomeGroup services, the Homegroup icon will disappear from the from the Navigation Panel completely.
Solution 2 – Use Registry Editor
If you want to remove Homegroup icon from Navigation Panel, you can do so by using Registry Editor. We have to warn you that Registry Editor is a powerful tool, and if you’re not careful you can cause stability issues with your Windows 10 installation.
If you decide to use this method, it might be a good idea to export your your registry and use it as a backup in case anything goes wrong. To edit your registry, do the following:
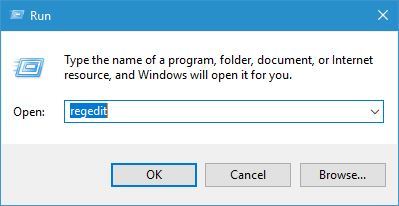
- Press Windows Key + R and enter regedit. Click OK or press Enter.
- When Registry Editor opens, navigate to HKEY_CURRENT_USER\Software\Classes\CLSID key in the left panel.
- In the right panel locate System.IsPinnedToNameSpaceTree DWORD and change its value to 0.
- After that, close Registry Editor and check if Homegroup icon is removed.
If you have Homegroup icon appearing on your Desktop, you can also remove it by using Registry Editor. To do that, simply follow these steps:
How to remove or delete Homegroup.
How do I remove a homegroup set up by an now dead computer. Non of the current computers are joined to it.
Original title: Homegroup removal
Replies (11)
* Please try a lower page number.
* Please enter only numbers.
* Please try a lower page number.
* Please enter only numbers.
![]()
Thank you for posting your query in Microsoft Community.
Sorry for the inconvenience caused.
Homegroups can’t be deleted, but you can make one go away by having all the PCs that belong to it leave. Here’s how to leave a homegroup
please refer to the article Home Group problems in Windows and refer to the section I cant delete Home group
Note: Articles for Windows 8.1 also applies to Windows 10
Hope this helps.
Please get back to us with the updated status and we will be glad to help you further.
2 people found this reply helpful
Was this reply helpful?
Sorry this didn’t help.
Great! Thanks for your feedback.
How satisfied are you with this reply?
Thanks for your feedback, it helps us improve the site.
How satisfied are you with this reply?
Thanks for your feedback.
Thanks. I had already done that. But I want a homegroup and I can only join the former group for which I know the password. Because the computer which set this up is no more when I try to join the only option offered is to join that group. However inputting the password results in no action just a long delay whilst the computers try to find the originator which no longer exists.
1 person found this reply helpful
Was this reply helpful?
Sorry this didn’t help.
Great! Thanks for your feedback.
How satisfied are you with this reply?
Thanks for your feedback, it helps us improve the site.
How satisfied are you with this reply?
Thanks for your feedback.
The former group must be left from any and all your other computers first not just the one that set it up. Even if you no longer have one or more of the computers, you must leave the homegroup on all the ones that you still have. Then reboot all the computers (important) and setup a new homegroup on only one—preferably the newest one—and join the group from your other computers. Don’t forget that homegroup can only be setup on windows 7, 8 or 10 computers.
Was this reply helpful?
Sorry this didn’t help.
Great! Thanks for your feedback.
How satisfied are you with this reply?
Thanks for your feedback, it helps us improve the site.
How satisfied are you with this reply?
Thanks for your feedback.
I did all of that and the computer I wish to use as the homegroup base then allowed me to set up a new homegroup and provided a password for it (different from the one for the old group). However when I tried to join this group on the other two machines they seem to be trying to join the old group because the new password was not requested and the same behaviour was started.
The «first» computer then reported the existence of the old homegroup and tried to join that.
Was this reply helpful?
Sorry this didn’t help.
Great! Thanks for your feedback.
How satisfied are you with this reply?
Thanks for your feedback, it helps us improve the site.
How satisfied are you with this reply?
Thanks for your feedback.
After spending over 2 hours reading all of the forums and trying all of the suggested remedies, without success) I will try and control my frustration and temper as I write this.
This is beyond ridiculous that Microsoft allows this problem to continue without a simple remedy. The path that Microsoft says to go to, and then delete the files in that folder, does not exist on my computer nor ANY of the computers that are on my home network. All computers get the message that there is a HomeGroup to join, but none of them show a HomeGroup in the menu and all get the same error message when the password is entered to join the existing HomeGroup. (Yes, the password is correct — 100% certain). No changes have been made to any of the computer or network configurations. The only thing that has happened is a new (additional) computer was purchased and I tried to join it to the HomeGroup. Suddenly there is no Homegroup detected on the network, and there is no way to delete what use to be the HomeGroup and no way to create a new HomeGroup.
Microsoft simply gives the same advice that is found in Philippians 2:12 — go work out your own salvation with fear and trembling. It is time to start taking a serious look at Linux.
13 people found this reply helpful
Was this reply helpful?
Sorry this didn’t help.
Great! Thanks for your feedback.
How satisfied are you with this reply?
Thanks for your feedback, it helps us improve the site.
How satisfied are you with this reply?
Thanks for your feedback.
I have to express my agreement with you here MJohns9888 — This Homegroup nonsense was always an ingenious solution to a non-existent problem. I really don’t understand who on earth really needs it or wants it. What’s worse, you used to be able to disable the Homegroup services, but guess what?? They no longer exist in the latest Insider Release of Windows 10. No matter how often I tell my computer that I do NOT WANT to use Homegroup, it persistently just puts it back all by itself!
This is just the tip of the iceberg when it comes to Windows networking. Microsoft has created a labyrinthine mess of arcane settings (advanced sharing settings. ) that nobody really understands (not even their own tech people!) You have to be part alchemist, part wizard and part plain lucky to actually get it all to work properly. And good luck if you do, because Microsoft might just change all your settings randomly for reasons best known to them!
As an IT professional for the past 26 years I thoroughly resent this unnecessary overcomplication of the networking processes. At least allow us to disable all the nonsense if we don’t want or need it!
My advice is to disable all homegroups, use DHCP, User Accounts and Workgroup Names to configure your network, share what you want to share and be done with it. Good luck!
Password Recovery
How do I remove a computer from a domain that no longer exists? Or unjoin and rejoin the domain without resetting user profile? In this tutorial we’ll show you 3 methods to remove Windows 10 computer from domain. Before getting started, you need to log on to Windows 10 with local administrator account instead of domain account. If you couldn’t remember the password, PCUnlocker can be of help.
Method 1: Remove Windows 10 Computer from Domain Using System Properties
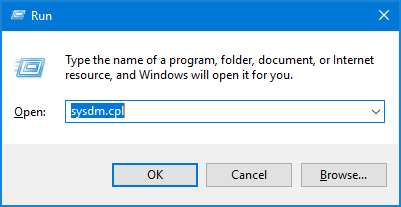
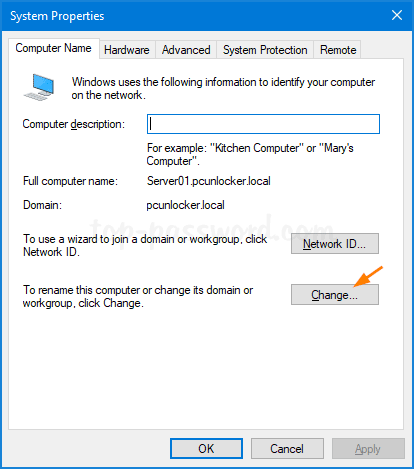
- Press the Windows key + R on the keyboard, then type sysdm.cpl in the Run box and press Enter.
When the System Properties window opens, click on the Change button at the bottom of the “Computer Name” tab.
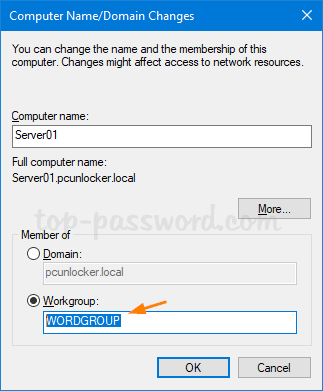
Select the Workgroup radio button, enter a workgroup name you want to be a member of after unjoining the domain. Click OK.
Click OK when prompted.
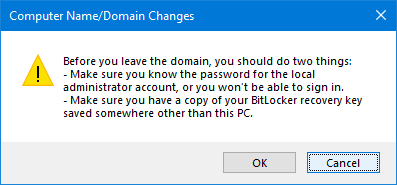
You will be asked to restart the computer so that changes can be applied.
Method 2: Remove Windows 10 Computer from Domain Using Settings App
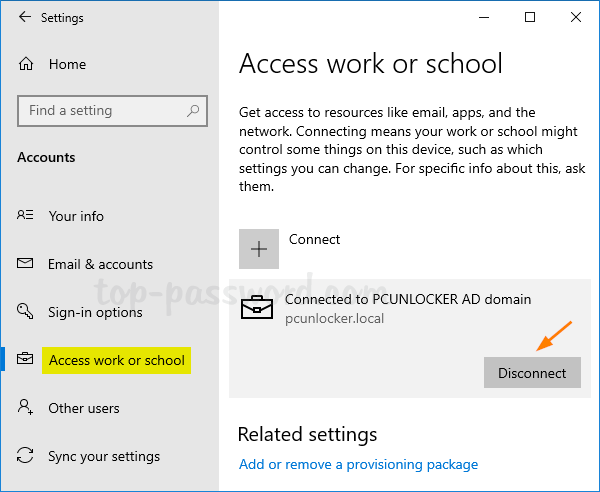
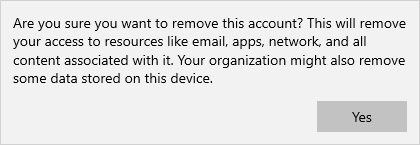
- Open the Settings app and navigate to Accounts ->Access work or school. On the right pane, click the icon labeled Connected to (your domain) AD domain, and then click Disconnect.
Click on Yes to confirm.
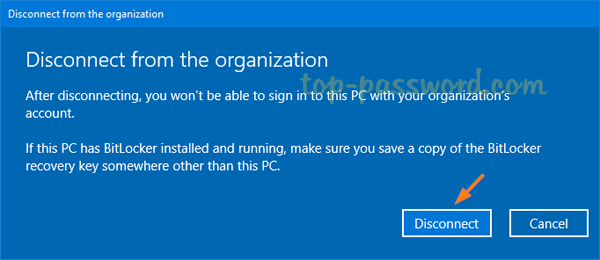
When the “Disconnect from the organization” prompt appears, click on Disconnect.
Method 3: Remove Windows 10 Computer from Domain Using PowerShell
- Open the Windows PowerShell with admin rights, type the following command to unjoin the domain.
Remove-Computer -UnjoinDomaincredential Domain_Name\Administrator -PassThru -Verbose -Restart -Force
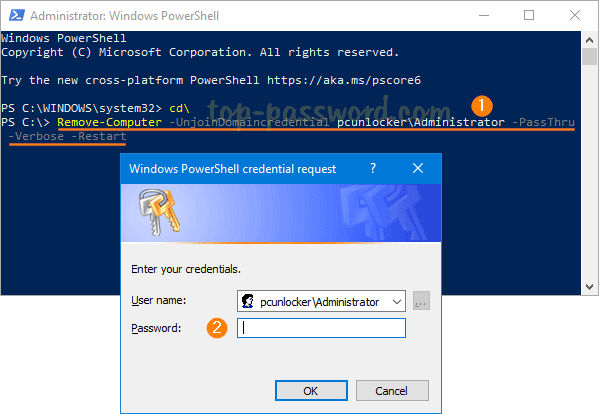
Enter the domain administrator password when prompted, and click OK.
You’ll see a warning: After you leave the domain you will need to know the password of the local administrator account to log onto this computer. Type Y to continue.


