- Стирание и переустановка macOS
- Безопасный downgrade macOS Big Sur (без 1008F)
- Подготовка учетной записи
- Подготовка USB — накопителя
- Создание установщика macOS Catalina
- Загрузка Mac для установки macOS Catalina
- Установка macOS Сatalina
- Заключение
- How to Reset MacOS Password in MacOS Big Sur, Catalina, Mojave
- How to Reset MacOS Password in macOS Big Sur, Catalina, Mojave with Apple ID
- Reset MacBook Mac to Factory Settings on Monterey/Big Sur, Catalina, Mojave, High Sierra, EI Capitan, Yosemite
- Steps for Reset Mac to Factory Settings or Clean Mac for Sell: Any macOS Version
- jaysukh patel
Стирание и переустановка macOS
Можно восстановить заводские настройки Mac. Для этого выполните стирание Mac, а затем переустановите macOS, используя встроенную систему восстановления Mac — режим восстановления macOS.
Важно! При стирании тома вся информация с него удаляется. Перед этим создайте резервную копию необходимых файлов и информации на запасном устройстве.
Ваш компьютер должен быть подключен к интернету. При выполнении переустановки на ноутбуке Mac подключите адаптер питания к сети питания.
Запустите компьютер в режиме восстановления macOS.
На Mac с процессором Apple. Выберите меню Apple

> «Выключить», нажмите и удерживайте кнопку питания, пока не появится надпись «Загрузка параметров запуска», выберите «Параметры», нажмите «Продолжить», затем следуйте инструкциям на экране.
На Mac с процессором Intel. Выберите пункт меню «Apple»
> «Перезагрузить» и сразу же нажмите и удерживайте сочетание клавиш Command-R.
В окне приложения «Восстановление» выберите «Дисковая утилита», затем нажмите «Продолжить».
В боковом меню Дисковой утилиты выберите том, который нужно стереть, и нажмите кнопку «Стереть» на панели инструментов.
Введите имя тома, нажмите меню «Формат» и выберите APFS, а затем нажмите «Стереть группу томов».
Когда операция будет выполнена, нажмите «Готово», затем выберите «Дисковая утилита» > «Завершить Дисковую утилиту».
В окне приложения «Восстановление» выберите «Переустановить macOS Big Sur», нажмите «Продолжить», затем следуйте инструкциям на экране.
Источник
Безопасный downgrade macOS Big Sur (без 1008F)
Недавно, я писал о том, как решить проблему с вечной ошибкой 1008F при попытке откатить macOS Big Sur до macOS Catalina через Internet Recovery. Как показал опрос, есть необходимость рассказать про способ отката macOS Big Sur без ошибки 1008F. Причин для отката может быть масса, и если вы обладатель одной из них, то этот пост для вас. Главное помнить о том, что описанный ниже метод приведет к полному стиранию данных с вашего компьютера Mac. Все далее описанное, происходило с MacBook pro 2019 с чипом безопасности T2 и HDD (256 GB) 2,5 в USB — кейсе.
Подготовка учетной записи
Первое что нам понадобится сделать — отключить функцию найти Mac и выйти из программы бета-тестирования:
Для отключения функции «Найти Mac», перейдите в «Системные настройки» -> Apple ID
2. «Найти Mac» -> Параметры
3. Нажмите кнопку «Выключить», после чего опция должна выглядеть так:
4. Для отключения программы бета-тестирования перейдите по ссылке
5. Войдите в свою учетную запись:
6. Покиньте программу:

После этих нехитрых манипуляций, можно приступать к созданию загрузочного диска.
Подготовка USB — накопителя
1. Подключите внешний USB — накопитель к вашему компьютеру Mac
2. Запустите дисковую утилиту
3. Выберите «Показать все устройства»
Выберите верхний уровень вашего устройства (в моем случае JMicron Tech Media (0 на рис.)) -> Стереть (1 на рис.), задайте требуемые параметры (2, 3, 4 на рис.) и нажмите кнопку «Стереть» (5 на рис.)
Теперь внешний USB — накопитель подготовлен, осталось записать на него установочный образ macOS Catalina.
Создание установщика macOS Catalina
1. Перейдите по ссылке, после чего должен открыться AppStore
2. Нажмите кнопку загрузить, затем в диалоговом окне подтвердите загрузку
3. Дождитесь окончания загрузки
4. После завершения загрузки, появится сообщение об ошибке (это нормально)
5. Требуется закрыть ошибку и перейти в «Программы»
6. На «Установка macOS Catalina» нажмите правую кнопку мыши -> «Показать содержимое пакета» и перейдите в папку «Resources»
7. Откройте терминал и перетащите туда «createinstallmedia»
8. После чего допишите —volume
9. Левой кнопкой мыши, выберите любое пустое место на рабочем столе, нажмите Shift + Command + G и в появившемся окне введите /volumes -> «Перейти»
9. В открывшемся окне, вы должны увидеть устройство (том) bootable (если во время подготовки USB — накопителя вы называли его также как на рис.)
10. Перетащите bootable в терминал. На этом шаге у вас должна получиться следующая команда:
** для скорости, можно скопировать следующую строку: sudo /Applications/Install\ macOS\ Catalina.app/Contents/Resources/createinstallmedia —volume /Volumes/ (не забудьте добавить имя тома). Также вся информация есть в официальной документации.
11. Нажмите Enter -> y -> Enter
12. Дождитесь завершения операции
Поздравляю! Основная часть работы уже проделана. Осталось только загрузиться с подготовленного USB — накопителя.
Загрузка Mac для установки macOS Catalina
1. Выключите Mac, после чего включите его удерживая Command + R, до тех пор пока у вас не откроется экран с утилитой восстановления системы.
2. Перейдите в «Утилиты» -> «Утилита безопасной загрузки» . В моделях до 2018 года, нужно перейти к п.5
3. Введите пароль от macOS

4. Задайте конфигурацию как на рисунке

5. Перезагрузите Mac. Во время перезагрузки, удерживайте клавиши Alt (option)
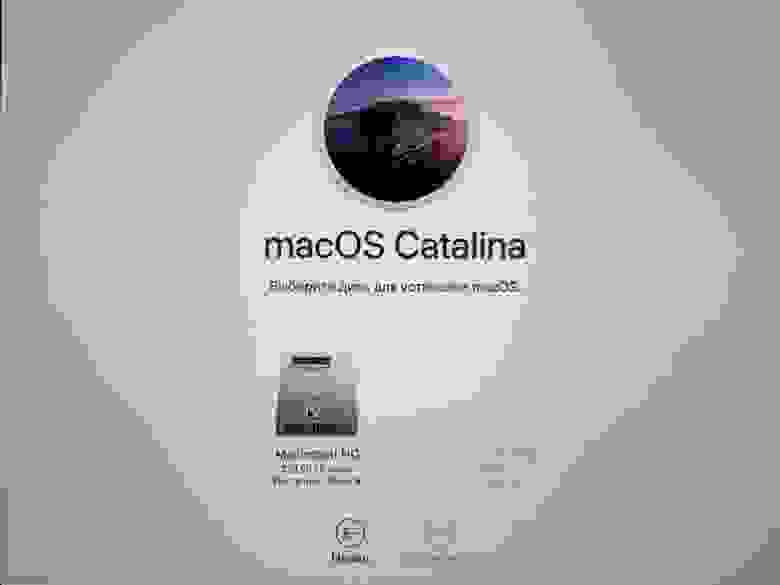
6. Если вы все сделали верно, у вас должен появиться выбор загрузочного диска. Нужно выбрать «Install macOS Catalina»
Установка macOS Сatalina
Процесс установки macOS Catalina происходит в обычном режиме. Единственное что нужно сделать перед этим — отформатировать жесткий диск Mac. В macOS Big Sur появился дополнительный раздел Update, который в macOS Catalina не используется. Перед установкой в дисковой утилите требуется
1. Стереть текущий раздел с данными

2. Выбрать раздел «Update» -> Правая кнопка мыши -> Удалить том APFS
3. После чего можно начинать установку macOS Catalina в обычном режиме
Заключение
Надеюсь, этот пост поможет вам без проблем откатиться на macOS Catalina и избежать встречи с ошибкой 1008F. Процесс отката старался описать максимально детально и просто. Если у вас остались какие-либо вопросы, с радостью на них отвечу.
Желаю вам легких апдейтов, даунгрейдов и вообще поменьше багов и лагов.
Источник
How to Reset MacOS Password in MacOS Big Sur, Catalina, Mojave

Did you forget or lose the password for your Mac’s user account? Thankfully, macOS Big Sur, Catalina, and Mojave make it easy to reset this password, and you can do it in a matter of seconds regardless of what Mac you own, with the help of your Apple ID.
Nowadays, almost everyone who owns Apple devices already has an Apple ID that’s used for making purchases on the App Store, subscribing to services like iCloud, Apple Music, and more. Therefore, there’s a pretty good chance that you have already signed in to your Apple account on the Mac you’re using. As long as you have allowed password reset using Apple ID on your Mac, you will be able to easily reset your Mac’s login password by using the Apple ID.
Read on if you’re interested in learning how to reset a macOS password in macOS Big Sur, Catalina, or Mojave with just your Apple account.
How to Reset MacOS Password in macOS Big Sur, Catalina, Mojave with Apple ID
This method is applicable to all the recent versions of macOS, but simply signing in to your Mac with an Apple account isn’t good enough. Allowing password reset using Apple ID is optional and disabled by default, so you’ll need to make sure that’s enabled to use this feature. Also you’ll lose access to the prior account Keychain without having the password for it, so if you can remember the password that is the better option.
- At the boot screen or login screen of your Mac, click on the question mark icon right next to the password field.
This will reveal your password hint, which may help jog your memory and if so simply enter the password… assuming you’ve forgotten the password, you’ll find the option to reset the password using your Apple ID. Click on the arrow icon to proceed further.
Next, simply type in your Apple ID login details and click on “Reset Password”.
You’ll get a warning that you’ll need to create a new keychain to store the user’s passwords. To access the previous keychain data, you’ll need the old password. Click “OK” to proceed to the next step.
Your Mac will now reboot into the Recovery Assistant where you’ll be able to reset your Mac’s user password. Type in your new preferred password, choose a hint and then click “Next” to complete the procedure.
That’s pretty much all there is to it, you’ll have reset your Mac’s password by simply using your Apple ID.
This is without a doubt the easiest way to reset your Mac’s password, as it doesn’t require you to enter recovery mode and choose boot drive or do anything complicated. However, this method is only applicable if the optional “Allow user to reset password with Apple ID” was checked beforehand. Note this feature existed in prior Mac OS X versions too, but it was referred to as using an iCloud password to login on the Mac.
This trick also works if you repeatedly enter the wrong password, where you’ll be asked to reset a forgotten password also using the Apple ID on the Mac, a feature that has been around a while but it’s more seamlessly integrated into modern macOS versions.
If this didn’t work because you don’t have the Apple ID / iCloud password option available, you’re not totally without hope. Other methods exist, but they’re more complex and you’ll have to boot your machine into macOS utilities by holding Command + R and then use Terminal to reset your Mac’s password using a more complex method that goes back to earlier Mac OS X versions. To be fair, it’s not all that hard considering you’ll only be typing “resetpassword” without the quotes in Terminal to access the password reset menu.
But what if you not only forgot your Mac password, but also forgot your Apple ID password after using Face ID or Touch ID to login to your account for so long? Fortunately, you can reset your Apple account’s password from the web by answering the security questions you set while creating the account.
We hope you were able to reset the password for your Mac’s user account without any issues. What do you think of this option to reset password with Apple ID? Did you use another method? Which approach worked for you? Share your experiences, thoughts, and tips in the comments.
Источник
Reset MacBook Mac to Factory Settings on Monterey/Big Sur, Catalina, Mojave, High Sierra, EI Capitan, Yosemite
Last Updated on Jul 10, 2021
Clear data, Means Reset mac to factory settings very essential action before selling your used Mac running on the latest macOS version, here. You can also follow the same process you have to follow on an older OS X Version (macOS Monterey, Big Sur, Catalina, Yosemite, Mavericks, Lion). No single change for iMac, MacBook, MacBook Pro, MacBook Air, and Mac Mini. Without any third party, Mac cleaner Software or Factory reset Applications, you can erase data, Settings and Saved History on App store, Browsers, Notes delete completely with Mac to factory setting.
we are happy to help you, submit this Form, if your solution is not covered in this article.
Note: Factory reset to make your Mac fresh like a new purchase if you are tolerating the freeze, Corrupted OS X, Auto close apps, Battery Drains, and Network problems.
After Factory reset you can reinstall the latest version of OS X online for your Mac’s Edition, Automatically. You can’t install or choose the option for the downgraded OS X version.
Also, you should take whole system data using Time Machine Backup or save it into the external drive. Don’t lose it. Be happy you don’t need any Bootable ISO DVD or CD.
Steps for Reset Mac to Factory Settings or Clean Mac for Sell: Any macOS Version
Important Note: M1 Mac users can directly Erase all content and settings on Mac like iPhone & iPad.
- Step 1: Open MacOS Utilites on Mac [M1 or Intel].
- Intel Mac: Restart your Mac OS X, That you want factory reset. After a second, Press Command + R from your keyboard, Until you will see the OS X Utility window on Screen.
- M1 Mac: Turn off your Mac and Turn on after 20 seconds, Press and Hold Power button, until your Mac screen show, Volume and Options [Gear icon] > Click on Options.
- Step 2: Next, select Disk Utility and click on the Continue button.
- Step 3: Choose your startup disk and erase that with the Erase option. It will erase your drive completely. Mind that your disk format type must be “Mac OS Extended (Journaled)“.
- Step 4: Set your diskstartupname and again go with the Erase button.
Last, Complete factory reset you need to install the latest OS X, by reinstalling from start-up screen. After Erase the Drive close this Disk Utility window.
When your Mac turns on, Without OS X installed your screen must be Disk Utility.
There, You have to go with Reinstall MacOS > Then Continue.
Follow on-screen easy instructions for OS X install after Reset mac to factory settings. I am sure about that, You never stuck with the stop process in between.
However, you get any problem check your internet connectivity. All is fine, Then share with me on the comment section.
jaysukh patel
Jaysukh Patel is the founder of howtoisolve. Also self Professional Developer, Techno lover mainly for iPhone, iPad, iPod Touch and iOS, Jaysukh is one of responsible person in his family. Contact On: [email protected] [OR] [email protected]
Источник


