- How to Share a Printer in Windows 10
- Sharing Printers over the Network in Windows 10
- Connect to a Windows 10 Shared Printer
- Conclusion
- Share your network printer
- Share the printer on the primary PC
- Connect the shared printer to another PC
- Set up Sharing settings
- Find your PC name
- How to Turn On or Off File and Printer Sharing in Windows 10
- Turn On or Off File and Printer Sharing in Windows 10
- 1] Enable File and Printer Sharing through Control Panel
- 2] Turn On File and Printer Sharing using Command Prompt
- 3] Enable or Disable File and Printer Sharing via PowerShell
How to Share a Printer in Windows 10

In Windows 10, you can take a printer, plug it into one computer, and then print to it from another computer. It’s all made possible because of network printer sharing. We covered this before in our article on sharing printers in Windows 7, but some of the steps and screens have changed slightly in Windows 10. Read on for more details.
Sharing Printers over the Network in Windows 10
Before you can share a printer, it must first be set up, connected and powered on. Click Start > Settings > Devices, then open the Devices and Printers link. Right-click your printer, then click Printer properties.
Click Start > Settings > Devices, then open the Devices and Printers link. Right-click your printer, then click Printer properties.

Select the Sharing tab then check the box to share your printer.
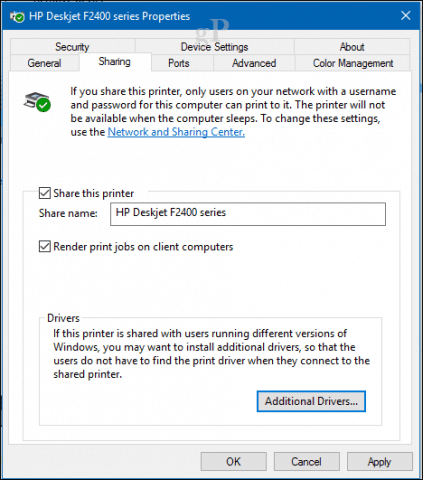
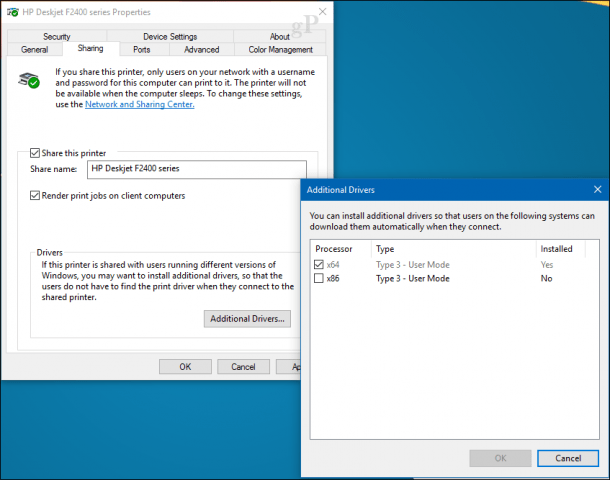
Users should take into account, if you are sharing a printer with multiple devices running a mixture of Windows client architectures – 32 or 64 bit -, you should enable the “Render print jobs on client computers” option. This will ensure other users can easily install the printer when connecting over the network.
Connect to a Windows 10 Shared Printer
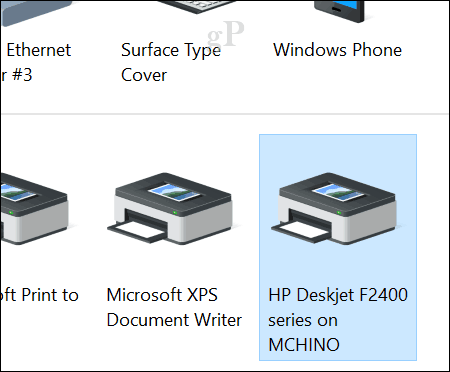
After setting up your shared printer, you can connect to it multiple ways. The first method is from within Devices and Printer. Click the Add Printer button, then click the link, The printer that I want isn’t listed. Choose the Select a shared printer by name radio box then browse to the printer on your network then click open.

You will be prompted to install the driver. Click Next to complete the installation of the printer.

That’s it! The printer will now show up in Devices and printers as a local device.
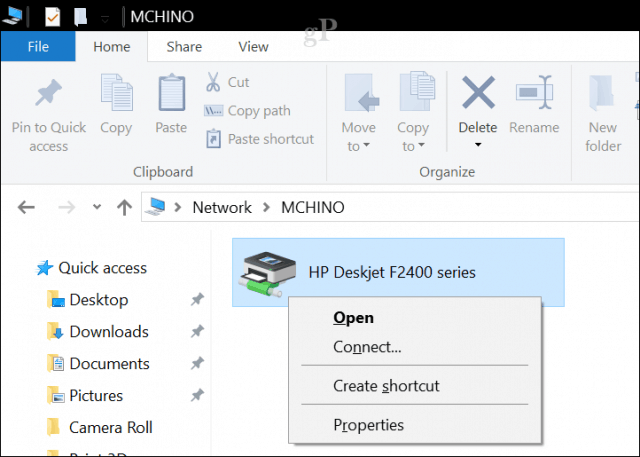
Another way you can connect to a shared network printer is from within File Explorer. Open the Network folder, browse the computer containing the shared printer, right-click it then click Connect.
Conclusion
And there you have it. Sharing printers over a Windows 10 network is a great way to hook up multiple devices to the same printer. This lets you print files and documents without emailing them between devices. This is just one of the ways you can easily share files, storage, and printers in Windows 10.
Have a question about printer shares on the network? Ask in the comments below or visit our Windows 10 forum.
Share your network printer
In Windows 10, you can share your printer with many PCs on your network. To share a printer from the PC that the printer is connected to (the primary PC) with secondary PCs that the printer is not connected to, you must set up sharing settings for the printer, connect the printer to the primary PC (either wirelessly or by using a USB cable), and then turn on the printer. Also make sure the primary PC is turned on, connected to the printer, and connected to the network.
Note: When sharing a printer, make sure that sharing settings are set up on the primary and secondary PCs. Also, make sure you know the name of the primary PC. For more info, see the Set up Sharing settings and Find your PC name sections at the end of this topic.
Share the printer on the primary PC
There are two ways to share your printer: using Settings or Control Panel.
Share your printer using Settings
Select the Start button, then select Settings > Devices > Printers & scanners.
Choose the printer you want to share, then select Manage.
Select Printer Properties, then choose the Sharing tab.
On the Sharing tab, select Share this printer.
If you want, edit the share name of the printer. You’ll use this name to connect to the printer from a secondary PC.
Share your printer using Control Panel
In the search box on the taskbar, type control panel and then select Control Panel.
Under Hardware and Sound, select View devices and printers.
Select and hold (or right-click) the printer you want to share, select Printer properties, and then choose the Sharing tab.
On the Sharing tab, select Share this printer.
If you want, edit the share name of the printer. You’ll use this name to connect to the printer from a secondary PC.
Select the Start button, then select Settings > Devices > Printers & scanners.
Choose the printer you want to share, then select Manage.
Select Printer Properties, then choose the Sharing tab.
On the Sharing tab, select Share this printer.
If you want, edit the Share name of the printer. You’ll use this name to connect to the printer from a secondary PC.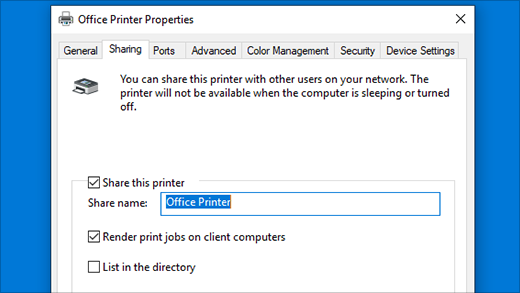
In the search box on the taskbar, type control panel and then select Control Panel.
Under Hardware and Sound, select View devices and printers.
Select and hold (or right-click) the printer you want to share, select Printer properties, and then choose the Sharing tab.
On the Sharing tab, select Share this printer.
If you want, edit the share name of the printer. You’ll use this name to connect to the printer from a secondary PC.
Connect the shared printer to another PC
There are two ways to connect a shared printer to another PC: using Settings or Control Panel.
Select the Start button, then select Settings > Devices > Printers & scanners.
Under Add printers & scanners, select Add a printer or scanner.
Choose the printer you want, and then select Add Device.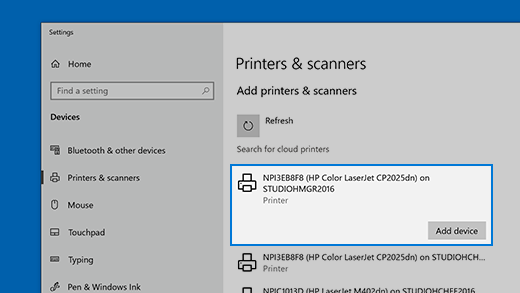
If you don’t see the printer you want, select The printer that I want isn’t listed.
In the Add printer dialog box, select Select a shared printer by name, and then enter the computer or device name of the primary PC and the share name of the printer using one of these formats:
When prompted to install the printer driver, select Next to complete the installation.
For more info about the computer or device name, see the Find your PC name section in this topic. By default, you need the user name and password of the primary PC to access the printer.
In the search box on the taskbar, type control panel and then select Control Panel.
Under Hardware and Sound, select View devices and printers, and then select Add a printer.
Select the printer you want, select Next. When prompted, install the printer driver.
If you don’t see the printer you want, select The printer that I want isn’t listed.
In the Add a device dialog box, select Select a shared printer by name, and then enter the computer or device name of the primary PC and the share name of the printer using one of these formats:
When prompted to install the printer driver, select Next to complete the installation.
For more info about the computer or device name, see the Find your PC name section in this topic. By default, you need the user name and password of the primary PC to access the printer.
Set up Sharing settings
The settings you use to share devices is often turned on by default. If not, follow the steps in this section to turn settings on using settings or Control Panel.
Select the Start button, then select Settings > Network & Internet > Wi-Fi.
Under Related settings, select Change advanced sharing options.
In the Advanced sharing settings dialog box, expand the Private section. Next, under Network discovery, select Turn on network discovery.
Under File and printer sharing, select Turn on file and printer sharing.
In the search box on the taskbar, type control panel and then select Control Panel.
Select Network and Internet > Network and Sharing Center > Change advanced sharing settings.
In the Advanced sharing settings dialog box, expand the Private section. Next, under Network discovery, select Turn on network discovery.
Under File and printer sharing, select Turn on file and printer sharing.
Find your PC name
You’ll need the name of your primary PC, also called the computer name or device name, to connect the secondary PC to the printer.
In the search box on the taskbar, type computer name.
Select View your PC name.
Under Device name, you’ll see the PC (computer) name.
In the search box on the taskbar, type control panel and then select Control Panel.
Select System and Security > System > See the name of this computer.
Under Computer name, you’ll see the PC (computer) name.
How to Turn On or Off File and Printer Sharing in Windows 10
Windows 10 is one of the series of operating systems developed by Microsoft. Network sharing and communication of one system with another has always been an element of great priority in Microsoft operating systems. Out of various sharing features, File and Printer Sharing is quite popular among the users. In this feature, file sharing allows the exchange of files and data between networks, and print sharing allows one user to send print jobs from one network to the other network’s attached printer. This post will guide you on how to turn on or off file and printer sharing in Windows 10.
It is always recommended by Microsoft to turn off file and print sharing features to protect the files from getting shared automatically through the wireless network. These features are also essential and make lengthy tasks easy but allowing the systems to access each other’s data and send commands.
Turn On or Off File and Printer Sharing in Windows 10
File sharing helps the other user connected through network sharing on the same connection to access, read and edit the files of the other user. Print sharing allows the users connected on the same network to send print jobs from their system to your printer. Users may also wish to turn off this feature when connected to public networks for security purposes.
Before you turn the feature On, make sure the File and Printer Sharing forMicrosoft option is enabled in the Networks adapter properties window.
- To do so, open the Control Panel window first.
- Set the View by as Category
- Then go to Network and Internet >Network and Sharing Center >Change adapter settings.
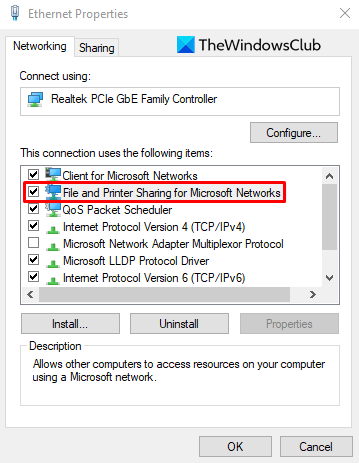
- Right-click on your network adapter which you want to enable or disable and then select the Properties option from the context menu.
- On the Networking tab, check the box next to the File and Printer Sharing for Microsoft Networks option.
- Then click on the OK button and close the window.
Now you will need to turn on the file and printer sharing on your system. There are three methods that you can use for turning on and off file and printer sharing in Windows 10:
- Through the Control Panel.
- Using the Command Prompt.
- Via the Windows PowerShell.
Let’s now explain all the methods in detail:
1] Enable File and Printer Sharing through Control Panel
The file and print sharing can be easily accessed and control through the control panel. Follow the below suggestions to continue:
- Open the Control Panel.
- Click Network and Internet.
- Select Network and Sharing Center.
- Then click on the Change advanced sharing settings option.
- If you want to enable this option, go to the File and printer sharing section and check the Turn on file and printer sharing box. And check the Turn off file and printer sharing box to disable the option.
Let’s now see the above steps in details:
To get it started, open the Control Panel first. Once it opens, make sure that View by is set as Category.
Now inside the Control Panel, go to Network and Internet.
Further, choose Network and Sharing Center. The Network and Sharing Center window will have several options out of which you have to select Change advanced sharing settings.
The Advanced Sharing Settings window will appear on your screen with Network discovery and File and printer sharing options as shown in the above image. Under the File and printer sharing select Turn on file and printer sharing and Save changes.
Although if this option is already enabled in your device and now you are looking to turn it off then simply check the box next to the Turn off file and printer sharing option. Then click on the Save changes button to apply the settings.
2] Turn On File and Printer Sharing using Command Prompt
The file and printer sharing can also be enabled or disabled using the command prompt. To do so, run Command Prompt as an administrator first.
Inside the elevated Command Prompt window, type the following text code and press the Enter key to enable the file and printer sharing service for all network profiles:
If you want to disable the file and printer sharing, copy and paste the following command and then hit the Enter key:
Now you are ready to go. Check if it is done.
3] Enable or Disable File and Printer Sharing via PowerShell
You can also use your Windows PowerShell application to turn on or off file and printer sharing features.
Now copy and paste the below command line and then hit Enter to execute it. You can run the particular command line for the relevant network profiles:
- For all the network profiles:
- For the Domain network profile:
- For the Private network profile:
- For the Public network profile:
Similarly, if you want to turn this feature off, then run the specific command for the relevant profile:
- For all the network profiles:
- For the Domain network profile:
- For the Private network profile:
- For the Public network profile:
After running the command, now close the PowerShell window.


