- How to start kali linux
- System Requirements
- Installation Prerequisites
- Preparing for the Installation
- Kali Linux Installation Procedure
- Language
- Network
- User Accounts
- Clock
- Encrypted LVM
- Proxy Information
- Metapackages
- Boot Information
- Reboot
- Post Installation
- How to start kali linux
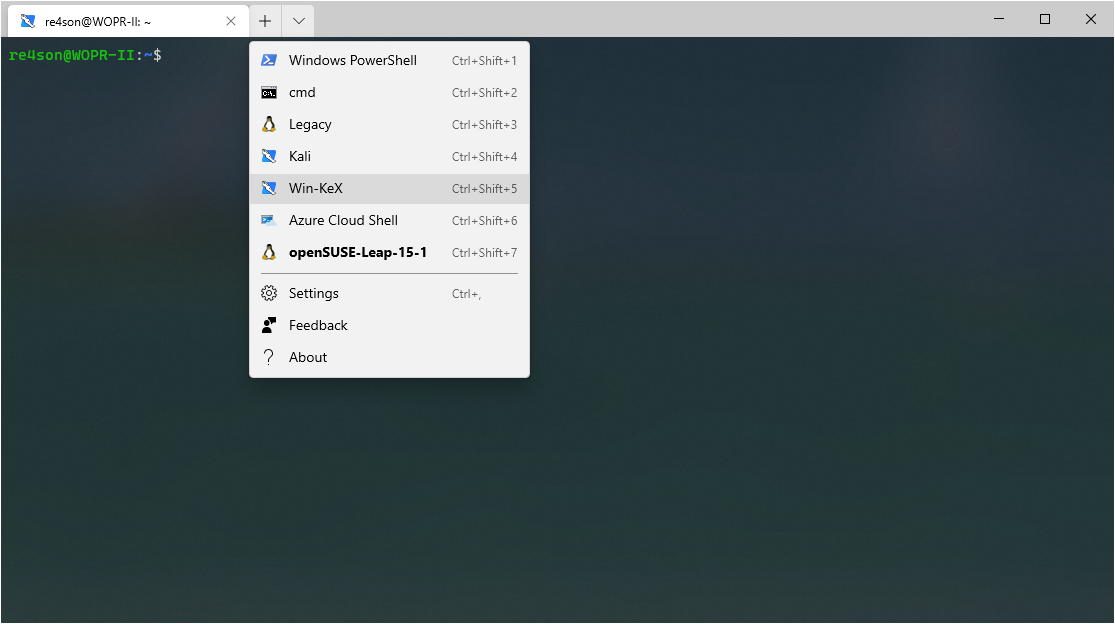
- This page details the steps to install Win-Kex in under 2 minutes.
- Installation
- Prerequisites
- Install Kali Linux in WSL2
- Install Win-KeX
- Run Win-KeX
- Win-KeX supports three modes:
- Optional Steps:
- Enjoy Win-KeX!
- Kali Linux для начинающих
- Получаем токен, используя SQLi
How to start kali linux
Installing Kali Linux (single boot) on your computer is an easy process. This guide will cover the basic install (which can be done on bare metal or guest VM), with the option of encrypting the partition. At times, you may have sensitive data you would prefer to encrypt using Full Disk Encryption (FDE). During the setup process you can initiate an LVM encrypted install on either Hard Disk or USB drives.
First, you’ll need compatible computer hardware. Kali Linux is supported on amd64 (x86_64/64-Bit) and i386 (x86/32-Bit) platforms. Where possible, we would recommend using the amd64 images. The hardware requirements are minimal as listed in the section below, although better hardware will naturally provide better performance. You should be able to use Kali Linux on newer hardware with UEFI and older systems with BIOS.
Our i386 images, by default use a PAE kernel, so you can run them on systems with over 4 GB of RAM.
In our example, we will be installing Kali Linux in a fresh guest VM, without any existing operating systems pre-installed. We will explain other possible scenarios throughout the guide.
System Requirements
The installation requirements for Kali Linux will vary depending on what you would like to install and your setup. For system requirements:
- On the low end, you can set up Kali Linux as a basic Secure Shell (SSH) server with no desktop, using as little as 128 MB of RAM (512 MB recommended) and 2 GB of disk space.
- On the higher end, if you opt to install the default Xfce4 desktop and the kali-linux-default metapackage, you should really aim for at least 2 GB of RAM and 20 GB of disk space.
- When using resource-intensive applications, such as Burp Suite, they recommend at least 8 GB of RAM(and even more if it large web application!) or using simultaneous programs at the same time.
Installation Prerequisites
This guide will make also the following assumptions when installing Kali Linux:
- Using the amd64 installer image.
- CD/DVD drive / USB boot support.
- Single disk to install to.
- Connected to a network (with DHCP & DNS enabled) which has outbound Internet access.
We will be wiping any existing data on the hard disk, so please backup any important information on the device to an external media.
Preparing for the Installation
Download Kali Linux (We recommend the image marked Installer).
Burn The Kali Linux ISO to DVD or image Kali Linux Live to USB drive. (If you cannot, check out the Kali Linux Network Install).
Backup any important information on the device to an external media.
Ensure that your computer is set to boot from CD/DVD/USB in your BIOS/UEFI.
Kali Linux Installation Procedure
- To start your installation, boot with your chosen installation medium. You should be greeted with the Kali Linux Boot screen. Choose either Graphical install or Install (Text-Mode). In this example, we chose the Graphical install.
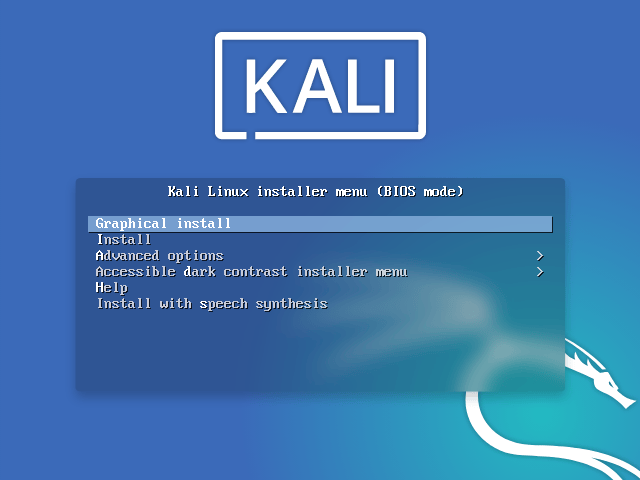
If you’re using the live image instead, you will see another mode, Live, which is also the default boot option. 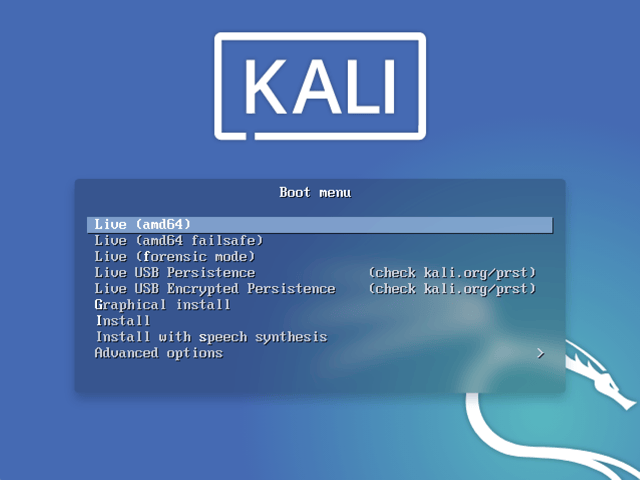
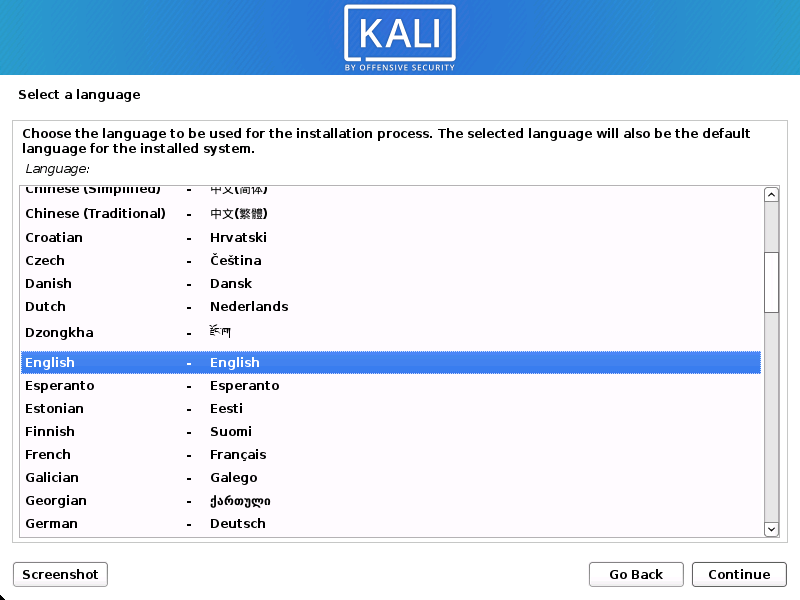
Language
- Select your preferred language. This will be used for both the setup process and once you are using Kali Linux.
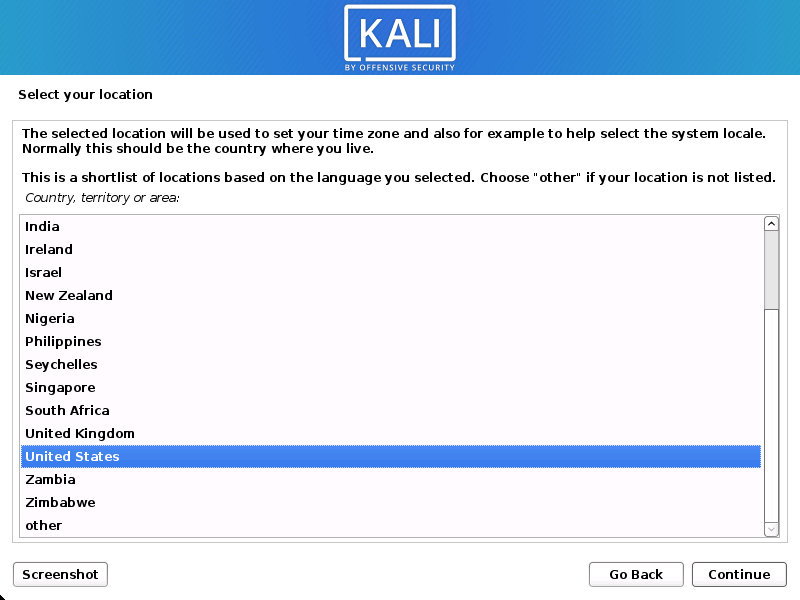
- Specify your geographic location.
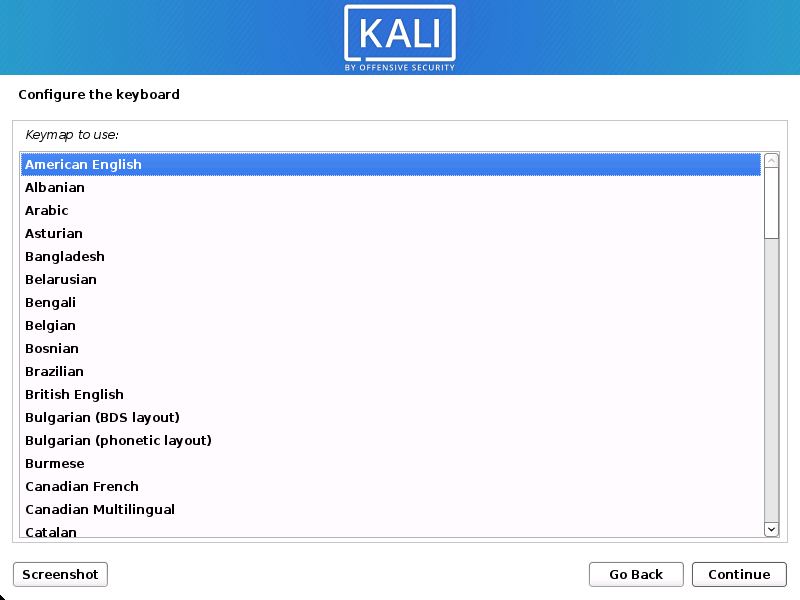
- Select your keyboard layout.
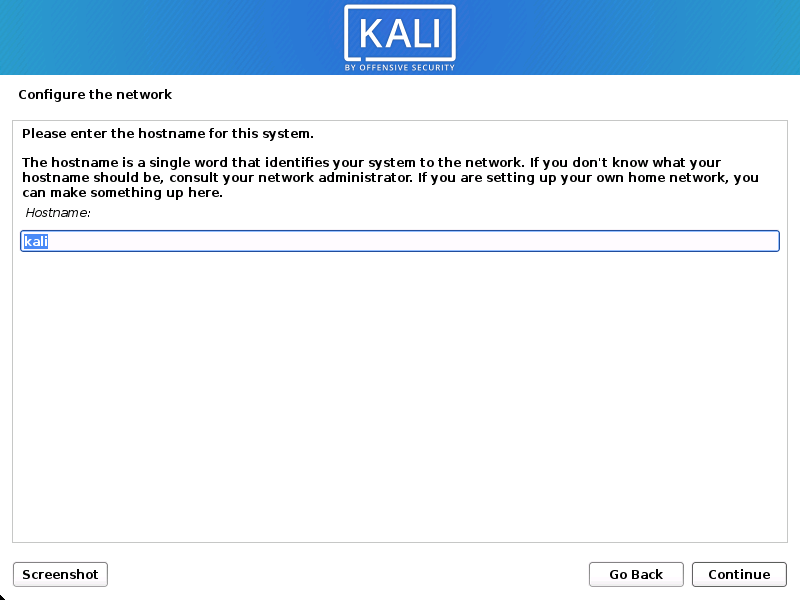
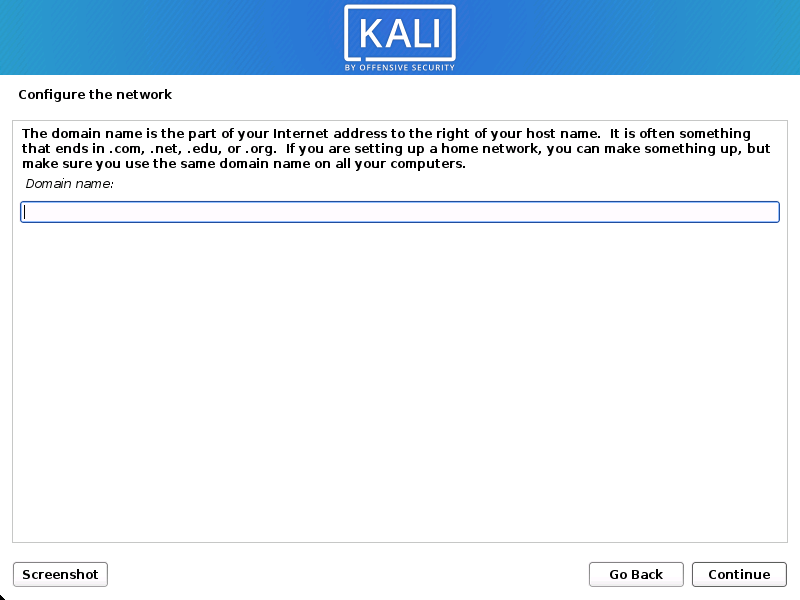
Network
- The setup will now probe your network interfaces, looks for a DHCP service, and then prompt you to enter a hostname for your system. In the example below, we’ve entered kali as our hostname.
If there is no network access with DHCP service detected, you may need to manually configure the network information or do not configure the network at this time.
- If there isn’t a DHCP service running on the network, it will ask you to manually enter the network information after probing for network interfaces, or you can skip.
- If Kali Linux doesn’t detect your NIC, you either need to include the drivers for it when prompted, or generate a custom Kali Linux ISO with them pre-included.
- If the setup detects multiple NICs, it may prompt you which one to use for the install.
- If the chosen NIC is 802.11 based, you will be asked for your wireless network information before being prompted for a hostname.
- You may optionally provide a default domain name for this system to use (values may be pulled in from DHCP or if there is an existing operating systems pre-existing).
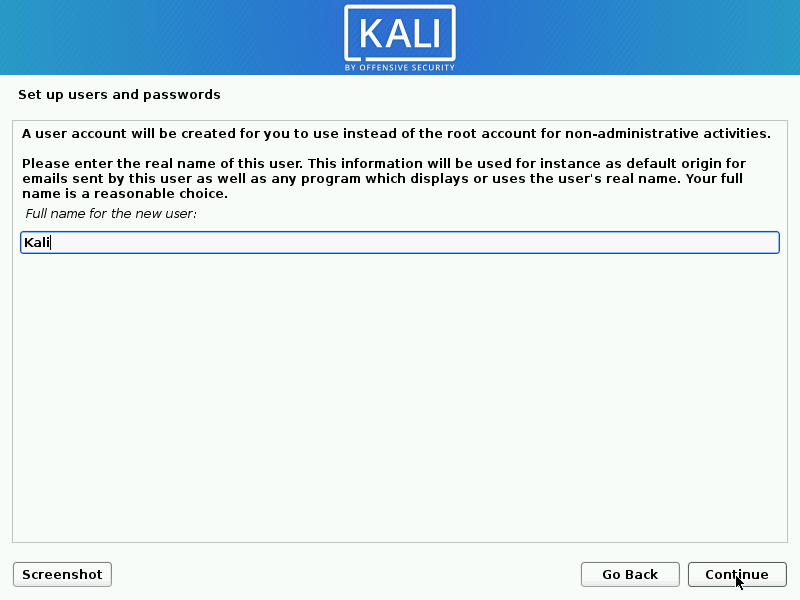
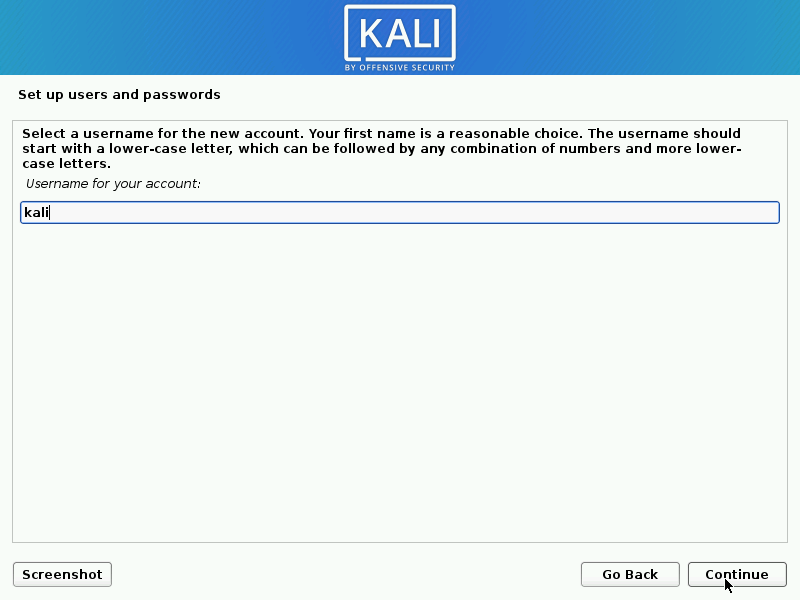
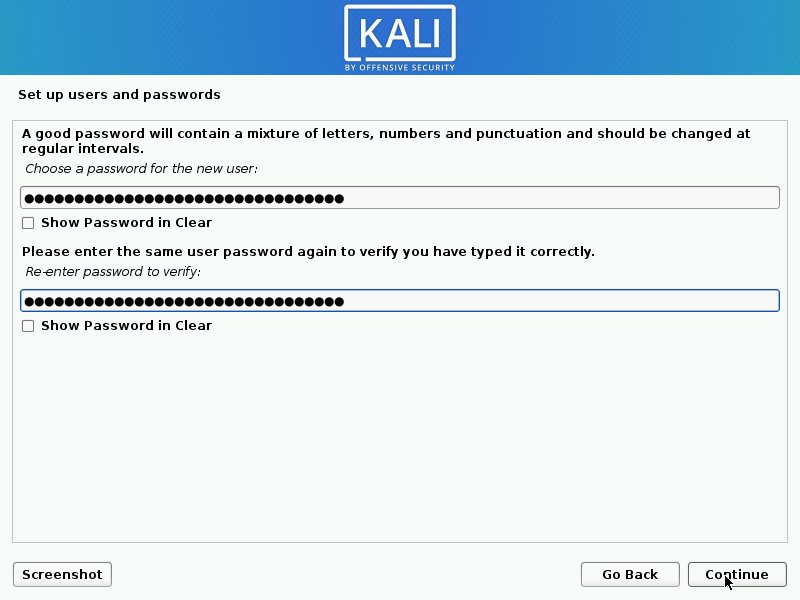
User Accounts
- Next, create the user account for the system (Full name, username and a strong password).
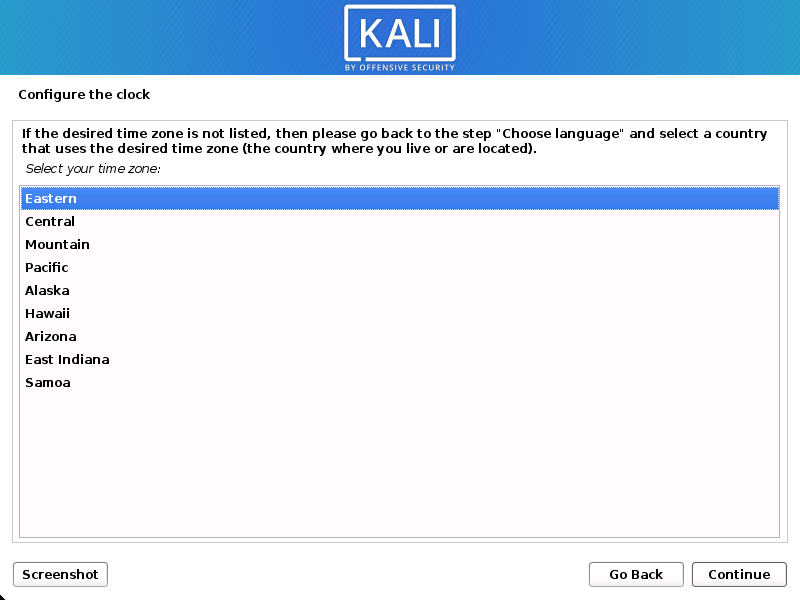
Clock
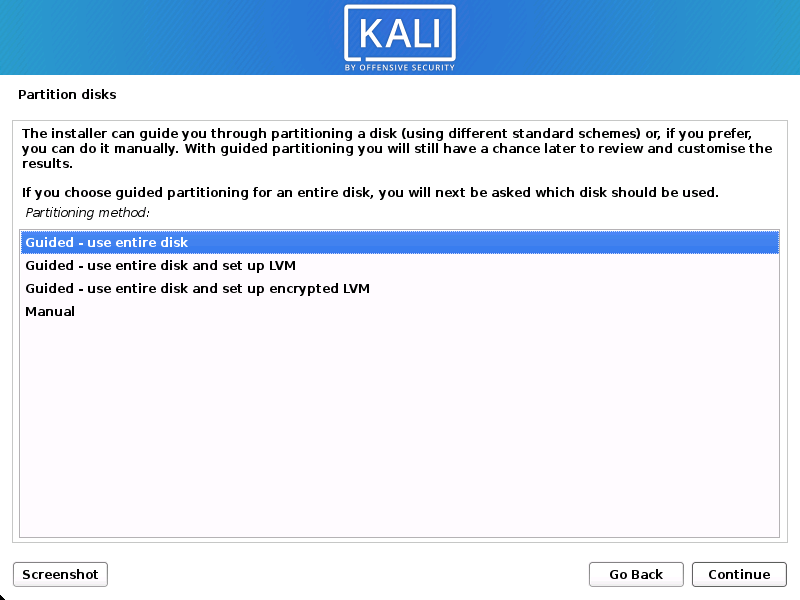
- The installer will now probe your disks and offer you various choices, depending on the setup.
In our guide, we are using a clean disk, so we have four options to pick from. We will select Guided — the entire disk, as this is the single boot installation for Kali Linux, so we do not want any other operating systems installed, so we are happy to wipe the disk.
If there is an pre-existing data on the disk, you will have have an extra option (Guided — use the largest continuous free space) than the example below. This would instruct the setup not to alter any existing data, which is perfect for for dual-booting into another operating system. As this is not the case in this example, it is not visible.
Experienced users can use the “Manual” partitioning method for more granular configuration options, which is covered more in our BTRFS guide.
If you want to encrypt Kali Linux, you can enable Full Disk Encryption (FDE), by selecting Guided — used entire disk and setup encrypted LVM. When selected, later on in the setup (not in this guide) prompt you to enter a password (twice). You will have to enter this password every time you start up Kali Linux.
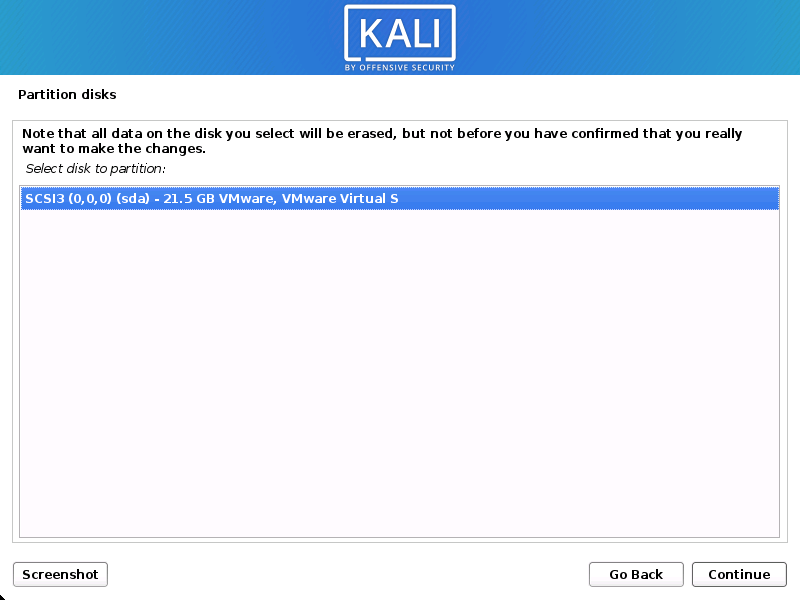
- Select the disk to be partitioned.
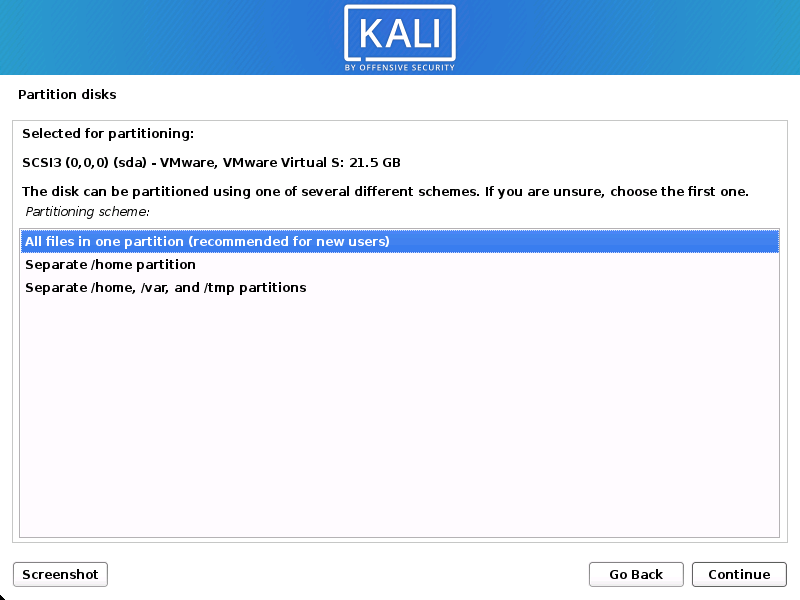
- Depending on your needs, you can choose to keep all your files in a single partition — the default — or to have separate partitions for one or more of the top-level directories.
If you’re not sure which you want, you want “All files in one partition”.
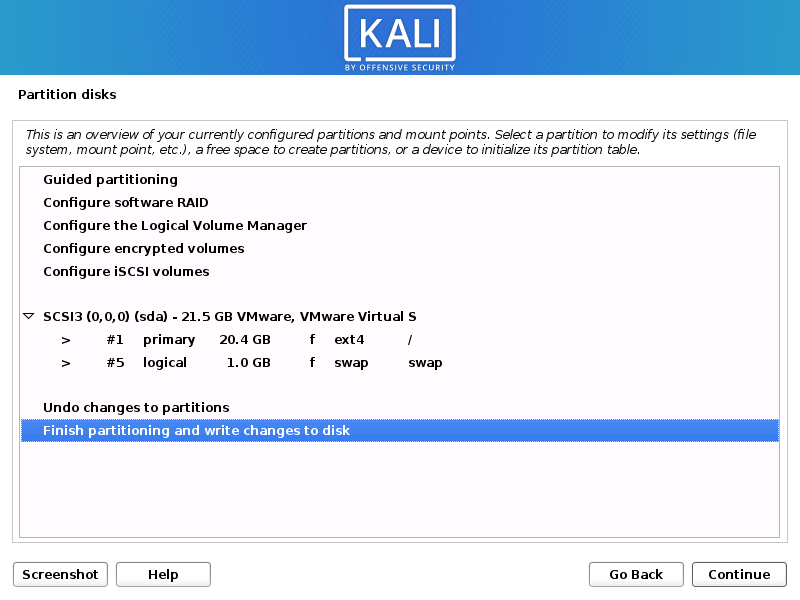
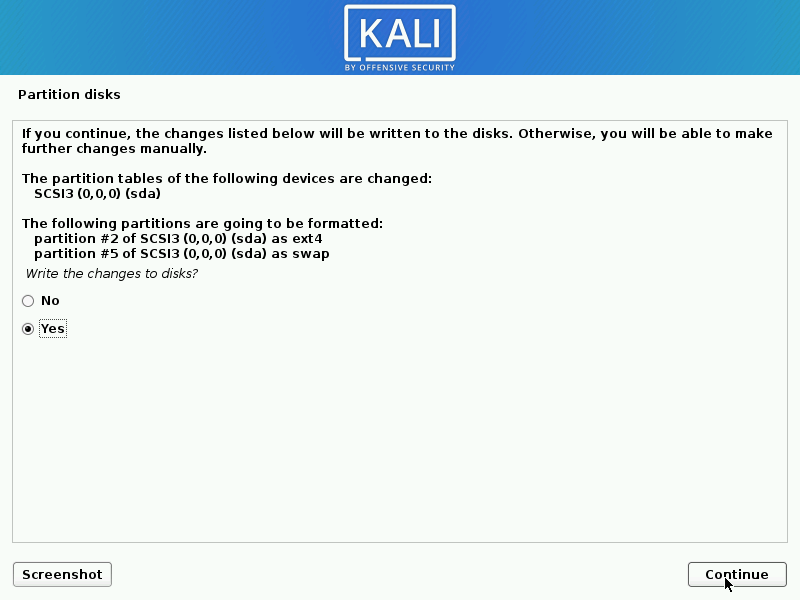
- Next, you’ll have one last chance to review your disk configuration before the installer makes irreversible changes. After you click Continue, the installer will go to work and you’ll have an almost finished installation.
Encrypted LVM
If enabled in the previous step, Kali Linux will now start to perform a secure wipe of the hard disk, before asking you for a LVM password.
Please sure a strong password, else you will have to agree to the warning about a weak passphrase.
This wipe may take “a while” (hours) depending on the size and speed of the drive.
If you wish to risk it, you can skip it.
Proxy Information
- Kali Linux uses a central repository to distribute applications. You’ll need to enter any appropriate proxy information as needed.

Metapackages
If network access was not setup, you will want to continue with setup when prompt.
If you are using the Live image, you will not have the following stage.
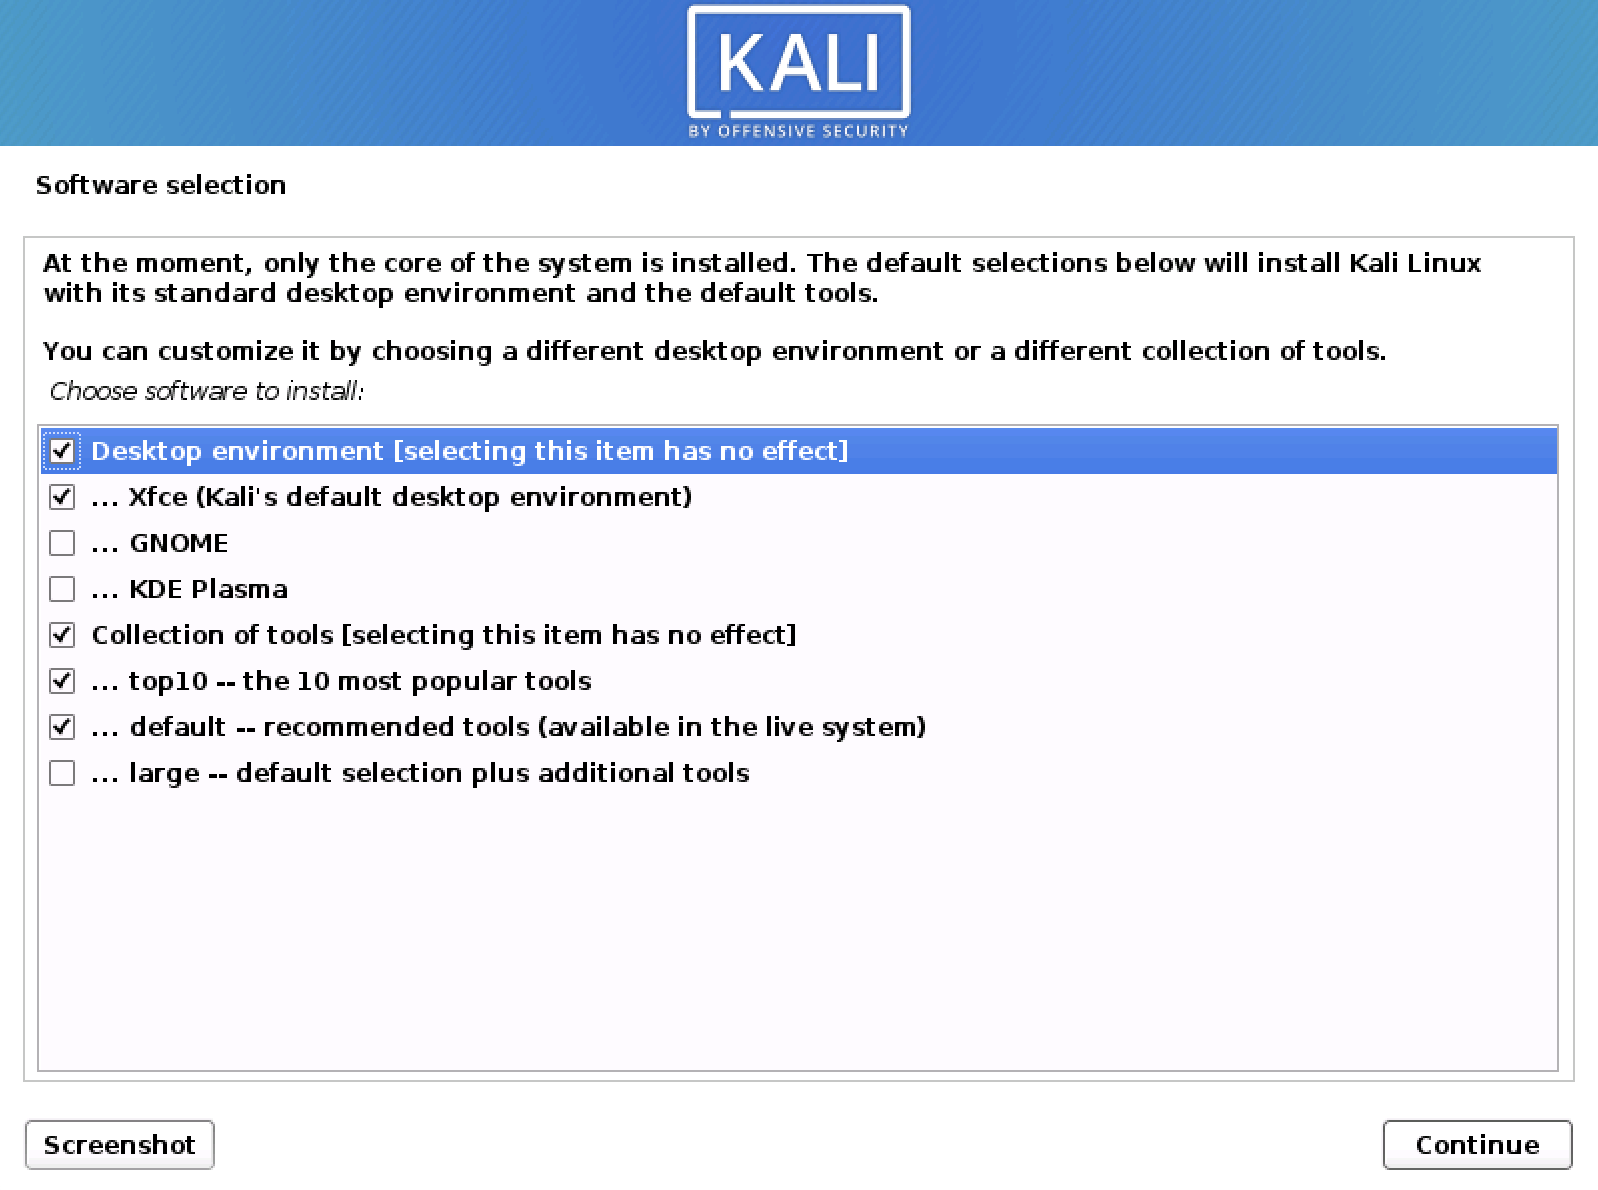
- Next you can select which metapackages you would like to install. The default selections will install a standard Kali Linux system and you don’t really have to change anything here.
Please refer to this guide if you prefer to change the default selections.
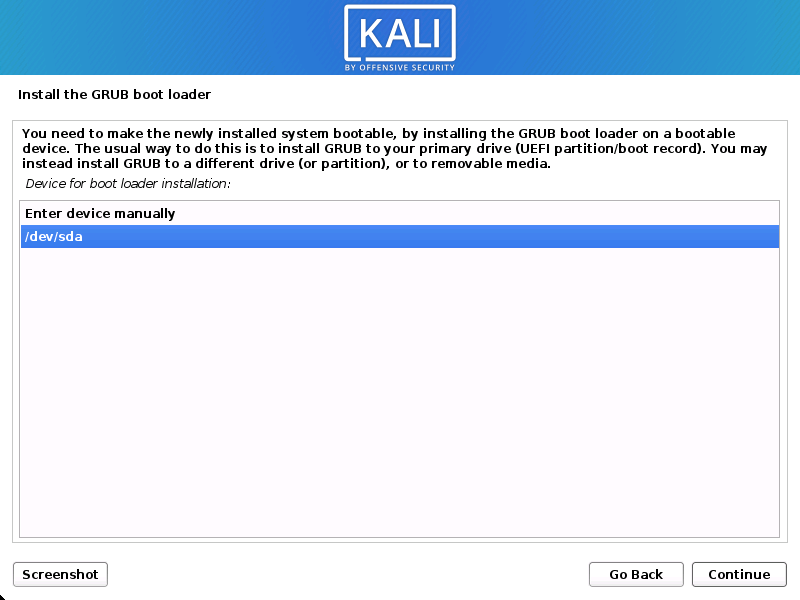
Boot Information
- Next confirm to install the GRUB boot loader.
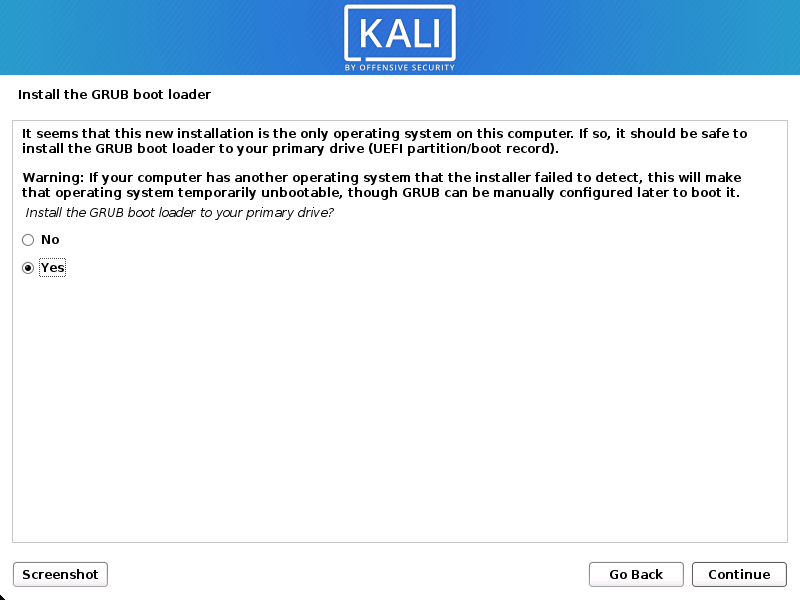
- Select the hard drive to install the GRUB bootloader in (it does not by default select any drive).
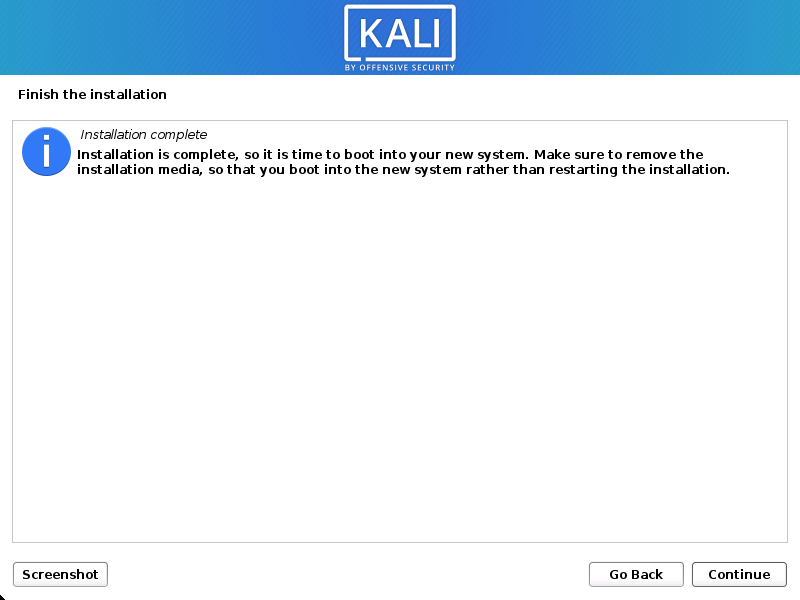
Reboot
- Finally, click Continue to reboot into your new Kali Linux installation.
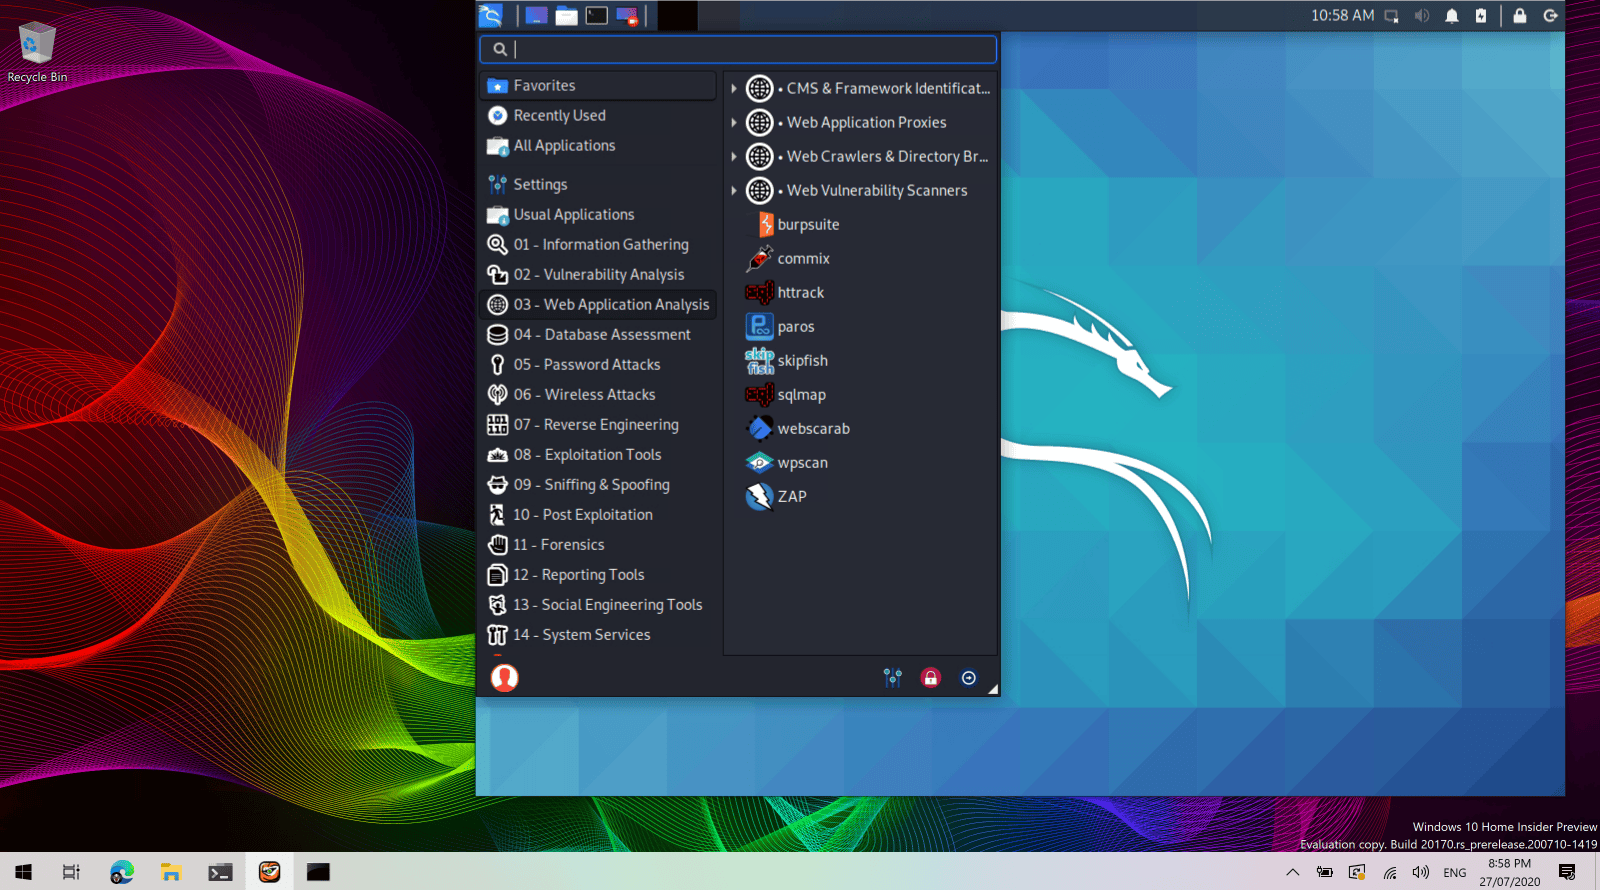
Post Installation
Now that you’ve completed installing Kali Linux, it’s time to customize your system.
The General Use section has more information and you can also find tips on how to get the most out of Kali Linux in our User Forums.
Updated on: 2021-Sep-27
Author: gamb1t
Источник
How to start kali linux
This page details the steps to install Win-Kex in under 2 minutes.
Installation
All installation steps, up to the point where we install Win-Kex, are also explained in the 5 minute video guide by the amazing NetworkChuck:
Prerequisites
- Running Windows 10 version 2004 or higher
- Using Windows Terminal
Install Kali Linux in WSL2
- Open PowerShell as administrator and run:
-
Open PowerShell as administrator and run:
Download and install the WSL2 Linux Kernel from here: https://aka.ms/wsl2kernel
Open PowerShell as administrator and run: wsl —set-default-version 2
Install Kali Linux from the Microsoft Store
Note: to upgrade an existing WSL1 kali-linux installation, type: wsl —set-version kali-linux 2
Run Kali and finish the initial setup
Install Win-KeX
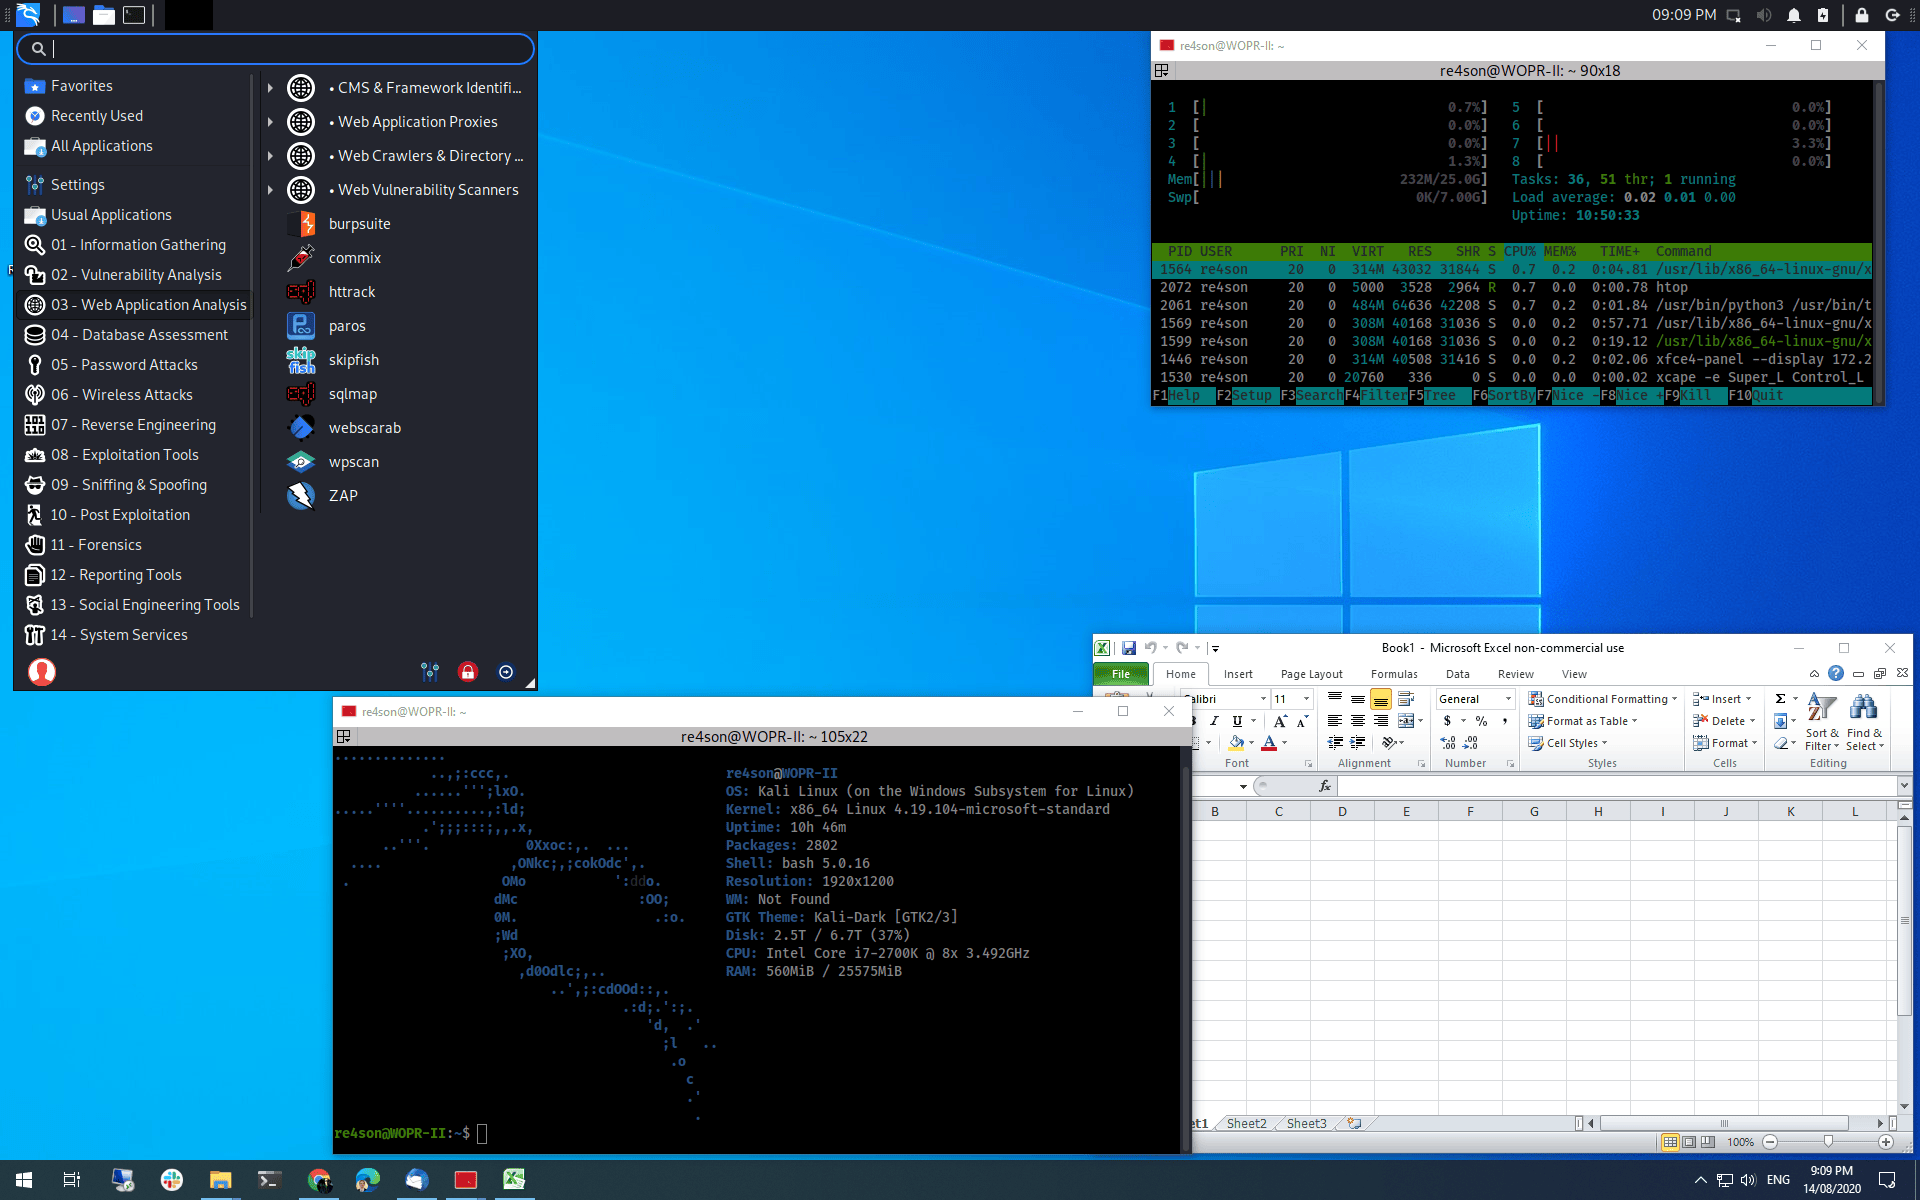
Run Win-KeX
Win-KeX supports three modes:
Window Mode:

To start Win-KeX in Window mode with sound support, run
Refer to the Win-KeX Win usage documentation for further information.
Enhanced Session Mode:
To start Win-KeX in Enhanced Session Mode with sound support and arm workaround, run
Refer to the Win-KeX ESM usage documentation for further information.
Seamless mode:
To start Win-KeX in Seamless mode with sound support, run
Refer to the Win-KeX SL usage documentation for further information.
Optional Steps:
- If you have the space, why not install “Kali with the lot”?: sudo apt install -y kali-linux-large
Choose amongst these options:
Basic Win-KeX in window mode with sound:
Advanced Win-KeX in window mode with sound — Kali icon and start in kali home directory:
Copy the kali-menu.png icon across to your windows picture directory and add the icon and start directory to your WT config:
Basic Win-KeX in seamless mode with sound:
Advanced Win-KeX in seamless mode with sound — Kali icon and start in kali home directory:
Copy the kali-menu.png icon across to your windows picture directory and add the icon and start directory to your WT config:
Basic Win-KeX in ESM mode with sound:
Advanced Win-KeX in ESM mode with sound — Kali icon and start in kali home directory:
Copy the kali-menu.png icon across to your windows picture directory and add the icon and start directory to your WT config:
For more information, ask for help via:
or consult the manpage via:
or join us in the Kali Forums
Enjoy Win-KeX!
Updated on: 2021-Sep-27
Author: Re4sonИсточник
Kali Linux для начинающих
14 декабря будет запущена новая «Test lab» — лаборатория тестирования на проникновение, имитирующая работу реальной корпоративной сети, в которой каждый желающий сможет проверить свои навыки тестирования на проникновение. Поскольку порог вхождения для выполнения всех заданий лаборатории достаточно высокий, мы решили выпустить небольшой гайд для начинающих по работе с Kali Linux 2018.4 — одним из самых популярных пентест-дистрибутивов, разработанного как преемник BackTrack и основного на Debian.
Причина популярности простая – довольно дружелюбный интерфейс и наличие необходимых инструментов для пентеста “из коробки”. Инструменты распределены по категориям, что очень удобно. Имеются варианты установки на АРМ, например, Raspberry Pi 3, а также на мобильные платформы под управлением Android. Я сейчас говорю про Kali NetHunter – тот же Kali, который практически без изменений устанавливается поверх Android и работающий внутри chroot-окружения.
Получаем токен, используя SQLi
По легенде у нас есть некий хост test.lab. Наша задача — определить уязвимости и выполнить их эксплуатацию.
Начнем с разведки — выполним сканирование портов: nmap -v test.lab
Сканирование в режиме по умолчанию результатов не дало, произведем сканирование всех портов: nmap -v -p 1-65535 192.168.60.13
На порту 9447 доступно веб-приложение:
Используя инструмент nikto, определим, что вероятнее всего используется CMS WordPress:
nikto -host test.lab:9447Проверим приложение, используя WPScan: wpscan —url http://test.lab:9447
Нам удалось обнаружить плагин WP Symposium 15.5.1.Для данной версии имеется уязвимость SQL Injection, и также в выводе представлены ссылки на базы с описанием уязвимости, где мы и будем искать информацию.
Мы нашли способ эксплуатировать уязвимость на www.exploit-db.com/exploits/37824
Теперь нужно проверить ее, подставив этот параметр к нашему url.
Используя Burp Suite, посмотрим, какие запросы приходят при обращении к этому адресу:
Скопируем этот GET запрос в файл и передадим его в sqlmap с параметром -r, добавив ключ уязвимого параметра -p “size” и —dbs для нахождения баз данных.
sqlmap -r qwe -p “size” —dbsВ итоге мы получили несколько баз. Проверим содержимое базы wordpress_test и найденных таблиц:
sqlmap -r qwe -D wordpress_test —tablesqlmap -r qwe -D wordpress_test -T wp_posts —dump
В таблице wp_post в одной из скрытых записей нам удалось найти токен Y@u-wIn. .
Использование Nemeisida WAF не позволит выполнить эксплуатацию подобной уязвимости.
600 доступных инструментов, которые найдут свое применение у любого — от начинающего до профессионала.
Соблюдайте законодательство и до встречи в Test lab v.12.
Источник