- Linux Ping Command Explained with Examples
- Using ping command in Linux
- Send only N number of packets
- Send ping only for a limited time
- Change the time interval between two pings
- Change the packet size
- DoS attack with Ping flooding aka Ping of Death
- Bonus Tip: Send audible pings
- Troubleshooting Ping command
- No reply for ping
- Destination host unreachable
- Request times out
- How to stop ICMP ping flood attack (DOS) on Linux
- Denial-of-Service Attacks
- What is ping flood attack? Why you should worry?
- Lab Environment
- Example-1: Stop ICMP ping flood attack (IPv4) with iptables
- Example-2: Stop ICMP ping flood attack (IPv6) with iptables
- Example-3: Protect ping flood DOS attack using firewalld (IPv4)
- Example-4: Protect ping flood DOS attack using firewalld (IPv6)
- Conclusion
- References
- Related Posts
- Как отключить/включить ответ ping в Linux
- 1 Отключить/включить постоянный ответ ping (через sysctl)
- 2 Временно отключить/включить ответ ping (через sysctl)
- 3 Временно отключить ответ ping (через брандмауэр/iptables)
- 4 Временно включить ответ ping (через брандмауэр/iptables)
- Бонус
- How to Start and Stop Ping in Linux
- How to Ping in Linux
- How to Stop Ping in Linux
Linux Ping Command Explained with Examples
Ping is one of the most commonly used networking commands in Linux and other operating systems.
Ping is mainly used to check if a remote host is reachable or not. The remote host could be a web server, your router or a system on your local network.
How does ping work? It actually sends small ICMP packets to the remote host and waits for the response. If the host is up, you should see a response.
It’s like the sonar technology used in submarines. The submarines send pulses of audio signal and wait for the echo to return.
So, how do you use Ping in Linux? What are different Ping command options? Let me show you some of the common usages of the Ping command.
Did you know? Ping command is correctly written as PING and it stands for Packet Internet Groper.
Using ping command in Linux
You can use ping command with either the IP address or the hostname/URL.
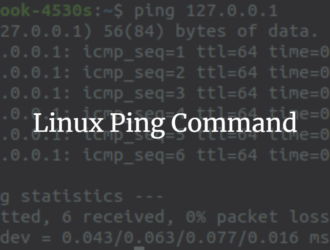
Suppose I ping Google. It will send ICMP packets of size 56 bytes to google.com.
You have to manually stop the ping command else it will keep on running. You can use the Ctrl+C terminal shortcut to stop the ping command in Linux, as I did in the above example.
When you stop the ping command, it presents you with a summary of the transmission. You can see stats like the number of ICMP packets transmitted, received packets, lost packets etc.
Now that you know how to ping in Linux, let’s see some of the other ping command options.
Send only N number of packets
If you don’t want the ping command to run forever without manually stopping it, you can use the -c option.
With this, you can specify the number of packets the ping command should send before stopping automatically.
Send ping only for a limited time
Apart from setting the number of packets to send, you can also set for how long the packets will be sent.
For example, if you want to send ping packets for only 5 seconds, you can use it like this:
Change the time interval between two pings
By default, ping sends the packets at an interval of one second. You can change this time interval with the -i option.
To send the ICMP packets with an interval of 3 seconds, you can use Ping command like this:
You can decrease the time interval between pings as well.
However, if you try to decrease the time interval below 0.2 seconds (200 ms), you’ll see an error:
Don’t worry. You can still ping with an interval less than 200 ms. But to do that, you need to use the ping with root privileges.
Change the packet size
The default ICMP packet size sent by Ping is 56 bytes. This can be changed as well with the help of -s command.
DoS attack with Ping flooding aka Ping of Death
One of the simplest DoS attack is the Ping of Death. In this kind of attack, the attacker sends a large number of ping request in a very short span of time. If the server is not well configured, it will crumble in handling the ping request and the website will go down.
The ping command has built-in ‘feature’ for this. It’s called ping flooding and it can be achieved with the -f option. You’ll need sudo rights to run this option with zero interval.
When you run this command, you’ll see some dots appearing and disappearing in the output. Every single ‘.’ denotes a request whereas the reply is a backspace (this is why dots disappear).
This flood ping option is useful in testing the load capacity of a server.
Bonus Tip: Send audible pings
You can send audible pings with -a option. With this, you’ll hear a beep for every successful ping.
Note that not all Linux distributions are configured to make the beep noise. I tested it on Ubuntu 18.04 and I could hear the beep.
Troubleshooting Ping command
So far what we have seen is the successful examples of the ping command. But that won’t happen all the time. Let’s see some of the common errors you may see and understand the reason for those errors.
No reply for ping
You might notice that certain hosts do not reply to the ping request. It seems like the ping command has hanged because there is no response. The command just stays there, it doesn’t even times out.
If you terminate the ping command, you’ll see some strange statistics.
As you can see, 100 packets were transmitted but no response was received for any of them.
It’s most likely because some servers discard the ICMP packets. This is a security measure to avoid ping flooding.
Destination host unreachable
This error can occurred because of one of the two reasons:
- Either the local system has no route to the remote host
- or the end point router has no route to the remote host
If you only see the ‘destination host unreachable’ error, this means your system couldn’t find a route to the remote host.
On the other hand, if you see the error in the “Reply from ” part of the reply, it means that the packet was sent outside of your network but it couldn’t reach the destination.
Some times servers also block the ICMP traffic that could show this error.
Request times out
This error means that the packets reached the remote server but the reply could not reach your system. The issue could be lost packets or routing error.
Ready to Ping?
I hope this tutorial helped you in understanding the Linux ping command better.
If you have questions or suggestions, please leave a message in the comment section.
Источник
How to stop ICMP ping flood attack (DOS) on Linux
Table of Contents
I really don’t think ping needs any sort of introduction. ping is a network troubleshooting tool that reports whether or not a remote node is reachable. ping sends an ICMP echo request to the remote node that should then reply with an ICMP echo reply. Because ping and ICMP can be used very effectively to map out a network, many network packet filters and firewalls are configured to drop ICMP to provide tighter security.
Besides checking if a node is responding (or other simple connectivity issues), ping also can be used to troubleshoot other network-related matter. But today we plan to discuss a scenario when someone can use to overload the network of a server by sending a flood of ping request.
Denial-of-Service Attacks
DoS attacks are based on the idea of flooding your system with packets to disrupt or seriously degrade your Internet connection, tying up local servers to the extent that legitimate requests can’t be honored or, in the worst case, crashing your system altogether. The two most common results are keeping the system too busy to do anything useful and tying up critical system resources.
You can’t protect against DoS attacks completely. They can take as many different forms as the attacker’s imagination allows. Anything that results in a response from your system, anything that results in your system allocating resources (including logging of the attack), anything that induces a remote site to stop communicating with you—all can be used in a DoS attack.
These attacks usually involve one of several classic patterns, including TCP SYN flooding, ping flooding, UDP flooding, fragmentation bombs, buffer overflows, and ICMP routing redirect bombs.
What is ping flood attack? Why you should worry?
- A ping flood is a denial-of-service attack in which the attacker attempts to overwhelm a targeted device, causing the target to become inaccessible to normal traffic.
- The -f parameter must be used with ping command which causes Linux to send as many ICMP echo requests as possible, which can quickly cause network problems on burdened networks.
- The parameter can be used to create a load that simulates a heavy network or to create an additional load on the target machine.
- Flood ping-output packets as fast as they come back or 100 times per second, whichever is greater.
- It is most successful if the attacker has more bandwidth than the victim
- If the target system is slow enough, it is possible to consume enough of its CPU cycles for a user to notice a significant slowdown.
- PING-based Distributed Denial of Service (DDoS) attacks are infamous as they are known to have brought down high profile web sites such as Ebay, ETrade and Yahoo. They have also been used in an attempt to bring down the entire Internet by attacking its DNS root servers.
- This Ping Flood Attack is a Layer-3 attack in the TCP/IP suite. One of the earlier work shows that a simple Ping attack can make the target host busy in processing the ping requests consuming 100% of the CPU utilization
Here we are sending ping flood from server1 to server2 : 
As you can see that there is
0% packet loss and almost 12935 packets were transmitted in 658ms.
Lab Environment
I have two virtual machines running with CentOS 7 and 8 Linux. The hostname of these VMs are server-1 and server-2 . In all my examples I will use server-1 as my client and server-2 as my server so all the iptables or firewalld related changes must be done on the server node i.e. server-2 for us.
Example-1: Stop ICMP ping flood attack (IPv4) with iptables
It is always recommended to BLOCK all incoming requests to your Linux Server and only allow requests as per the ALLOW rules. But before your DROP all the incoming requests, at least allow port 22 so that you are able to connect to your server using SSH.
Now DROP all the incoming request via INPUT chain:
List the applied rules:
So we have to apply hash limit to ICMP type 8 which is for Echo Request.
List the applied rules:
Now attempt to send ping flood from server-1 to server-2 : 
So we have not completely blocked ICMP packets, instead just applied hash limit to avoid ping flood attacks which is why there is 84% packet loss instead of 100%.
Example-2: Stop ICMP ping flood attack (IPv6) with iptables
Similar to IPv4 we can also control ICMP Echo request by applying a hash limit for IPv6 traffic. To limit ping flood for IPv6 packets you must apply iptables rule to ICMPv6 type 128:
First of all DROP all incoming requests:
Now apply hash limit to ICMPv6 type 128 using the following rule:
List this applied rules for IPv6:
Verify if ICMPv6 Echo Request is limited for ping flood for this node where we have applied the iptables rule: 
Our 78% of ping6 packets were dropped so our hash limit is working as expected.
Example-3: Protect ping flood DOS attack using firewalld (IPv4)
In this example we will use firewalld to control the ping flood based DOS attack. There are different ways you can use firewalld, we will apply a direct rule which is sort of one-to-one mapping to iptables.
Activate the changes:
You can list the applied direct rules using:
Verify if ping flood traffic is blocked by firewalld: 
So 49% of the flood requests are dropped which means our rule is working as expected.
Example-4: Protect ping flood DOS attack using firewalld (IPv6)
Similar to IPv4 we can also limit ping flood requests using firewalld for IPv6. You may add this direct rule in your environment:
Activate the changes:
Currently I don’t have an IPv6 environment with firewalld to test this rule, but if you face any issues then let me know using the comments section.
Conclusion
In this article we explored ICMP i.e. Internet Control Message Protocol and covered the areas related to Ping flood based DOC attacks. ICMP doesn’t use ports. Instead it talks to the Ethernet card at a low level. But ICMP does have types to identify itself. Since we wanted to limit the ICMP Echo request so we have applied our iptables and firewalld rules to limit ICMP and ICMPv6 Echo request type.
References
Related Posts
Didn’t find what you were looking for? Perform a quick search across GoLinuxCloud
If my articles on GoLinuxCloud has helped you, kindly consider buying me a coffee as a token of appreciation.

For any other feedbacks or questions you can either use the comments section or contact me form.
Thank You for your support!!
Источник
Как отключить/включить ответ ping в Linux
Главное меню » Linux » Как отключить/включить ответ ping в Linux
1 Отключить/включить постоянный ответ ping (через sysctl)
1.1 Добавьте следующую строку в «/etc/sysctl.conf» (чтобы включить, измените 1 на 0)
Мы можем использовать следующую команду для достижения этого
1.2 Применить изменение
2 Временно отключить/включить ответ ping (через sysctl)
2.1 Выполните следующую команду, чтобы временно отключить ответ ping (чтобы включить, измените 1 на 0)
2.2 Применить изменение
3 Временно отключить ответ ping (через брандмауэр/iptables)
3.1 Выполните следующую команду, чтобы заблокировать/сбросить ping-трафик
Примечание. Хотя правила iptables будут действовать после перезагрузки в CentOS и RHEL, они не будут действовать после перезагрузки в Debian/Ubuntu/Kali Linux и т. д..
4 Временно включить ответ ping (через брандмауэр/iptables)
4.1 Выполните следующую команду, чтобы включить/разрешить ping-трафик
Примечание. Как и в разделе 3, правила firewall/iptables будут действовать после перезагрузки в CentOS и RHEL, они не будут действовать после перезагрузки в Debian/Ubuntu/Kali Linux и т. д.
Бонус
Еще один способ легко разрешить ответ ping – просто временно отключить iptables/firewall.
Если вы нашли ошибку, пожалуйста, выделите фрагмент текста и нажмите Ctrl+Enter.
Источник
How to Start and Stop Ping in Linux
For those that don’t know, to “ping” is to test the connection between two computers in the form of response time. The lower the number of milliseconds, the higher the connection speed. For Linux users new to the system or those simply seeking a refresher course, read on to learn the step-by-step process for how to both start and stop ping on your Linux computer.
How to Ping in Linux
To ping an external computer using the Linux terminal, just follow these 3 steps:
- First, in order to use the ping command, you need to have a target. After all, you’re testing the response time between your system and another system. This means you will need to enter a URL or IP Address for the system you are trying to ping. To test this, we’ll use www.hivelocity.net.
- After opening a terminal window, you’ll enter the ping command followed by the URL/IP Address you are attempting to contact. For example:
ping www.hivelocity.net
How to Stop Ping in Linux
You can easily stop any currently running command in Linux using the command Ctrl+C. Users familiar with the Windows operating system will recognize this as the “copy” command, however, on Linux, Ctrl+C has historically been used to cancel commands. This can often be a source of confusion for new users.
*Note: Curious how to actually copy and paste in the Linux terminal? Check out our post, How to Copy and Paste in Linux Terminal.
Looking for more information on Linux ? Search our Knowledge Base !
Interested in more articles about Operating Systems ? Navigate to our Categories page using the bar on the left or check out these popular articles:
Popular tags within this category include: Linux , Windows , Apache , CentOS , Debian , Fedora , RedHat , and more.
Don’t see what you’re looking for? Use the search bar at the top to search our entire Knowledge Base.
The Hivelocity Difference
Seeking a better Dedicated Server solution? In the market for Private Cloud or Colocation services? Check out Hivelocity’s extensive list of products for great deals and offers.
With best-in-class customer service, affordable pricing, a wide-range of fully-customizable options, and a network like no other, Hivelocity is the hosting solution you’ve been waiting for.
Unsure which of our services is best for your particular needs? Call or live chat with one of our sales agents today and see the difference Hivelocity can make for you.
Источник


