- How to Disable Windows 10 Update in Every Way
- All solutions to disable Windows 10 update:
- How to Disable Windows 10 Update
- Solution 1. Disable Windows Update Service
- Solution 2. Change the Setting of the Group Policy Editor
- Solution 3. Meter Your Network Connection
- Solution 4. Change the way of Windows 10 Updates Using Registry
- How to Stop Windows 10 Update in Progress in 3 Ways
- How to Stop Windows 10 Update in Progress on Blue Screen
- 1. Stop Windows 10 Automatic Maintenance to Stop UpdateВ
- 2. How to Stop Windows 10 Update in Progress in Services
- 3.В How to Stop Windows Update in Progress in Windows 10 Pro
- People Also Ask
- 1.В How do I stop a Windows Update in Progress?
- 2. What happens if you turn off computer during update?
- 3. What do I do if my computer is stuck updating?
- Bonus Tips: Use Windows 10 Partition MasterВ
How to Disable Windows 10 Update in Every Way
«Every time I try to shut down my computer, I was forced to update my Windows 10. But I really don’t want to update my operating system because the automatic update might take up the system and network resources. Is there anybody who can help me solve this problem and disable Windows 10 update? Thanks in advance.»
All solutions to disable Windows 10 update:
Whenever you are faced with Windows 10’s automatic update notification like:
- Install updates automaticallyВ
- Download Updates but choose when to install them
- Check for updates but let me choose whether to download and install them
What would you do? Here, we have the following solutions.
How to Disable Windows 10 Update
Follow the methods below to disable Windows 10 update correctly.В
Solution 1. Disable Windows Update Service
Understand the limitations of this method. While disabling the automatic update service will temporarily halt any Windows 10 cumulative updates, the service will re-enable itself after a certain amount of time. Here are the directions:
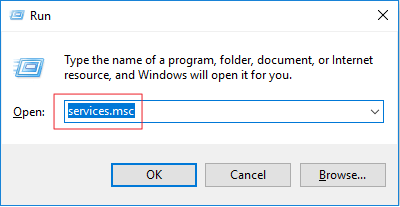
1. Press the Windows logo key + R at the same time to invoke the Run box.
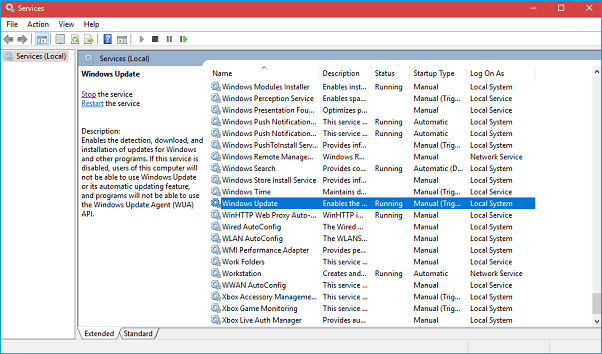
2. Type services.msc and press Enter.
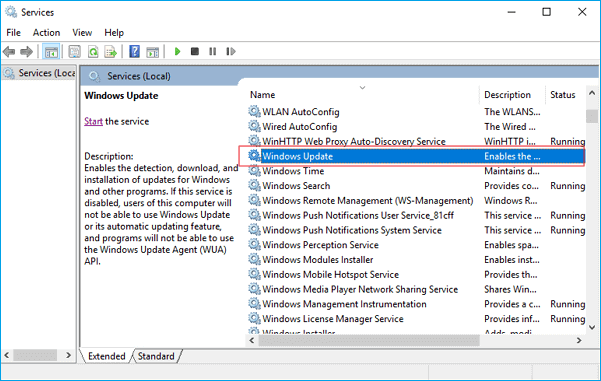
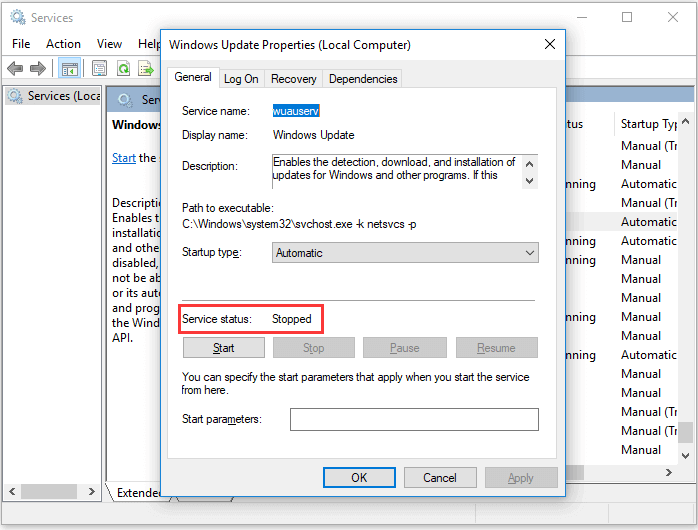
3. Scroll down to Windows Update, and double-click it.
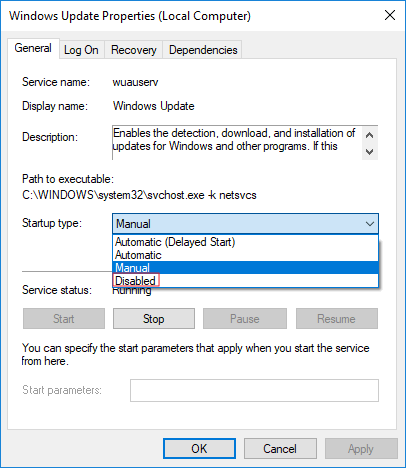
4. In Startup type, select «Disabled». Then click «Apply» and «OK» to save the settings.
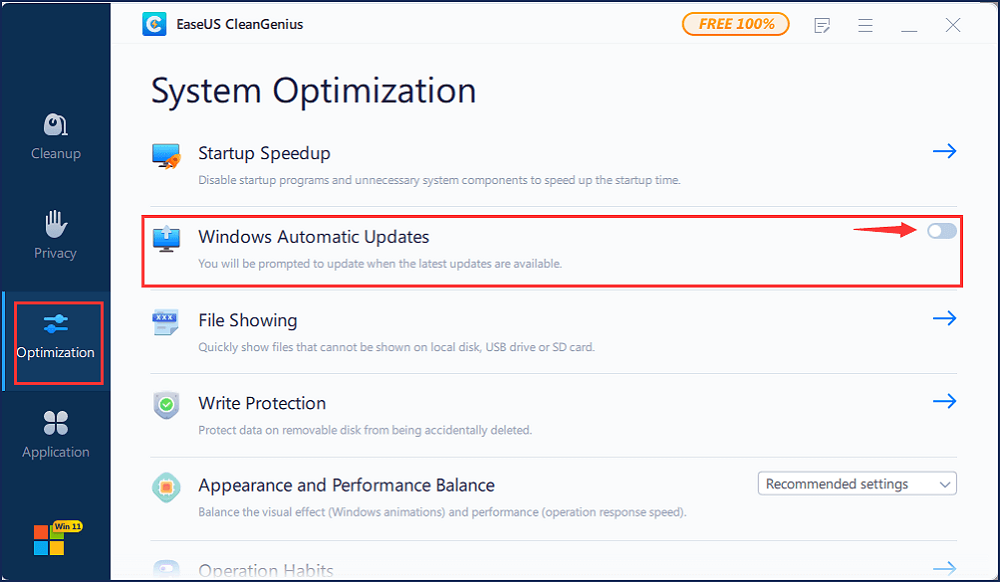
Do you prefer a one-click solution to disable the Windows automatic update feature? If so, get the versatile toolkit — EaseUS Tools M to help you. With it, you can disable/enable Windows Update, repair hard drives, remove/enable write-protection, and more within seconds.
To disable Windows Update:
Step 1. оњљ DOWNLOAD EaseUS Tools M for free and install it on your computer.
Step 2. Launch EaseUS Tools M and go to «System Update Management».
Step 3. The tool will detect the status of the Windows Update service automatically. If Windows Update is currently enabled, click «Disable» to stop the service.
Step 4. If you want to check whether you have disabled the service automatically, go to «Start» > type «Services» > right-click «Services» and choose «Run as administrator».
Step 5. In the list of services, find and right-click «Windows Update» > «Properties». In the «Service status» section, you should see the service has been stopped.
Solution 2. Change the Setting of the Group Policy Editor
The Group Policy feature is not available in the Home edition. So, only when you run Windows 10 Professional, Enterprise, or Education, you can use the Group Policy Editor to change the settings to prevent Windows 10 from automatically updating. The group policy editor will notify you of new updates without automatically installing them.В
- Press the Windows logo key + R then type gpedit.msc and click OK.
- Go to «Computer Configuration» > «Administrative Templates» > «Windows Components» > «Windows Update».
- Double-click «Configure Automatic Updates».
- Select «Disabled» in Configured Automatic Updates on the left, and click Apply and «OK»В to disable the Windows automatic update feature.
Note: If you need to update your Windows version later, you can repeat the steps above, then select Enabled to turn on this feature, so that you can continue to download the updates.
Solution 3. Meter Your Network Connection
Understand that this method won’t work for Ethernet connections. You can only disable automatic updates by using this method on a Wi-Fi connection. If your computer is connected to WiFi, you can try this to stop Windows 10 automatic updates.В
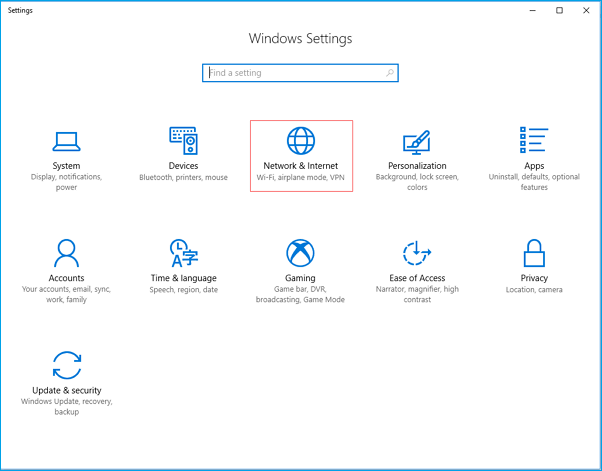
1. Click the Start button at the bottom left on your desktop, then click the «Settings» app.
2. Click «Network & Internet».
3. Click WiF in the left pane, then click the name of your Wi-Fi connection.
4. Click to turn on Set as metered connection.
Solution 4. Change the way of Windows 10 Updates Using Registry
Extra Tips: Editing the registry is risky, and it can cause irreversible damage to your installation if you don’t do it correctly. It’s recommended that you make a full backup of your computer before proceeding. All you need to do is use thisВ backup software to back up your data in three steps:
Support Windows 10/8.1/8/7/Vista/XP
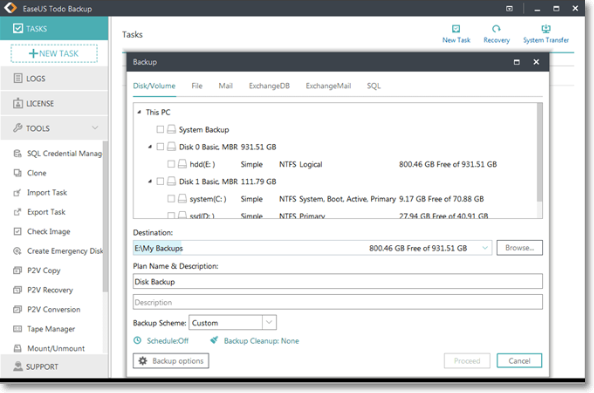
Step 1. Launch EaseUS Todo Backup software and then choose «File Backup», «Disk/partition Backup» or «System Backup» for different backup purpose.
Step 2. Choose the system, disk partition, files or apps that you want to back up. Then select a destination where you want to store the backup file.
Step 3. Click «Proceed» to start the data backup process.
With a backup at hand, now it’s safe to customize a Windows 10 update without receiving any forced updates on your computer. Here’s how to make the change in Registry:
1. Use the Windows key + R keyboard shortcut to open the Run command.
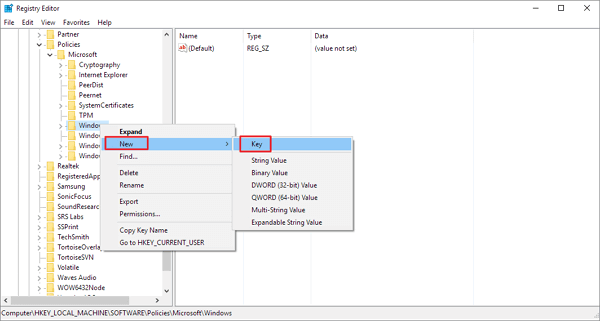
2. Type regedit, and click OK to open the Registry.
Browse the following path:
3. Right-click the Windows (folder) key, select «New» and then click «Key».
4. Name the new key «WindowsUpdate» and press «Enter».
5. Right-click the newly created key, select «new», and click «Key».
6. Name the new key AU and press Enter.
Inside the newly created key, right-click on the right side, select «New», and click on «DWORD (32-bit) Value».
7. Name the new key AUOptions and press Enter.
Double-click the newly created key and change its value to 2. It’s for «Notify for download and notify for install». Click «OK».
8. Close the Registry to complete the task.
Using this value prevents Windows 10 from downloading updates automatically, and you’ll get a notification when new updates are available. In this way, you can avoid any auto Windows 10 update effectively.
That’s how you could make an attempt to disable Windows 10 update in every way. Each method has been proved to work as long as you wish to turn off all the automatic updates in Windows 10.
How to Stop Windows 10 Update in Progress in 3 Ways
How to stop Windows 10 update in progress? How to cancel Windows update in progressВ even started? Check the three simple methods here to stop windows update in progress.В
| Workable Solutions | Step-by-step Troubleshooting |
|---|---|
| Fix 1. Stop automatic maintenance | Open Windows 10 search box, type «Control Panel» and hit the «Enter» button. Click «System and. Full steps |
| Fix 2. Stop updates in the Services | Type Services in the Windows 10 Search Windows box. When the Services application appears. Full steps |
| Fix 3. Stop Windows 10 Pro updateВ | В Press Windows + R keys to start the Run window. Type gpedit.msc and click «OK». Go to. Full steps |
Downloading and installing the Windows updates automatically on your system can keep your systemВ up to date and make your computerВ more secure. This is because each update includesВ patches for security. But nonetheless, many users still want to stop or cancel Windows updateВ in progress. The solutions presented in this article are applicable to Windows 10 users of Home, Pro, and Enterprise who are looking for answers to the following questions.
- How to stop Windows 10 update in progress
- How to stop Windows update in progress once started
- How to cancel an unwanted Windows 10 update
- How to interrupt Windows 10 updates while updating
As you can tell, people are asking the same question using different expressions. All in all, they are downloading an update by default and want to have it canceled. How to do it? Follow the easy and useful methods below. ButВ you should know that, if you disable or stop Windows 10 updates,В your computer will be left vulnerable to attack. So think twice before you stop Windows update in progress.
How to Stop Windows 10 Update in Progress on Blue Screen
If your PC has already started installing the update,В your computer will be on a blue screen showing the progress percentage andВ tellingВ you not to turn off your computer.В You should do what it says and let the update complete. You should neverВ shut down your device to stop the update in progress. This can cause serious damage to Windows and make your computer unusable. When the process finishes, you canВ either uninstall the update or use Windows 10’s rollback option to set your computerВ back to the previous version.В
1. Stop Windows 10 Automatic Maintenance to Stop UpdateВ
If the Windows 10 update has not been installed,В even if you have already downloaded it, you can still stop itВ instantly. You just need to stop the «maintenance» of Windows itself.В Follow the following steps correctly.В
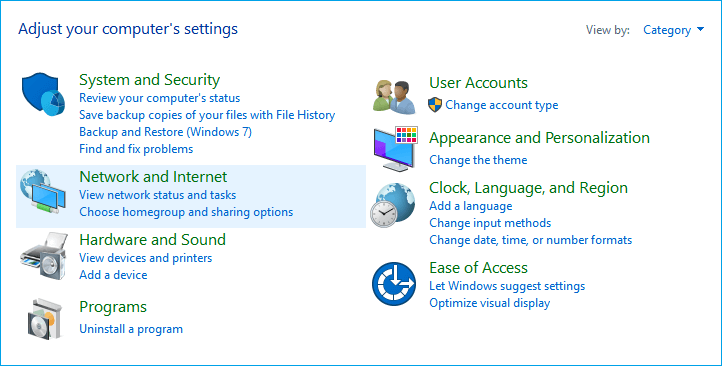
Step 1.В OpenВ Windows 10В search box, type «Control Panel» and hit the «Enter» button.
Step 2.В Click «System and Security» option.
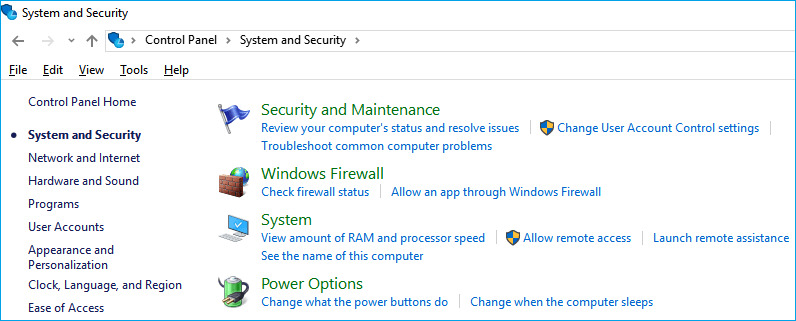
Step 3.В Now,В click the «Security and Maintenance» option.В
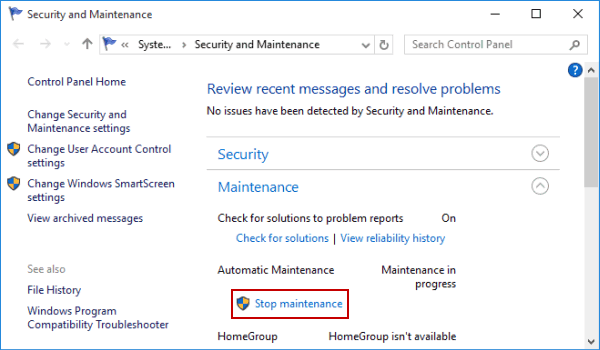
Step 4.В On the right side of Maintenance, click the button to expand the settings. Here you will hit the «StopВ maintenance» toВ stop Windows 10 update in progress.
2. How to Stop Windows 10 Update in Progress in Services
How to disable Windows 10 update permanentlyВ and stop Windows 10 updateВ at any time in the immediate future, you can turn off Windows automatic updates entirely. ThisВ also can cancel Windows update in progress.
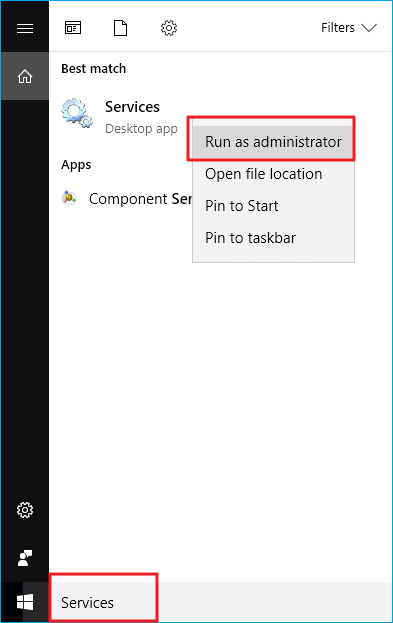
Step 1.В Type Services in the Windows 10 Search Windows box. When the Services application appears in the search results, right-click on it and select «Run as Administrator».
Step 2.В In the Services window, you will find out the list of all the services running in the background. You need to scroll down until you find the Windows Update service. As you can see from its status, the Windows Update is running.
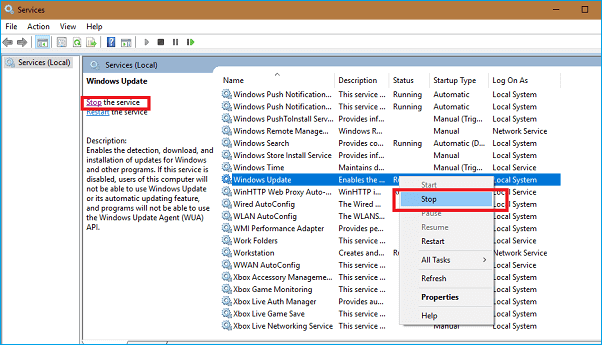
Step 3.В Here you need to right-click «Windows Update», and from the context menu, select «Stop». Alternatively, you can click on the «Stop» link available under the Windows Update option on the top left side of the window.
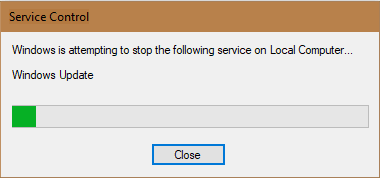
Step 4.В A small dialogue box will appear, showing you the process to stop the progress. Close the window once finished.
Since the Windows 10 system updateВ you’ve just now canceled has been already downloaded on your computer, it’s insignificant to keep such an update package with a large file size on your computer. Luckily, you can use EaseUS partition manager to delete Windows 10 update files you’ve canceled in progress and free up disk space.
3.В How to Stop Windows Update in Progress in Windows 10 Pro
For Windows 10 Professional users, there is an additional method to apply to stop Windows 10 updates in progress by using Windows 10 Group Policy Editor. Some users may prefer this method to stop and cancel the update. Note: This solution isn’t available in the Windows Home edition.
Step 1.В Press Windows + RВ keys to start the Run window. Type gpedit.mscВ and clickВ «OK».
Step 2.В Go to «Computer Configuration»В > «Administrative Templates»В > «Windows Components»В > «Windows Update».
Step 3. Find and clickВ «Configure Automatic Updates».В On the pop-up window, tick «Disabled», then clickВ «Apply»В and «OK».

Summary:В After trying the three ways above correctly, we believe you have stopped Windows 10 update in progress successfully. You can also reverse these steps and allow Windows 10 automatic updates.
People Also Ask
1.В How do I stop a Windows Update in Progress?
Here are three ways to stop a Windows update in progress, either stop update in service, or stop Windows automatic maintenance, or using the Windows 10 Group Policy EditorВ for Windows 10 Professional users.
2. What happens if you turn off computer during update?
When your computer system has already started the installation of the update, you can’t stop update in progress on the blue screen. Otherwise, you risk damaging your Windows install, which could make your system unusable.
3. What do I do if my computer is stuck updating?
If Windows 10 update stuck at checking for updates, you could try to fix by stopping Windows update service, deleting all files in «DataStore» and «Download» folder, or starting windows update service in the Command prompt window.В
Bonus Tips: Use Windows 10 Partition MasterВ
The latest Windows system lays the foundation for your computer to run smoothly, and if you can manage your disks better, your computer’s performance will improveВ significantly. EaseUS Windows partition manager software can help you create, resize, clone, move, merge, and format partitions in the simplest way.В В
Besides, it provides advanced disk/partition conversion functions to convert a logical partition to primary or primary partition to logical, FAT to NTFS partition, MBR disk to GPT, or GPT disk to MBR. The following steps show you how to use this excellent partition manager to resize the partition without effort. Try it, and it will be a great tool for daily disk management.В
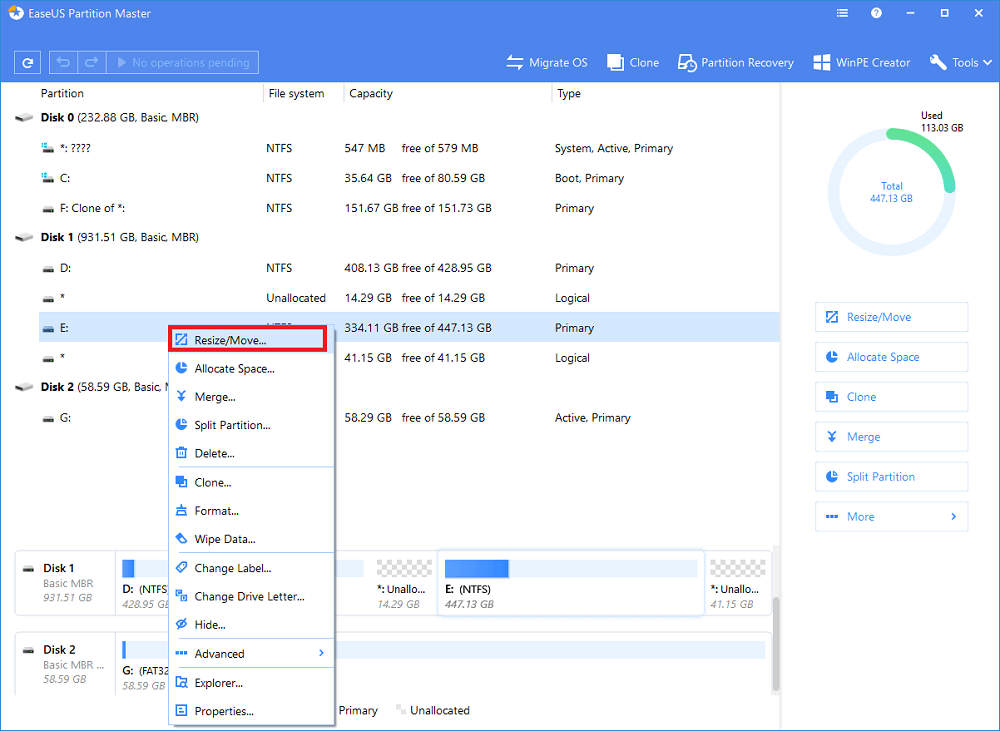
Step 1: Locate the drive/partition
Which drive/partition do you want to adjust its size? Right-click on it and choose «Resize/Move».
Step 2: Resize the partition
You can either shrink the selected partition or extend it.
To shrink the partition, simply use your mouse to drag one of its ends into unallocated space. Expand the «Advanced Settings» list, where you can see the exact disk space for each partition. Once done, click «OK».
Fig. 1 Unallocated space before the drive.
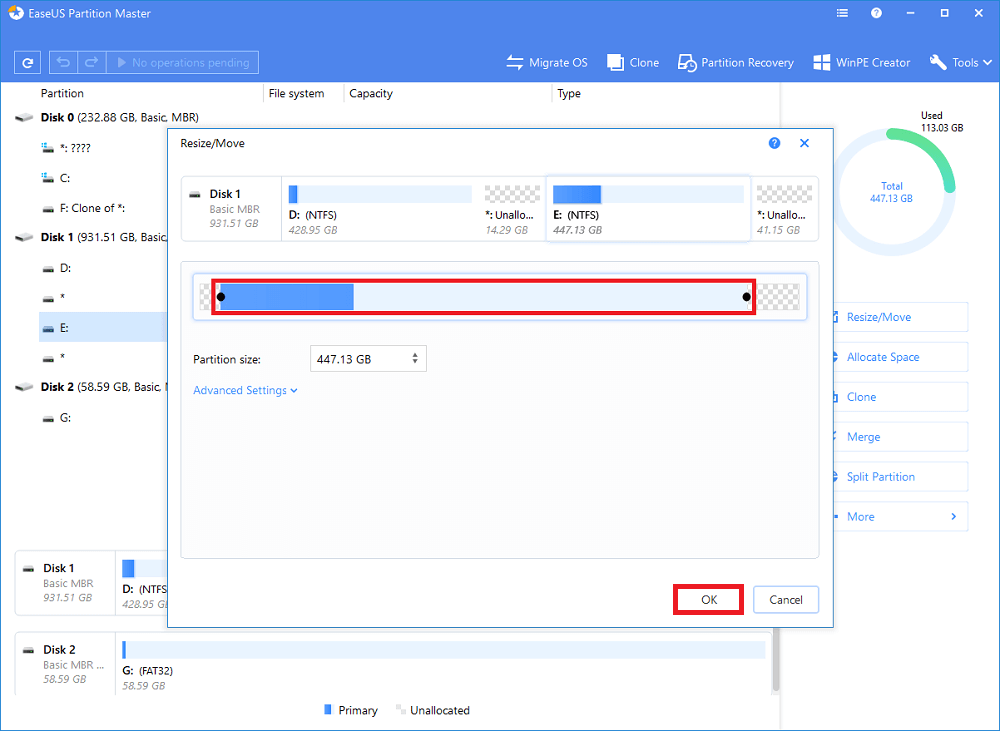
Fig. 2 Unallocated space after the drive.
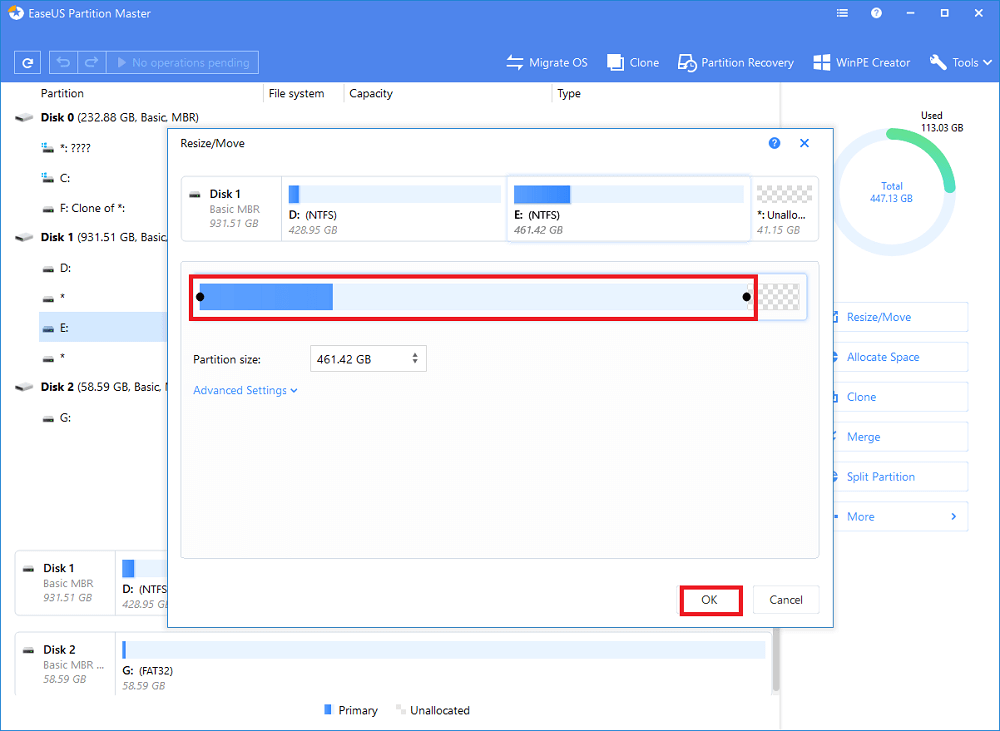
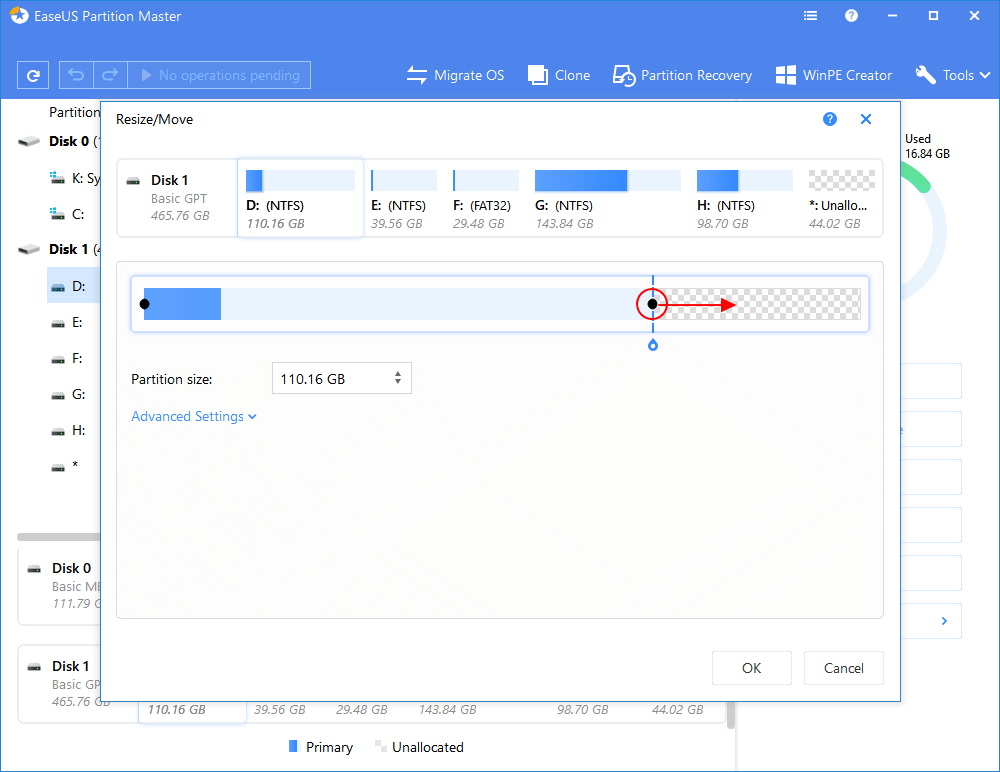
To extend the partition, make sure that there is unallocated space aside (if there isn’t, follow the above steps to create some). In the same way, drag your mouse towards the unallocated space. Click «OK».
Fig. 3 Add unallocated space into the partition
Step 3: Apply changes
At this step, you will see the new disk partition information & diagram.

To save changes, click the «Execute Operation» button and then «Apply».


