- How to upgrade linux ubuntu
- 2. Launch the Software Updater
- 3. Check for updates
- If no upgrade appears
- 4. Install the upgrade
- Как обновить Ubuntu до 20.04
- Обновление Ubuntu до 20.04
- Шаг 1. Обновление дистрибутива
- Шаг 2. Настройка источников
- Шаг 3. Запуск менеджера обновлений
- Шаг 4. Примечания к выпуску
- Шаг 5. Подтверждение обновления
- Шаг 6. Настройка раскладки
- Шаг 7. Очистка ненужных пакетов
- Шаг 8. Перезагрузка
- Шаг 9. Вход
- Шаг 10. Готово
- Обновление Ubuntu Server до 20.04
- Выводы
- Upgrading
- Upgrade paths
- Upgrade checklist
- Upgrade
- do-release-upgrade
- Pre-upgrade summary
- Configuration changes
- Package removal
- Reboot
How to upgrade linux ubuntu
We recommend that you back up your existing Ubuntu installation before you update your computer.
Being able to upgrade Ubuntu from one version to the next is one of Ubuntu’s best features. You benefit from getting the latest software, including new security patches, and all the upgraded technology that comes with a new release without having to resort to reinstalling and reconfiguring your system.
Best of all, upgrading Ubuntu to the latest release is easy. As we’ll demonstrate!
For more recent versions, please read the release notes for Ubuntu 18.04 LTS or Ubuntu 20.04 LTS.
2. Launch the Software Updater
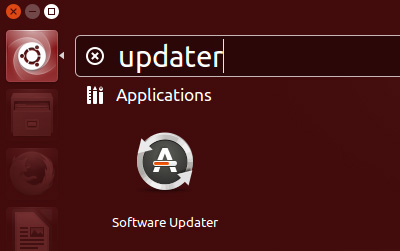
On versions of Ubuntu prior to 18.04, press the Superkey (Windows key) to launch the Dash and search for Update Manager.
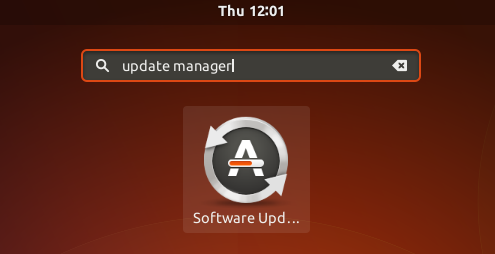
For Ubuntu 18.04 or later, click on the Show Applications icon in the bottom left of the desktop and search for Update Manager.
As the application launches it will first check if there are any updates for your current version of Ubuntu that need to be installed. If it does find any, install these first and run Update Manager again if you need to restart your machine.
3. Check for updates
Update Manager will open a window to inform you that your computer is up to date. Click on the Settings button to open the main user-interface.
Select the tab called Updates, if not already selected. Then set the Notify me of a new Ubuntu version dropdown menu to either For any new version or For long-term support versions, if you’re wanting to update to the latest LTS release. You may be asked for your password to make this change. See the Ubuntu wiki for details on the differences between standard and LTS releases.
Click on Close to be taken back to the update pane and OK to close this.
We now need to open Update Manager one more time, only this time Update Manager will open up and tell you that a new distribution is available. Click Upgrade.
If no upgrade appears
An upgrade will not appear if upgrades to the next release of Ubuntu are not recommended yet and have not been enabled.
4. Install the upgrade
After asking for your password, you will be presented with the Release Notes for the release you’re about to upgrade to.
Select the Upgrade button to start the initialisation process. A few moments later you’ll be asked Do you want to start the upgrade? Press Start Upgrade to pass the point of no return and start the upgrade process.
The upgrade will now proceed. The Distribution Upgrade pane will track the upgrade process and allow you to monitor progress. As the process is dependent on both your network connection and the performance of your computer, the upgrade could take anything from ten or 20 minutes to an hour or more.
After the new packages are installed, you may be asked whether you want to remove any obsolete packages. These are packages that were installed on your previous version of Ubuntu but are no longer required by the new one. You can safely select Remove.
Finally, you’ll be asked to restart the system to complete the upgrade.
Congratulations! You have successfully upgraded Ubuntu!
Источник
Как обновить Ubuntu до 20.04
Недавно вышла новая версия Ubuntu с длительным сроком поддержки — Ubuntu 20.04. Согласно информации на официальном сайте она будет получать обновления безопасности до 2025 года. В новой версии мы уже привычно получим обновление программного стека, новую версию Gnome и внешний вид.
Более подробно о том, что нового в Ubuntu 20.04 можно посмотреть в отдельной статье. А сегодня мы поговорим о том, как обновить Ubuntu до 20.04. Примечательно, что у вас нет необходимости ставить промежуточные версии 19.04 или 19.10. Если вы использовали LTS релиз 18.04, то можете обновится прямо с него. Процедура обновления мало чем отличается от предыдущих лет.
Обновление Ubuntu до 20.04
Шаг 1. Обновление дистрибутива
Первым делом необходимо обновить вашу текущую версию дистрибутива до самой свежей версии из репозиториев. Это необходимо, чтобы утилита обновления работала в максимально приближенных условиях к тем, в которых её создавали, и вы не получили никаких ошибок или проблем. Это можно сделать через терминал:
sudo apt update
sudo apt full-upgrade
Или же через графический интерфейс. Для этого откройте утилиту Обновление системы из главного меню:
Утилита найдёт обновления и предложит их установить. Вам достаточно согласиться и дождаться завершения установки:
Теперь можем обновить Ubuntu 18.04 до 20.04.
Шаг 2. Настройка источников
Чтобы обновиться именно до LTS, надо настроить источники обновлений. Для этого откройте утилиту Программы и обновления:
Здесь перейдите на вкладку Обновления и для пункта Уведомлять меня о выходе новой версии Ubuntu выберите При доступности первой с длительным сроком поддержки:
Шаг 3. Запуск менеджера обновлений
Запустите менеджер обновлений, выполнив команду update-manager в терминале:
update-manager -c -d
Утилита сообщит, что обнаружен новый выпуск Ubuntu 20.04. Для начала процесса обновления нажмите Обновить.
Шаг 4. Примечания к выпуску
Ознакомьтесь с примечаниями к выпуску и нажмите кнопку Обновить, чтобы начать:
Шаг 5. Подтверждение обновления
Дождитесь завершения загрузки установщика, а затем подтвердите обновление системы с помощью кнопки Обновить. После этого пути назад уже не будет.
Шаг 6. Настройка раскладки
В процессе обновления утилита предложит выбрать клавишу для переключения раскладки клавиатуры:
Шаг 7. Очистка ненужных пакетов
Затем система предложит очистить все ненужные пакеты, которые остались от старой установки:
Шаг 8. Перезагрузка
После завершения процесса перезагрузите компьютер, нажав кнопку Перезагрузить сейчас:
Шаг 9. Вход
После перезагрузки вас встретит уже новая система. Авторизуйтесь в ней с помощью вашего логина и пароля:
Шаг 10. Готово
Обновление Ubuntu 18.04 до 20.04 завершено, и вы можете посмотреть версию Ubuntu в настройках системы:
Обновление Ubuntu Server до 20.04
Процедура обновления Ubuntu Server в целом аналогичная версии для рабочего стола. Отличается только тем, что придётся выполнять все команды вручную и работать через терминал. Сначала обновите систему до самой новой версии:
sudo apt dist-upgrade -y
После завершения установки обновлений перезагрузите систему, чтобы все они начали действовать. Затем откройте файл /etc/update-manager/release-upgrades и убедитесь, что значение параметра конфигурации Prompt равняется lts:
sudo vi /etc/update-manager/release-upgrades
Затем запустите утилиту обновления:
sudo do-release-upgrade -d
Она заменит репозитории, загрузит и установит новый релиз Ubuntu на ваш сервер. Во время установки надо будет подтвердить само обновление, а также подтвердить очистку ненужных пакетов. В конце обновления потребуется перезагрузить сервер.
После перезагрузки вы можете посмотреть версию дистрибутива с помощью команды:
Выводы
В этой статье мы рассмотрели, как выполняется обновление ubuntu 19.10 до 20.04 или 18.04 до 20.04 на обычном компьютере или на сервере. Как видите, ничего сложного нет, однако перед обновлением следует сделать резервную копию важных данных. Как бы то ни было, но система, установленная заново, всегда работает стабильнее, чем обновленная, и шансов, что что-то пойдёт не так, намного меньше.
Источник
Upgrading
The following details how to upgrade an Ubuntu Server or Ubuntu cloud image to the next release.
Upgrade paths
Ubuntu supports the ability to upgrade from one LTS to the next LTS in sequential order. For example, a user on Ubuntu 16.04 LTS can upgrade to Ubuntu 18.04 LTS, but cannot jump directly to Ubuntu 20.04 LTS. To do this, the user would need to upgrade twice: once to Ubuntu 18.04 LTS, and then upgrade again to Ubuntu 20.04 LTS.
It is recommended that users run an LTS release as it provides 5 years of standard support and security updates. After the initial standard support, an extended support period is available via an Ubuntu Advantage subscription.
For a complete list of releases and current support status see the Ubuntu Wiki Releases page.
Upgrade checklist
To ensure a successful upgrade, please review the following items:
Check the release notes for the new release for any known issues or important changes. Release notes for each release are found on the Ubuntu Wiki Releases page.
Fully update the system. The upgrade process works best when the current system has all the latest updates installed. Users should confirm that these commands complete successfully and that no further updates are available. It is also suggested that users reboot the system after all the updates are applied to verify a user is running the latest kernel. To upgrade run the following commands:
Users should check that there is sufficient free disk space for the upgrade. Upgrading a system will at least download hundreds of new packages. Systems with additional software installed may require a few gigabytes of disk space.
The upgrade process takes time to complete. Users should have dedicated time to participate in the upgrade process.
Third-party software repositories and PPAs are disabled during the upgrade. However, any software installed from these repositories is not removed or downgraded. Software installed from these repositories is the single most common cause of upgrade issues.
Backup any and all data. Upgrades are normally safe, however, there is always the chance that something may go wrong. It is extremely important that the data is safely copied to a backup location to allow restoration if there are any problems or complications during the upgrade process.
Upgrade
It is recommended to upgrade the system using the do-release-upgrade command on server edition and cloud images. This command can handle system configuration changes that are sometimes needed between releases.
do-release-upgrade
To begin this process run the following command:
Upgrading to a development release of Ubuntu is available using the -d flag. However, using the development release or this flag is not recommended for production environments.
Upgrades from one LTS to the next LTS release are only available after the first point release. For example, Ubuntu 18.04 LTS will only upgrade to Ubuntu 20.04 LTS after the 20.04.1 point release. If users wish to update before the point release (e.g. on a subset of machines to evaluate the LTS upgrade) users can force the upgrade via the -d flag.
Pre-upgrade summary
Before making any changes the command will first do some checks to verify the system is ready to update. The user will get prompted with a summary of the upgrade before proceeding. If the user accepts the changes, the process will begin to update the system’s packages:
Configuration changes
It is possible during the upgrade process the user gets presented with a message to make decisions about package updates. These prompts occur when there are existing configuration files edited by the user and the new package configuration file are different. Below is an example prompt:
Users should look at the differences between the files and decide what to do. The default response is to keep the current version of the file. There are situations where accepting the new version, like with /boot/grub/menu.lst , is required for the system to boot correctly with the new kernel.
Package removal
After all packages are updated the user will again remove any obsolete, no longer needed, packages:
Reboot
Finally, when the upgrade is complete the user is prompted to reboot the system. The system is not considered upgraded until a reboot occurs:
Источник


