- Panes in Windows Terminal
- Creating a new pane
- Using the keyboard
- Using the new tab button and dropdown menu
- Switching between panes
- Resizing a pane
- Closing a pane
- Customizing panes using key bindings
- Duplicating a pane
- Zooming a pane
- Marking a pane as read-only
- New terminal arguments
- Layout panels
- Examples
- Panel properties
- Panel attached properties
- Panel borders
- RelativePanel
- StackPanel
- VariableSizedWrapGrid
- Canvas
Panes in Windows Terminal
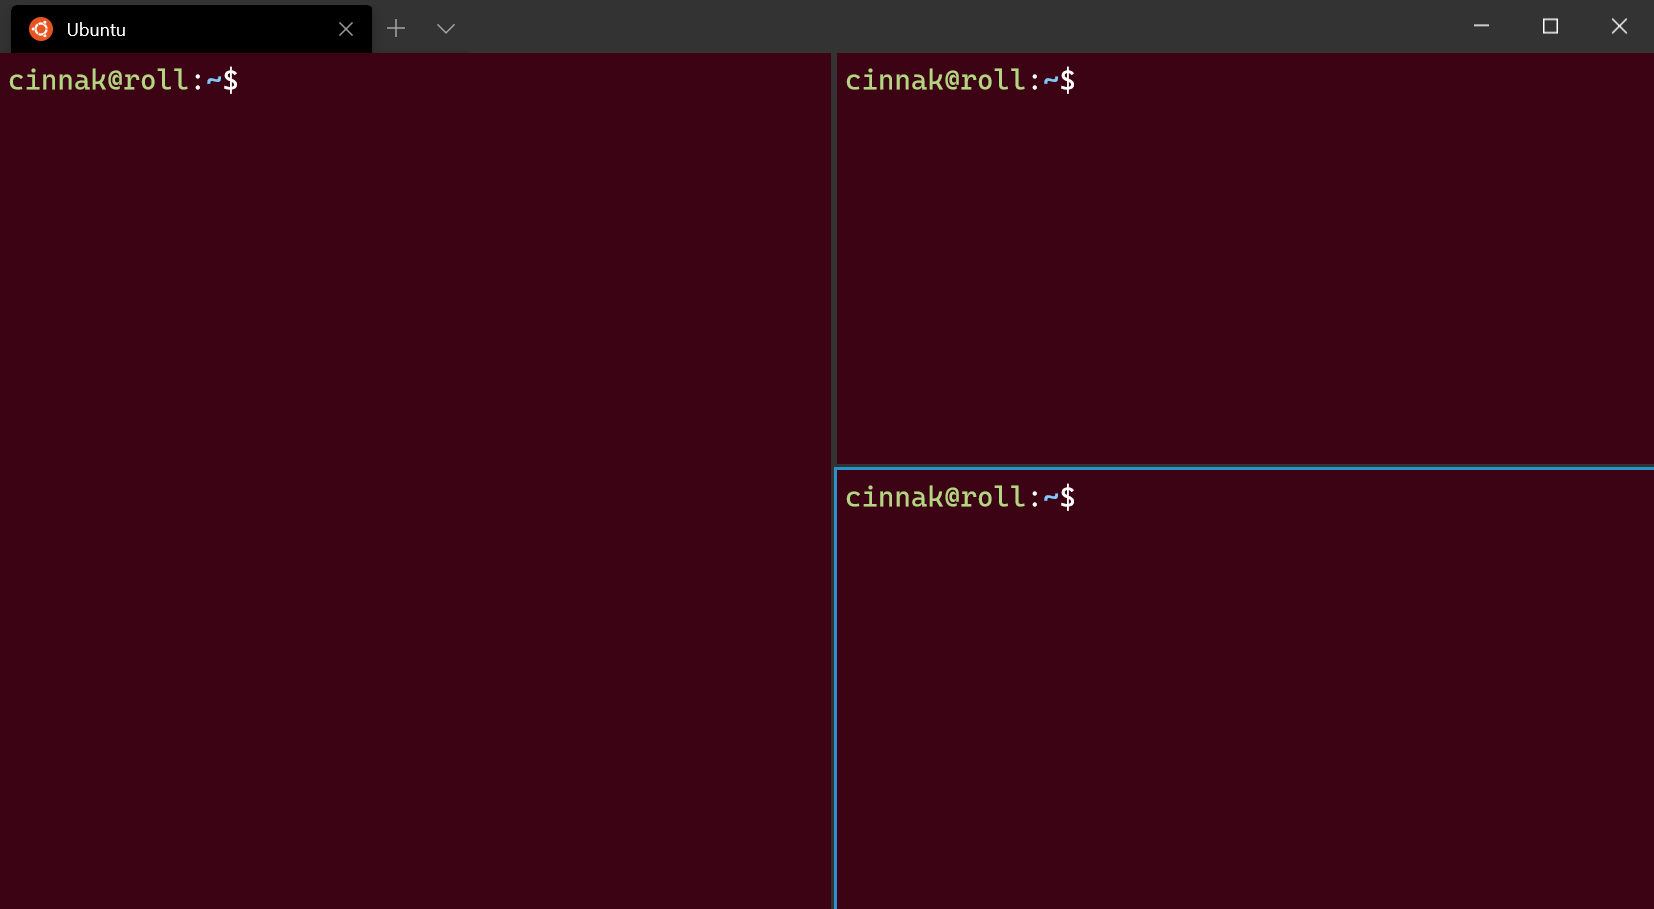
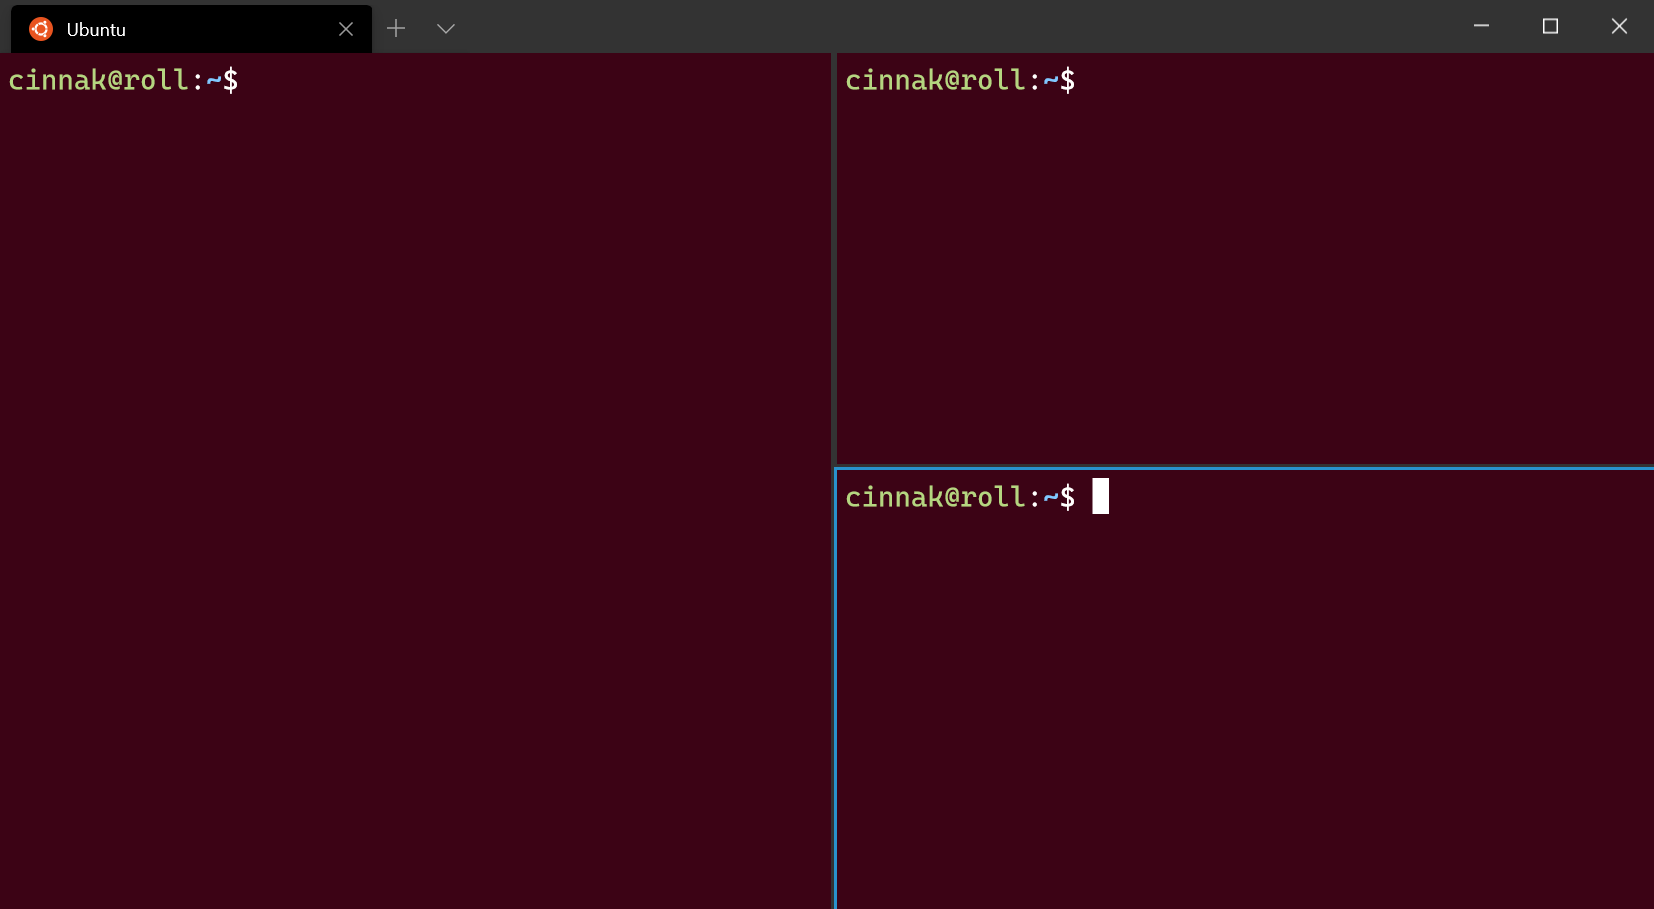
Panes give you the ability to run multiple command-line applications next to each other within the same tab. This minimizes the need to switch between tabs and lets you see multiple prompts at once.
Creating a new pane
Using the keyboard
You can either create a new vertical or horizontal pane in Windows Terminal. Splitting vertically will open a new pane to the right of the focused pane and splitting horizontally will open a new pane below the focused pane. To create a new vertical pane of your default profile, you can press the Alt + Shift + = key combination. For a horizontal pane of your default profile, you can use Alt + Shift + — .
 Configuration: Raspberry Ubuntu
If you would like to change these key bindings, you can create new ones using the splitPane action and vertical , horizontal , or auto values for the split property in your profiles.json file. The auto method will choose the direction that gives you the squarest panes. To learn more about key bindings, visit the Actions page.
Using the new tab button and dropdown menu
If you’d like to open a new pane of your default profile, you can hold the alt key and click the new tab button. If you’d like to open a new pane through the dropdown menu, you can hold alt and click on your desired profile. Both of these options will auto split the active window or pane into a new pane of the selected profile. The auto split mode splits in the direction that has the longest edge to create a pane.
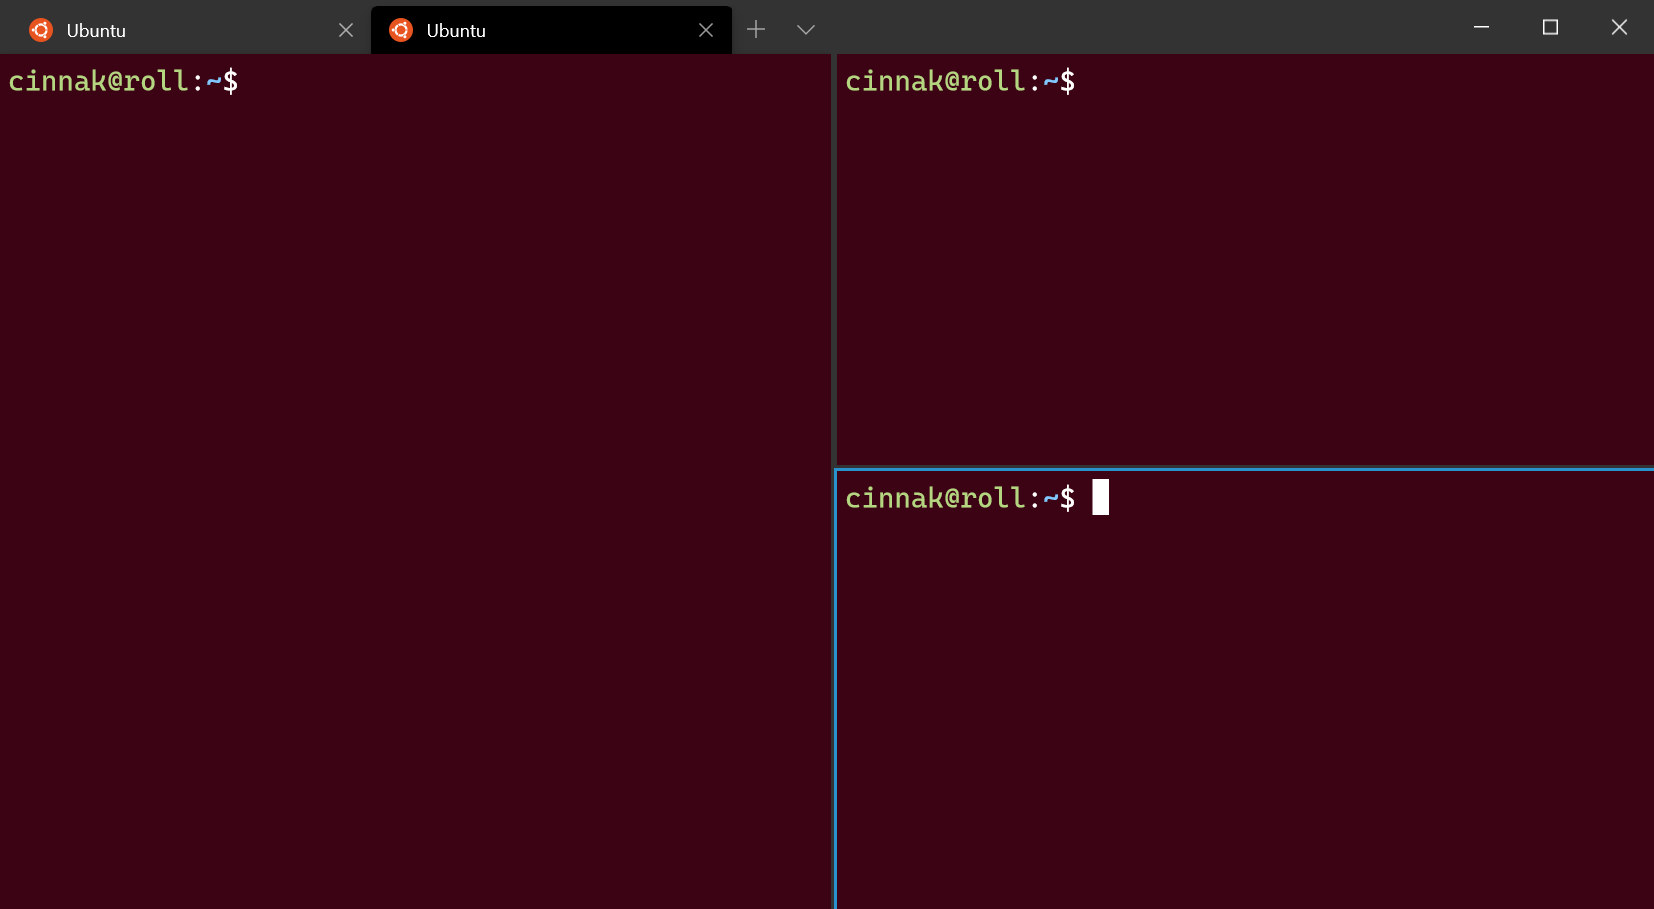
Switching between panes
The terminal allows you to navigate between panes by using the keyboard. If you hold the Alt key, you can use your arrow keys to move your focus between panes. You can identify which pane is in focus by the accent color border surrounding it. Note that this accent color is set in your Windows color settings.
You can customize this by adding key bindings for the moveFocus command and setting the direction to either down , left , right or up .
Resizing a pane
You can adjust the size of your panes by holding Alt + Shift and using your arrow keys to resize the focused pane.
To customize this key binding, you can add new ones using the resizePane action and setting the direction to either down , left , right , or up .
Closing a pane
You can close the focused pane by typing Ctrl + Shift + W . If you only have one pane, Ctrl + Shift + W will close the tab. As always, closing the last tab will close the window.
You can change which keys close the pane by adding a key binding that uses the closePane command.
Customizing panes using key bindings
You can customize what opens inside a new pane depending on your custom key bindings.
Duplicating a pane
The terminal allows you to duplicate the focused pane’s profile into another pane.

This can be done by adding the splitMode property with duplicate as the value to a splitPane key binding.
Zooming a pane
You can zoom the focused pane to fill the entire contents of the window.
This can be done by using the togglePaneZoom command.
Marking a pane as read-only
You can mark a pane as read-only, which will prevent input from going into the text buffer. If you attempt to close or input text into a read-only pane, the terminal will display a popup warning instead.
You can toggle read-only mode on a pane with the toggleReadOnlyMode command.
New terminal arguments
When opening a new pane or tab with a key binding, you can specify which profile is used by including the profile’s name, guid, or index. If none are specified, the default profile is used. This can be done by adding profile or index as an argument to a splitPane or newTab key binding. Note that indexing starts at 0.
Additionally, you can override certain aspects of the profile such as the profile’s command line executable, starting directory, or tab title. This can be accomplished by adding commandline , startingDirectory , and/or tabTitle to a splitPane or newTab key binding.
Layout panels
Layout panels are containers that allow you to arrange and group UI elements in your app. The built-in XAML layout panels include RelativePanel, StackPanel, Grid, VariableSizedWrapGrid, and Canvas. Here, we describe each panel and show how to use it to layout XAML UI elements.
There are several things to consider when choosing a layout panel:
- How the panel positions its child elements.
- How the panel sizes its child elements.
- How overlapping child elements are layered on top of each other (z-order).
- The number and complexity of nested panel elements needed to create your desired layout.
Examples
| XAML Controls Gallery | ||||||||||||||||||||||||||||||||||||
|---|---|---|---|---|---|---|---|---|---|---|---|---|---|---|---|---|---|---|---|---|---|---|---|---|---|---|---|---|---|---|---|---|---|---|---|---|
 |

| Panel alignment | Sibling alignment | Sibling position |
|---|---|---|
| AlignTopWithPanel | AlignTopWith | Above |
| AlignBottomWithPanel | AlignBottomWith | Below |
| AlignLeftWithPanel | AlignLeftWith | LeftOf |
| AlignRightWithPanel | AlignRightWith | RightOf |
| AlignHorizontalCenterWithPanel | AlignHorizontalCenterWith | В |
| AlignVerticalCenterWithPanel | AlignVerticalCenterWith | В |
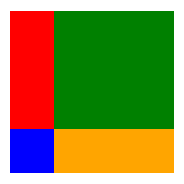
This XAML shows how to arrange elements in a RelativePanel.
The result looks like this.
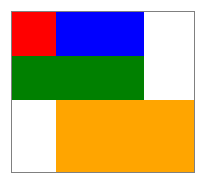
Here are a few things to note about the sizing of the rectangles:
- The red rectangle is given an explicit size of 44×44. It’s placed in the upper left corner of the panel, which is the default position.
- The green rectangle is given an explicit height of 44. Its left side is aligned with the red rectangle, and its right side is aligned with the blue rectangle, which determines its width.
- The orange rectangle isn’t given an explicit size. Its left side is aligned with the blue rectangle. Its right and bottom edges are aligned with the edge of the panel. Its size is determined by these alignments and it will resize as the panel resizes.
StackPanel
StackPanel arranges its child elements into a single line that can be oriented horizontally or vertically. StackPanel is typically used to arrange a small subsection of the UI on a page.
You can use the Orientation property to specify the direction of the child elements. The default orientation is Vertical.
The following XAML shows how to create a vertical StackPanel of items.
The result looks like this.
In a StackPanel, if a child element’s size is not set explicitly, it stretches to fill the available width (or height if the Orientation is Horizontal). In this example, the width of the rectangles is not set. The rectangles expand to fill the entire width of the StackPanel.
The Grid panel supports fluid layouts and allows you to arrange controls in multi-row and multi-column layouts. You specify a Grid’s rows and columns by using the RowDefinitions and ColumnDefinitions properties.
To position objects in specific cells of the Grid, use the Grid.Column and Grid.Row attached properties.
To make content span across multiple rows and columns, use the Grid.RowSpan and Grid.ColumnSpan attached properties.
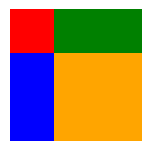
This XAML example shows how to create a Grid with two rows and two columns.
The result looks like this.
In this example, the sizing works like this:
- The second row has an explicit height of 44 effective pixels. By default, the height of the first row fills whatever space is left over.
- The width of the first column is set to Auto, so it’s as wide as needed for its children. In this case, it’s 44 effective pixels wide to accommodate the width of the red rectangle.
- There are no other size constraints on the rectangles, so each one stretches to fill the grid cell it’s in.
You can distribute space within a column or a row by using Auto or star sizing. You use auto sizing to let UI elements resize to fit their content or parent container. You can also use auto sizing with the rows and columns of a grid. To use auto sizing, set the Height and/or Width of UI elements to Auto.
You use proportional sizing, also called star sizing, to distribute available space among the rows and columns of a grid by weighted proportions. In XAML, star values are expressed as * (or n* for weighted star sizing). For example, to specify that one column is 5 times wider than the second column in a 2-column layout, use «5*» and «*» for the Width properties in the ColumnDefinition elements.
This example combines fixed, auto, and proportional sizing in a Grid with 4 columns.
| Column | Sizing | Description |
|---|---|---|
| Column_1 | Auto | The column will size to fit its content. |
| Column_2 | * | After the Auto columns are calculated, the column gets part of the remaining width. Column_2 will be one-half as wide as Column_4. |
| Column_3 | 44 | The column will be 44 pixels wide. |
| Column_4 | 2* | After the Auto columns are calculated, the column gets part of the remaining width. Column_4 will be twice as wide as Column_2. |
The default column width is «*», so you don’t need to explicitly set this value for the second column.
In the Visual Studio XAML designer, the result looks like this.

VariableSizedWrapGrid
VariableSizedWrapGrid is a Grid-style layout panel where rows or columns automatically wrap to a new row or column when the MaximumRowsOrColumns value is reached.
The Orientation property specifies whether the grid adds its items in rows or columns before wrapping. The default orientation is Vertical, which means the grid adds items from top to bottom until a column is full, then wraps to a new column. When the value is Horizontal, the grid adds items from left to right, then wraps to a new row.
Cell dimensions are specified by the ItemHeight and ItemWidth. Each cell is the same size. If ItemHeight or ItemWidth is not specified, then the first cell sizes to fit its content, and every other cell is the size of the first cell.
You can use the VariableSizedWrapGrid.ColumnSpan and VariableSizedWrapGrid.RowSpan attached properties to specify how many adjacent cells a child element should fill.
Here’s how to use a VariableSizedWrapGrid in XAML.
The result looks like this.
In this example, the maximum number of rows in each column is 3. The first column contains only 2 items (the red and blue rectangles) because the blue rectangle spans 2 rows. The green rectangle then wraps to the top of the next column.
Canvas
The Canvas panel positions its child elements using fixed coordinate points and does not support fluid layouts. You specify the points on individual child elements by setting the Canvas.Left and Canvas.Top attached properties on each element. The parent Canvas reads these attached property values from its children during the Arrange pass of layout.
Objects in a Canvas can overlap, where one object is drawn on top of another object. By default, the Canvas renders child objects in the order in which they’re declared, so the last child is rendered on top (each element has a default z-index of 0). This is the same as other built-in panels. However, Canvas also supports the Canvas.ZIndex attached property that you can set on each of the child elements. You can set this property in code to change the draw order of elements during run time. The element with the highest Canvas.ZIndex value draws last and therefore draws over any other elements that share the same space or overlap in any way. Note that alpha value (transparency) is respected, so even if elements overlap, the contents shown in overlap areas might be blended if the top one has a non-maximum alpha value.
The Canvas does not do any sizing of its children. Each element must specify its size.
Here’s an example of a Canvas in XAML.
The result looks like this.
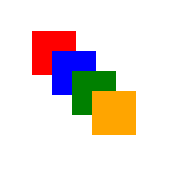
Use the Canvas panel with discretion. While it’s convenient to be able to precisely control positions of elements in UI for some scenarios, a fixed positioned layout panel causes that area of your UI to be less adaptive to overall app window size changes. App window resize might come from device orientation changes, split app windows, changing monitors, and a number of other user scenarios.


