- How to refresh, reset, or restore your PC
- Before you start to refresh or reset your PC
- Refresh, reset, or restore
- To refresh your PC
- To reset your PC
- To restore your PC to an earlier point in time
- How to refresh, reset, or restore your PC
- Before you start to refresh or reset your PC
- Refresh, reset, or restore
- To refresh your PC
- To reset your PC
- To restore your PC to an earlier point in time
- How to: Configure System Restore In Windows 10
- Advantages of System Restore Feature:
- Configure System Restore Feature in Windows 10:
- Enabling System Restore:
- Creating System Restore Point:
- Restoring the System using System Restore Point:
- Restoring the System if you can’t Boot to Windows:
How to refresh, reset, or restore your PC
Note: For information about this topic in Windows 10, see Recovery options in Windows 10.
If you’re having problems with your PC, you can:
Refresh your PC to reinstall Windows and keep your personal files and settings. Refresh also keeps the apps that came with your PC and the apps you installed from the Microsoft Store.
Reset your PC to reinstall Windows but delete your files, settings, and apps—except for the apps that came with your PC.
Restore your PC to undo recent system changes you’ve made.
If you’re having trouble starting (booting) your PC, see Windows Startup Settings (including safe mode), and go to the “Get to Windows Startup Settings in the Windows Recovery Environment” section. You can refresh, reset, or restore your PC from the Windows Recovery Environment.
If you want to back up and restore your personal files using File History, see Set up a drive for File History.
Before you start to refresh or reset your PC
In most cases, once you start to refresh or reset your PC, it’ll finish on its own. However, if Windows needs missing files, you’ll be asked to insert recovery media, which is typically on a DVD disc or thumb drive. If that happens, what you’ll need depends on your PC.
If your PC came with Windows 8.1 or Windows RT 8.1, you’ll need the discs or thumb drive that came with your PC. Check the info that came with your PC to see if your PC manufacturer provided these discs or media. In some cases, you might have created them when you first set up your PC.
If you don’t have either of those, you can make them if you have a USB thumb drive of 16 GB or larger. Having a recovery drive can help you troubleshoot and fix problems with your PC, even if it won’t start. For more info, see Create a USB recovery drive.
If you upgraded your PC to Windows 8.1 or Windows RT 8.1 with a DVD, use that disc. If you don’t have Windows 8.1 or Windows RT 8.1 media, contact Microsoft Support.
Refresh, reset, or restore
Select any of the following for more detailed info.
If your PC isn’t performing as well as it once did, and you don’t know why, you can refresh your PC without deleting any of your personal files or changing your settings.
Note: If you upgraded your PC from Windows 8 to Windows 8.1 and your PC has a Windows 8 recovery partition, refreshing your PC will restore Windows 8. You’ll need to upgrade to Windows 8.1 after the refresh has finished.
Warning: Apps you installed from websites and DVDs will be removed. Apps that came with your PC and apps you installed from Microsoft Store will be reinstalled. Windows puts a list of removed apps on your desktop after refreshing your PC.
To refresh your PC
Swipe in from the right edge of the screen, tap Settings, and then tap Change PC settings.
(If you’re using a mouse, point to the upper-right corner of the screen, move the mouse pointer down, click Settings, and then click Change PC settings.)
Tap or click Update and recovery, and then tap or click Recovery.
Under Refresh your PC without affecting your files, tap or click Get started.
Follow the instructions on the screen.
If you want to recycle your PC, give it away, or start over with it, you can reset it completely. This removes everything and reinstalls Windows.
Note: If you upgraded your PC from Windows 8 to Windows 8.1 and your PC has a Windows 8 recovery partition, resetting your PC will restore Windows 8. You’ll need to upgrade to Windows 8.1 after the reset has finished.
Warning: All of your personal files will be deleted and your settings will be reset. All apps that you installed will be removed. Only apps that came with your PC will be reinstalled.
To reset your PC
Swipe in from the right edge of the screen, tap Settings, and then tap Change PC settings.
(If you’re using a mouse, point to the upper-right corner of the screen, move the mouse pointer down, click Settings, and then click Change PC settings.)
Tap or click Update and recovery, and then tap or click Recovery.
Under Remove everything and reinstall Windows, tap or click Get started.
Follow the instructions on the screen.
Note: You’ll be asked to choose whether you want to erase data quickly or thoroughly. If you choose to erase data quickly, some data might be recoverable using special software. If you choose to erase data thoroughly, this will take longer but it makes recovering data less likely.
If you think an app or driver that you recently installed caused problems with your PC, you can restore Windows back to an earlier point in time, called a restore point. System Restore doesn’t change your personal files, but it might remove recently installed apps and drivers.
System Restore isn’t available for Windows RT 8.1.
Windows automatically creates a restore point when you install desktop apps and new Windows updates, if the last restore point is older than 7 days. You can also create a restore point manually at any time.
To restore your PC to an earlier point in time
Swipe in from the right edge of the screen, and then tap Search.
(If you’re using a mouse, point to the upper-right corner of the screen, move the mouse pointer down, and then click Search.)
Enter Control Panel in the search box, and tap or click Control Panel.
Enter Recovery in the Control Panel search box, and then tap or click Recovery.
Tap or click Open System Restore, and then follow the instructions.
If you need additional help refreshing, resetting, or restoring your PC, check out the Repair and Recovery community pages in the Windows forum for solutions that other people have found for problems they’ve experienced.
How to: Configure System Restore In Windows 10
There is a strong probability that your system might crash at certain occasions due to some malwares, infected programs or device drivers conflicting the operations of Windows. So, at that exact moment, you would be taunting yourself saying, “Why I didn’t backup my Windows”? This becomes more problematic when you have some important stuff in your PC or you have to do an important task. To prevent yourself from this problem, you don’t have to do a full backup of your Windows that can take a plenty of disk space. All you need to do is to use an amazing feature inside Windows that lets you revert back to a certain point if unexpected things occur.
So, this unique feature is called System Restore. All it does is that it creates a restore point by saving the current state of your Windows. After you have configured the System Restore feature in Windows 10, you can take full advantage of this feature. Whenever a new app, device driver or Windows update is installed on your PC, Windows can create it automatically or you can also configure it to set it manually. So, here I will be guiding you to configure the system restore feature in the latest build of Windows i.e. Windows 10.
Advantages of System Restore Feature:
You can create a restore point to save the current state of your Windows.
It doesn’t require a large volume of disk space as compared to full-backup.
It is easy to configure.
Restoration process using System Restore Feature is like cutting a cake.
Configure System Restore Feature in Windows 10:
In order to create a System Restore Point using System Restore Feature of Windows 10, you have to enable it inside settings. Follow along this guide to get it done.
Enabling System Restore:
To enable system restore in Windows 10, follow the steps below.
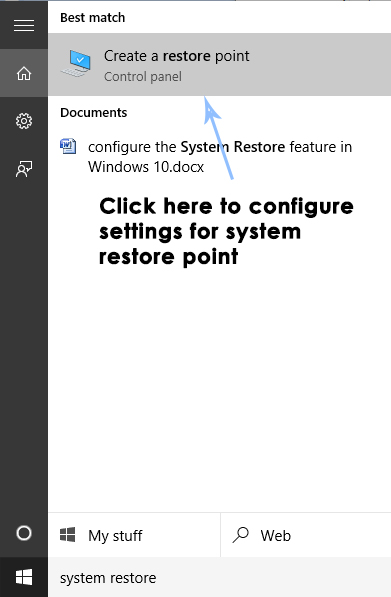
Search for System Restore using Cortana in your Windows 10. From there, click on Create a restore point.
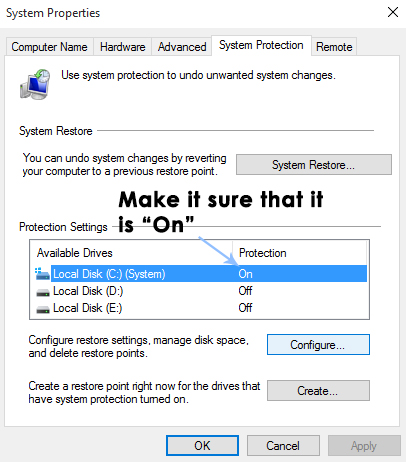
A System Properties window will appear containing the settings for restore point. Inside this window, navigate to Protection Settings and make it sure that protection is enabled on your Local Disk C (System Drive).
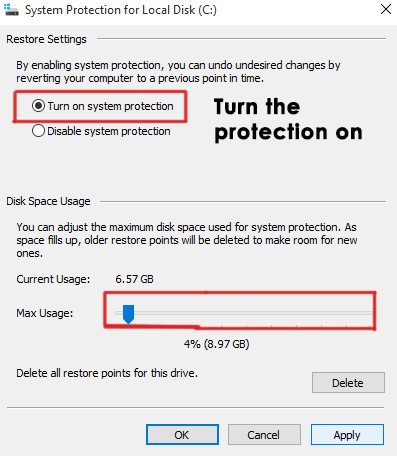
If it is disabled, select that disk and click on Configure button to enable the protection. You should also allocate the maximum disk space for system protection. You can set it to whatever value you want. Click on Apply and OK afterwards to apply the settings.
Now, the system will create a restore point automatically whenever an alteration happens inside your Windows.
Creating System Restore Point:
If you want to create a manual restore point (Which is preferred), then, follow along further.
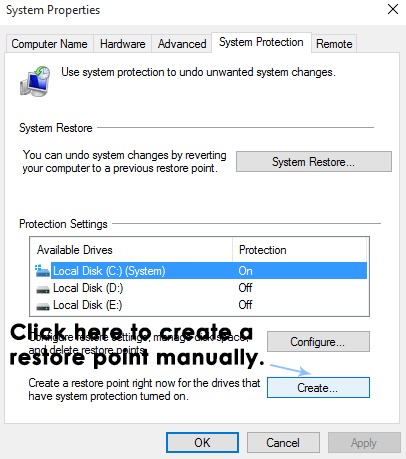
To create it manually, you need to click on click on Create button while selecting the Local Disk C inside System protection
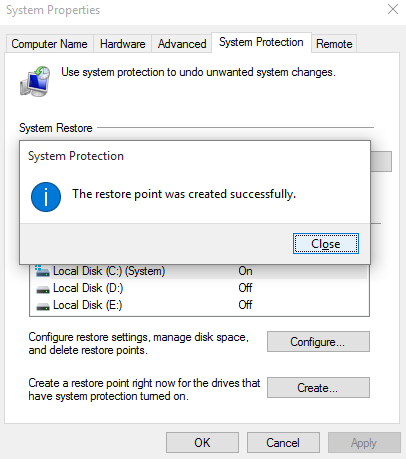
The next prompt window will ask you to type the description of your restore point. I prefer to type date of the restore point. It is important to manage the restore points accordingly. Click on Create button to start the process. It is a short process and might not take more than 1 minute.
Restoring the System using System Restore Point:
If, at some point, you come across certain issues with your Windows, you can restore your system to the restore point saved on your PC. In order to restore your system, follow the steps below.
Search for System Restore using Cortana and click on Create a restore point.
Inside System Properties window, click on System Restore
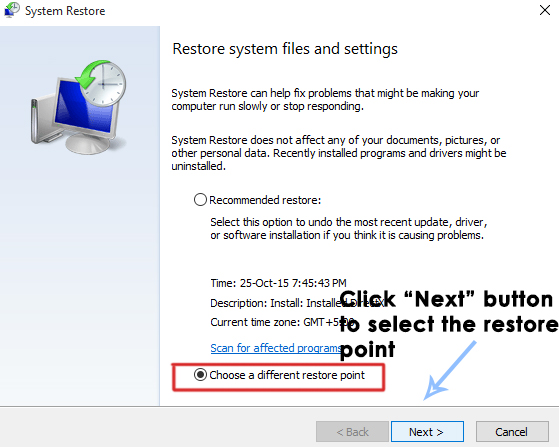
Inside the System Restore window, select the option labeled Choose a different restore point and hit the Next button
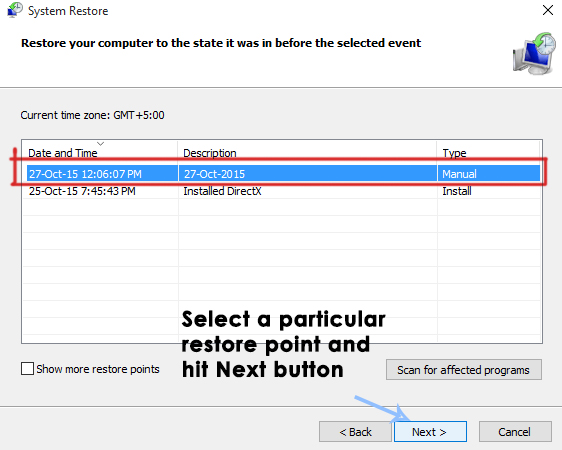
Select a particular restore point you saved before manually. You can also select any restore point present in the list and hit the Next button to initialize the restoration process. After the process is done successfully, you will be reverted to the state you saved before.
Restoring the System if you can’t Boot to Windows:
If you are unable to boot into your Windows 10, then you can follow along these steps.
Open the Advanced Options by following this guide on How to start Windows 10 in Safe Mode.
Inside Advanced options, click on System Restore and follow along the same procedure by selecting the Restore Point you created before. Your Windows will be restored back to the state which you saved before.


