- How To Install Android SDK Tools On Ubuntu 20.04
- Download SDK Tools
- Install SDK Tools
- Download and Install Platform Tools
- Configure Environment Variable
- Using the SDK Manager
- Using the Emulator and AVD Manager
- Summary
- Установка и запуск Android-приложений на Linux
- Установка Android Studio в Ubuntu 20.04
- Системные требования Android Studio:
- Установка Android Studio в Ubuntu
- 1. Установка из snap-пакета
- 2. Установка из центра приложений
- 3. Установка с официального сайта
- 4. Установка в JetBrains Toolbox
- Как удалить Android Studio
- Выводы
How To Install Android SDK Tools On Ubuntu 20.04
It provides all the steps required to install Android SDK Tools on Ubuntu 20.04 LTS.
In this tutorial, we will discuss all the steps required to install Android SDK Tools, SDK Manager, and AVD Manager on the popular Linux distribution i.e. Ubuntu 20.04 with Java 16. This tutorial provides the steps to install Android SDK Tools on Ubuntu 20.04 LTS, though the steps should be the same for other versions of Ubuntu and Linux systems.
This post is useful for the developers using Android SDK Tools with other IDEs without installing Android Studio for the use cases including hybrid app development using Ionic. It also assumes that a valid JAVA_HOME environment variable exists pointing to the installation directory of Java. You may follow the Java installation tutorials written by us including How To Install Java 8 On Ubuntu, How To Install Java 16 On Ubuntu 20.04 LTS, and How To Install OpenJDK 16 On Ubuntu 20.04 LTS.
In case you are interested in developing Android applications using Android Studio, you can also follow the other tutorials written by us including How To Install Android SDK Tools On Windows, How To Install Android Studio On Windows, and How To Install Android Studio On Ubuntu 20.04.
You may also be required to execute the below-mentioned command in case you have set the options previously for Java 9 or Java 10.
Notes: The Ubuntu 18.04 LTS version of this tutorial is available at — How To Install Android SDK Tools On Ubuntu 18.04. You can continue this tutorial for Ubuntu 20.04 LTS.
Download SDK Tools
Open the download tab of Android Studio and scroll down to the Command line tools only section. This section shows various options to download the SDK tools as shown in Fig 1.
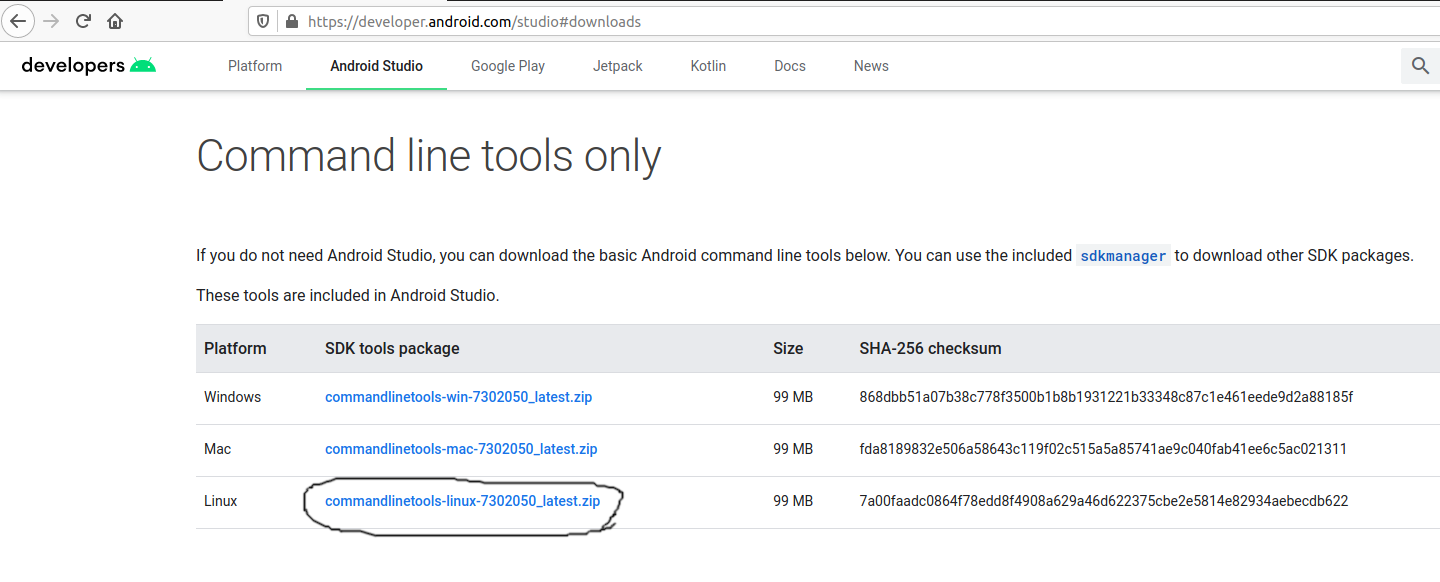
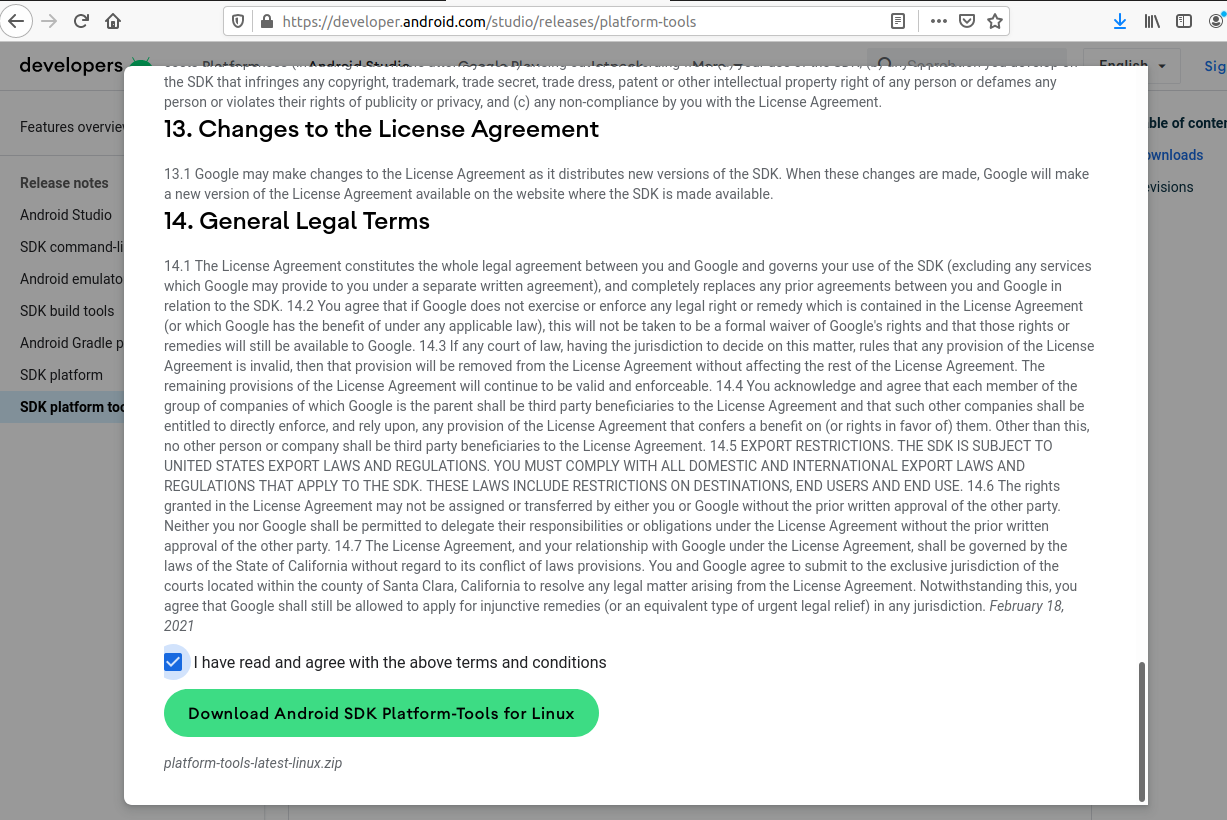
Click on the Download Link as highlighted in Fig 1. It will ask to accept the Terms and Conditions as shown in Fig 2.
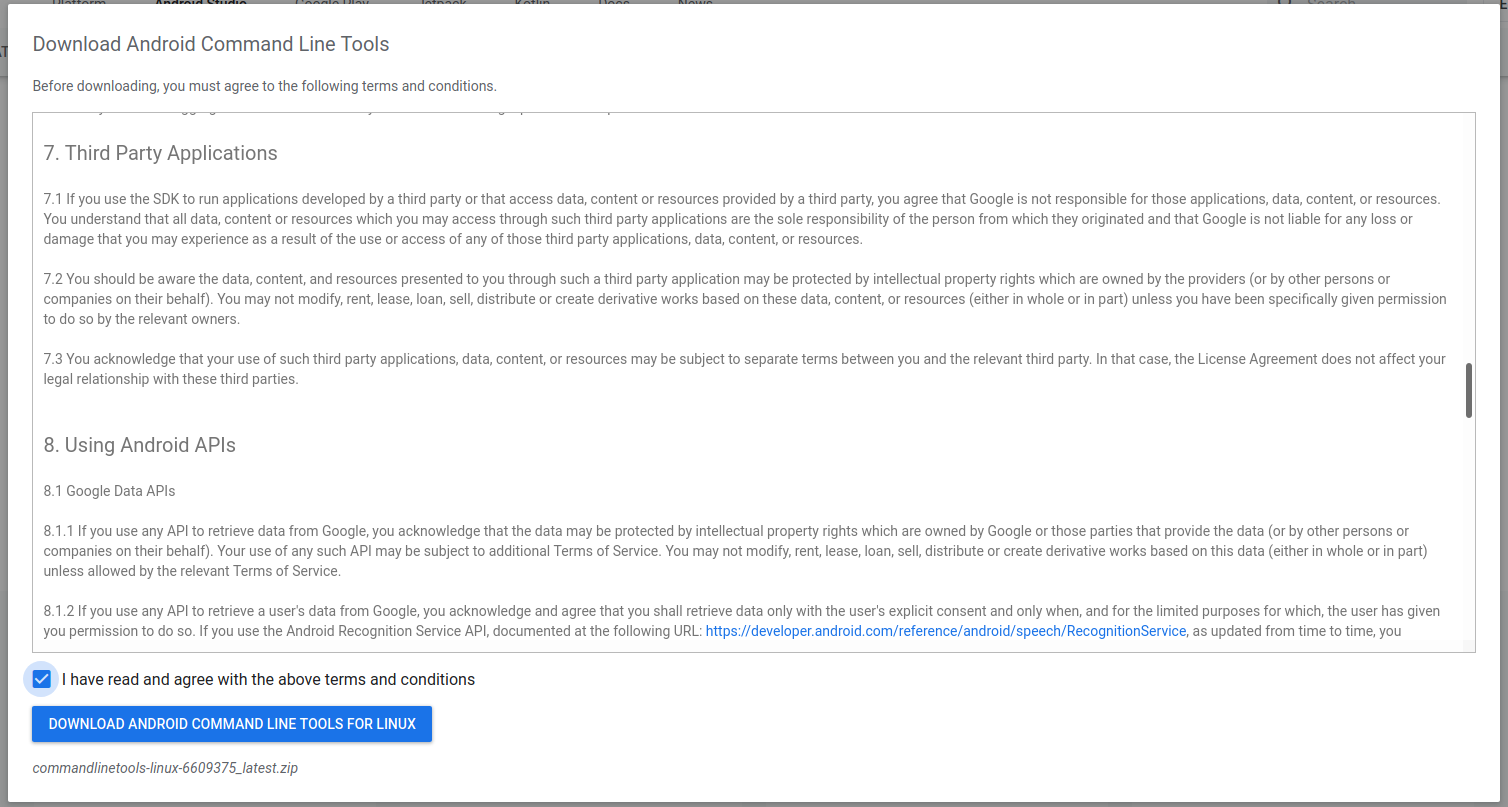
Go through the details, agree to the terms and conditions, and click the Download Button to start the download.
Install SDK Tools
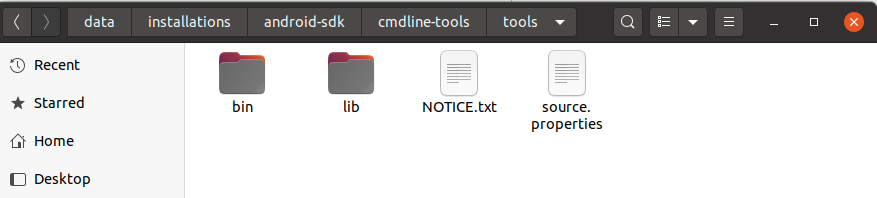
In this step, we will install the Android SDK Tools on Ubuntu. Create a directory having the name set to android-sdk and extract the content of the downloaded SDK Tools zip to this directory. Create another directory android-sdk/cmdline-tools to store the sdk-tools. Make sure that the tools directory is available directly within the android-sdk/cmdline-tools directory created by us.
Download and Install Platform Tools
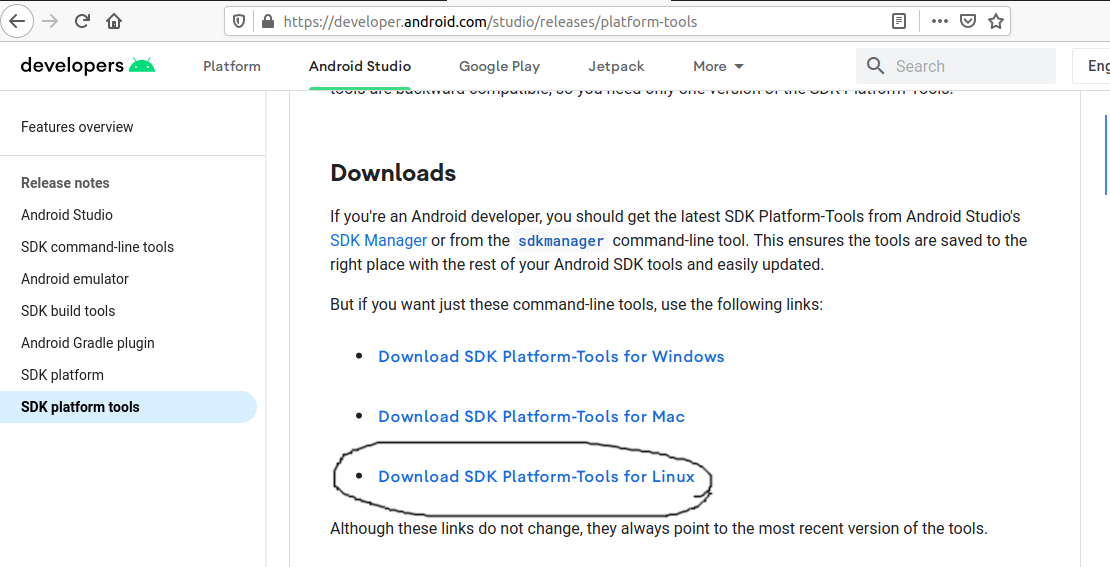
In this step, we will install the Android Platform Tools on Ubuntu. Follow the same steps similar to Android SDK Tools as shown in Fig 4, Fig 5, and Fig 6 to install Android Platform Tools using the download link.
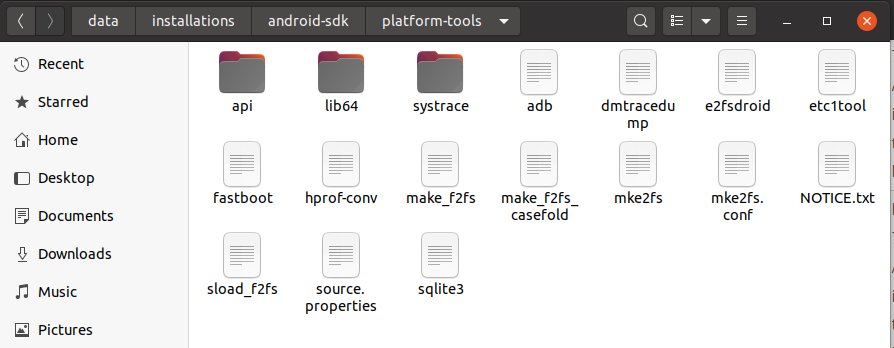
Make sure that the platform-tools content is available within the directory platform-tools. The directory structure should be similar to:
Configure Environment Variable
In this step, we will configure the environment variable to use the SDK tools installed by us. There are two ways to do it. In the first approach, we can update the .bashrc file of the user account. Another approach is to update /etc/profile file which works for all the accounts.
Approach A
Update .bashrc file of the user account.
Notes: Replace the android sdk path based on your installation directory.
Approach B
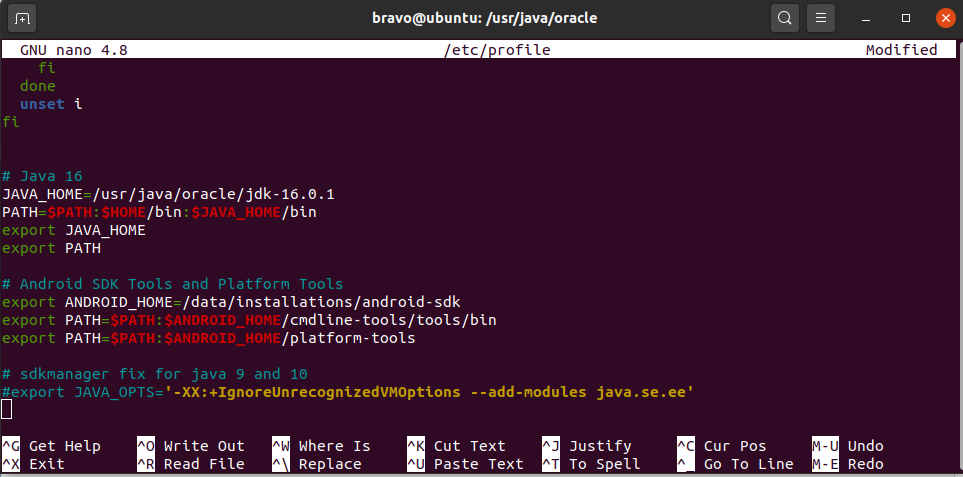
Update /etc/profile file.
Scroll down by pressing the Page Down button and add at the end of this file:
Make sure that you provide the correct path to the android-sdk directory.
Now press Ctrl + O and press Enter to write our change. Press Ctrl + X to exit the nano editor. The nano editor should look like Fig 7.
Notes: Approach B didn’t work for me.
Now test the Android SDK installed by us using the environment variables configured by us.
Using the SDK Manager
Update SDK Manager — Update the SDK manager using the below-mentioned command.
List — We can list the installed and available packages and images using the list command as shown below.
Install Platform — Use the below-mentioned command to install the Android 10 (API level 29) using the SDK manager.
It will ask to accept the terms and conditions. Enter y and hit Enter Key to accept the terms and conditions. This command creates the directories licenses and platforms within android-sdk and installs the package android-30 within the platforms directory having all the required files to run the emulator for Android 11.
If we again check the installed packages, the list command shows the installed options as shown below.
After installing the platforms, the directory structure should be:
Add System Image — We can add system image from available images shown by the list command using the SDK manager as shown below. We are adding the most recent default 64-bit system image.
Accept the License Agreement to complete the download. There are several projects which need Google Play Services. We need system images specific to Google Play Services as shown below.
Now again use the command list as shown below.
After installing the default system image, the directory structure should be:
Install Emulator — You might be required to install the emulator before creating the AVD using SDK Manager. The emulator gets installed while adding the system images in the previous steps.
Install Build Tools — Install the most recent build tool listed by the list command.
After installing the build tools, the directory structure should be:
Now again use the command list as shown below.
Using the Emulator and AVD Manager
Create AVD — Create the AVD using the system image downloaded in the previous step as shown below. Replace with actual name.
The above commands ask a bunch of questions to configure the AVD if we choose the custom hardware profile option. We have excluded the details of these options from this tutorial since these configuration details depend on the actual needs. After completing all the configurations, it creates the AVD using the name provided by us while configuring it.
List AVDs — Now go to the tools directory(only required in case you have omitted to add tools path to PATH while configuring environment variables) on the command line and check the installed platform as shown below.
It will list all the AVDs installed by us.
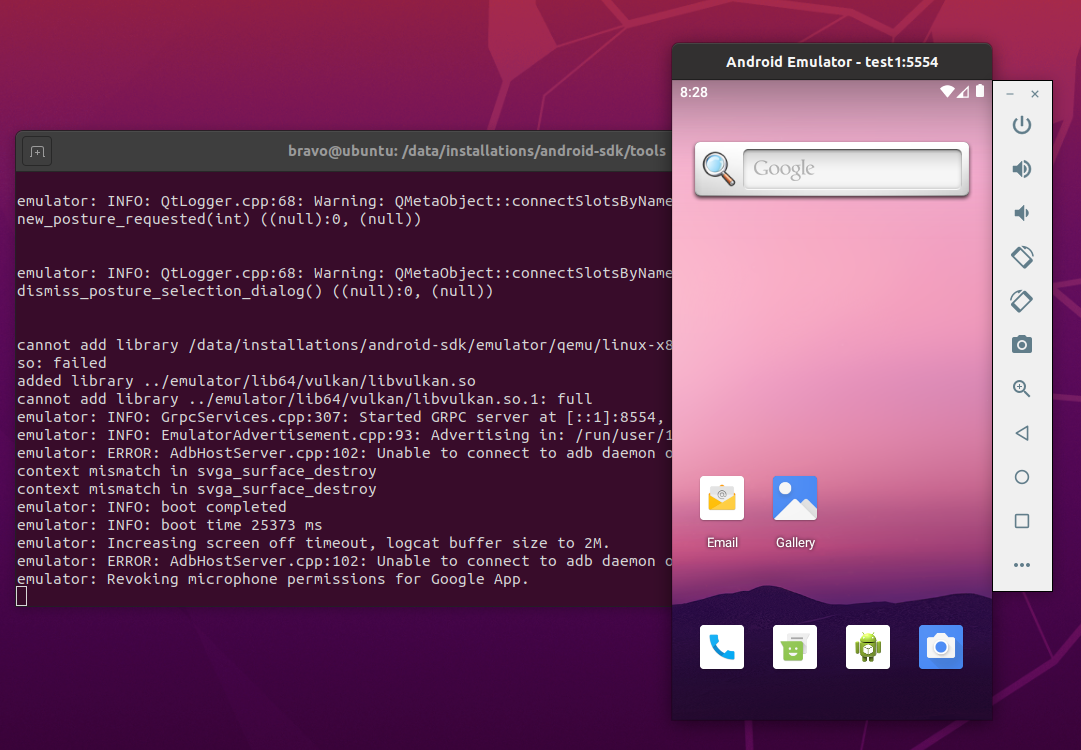
Launch AVD — We can launch the AVD using the emulator as shown below.
The emulator will take some time to completely launch the AVD. The final results should look similar to Fig 8.
Notes: I have used Ubuntu 20.04 LTS installed as VM using VMware Workstation Player, hence I have enabled the Virtualization for my Virtual Machine.
Delete Emulator — We can also delete an existing emulator as shown below.
Summary
This tutorial provided all the steps required to install Android SDK Tools and Android Platform Tools on Ubuntu 20.04 LTS. It also provided the steps required to launch the AVD using the Android Emulator.
Источник
Установка и запуск Android-приложений на Linux

Как известно, многие Android-приложения можно нативно запускать на Chrome OS благодаря библиотеке Chrome App Runtime.
С помощью расширений chromeos-apk и ARChon запуск Android APK стал возможен и на других ОС.
В этой публикации я расскажу, как установить произвольное Android-приложение на Ubuntu 14.04.
Исходные инструменты:
- Ubuntu 14.04 LTS;
- Chrome 39.0 (подойдет и другая версия 37+).
Устанавливаем ARChon Runtime
1) Скачиваем и распаковываем ARChon в произвольную дирректорию;
2) Открываем Chrome и включаем Developer mode в chrome://extensions/;
3) Кликаем «Load unpacked extension» и устанавливаем распакованный ARChon.
Далее необходимо подготовить архив APK для установки.
Устанавливаем chromeos-apk
1) Для Ubuntu прежде всего нужно установить библиотеку lib32stdc++6:
2) chromeos-apk можно установить с помощью менеджера пакетов npm (поставляется вместе с node.js).
3) Сейчас можно установить непосредственно chromeos-apk:
Теперь все готово к распаковке APK.
Подготавливаем APK с помощью chromeos-apk
1) Для распаковки APK-архива выполняем:
2) Теперь у нас есть Chrome-APK расширение, и все что нужно — загрузить (chrome://extensions/) и запустить его.
UPD: полезные ссылки от sequence
ARChon Packager: создает архивы для archon из установленных в телефоне приложений.
twerk: расширение хром, сильно облегчает конвертацию apk.
Источник
Установка Android Studio в Ubuntu 20.04
Android Studio — это официальная и самая популярная интегрированная среда разработки Android-приложений. Программа разрабатывается корпорацией Google и содержит все необходимые возможности. Среда основана на IntelliJ IDEA, которая написана на Java.
Среди возможностей Android Studio не только написание, сборка и тестирование программ, но и поддержка загрузки их на устройство, интеграция с облаком и многое другое. В этой статье мы рассмотрим, как выполняется установка Android Studio в Ubuntu.
Системные требования Android Studio:
Рекомендованные системные требования:
- Дистрибутив — любой 64 битный дистрибутив с установленной glibc 2.31 или выше и окружением рабочего стола Gnome, KDE или Unity DE.
- Процессор — 64-битный, с поддержкой SSSE3 и Intel VT или AMD V;
- RAM — 8 Гб или больше;
- Свободное место на диске — 8 Гб;
- Разрешение экрана — 1280 x 800;
Установка Android Studio в Ubuntu
Вы можете установить Android Studio и Android SDK несколькими способами: c помощью snap-пакета, с официального сайта, из центра приложений, а также с использованием специального инструмента: JetBrains Toolbox. Каждый из способов имеет свои преимущества, и мы рассмотрим их все.
1. Установка из snap-пакета
Для установки Android Studio с помощью snap-пакета откройте терминал и выполните команду:
sudo snap install android-studio —classic
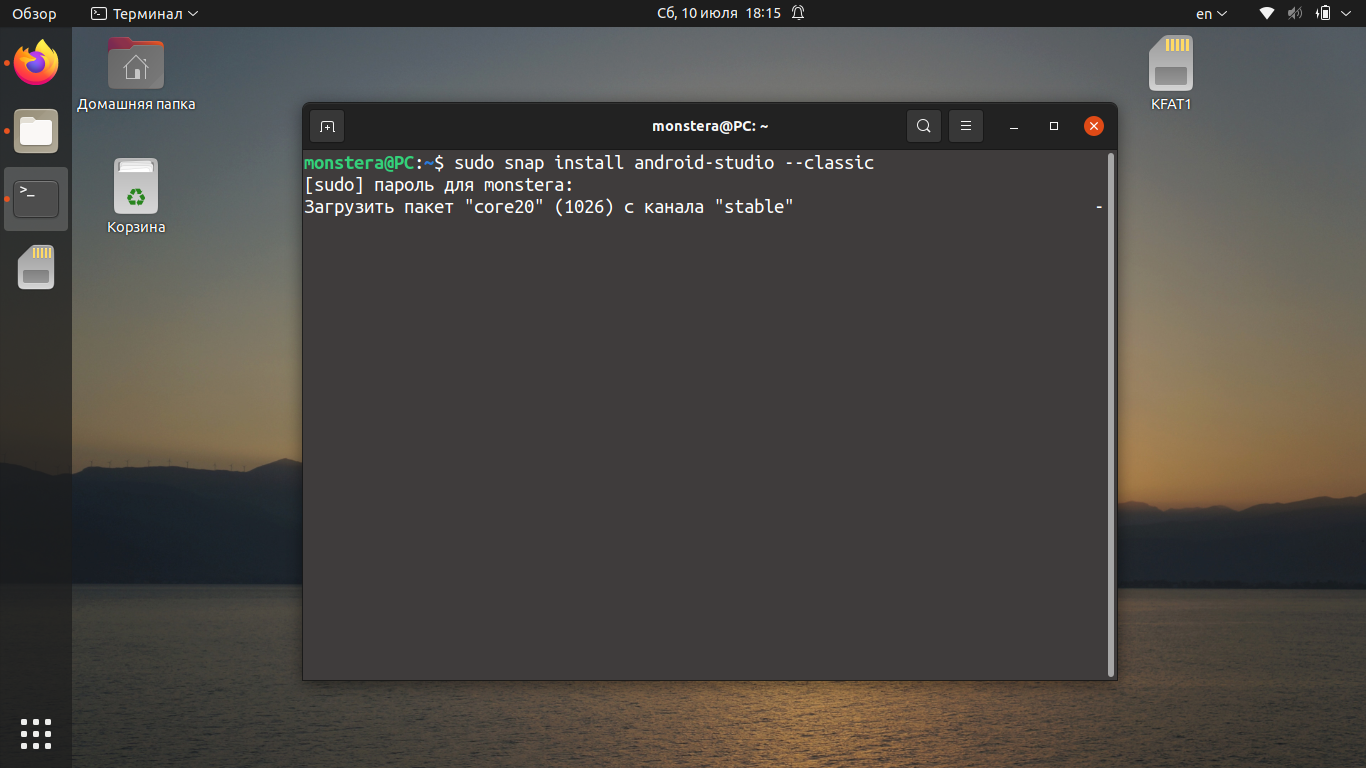
После завершения загрузки пакета программа будет доступна в главном меню.
2. Установка из центра приложений
Запустите центр приложений Ubuntu и введите в поиске название программы:
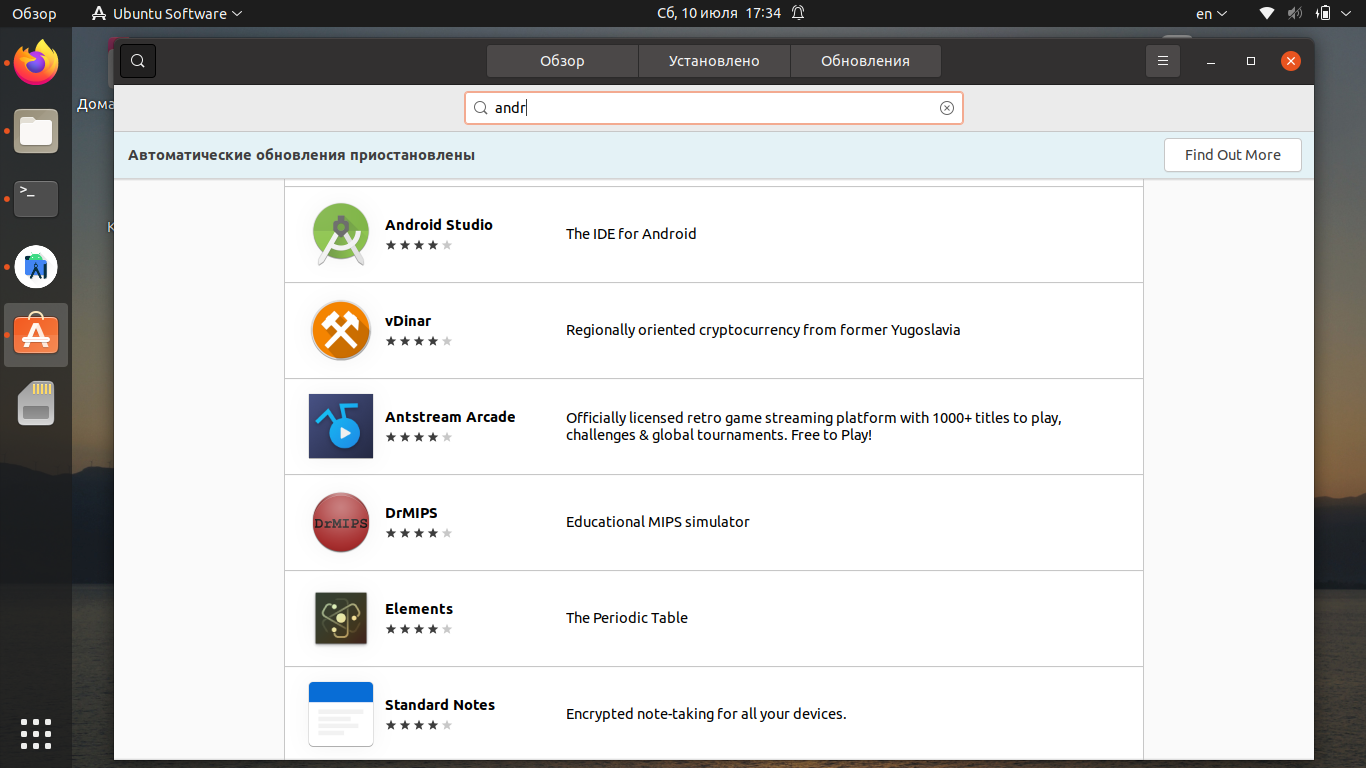
В списке выберите Android Studio и нажмите на кнопку Установить.
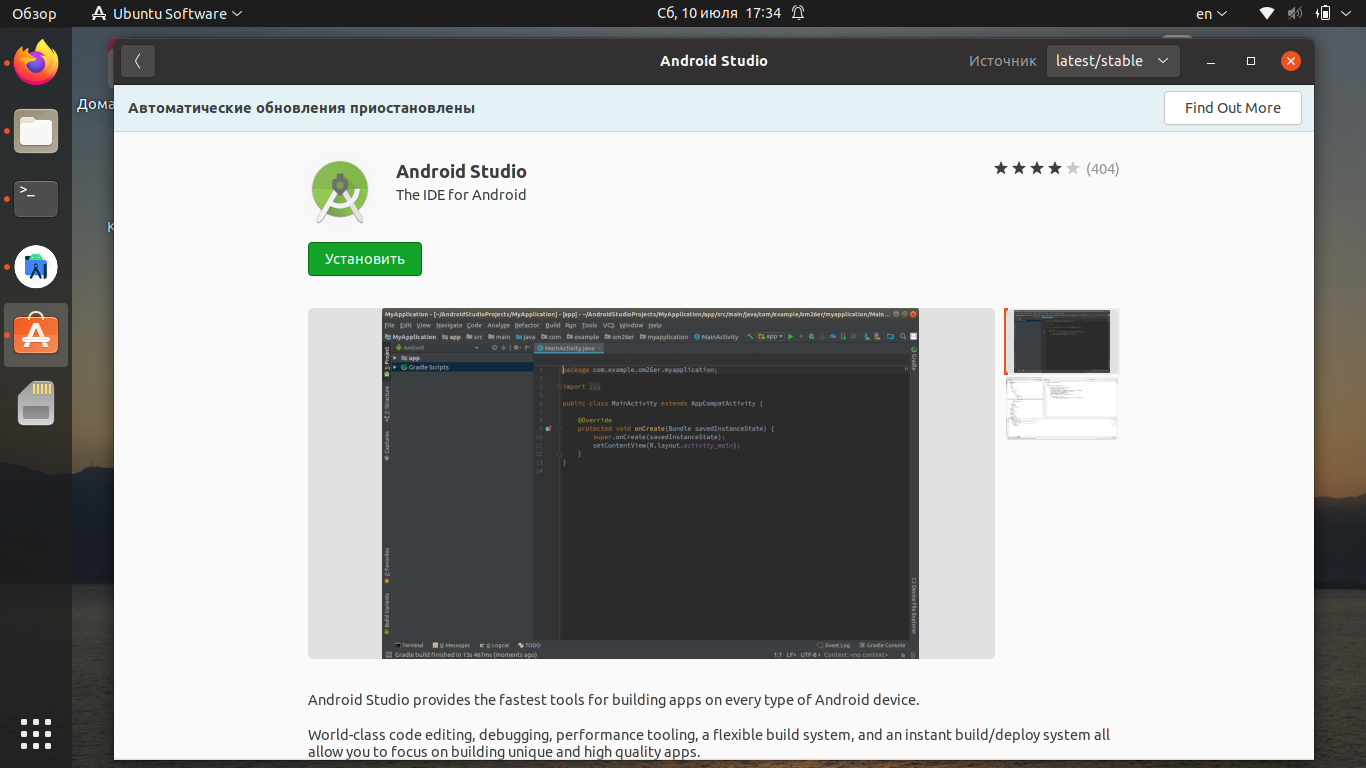
Дождитесь, пока инсталляция будет завершена.
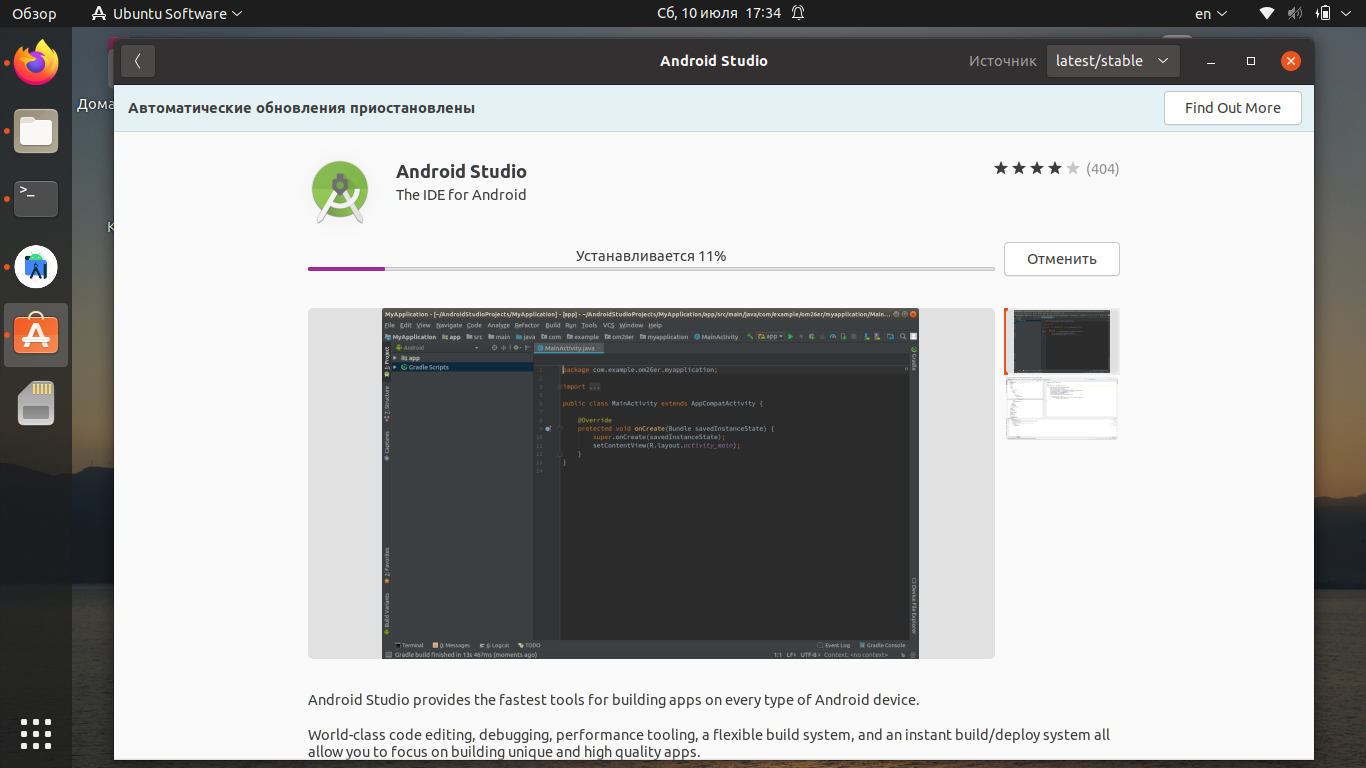
Процесс установки может занять до 30 минут (зависит от скорости вашего интернет-соединения). По окончании загрузки вы сможете запустить приложение.
3. Установка с официального сайта
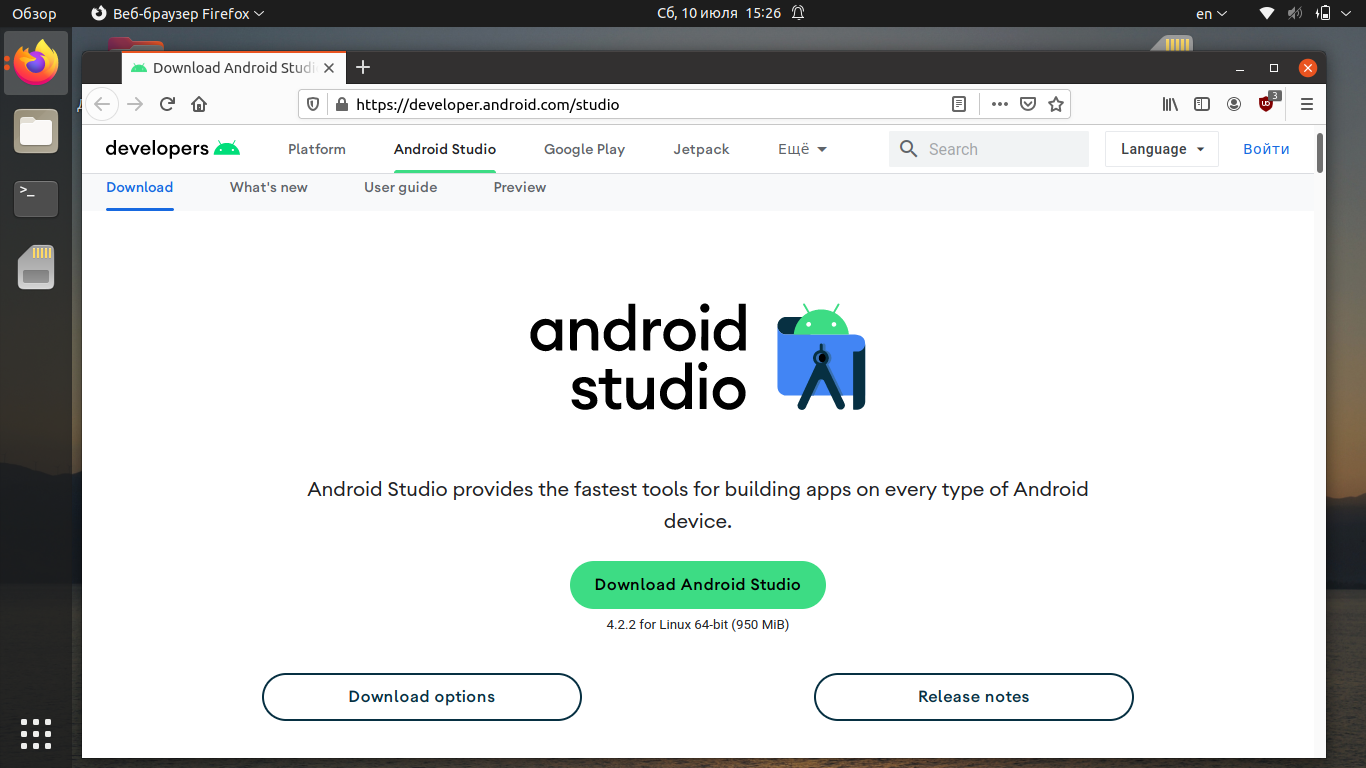
Прежде всего, вам необходимо загрузить установщик с официального сайта разработчиков. Перейдите на сайт и нажмите Download Android Studio.
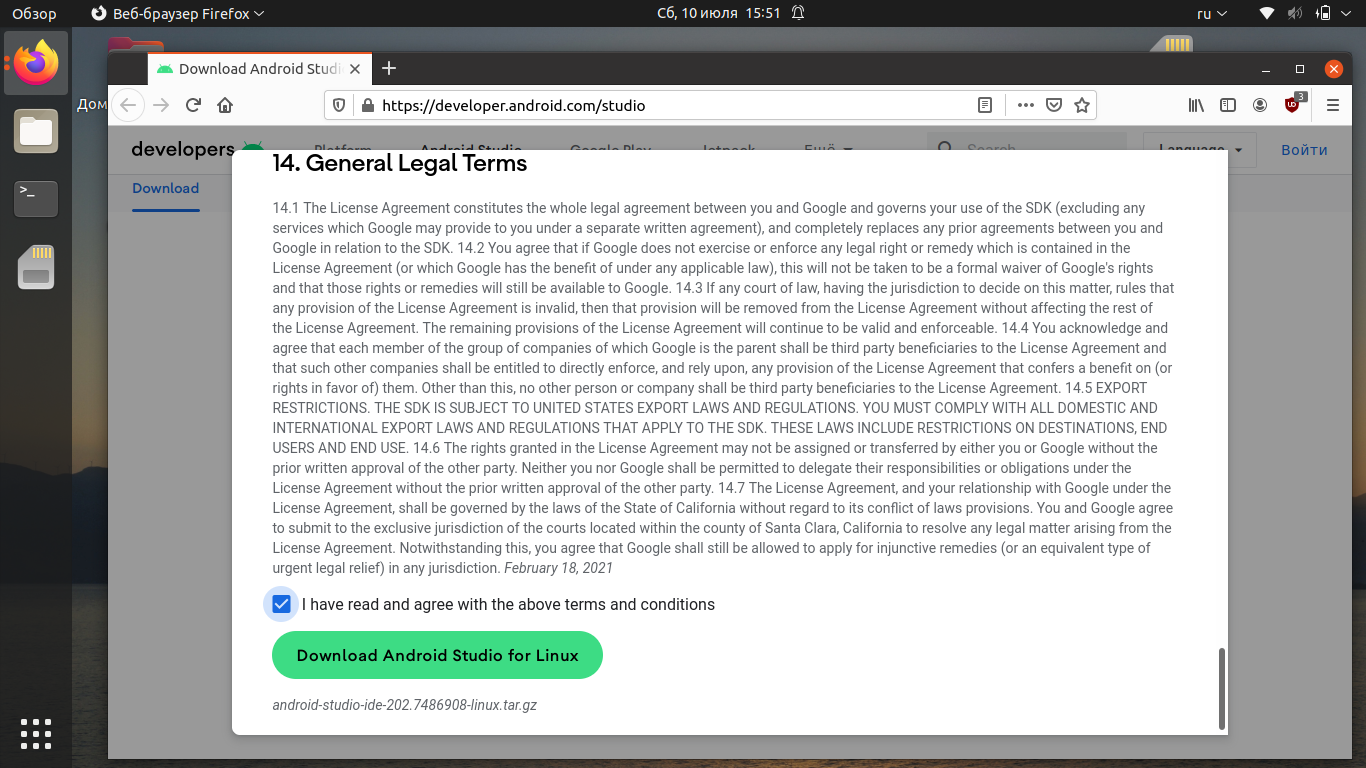
Ознакомьтесь с лицензионным соглашением, активируйте чекбокс и нажмите кнопку Download Android Studio for Linux.
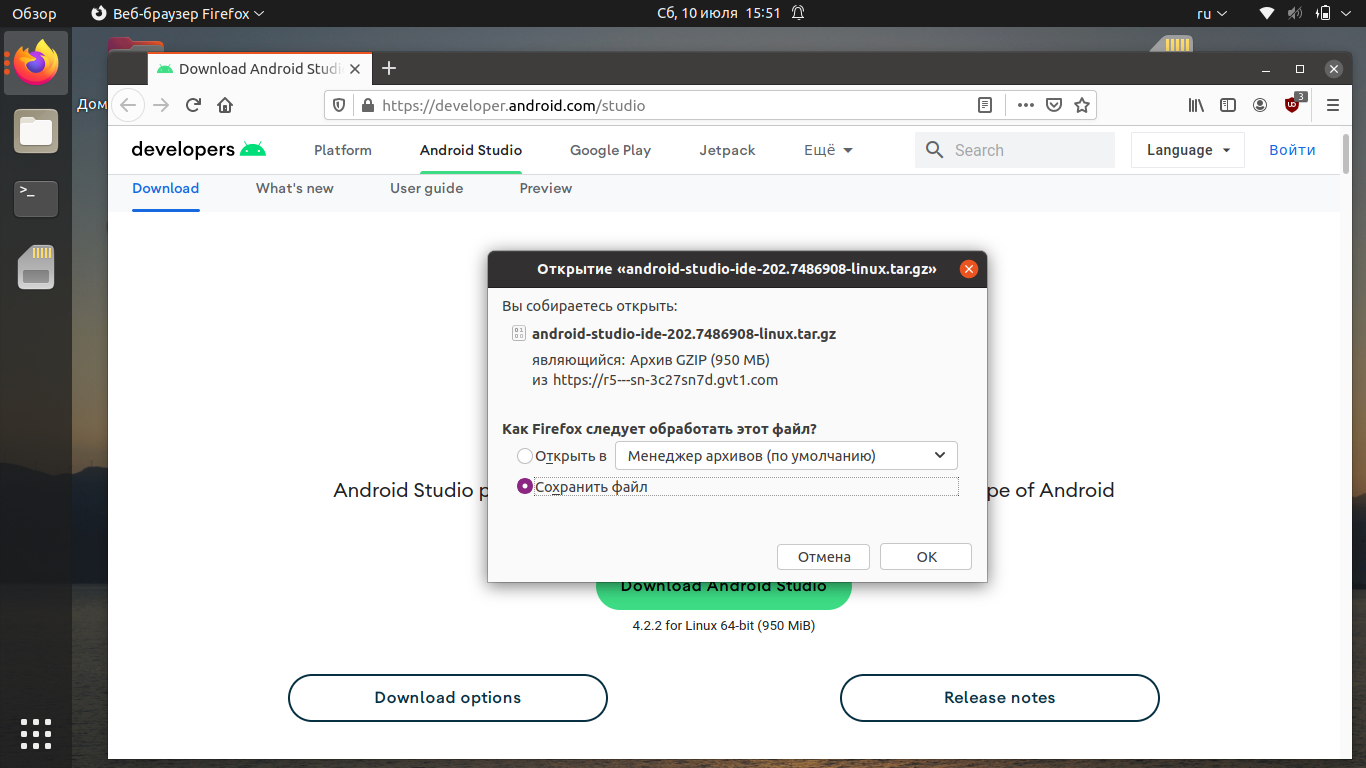
Выберите Сохранить файл и нажмите ОК.
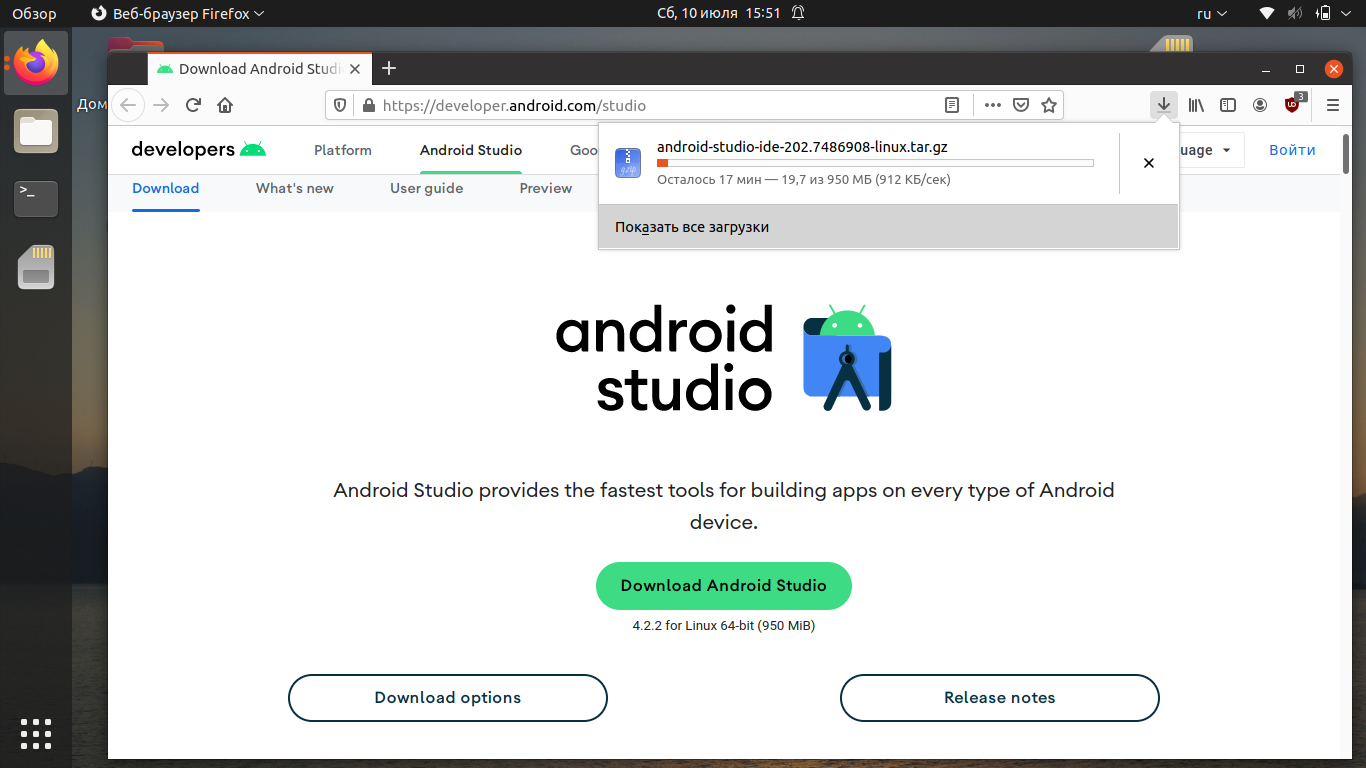
Дождитесь завершения скачивания.
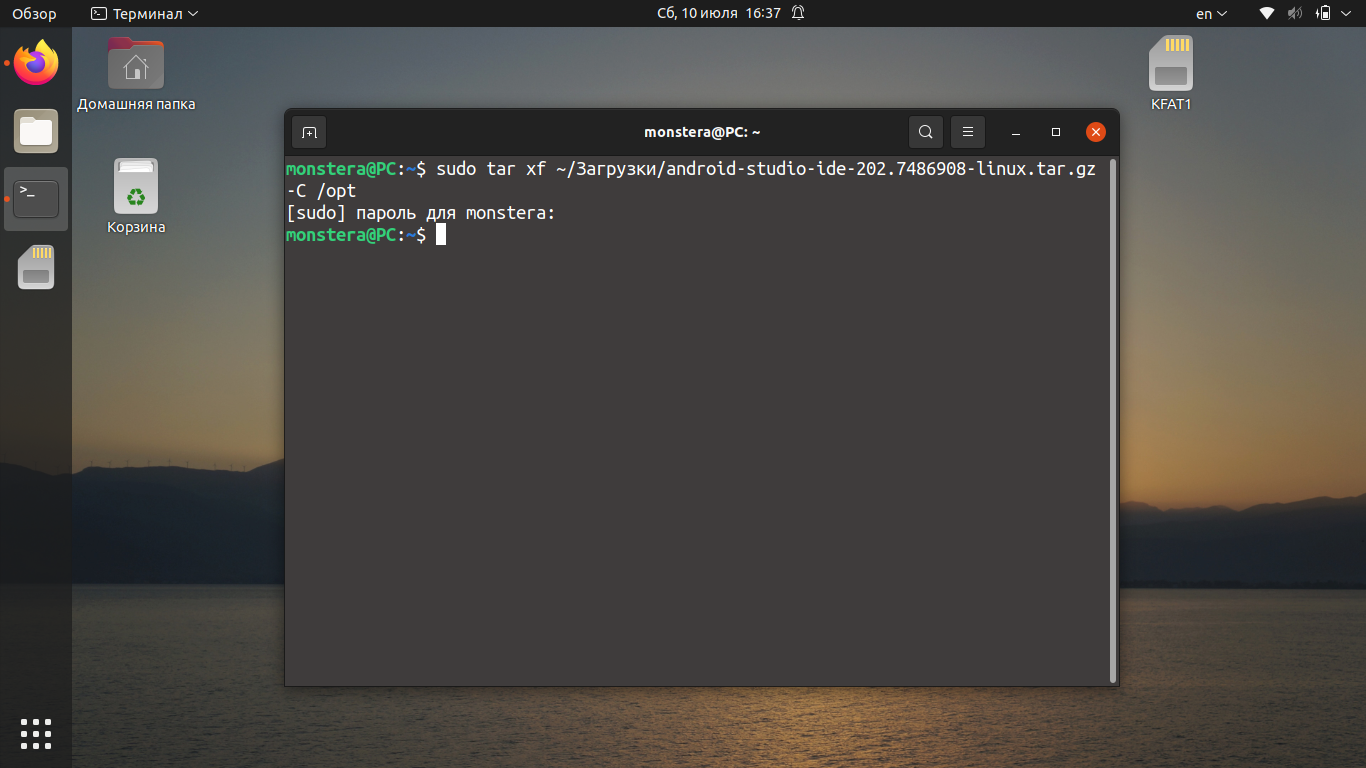
Когда файл будет загружен, перейдите в папку с загрузками и распакуйте содержимое архива в /opt. Для этого используйте команду вида (укажите скачанную вами версию приложения вместо 202.7486908):
/Загрузки/android-studio-ide-202.7486908-linux.tar.gz -C /opt
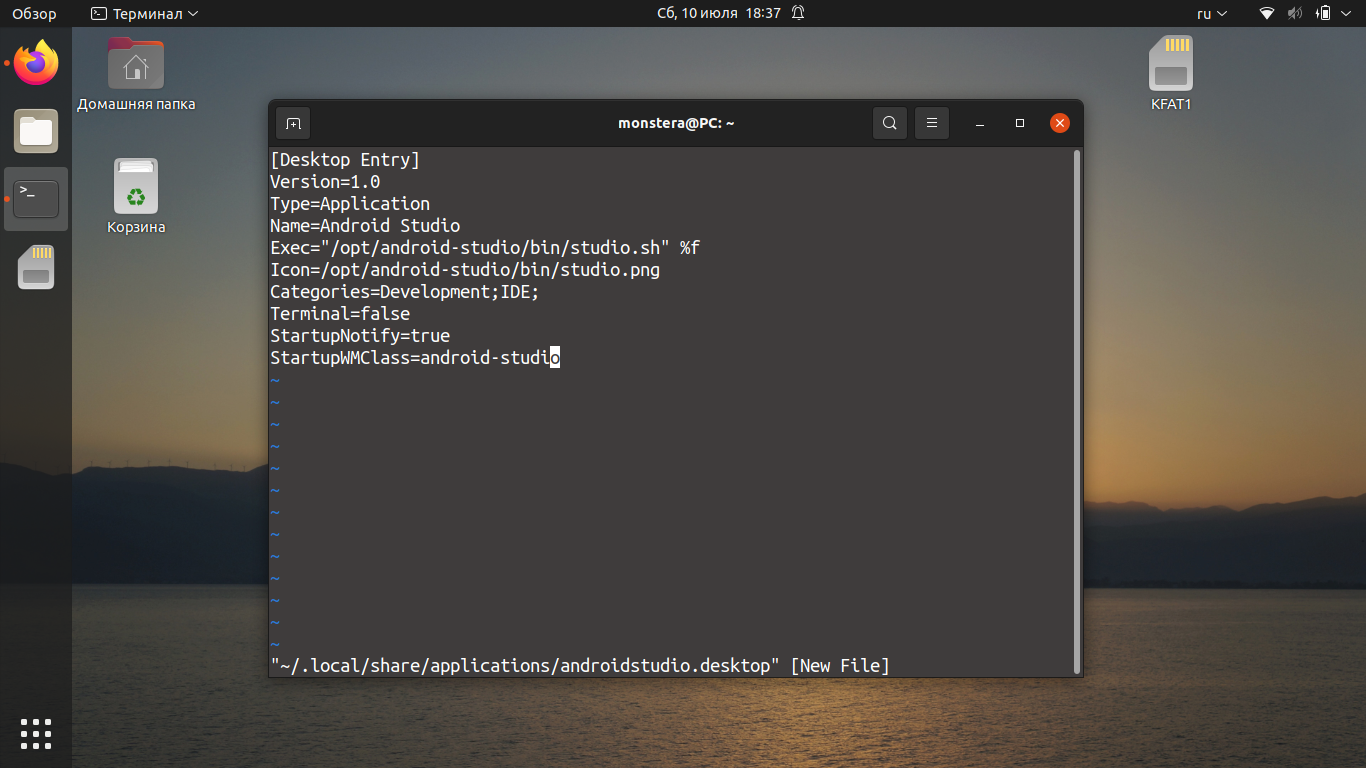
Чтобы добавить ярлык в меню приложений, создайте файл androidstudio.desktop командой:
Добавьте в файл следующий текст и сохраните его:
[Desktop Entry]
Version=1.0
Type=Application
Name=Android Studio
Exec=»/opt/android-studio/bin/studio.sh» %f
Icon=/opt/android-studio/bin/studio.png
Categories=Development;IDE;
Terminal=false
StartupNotify=true
StartupWMClass=android-studio
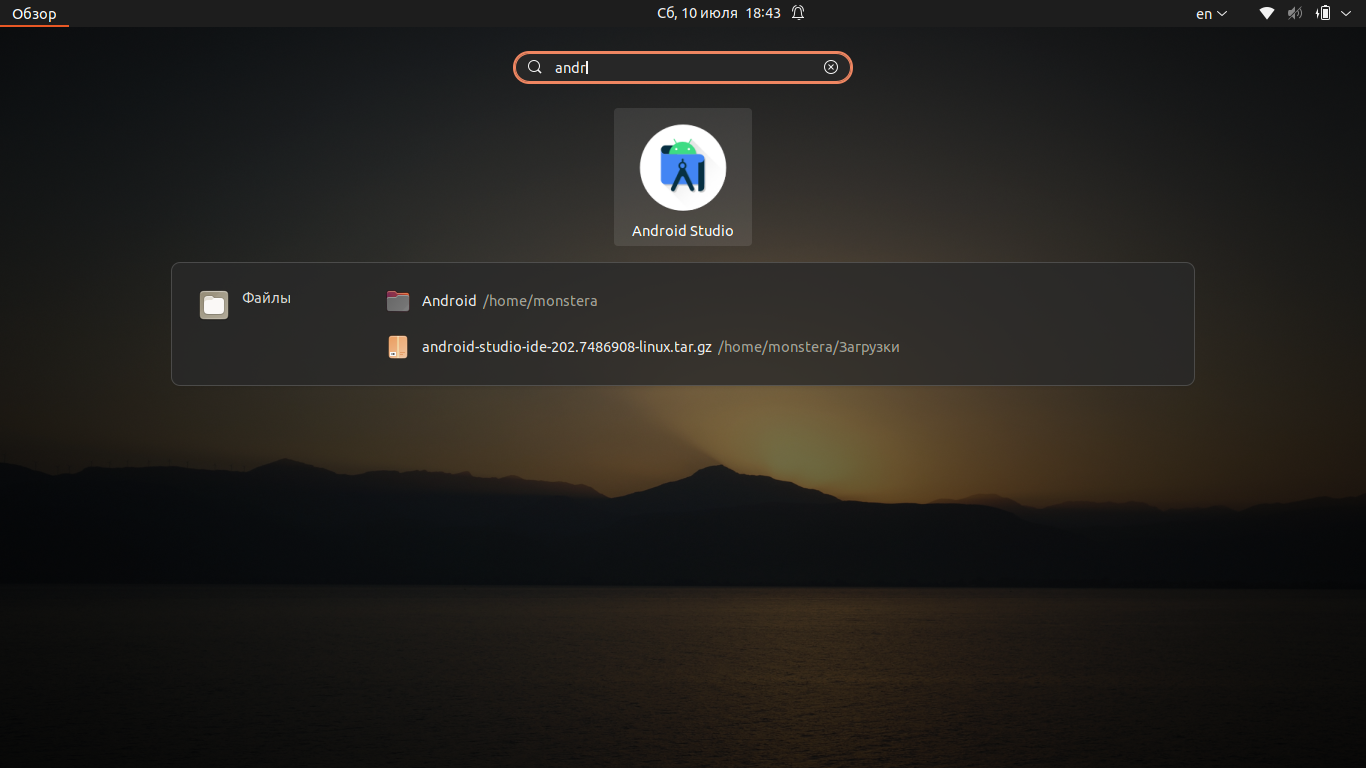
После этого установка будет завершена, и вы можете запустить среду разработки из главного меню:
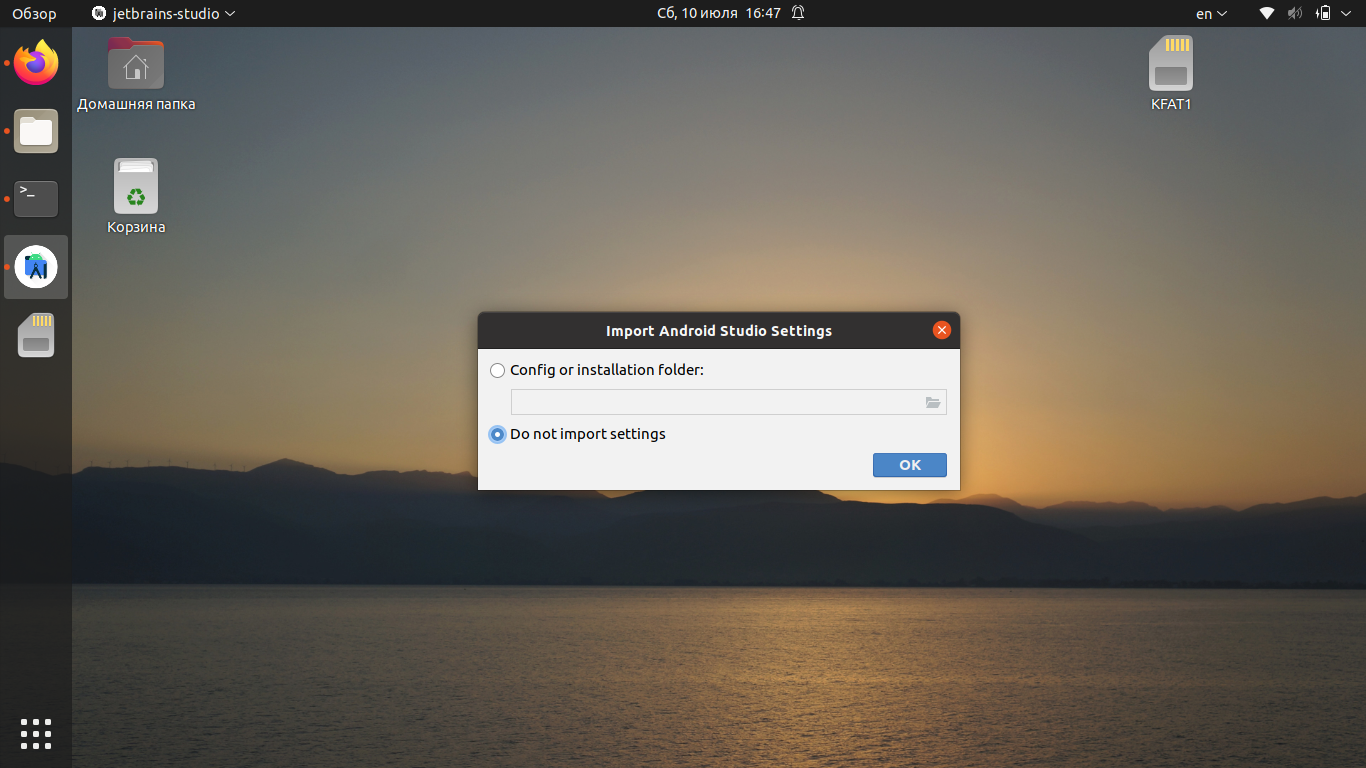
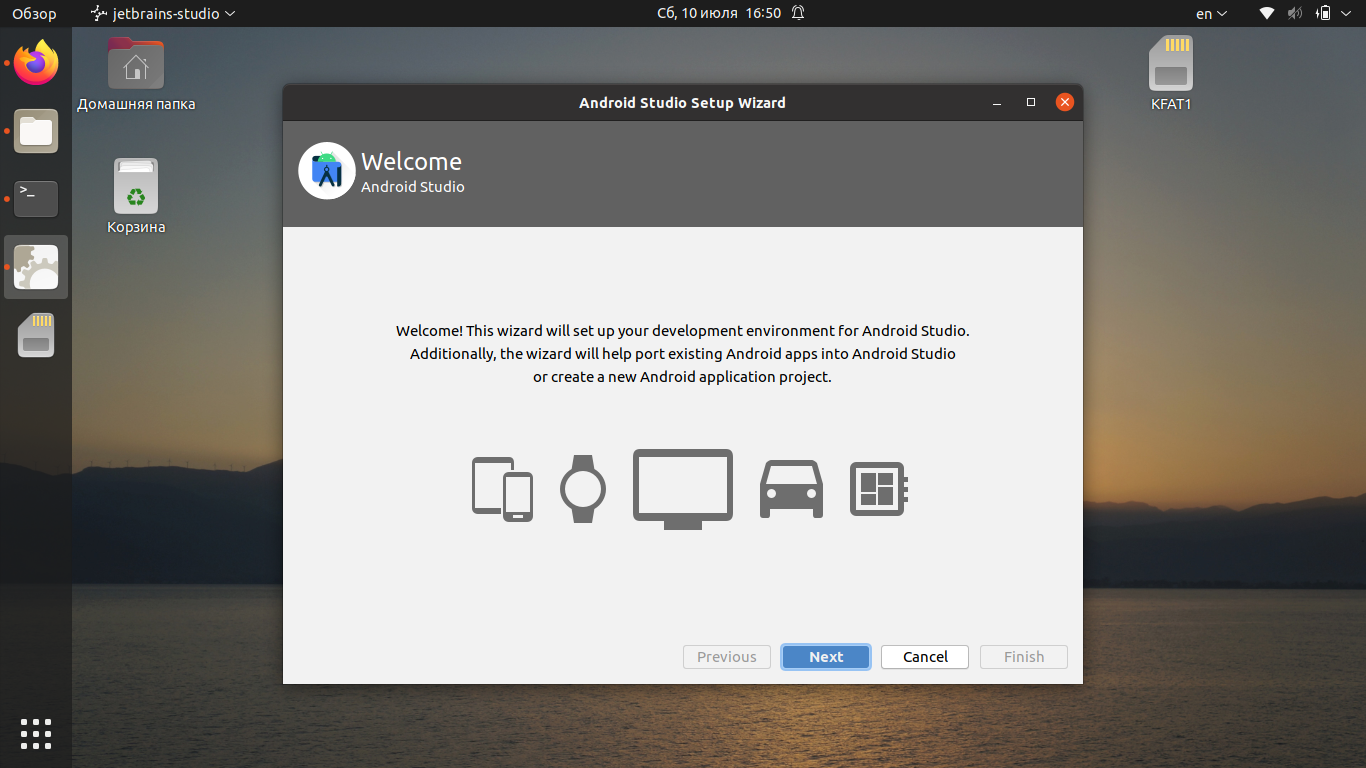
Но окончательная установка Android Studio ещё не завершена — программа должна скачать все необходимые компоненты и настройки. Если вы работали с Android Studio ранее, в следующем окне вы можете скопировать свои настройки. Если нет, — выберите Do not import settings и нажмите ОК.
Потребуется некоторое время, чтобы программа могла загрузить нужные компоненты и настроить систему.
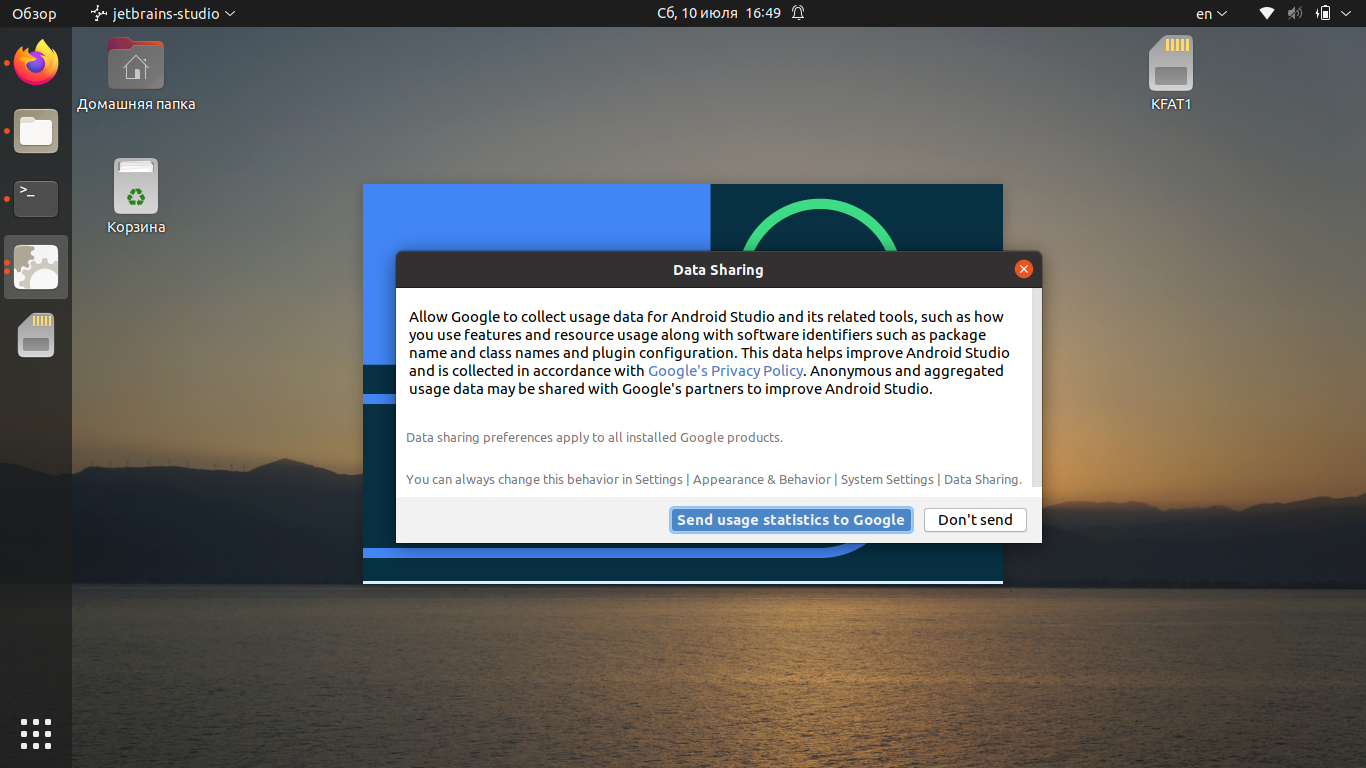
Приложение спросит, нужно ли отправлять статистику в Google. Эти данные могут использоваться для улучшения следующих версий Android Studio. Определитесь с выбором, чтобы продолжить установку.
На следующем экране нажмите кнопку Next:
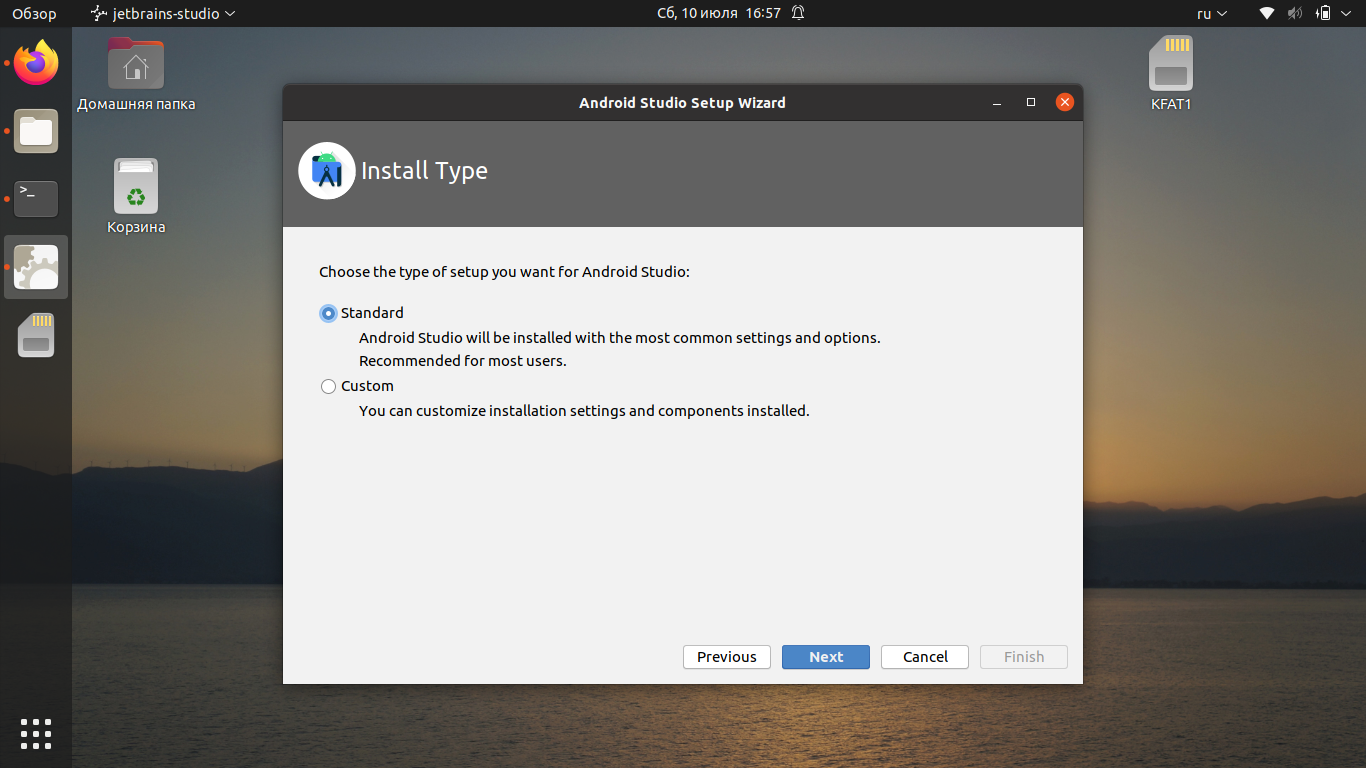
После этого вы сможете выбрать между стандартной автоматической инсталляцией и ручной. Второй способ позволяет выбрать для установки отдельные компоненты.
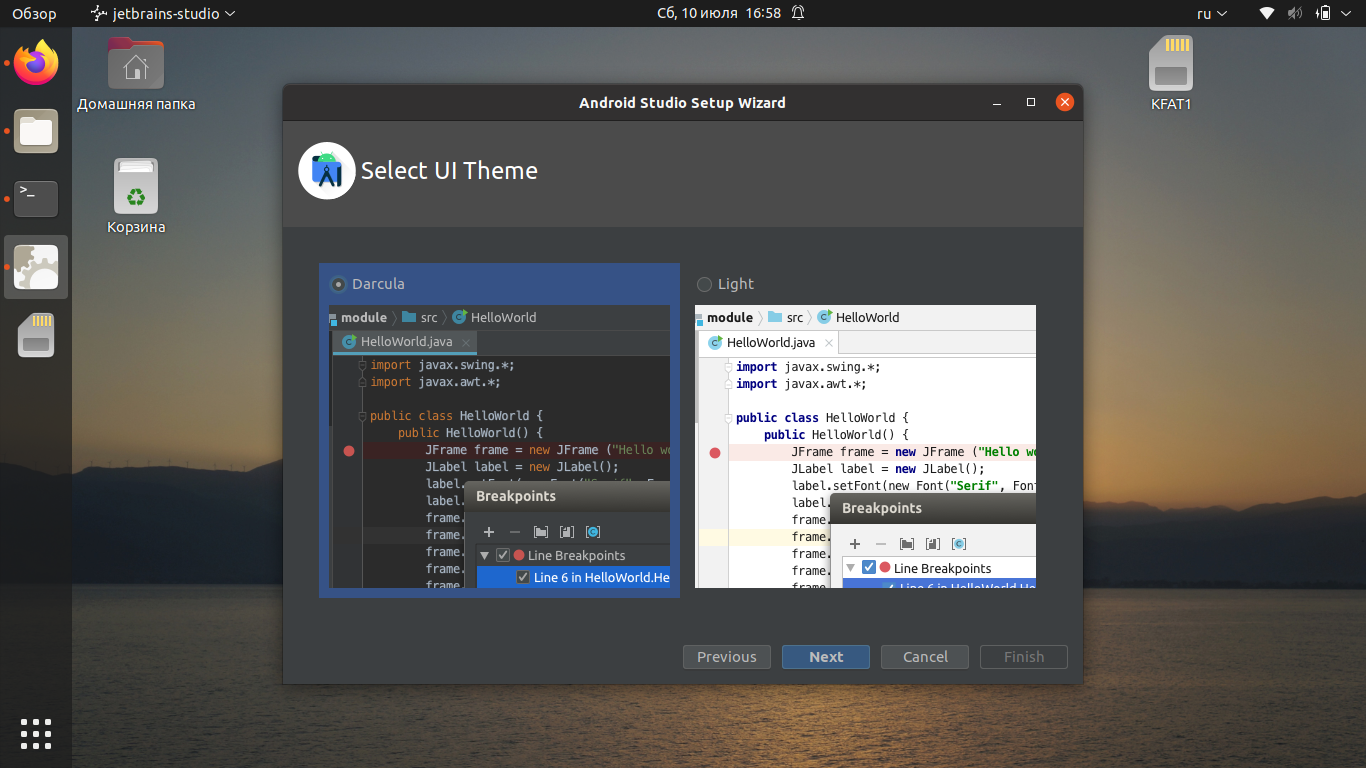
Выберите предпочитаемую тему оформления:
Ознакомьтесь со списком компонентов и их расположением:

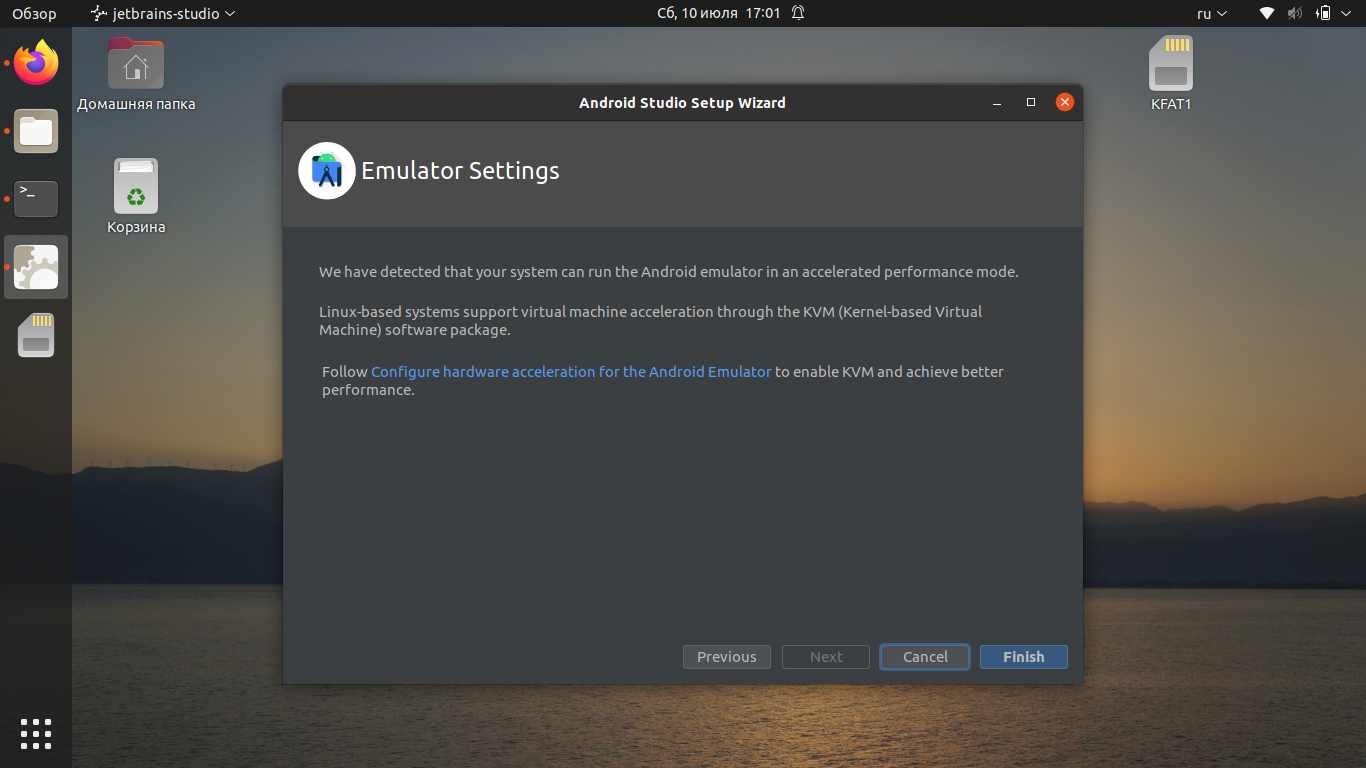
Приложение отобразит уведомление о том, можете ли вы использовать эмуляторы на своём компьютере (зависит от аппаратной составляющей).
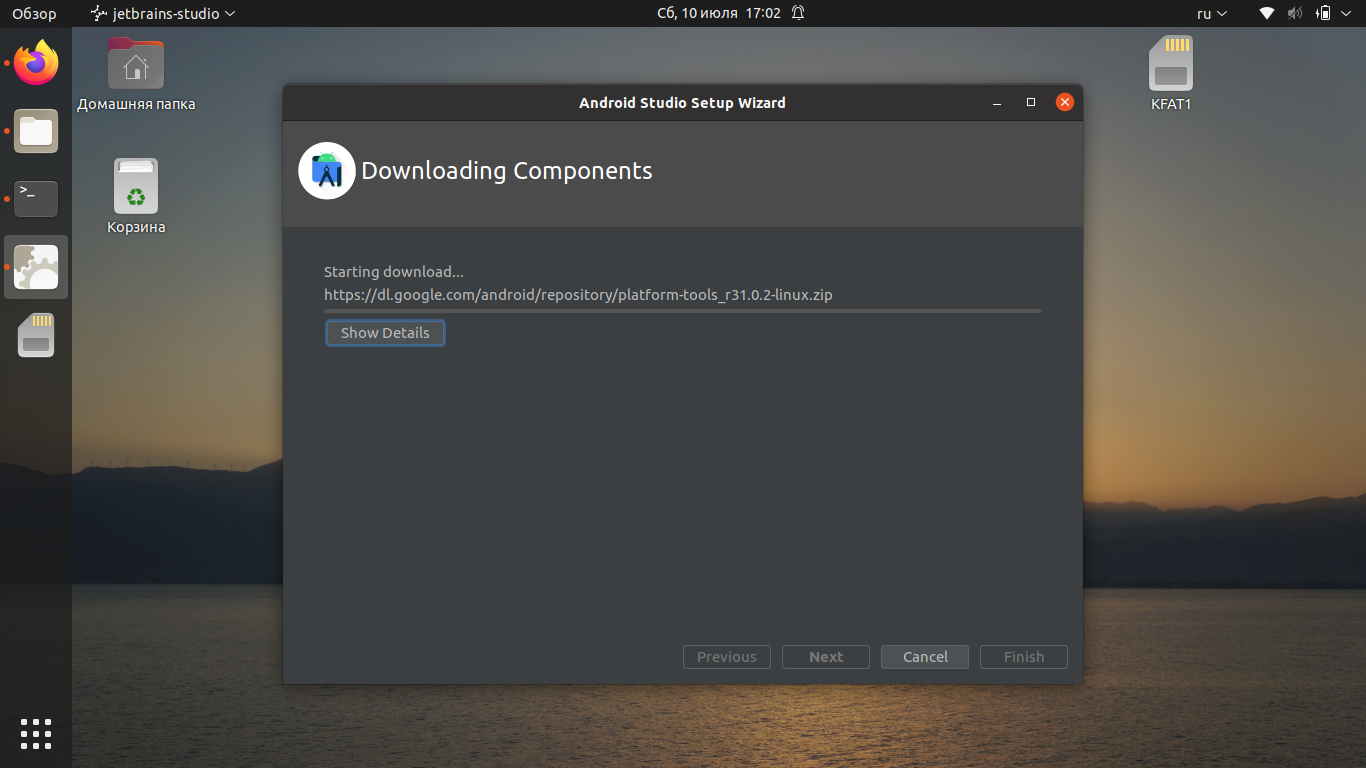
Далее начнётся загрузка, которая может занять довольно много времени, скорость зависит от вашего интернет соединения:
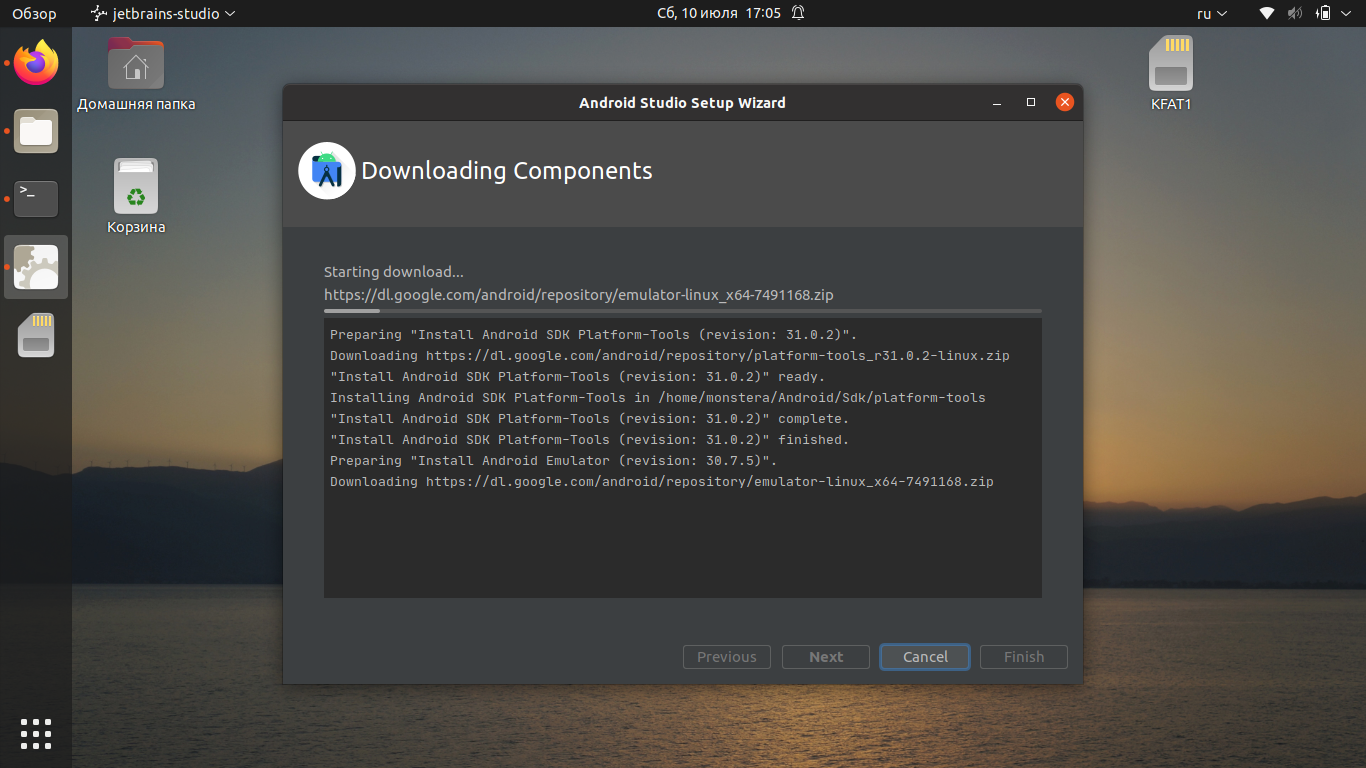
Можно нажать кнопку Show Details, чтобы наблюдать очерёдность установки компонентов:
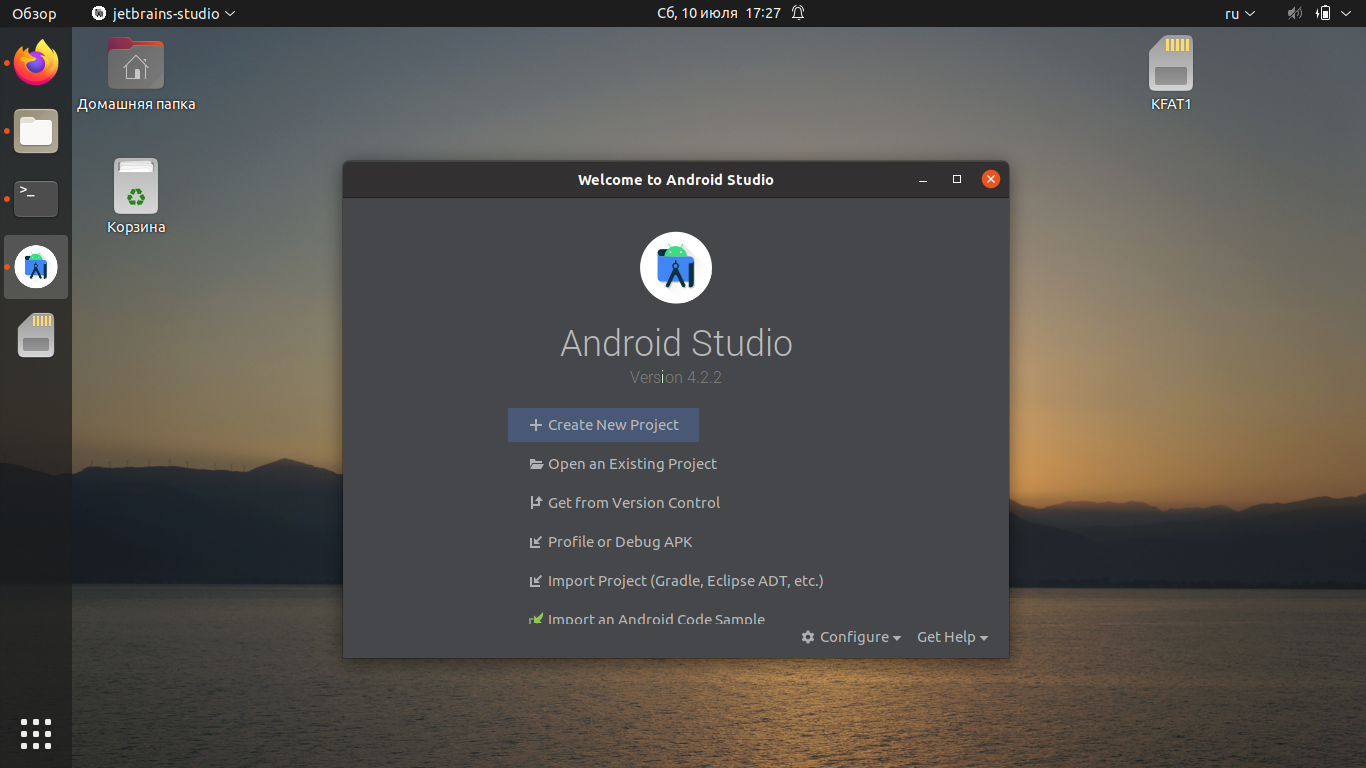
Когда загрузка завершится, вы можете нажать Finish и перейти к созданию нового проекта.
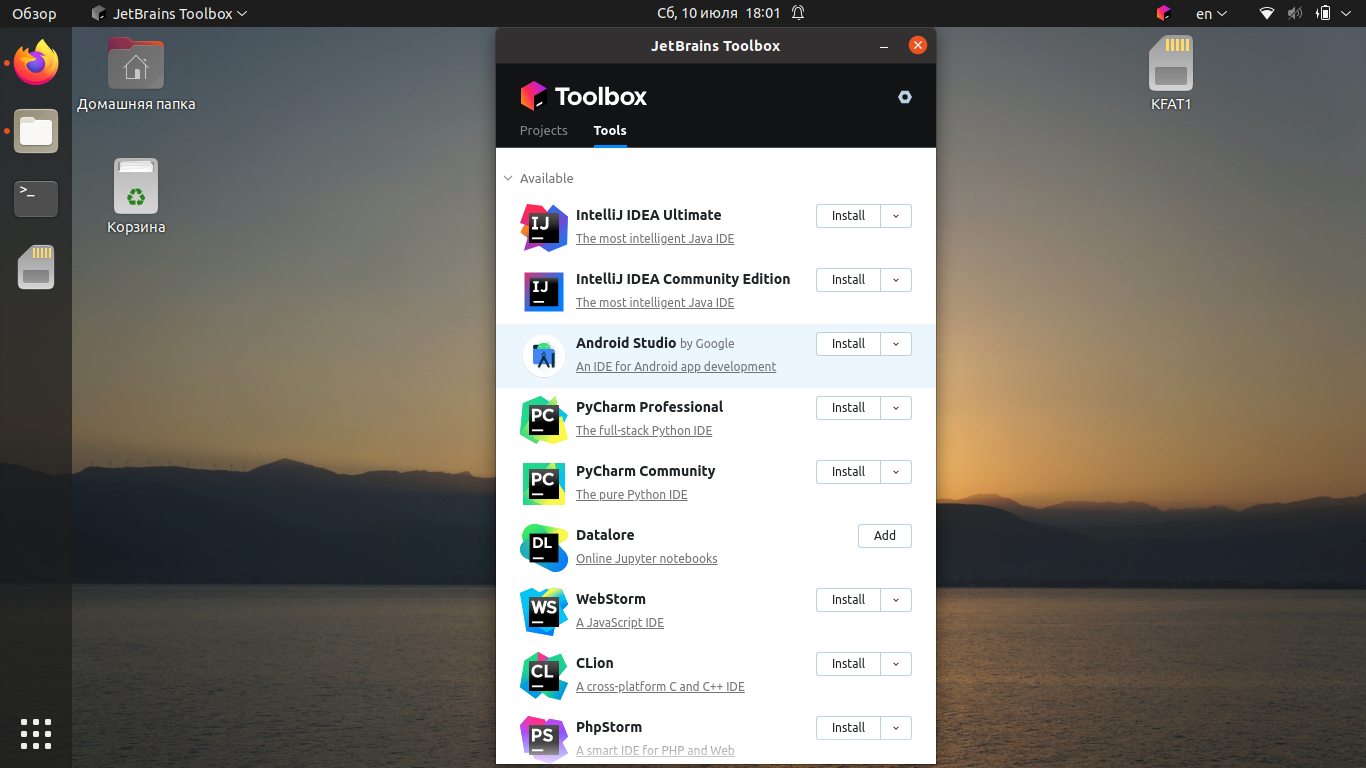
4. Установка в JetBrains Toolbox
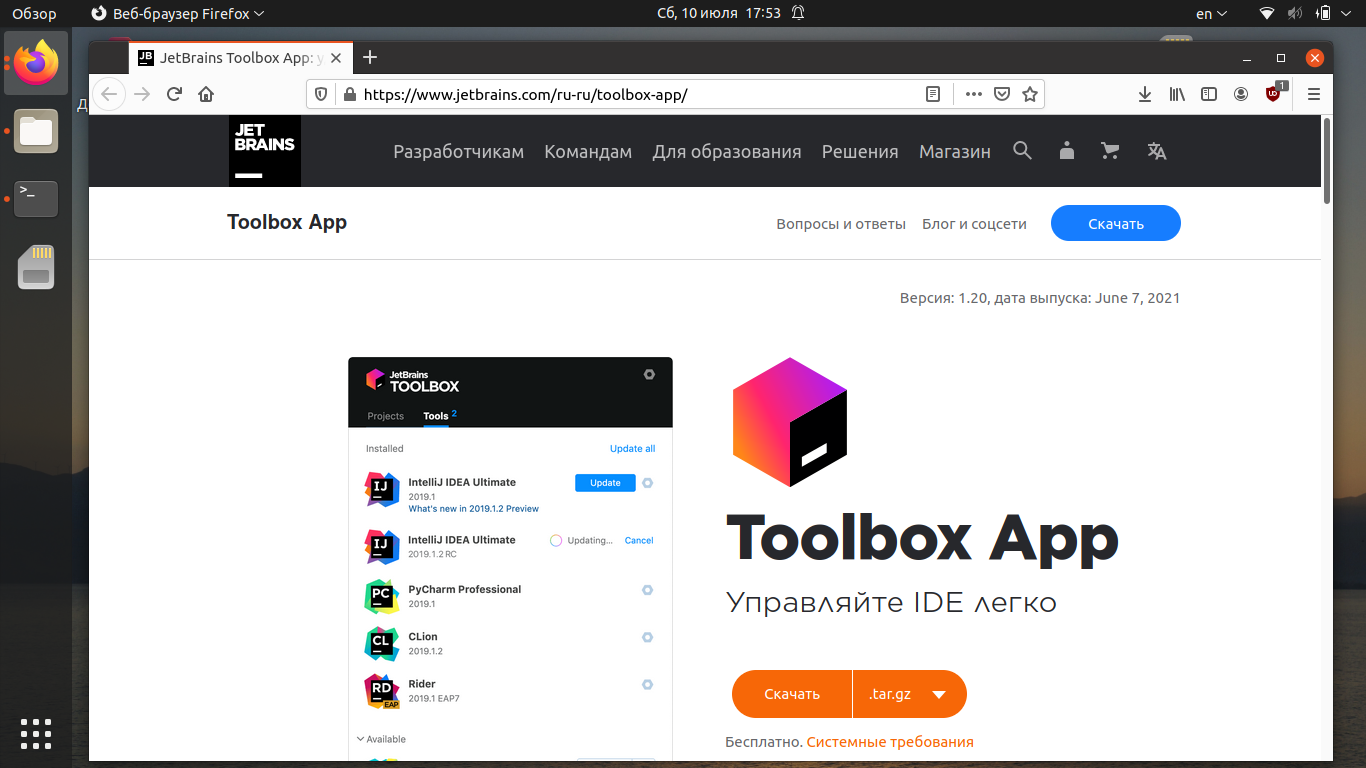
JetBrains Toolbox — это официальный инструмент для установки и пакетного обновления Android Studio и других продуктов JetBrains. Загрузить JetBrains Toolbox можно с официального сайта разработчиков.
После этого перейдите в директорию, куда был скачан архив. Например, если это папка Загрузки, выполните команду:
Распакуйте скачанный архив. Имя файла актуально на момент написания статьи, но в будущем версия может отличаться:
tar -xzvf jetbrains-toolbox-1.20.8804.tar.gz
Перейдите в созданную директорию:
Чтобы запустить менеджер пакетов, введите команду:
После запуска Toolbox найдите Android Studio в списке и нажмите кнопку Install:
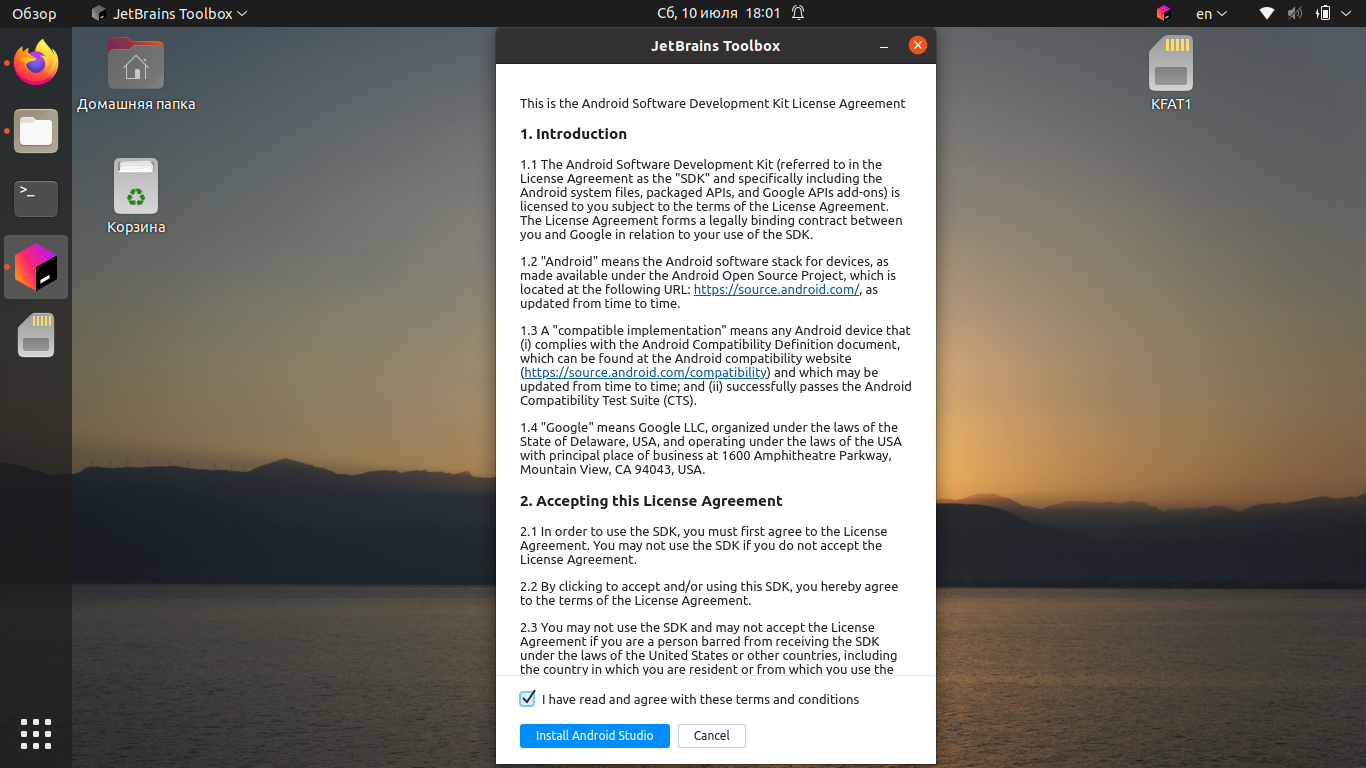
Подтвердите, что вы прочитали и принимаете лицензионное соглашение, после чего нажмите кнопку Install Android Studio.
Дождитесь, пока программа установится на ваш компьютер. После установки её можно будет запустить из главного меню Toolbox.

Как удалить Android Studio
Если вы устанавливали Android Studio с использованием snap-пакета или через центр приложений Ubuntu, её можно удалить командой:
sudo snap remove android-studio
Если же среда разработки была загружена с официального сайта, достаточно удалить распакованную папку вручную или с помощью команды в терминале:
sudo rm -Rf /opt/android-studio
Программа, установленная с помощью JetBrains Toolbox, удаляется с использованием этого инструмента. Перейдите в Toolbox, нажмите на значок шестерёнки рядом с Android Studio и выберите Delete.
Выводы
В этой статье мы рассмотрели, как выполняется установка Android Studio в Ubuntu 20.04 различными способами. Можете выбрать тот способ установки, который лучше всего подходит именно для вас. Если остались вопросы, задавайте их в комментариях.
Источник


