BCDBoot is a command-line tool used to configure the boot files on a PC or device to run the Windows operating system. You can use the tool in the following scenarios:
Add boot files to a PC after applying a new Windows image. In a typical image-based Windows deployment, use BCDBoot to set up the firmware and system partition to boot to your image. To learn more, see Capture and Apply Windows, System, and Recovery Partitions.
Set up the PC to boot to a virtual hard disk (VHD) file that includes a Windows image. To learn more, see Boot to VHD (Native Boot): Add a Virtual Hard Disk to the Boot Menu.
Repair the system partition. If the system partition has been corrupted, you can use BCDBoot to recreate the system partition files by using new copies of these files from the Windows partition.
Set up or repair the boot menu on a dual-boot PC. If you’ve installed more than one copy of Windows on a PC, you can use BCDBoot to add or repair the boot menu.
File Locations
In Windows and Windows Preinstallation Environment (WinPE)
In the Windows Assessment and Deployment Kit (WindowsВ ADK):
C:\Program Files (x86)\Windows Kits\10\Assessment and Deployment Kit\Deployment Tools\amd64\BCDBoot\BCDBoot.exe
Supported operating systems
BCDBoot can copy boot environment files from images of WindowsВ 10, Windows 8.1, WindowsВ 8, WindowsВ 7, WindowsВ Vista, Windows ServerВ 2016 Technical Preview, WindowsВ Server 2012 R2, Windows ServerВ 2012, Windows ServerВ 2008В R2, or WindowsВ ServerВ 2008.
How It Works
To configure the system partition, BCDBoot copies a small set of boot-environment files from the installed Windows image to the system partition.
BCDBoot can create a Boot Configuration Data (BCD) store on the system partition using the latest version of the Windows files:
BCDBoot creates a new BCD store and initialize the BCD boot-environment files on the system partition, including the Windows Boot Manager, using the %WINDIR%\System32\Config\BCD-Template file.
New in WindowsВ 10: During an upgrade, BCDBoot preserves any other existing boot entries, such as debugsettings, when creating the new store. Use the /c option to ignore the old settings and start fresh with a new BCD store.
If there is already a boot entry for this Windows partition, by default, BCDBoot erases the old boot entry and its values. Use the /m option to retain the values from an existing boot entry when you update the system files.
By default, BCDBoot moves the boot entry for the selected Windows partition to the top of the Windows Boot Manager boot order. Use the /d option to preserve the existing boot order.
On UEFI PCs, BCDBoot can update the firmware entries in the device’s NVRAM:
BCDBoot adds a firmware entry in the NVRAM to point to the Windows Boot Manager. By default, this entry is placed as the first item in the boot list. Use the /p option to preserve the existing UEFI boot order. Use /addlast to add it to the bottom of the boot order list.
Command-Line Options
The following command-line options are available for BCDBoot.exe.
Required. Specifies the location of the Windows directory to use as the source for copying boot-environment files.
The following example initializes the system partition by using BCD files from the C:\Windows folder:
Optional. Specifies the locale. The default is US English ( en-us ).
The following example sets the default BCD locale to Japanese:
Optional. Specifies the volume letter of the system partition. This option should not be used in typical deployment scenarios.
Use this setting to specify a system partition when you are configuring a drive that will be booted on another computer, such as a USB flash drive or a secondary hard drive.
UEFI:
BCDBoot copies the boot files to either the EFI system partition, or the partition specified by the /s option.
BCDBoot creates the BCD store in the same partition.
By default, BCDBoot creates a Windows Boot Manager entry in the NVRAM on the firmware to identify the boot files on the system partition. If the /s option is used, then this entry is not created. Instead, BCDBoot relies on the default firmware settings to identify the boot files on the system partition. By the UEFI 2.3.1 spec, the default firmware settings should open the file: \efi\boot\bootx64.efi in the EFI System Partition (ESP).
BIOS:
BCDBoot copies the boot files to either the active partition on the primary hard drive, or the partition specified by the /s option.
BCDBoot creates the BCD store in the same partition.
The following example copies BCD files from the C:\Windows folder to a system partition on a secondary hard drive that will be booted on another computer. The system partition on the secondary drive was assigned the volume letter S:
The following example creates boot entries on a USB flash drive with the volume letter S, including boot files to support either a UEFI-based or a BIOS-based computer:
Optional. Specifies the firmware type. Valid values include UEFI , BIOS , and ALL .
On BIOS/MBR-based systems, the default value is BIOS . This option creates the \Boot directory on the system partition and copies all required boot-environment files to this directory.
On UEFI/GPT-based systems, the default value is UEFI . This option creates the \Efi\Microsoft\Boot directory and copies all required boot-environment files to this directory.
When you specify the ALL value, BCDBoot creates both the \Boot and the \Efi\Microsoft\Boot directories, and copies all required boot-environment files for BIOS and UEFI to these directories.
If you specify the /f option, you must also specify the /s option to identify the volume letter of the system partition.
The following example copies BCD files that support booting on either a UEFI-based or a BIOS-based computer from the C:\Windows folder to a USB flash drive that was assigned the volume letter S:
Optional. Enables verbose mode. Example:
Optional. Merges the values from an existing boot entry into a new boot entry.
By default, this option merges only global objects. If you specify an OS Loader GUID, this option merges the loader object in the system template to produce a bootable entry.
The following example merges the operating-system loader in the current BCD store that the specified GUID identifies in the new BCD store:
Optional. Specifies that the Windows Boot Manager firmware entry should be added last. The default behavior is to add it first. Cannot be used with /p.
Optional. Specifies that the existing Windows Boot Manager firmware entry position should be preserved in the UEFI boot order. If entry does not exist, a new entry is added in the first position. Cannot be used with /addlast.
By default, during an upgrade BCDBoot moves the Windows Boot Manager to be the first entry in the UEFI boot order.
Optional. Preserves the existing default operating system entry in the object in Windows Boot Manager.
Optional. Specifies that any existing BCD elements should not be migrated.
New for WindowsВ 10: By default, during an upgrade, BCD elements such as debugsettings or flightsigning are preserved.
Repair the system partition
If the system partition has been corrupted, you can use BCDBoot to recreate the system partition files by using new copies of these files from the Windows partition.
Boot your PC to a command line. For example, boot to the Windows installation disk and press Shift+F10, or boot to Windows PE (WinPE: Create USB Bootable drive).
Use Diskpart to determine which drive letter contains your Windows partition and system partition ( diskpart, list vol, exit ).
Optional: Format your system partition: format (drive letter of your system partition) /q
Add a boot entry for your Windows partition: bcdboot D:\Windows
Reboot the PC. Windows should appear.
Set up or repair the boot menu on a dual-boot PC
When setting up a PC to boot more than one operating system, you may sometimes lose the ability to boot into one of the operating systems. The BCDBoot option allows you to quickly add boot options for a Windows-based operating system. To set up a dual-boot PC:
Install a separate hard drive or prepare a separate partition for each operating system.
Install the operating systems. For example, if your PC has WindowsВ 7, install WindowsВ 10 onto the other hard drive or partition.
Reboot the PC. The boot menus should appear with both operating systems listed.
If both operating systems aren’t listed:
Open a command line, either as an administrator from inside Windows, or by booting to a command line using the Windows installation media and pressing Shift+F10, or by booting to Windows PE (WinPE: Create USB Bootable drive).
Add boot options for a Windows operating system.
Reboot the PC. Now, the boot menu will show both menu options.
Troubleshooting
For information about repairing the boot files on a PC with Windows XP and a more recent version of Windows such as WindowsВ 7, see the Microsoft Knowledge Base Article 2277998.
Using larger Windows 10 ISOs with Boot Camp Assistant
November 3, 2018
NOTE: THIS UTILITY SHOULD NO LONGER BE NEEDED DUE TO APPLE UPDATING BOOT CAMP ASSISTANT TO USE EXFAT. WE HAVE LEFT THIS ARTICLE AND THE DOWNLOAD FOR HISTORICAL PURPOSES. IT IS NO LONGER SUPPORTED.
In the last few months, people installing Windows on their Macs with Boot Camp Assistant have started seeing the message “An Error occurred while copying the Windows installation files” when using some Windows 10 ISO downloaded from Microsoft. I have seen it a lot, since I do testing with ISO of Windows Enterprise downloaded from Microsoft that have been showing this problem. It didn’t seem to happen with all ISO so I investigated the issue, filed a bug with Apple, and figured out a workaround to the problem.
The Cause
When Windows 10 is installed with Boot Camp Assistant, Boot Camp Assistant prepares the disk for installation. To do this, it does the following operations:
Download the Windows Support software from Apple for the current Mac.
Creates 2 partitions, one where Windows will be installed (“BOOTCAMP”) and one where the installer files will reside (“OSXRESERVED”). Both are formatted as FAT32.
Copies all the files from the ISO that was specified at the start of the process by the user to the OSXRESERVED partition. This is where the error happens.
Copies the files from the WindowsSupport to the OSXRESERVED partition. These files provide both the drivers needed when installing and the drivers that are installed post-install.
Sets the boot disk to the OSXRESERVED partition and reboots.
Windows boots from the OSXRESERVED and shows the available editions of Windows from the install.wim file in the support folder on OSXRESERVED. This is a large file (usually around 4 GB). The install.wim contains all of the files for a vanilla copy of Windows 10 and is the largest file in the installer ISO.
So, here is where the problem resides: FAT32 cannot handle files greater than 4 GB. Each new version of Windows increases the size of this file, and ISOs that contain more editions of Windows can be larger than other ISOs that contain less editions.
In step 3 above, the error message “An Error occurred while copying the Windows installation files” is shown because Boot Camp assistant cannot copy the install.wim to a FAT32 filesystem. This file is required, so the whole process aborts.
To make matters even worse, the disk in the Mac is left in a state where it is difficult to revert back to a single partition. The OSXRESERVED partition is hidden and unmounted, and Boot Camp Assistant cannot restore a disk that has multiple FAT32 partitions.
The Solution
To resolve this issue, both FAT32 partitions need to be removed from the disk and a new ISO must be created where no single file is larger than 4GB. We have created a free utility called “Boot Camp ISO Converter” that copies all the files in the ISO to a folder, splits up the install.wim into parts no larger than 2GB, and creates a new ISO that can be used with Boot Camp Assistant. Here is a step-by-step instructions:
Removing the installer partitions
Make sure you have a good backup of all files on the disk that could be lost, including all the Mac files. Repartitioning could fail due to drive errors, so having a good backup is important.
Open Disk Utility, select the startup disk, and click the partition button.
Select the OSXRESERVED partition and click the “-” button to remove the partition.
Select the BOOTCAMP partition and click the “-” button to remove the partition.
Click Apply to start the partition removal process.
Splitting the ISO
Download Boot Camp ISO Converter (https://twocanoes-software-updates.s3.amazonaws.com/Boot%20Camp%20ISO%20Converter1_6.dmg) and install.
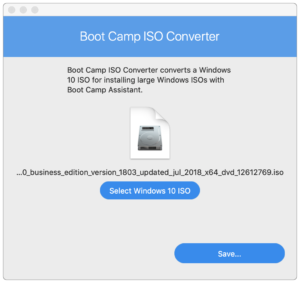
Open Boot Camp ISO Converter and select the ISO that caused the error.
Click “Save…” and specify a name and location for the new ISO.
After the operation is completed, the new ISO can be used to install Windows with Boot Camp assistant following the standard process.
Boot Camp ISO Converter
Boot Camp ISO Converter uses a command like tool called “wimsplit” to split the wim into parts no larger than 2GB. The WIM format supports split files; when installing Windows, the Windows installer recognizes the split files as treats them as a single large file, as long as all the split files are in the same folder. If you look in the sources folder on the new ISO, you will see multiple install.swm files with a number appended on the end.
If you like this article and want to hear more, sign up for our newsletter or follow us on Twitter.