- Установка и настройка SFTP сервера (SSH FTP) в Windows на базе OpenSSH
- Особенности протокола SFTP
- Реализация SFTP в системах Windows
- Установка Win32 OpenSSH в Windows 10 1803+/Windows Server 2019
- Установка Win32 OpenSSH на Windows Server 2016/2012 R2
- Тестируем SFTP подключение с помощью WinSCP
- Удаление службы Win32 OpenSSH
- Installing a secure FTP server on Windows using IIS
- Installing FTP Server
- On Windows Server 2016 and Windows Server 2012
- On Windows Server 2008 R2
- On Windows Desktop (Windows 10, Windows 8, Windows 7 and Windows Vista)
- Opening IIS Manager
- Creating Certificate for the FTPS Server
- Servers behind external Firewall/NAT
- Windows Firewall Rules
- Restarting FTP Service
- Adding FTP Site
- To a Web Site
- Standalone FTP Site
- Connecting to Your FTPS Server
Установка и настройка SFTP сервера (SSH FTP) в Windows на базе OpenSSH
С помощью официального пакета OpenSSH для Windows вы можете с легкостью организовать безопасный обмен файлами между клиентом и серверов Windows по защищенному протоколу передачи файлов SFTP (Secure FTP). В этой статье мы покажем, как с помощью Win32-OpenSSH установить SFTP сервер на Windows 10 или Windows Server 2016/2012R2.
Особенности протокола SFTP
Протокол SFTP (Secure File Transfer Protocol , Secure FTP или SSH FTP) это расширение протокола SSH, являющимся стандартом мира UNIX/Linux систем. Хотя с точки зрения пользователей он похож на FTP, но на самом деле это абсолютно другой протокол, не имеющий с FTP ничего общего. Данные между клиентом и сервером передаются по порту 22 через SSH туннель.
Основные преимущества протокола SFTP:
- Передача файлов и команд происходит внутри защищенной SSH-сессии;
- Для передачи файлов и команд используется одно соединение;
- Поддержка символических ссылок, функций прерывания, возобновления передачи, удаления файла и пр;
- Как правило, на каналах, где FTP работает медленно или с перебоем, SFTP-соединение работает более надежно и быстро;
- Возможность аутентификации с помощью SSH ключей.
Реализация SFTP в системах Windows
Исторически в операционных системах Windows отсутствуют встроенные средства для организации защищенного SFTP сервера. Для этих целей обычно использовались открытые или коммерческие решения, к примеру, Core FTP, FileZilla, CYGWIN, OpenSSH, FTP Shell, IPSwitch и пр. Однако несколько лет назад Microsoft выпустила свою версию порта OpenSSH для win32. Данный проект называется Win32-OpenSSH.
Рассмотрим процесс настройки SFTP сервера в Windows 10 и Windows Server 2016/2012 R2 с помощью пакета Win32-OpenSSH.
Установка Win32 OpenSSH в Windows 10 1803+/Windows Server 2019
В Windows 10, начиная с билда 1803, и в Windows Server 2019 пакет OpenSSH (как и RSAT) уже включен в операционную систему в виде Feature on Demand (FoD).
В Windows 10 и Windows Server 2019 вы можете установить сервер OpenSSH с помощью командлета PowerShell:
Add-WindowsCapability -Online -Name OpenSSH.Server*
Или с помощью DISM:
dism /Online /Add-Capability /CapabilityName:OpenSSH.Server
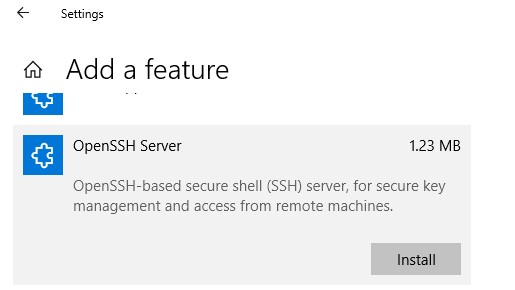
Или можно установить OpenSSH из графического интерфейса Windows 10 (Settings -> Apps -> Optional Features -> Add a feature -> Open SSH Server -> Install).
Исполняемые файлы OpenSSH находятся в каталоге:
Конфигурационный файл sshd_config находится в каталоге C:\ProgramData\ssh (каталог создается после первого запуска службы).
Файл authorized_keys и ключи хранятся в каталоге %USERPROFILE%\.ssh\.
Установка Win32 OpenSSH на Windows Server 2016/2012 R2
В предыдущих версиях Windows 10 и в Windows Server 2016/2012 R2 вы должны скачать и установить OpenSSH с GitHub (https://github.com/PowerShell/Win32-OpenSSH/releases). Нам нужна версия для 64 битной версии Windows: OpenSSH-Win64.zip (3,5 Мб).
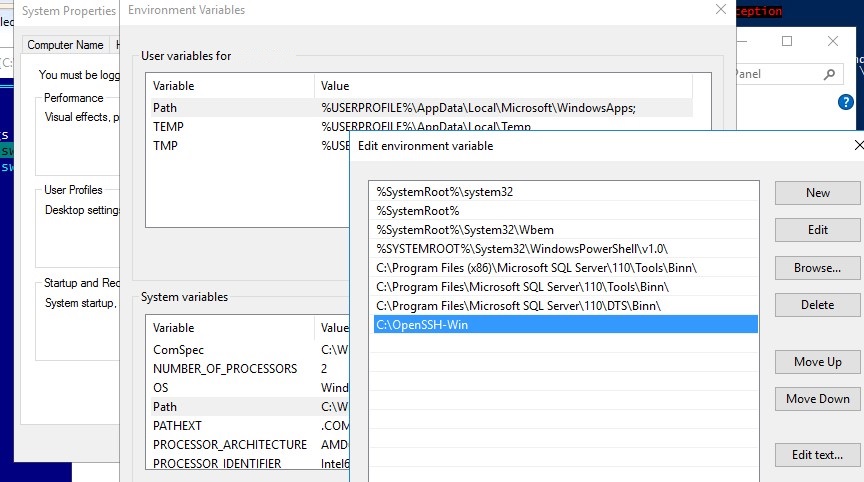
- Распаковываем содержимое архива в целевой каталог, к примеру: C:\OpenSSH-Win
- Запускаем командную строку PowerShell с правами администратора и переходим в каталог OpenSSH: Cd C:\OpenSSH-Win
- Добавьте путь к каталогу OpenSSH в переменную окружения Path;

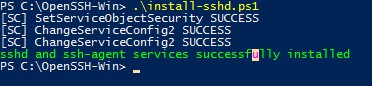
- Установите сервер OpenSSH: .\install-sshd.ps1 (должно появиться зеленое сообщение “sshd and ssh-agent services successfully installed”);
- Сгенерируйте SSH ключи для сервера (нужны для запуска службы sshd): ssh-keygen.exe –A

, убедитесь, что создан каталог %programdata%\ssh.
Тестируем SFTP подключение с помощью WinSCP
Попробуем подключиться к поднятому нами SSH серверу по протоколу SFTP. Для этих целей воспользуемся свободным клиентом WinSCP.
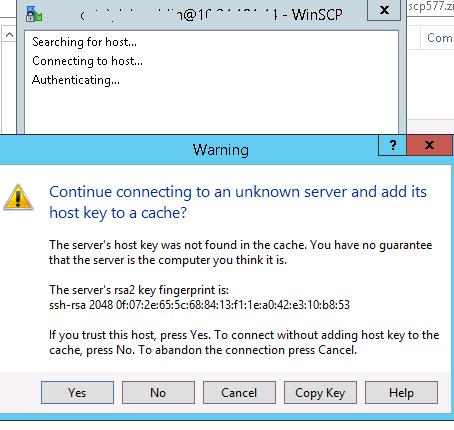
В окне настройки подключения выберите протокол передачи файлов SFTP, укажите имя сервера и данные учетной записи Windows, под которой осуществляется подключение (возможно также настроить авторизацию по ключам).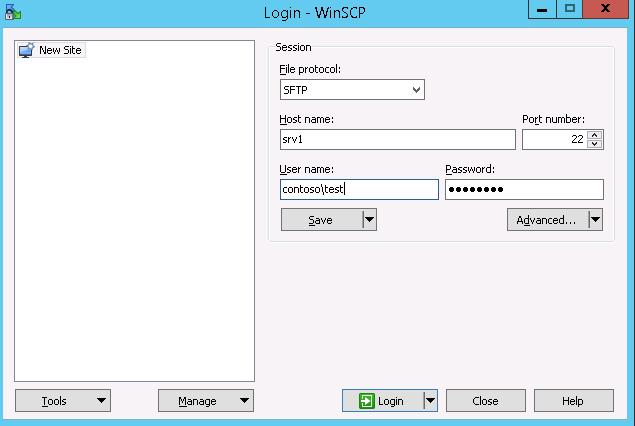 При первом подключении появится окно с предупреждением о том, что ключ хоста отсутствует в локальном кеше.
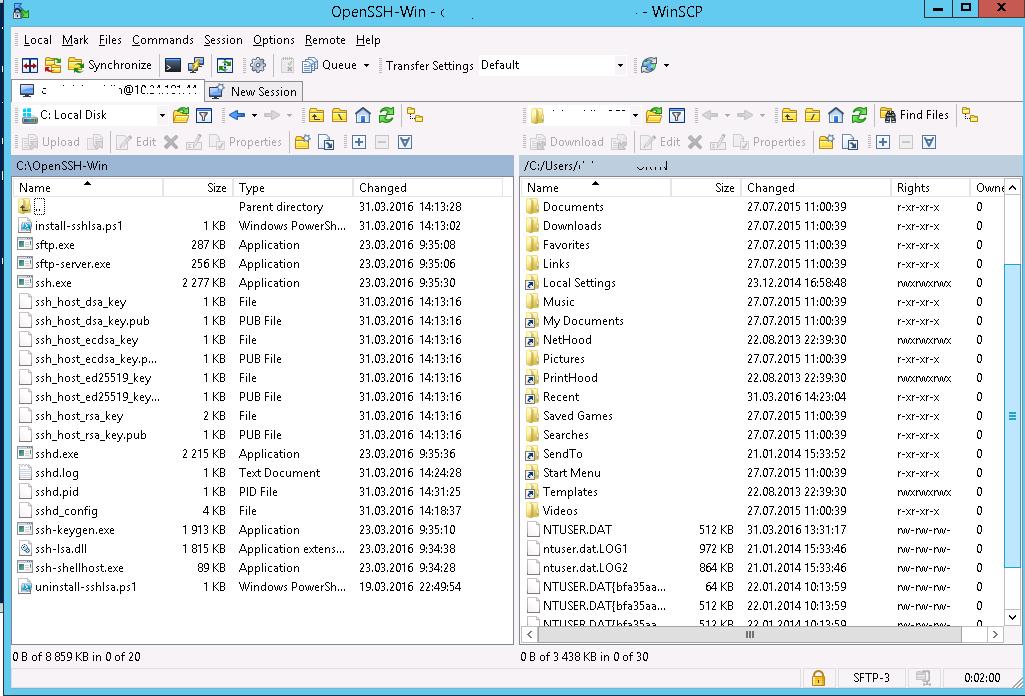
 Если все настроено правильно, клиент должен подключиться к SFTP серверу и отобразить список файлов в домашнем каталоге пользователя (по умолчанию каталог с профилем пользователя).
С помощью привычного интерфейса файлового менеджера можно безопасно копировать файлы между сервером и клиентом. Передача файлов будет осуществляться по защищённому протоколу SFTP.
Удаление службы Win32 OpenSSH
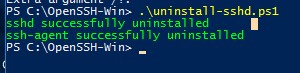
Чтобы корректно удалить службу Win32 OpenSSH из системы:
- Откроем консоль Powershell с правами администратора
- Остановим службу SSHD: Stop-Service sshd
- Удалим службу OpenSSD:Удалим ключи: .\uninstall-sshlsa.ps1
Installing a secure FTP server on Windows using IIS
Installing FTP Server
On Windows Server 2016 and Windows Server 2012
- In Windows Server Manager go to Dashboard and run Manage > Add Roles and Features.
- In Add Roles and Features wizard:
- Proceed to Installation Type step and confirm Role-based or feature-based installation.
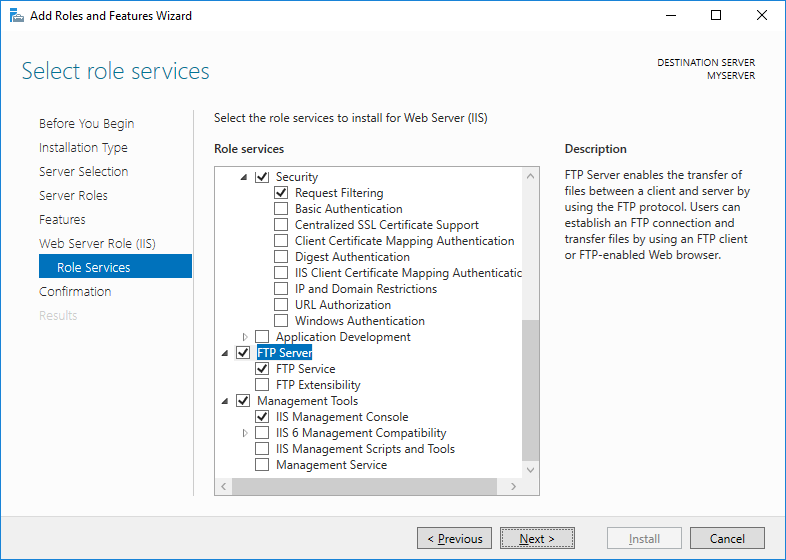
- Proceed to Server Roles step and check Web Server (IIS) role. Note that it is checked already, if you had IIS installed as a Web Server previously. Confirm installing IIS Management Console tool.
- Proceed to Web Server Role (IIS) > Role Services step and check FTP Server role service. Uncheck Web Server role service, if you do not need it.
- Proceed to the end of the wizard and click Install.
- Wait for the installation to complete.
On Windows Server 2008 R2
If you do not have IIS installed yet:
- In Windows Server Manager go to Roles node and in Roles Summary panel click Add Roles.
- In Add Roles wizard:
- Proceed to Server Roles step and check Web Server (IIS) role.
- Proceed to Role Services step and check FTP Server > FTP Service role service. Uncheck Web Server role service, if you do not need it. Make sure Management Service > IIS Management Console role service is checked.
- Proceed to the end of the wizard and click Install.
- Wait for the installation to complete.
If you have IIS installed already (i.e. as a Web Server):
- In Windows Server Manager go to Roles node and in Web Server (IIS) > Role Services panel click Add Role Services.
- In Add Role Services wizard:
- Check FTP Server > FTP Service role service.
- Make sure that Management Service > IIS Management Console is checked.
- Confirm with Next button.
- Proceed to the end of the wizard and click Install.
- Wait for the installation to complete.

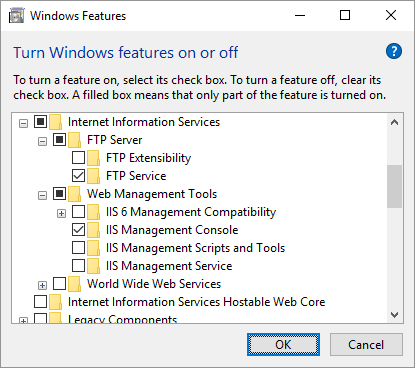
On Windows Desktop (Windows 10, Windows 8, Windows 7 and Windows Vista)
- Go to Control Panel > Programs > Program and Features > Turn Windows features on or off.
- On a Windows Features window:
- Expand Internet Information Services > FTP Server and check FTP Service.
- Expand Internet Information Services > Web Management Tools and check IIS Management Console, if it is not checked yet.
- Confirm with OK button.
- Wait for the installation to complete.
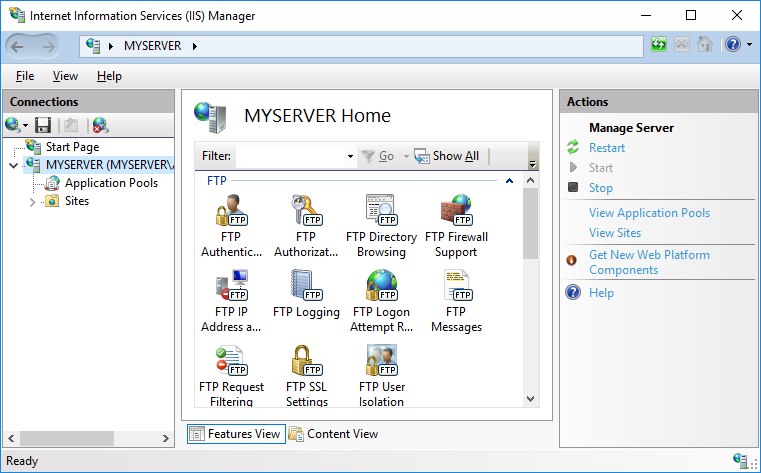
Opening IIS Manager
- Go to Control Panel > System and Security > Administrative Tools and open Internet Information Services (IIS) Manager.
- Navigate to your Windows server node.
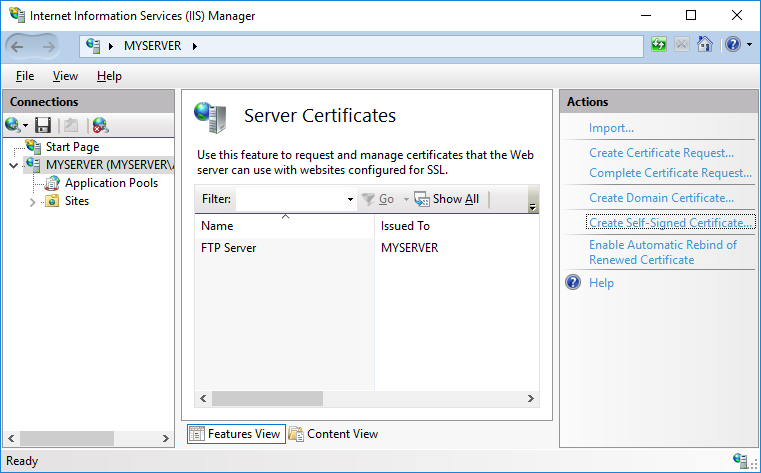
Creating Certificate for the FTPS Server
You may also create a self-signed certificate locally, but in such case users of your FTPS server will be warned, when connecting to the server.
To create the self-signed certificate:
- In IIS Manager, open IIS > Server Certificates.
- Click on Create Self-Signed Certificate action.
- Specify a certificate name (e.g. “FTP Server”) and submit with OK.
Self-signed certificates created by IIS Manager do not work with FTPS clients that check for key usage violations.2 To create a certificate with a correct key usage, use New-SelfSignedCertificate PowerShell as an Administrator:
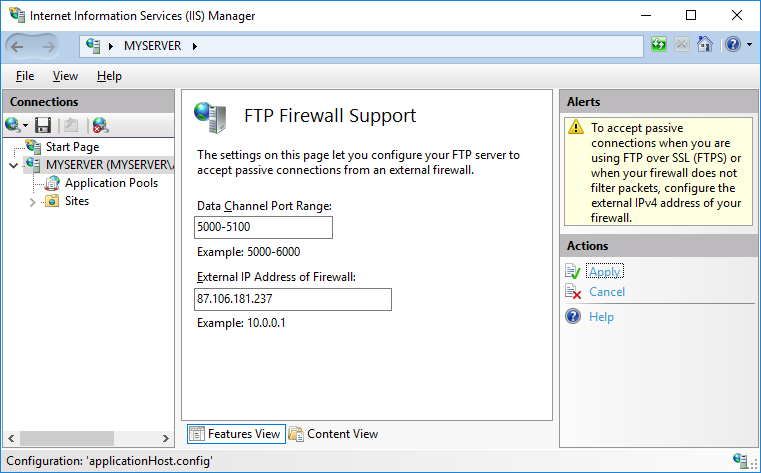
Servers behind external Firewall/NAT
- In IIS Manager, open FTP > FTP Firewall Support.
- Specify your server’s external IP address.
For Microsoft Azure Windows servers you will find the external IP address in Public IP address section of the virtual machine page.
When behind an external firewall, you need to open ports for data connections (obviously in addition to opening an FTP port 21 and possibly an implicit TLS/SSL FTP port 990). You won’t probably want to open whole default port range 1024-65535. In such case, you need to tell the FTP server to use only the range that is opened on the firewall. Use a Data Channel Port Range box for that. Any time you change this range, you will need to restart FTP service. Learn how to open ports on Microsoft Azure.
Click Apply action to submit your settings.
Some external firewalls are able to monitor FTP control connection and automatically open and close the data connection ports as needed. So you do not need to have whole port range opened all the time, even when not in use. This won’t work with the secure FTPS as the control connection is encrypted and the firewall cannot monitor it.
Windows Firewall Rules
An internal Windows firewall is automatically configured with rules for the ports 21, 990 and 1024-65535 when IIS FTP server is installed.
The rules are not enabled initially though some versions of Windows.3 To enable or change the rules, go to Control Panel > System and Security > Windows Defender Firewall4 > Advanced Settings > Inbound Rules and locate three “FTP server” rules. If the rules are not enabled, click on Actions > Enable Rule.
Restarting FTP Service
While the internal Windows firewall is automatically configured to open FTP ports when FTP server is installed, this change does not seem to apply, until FTP service is restarted. The same is true for changing data channel port range.
To restart FTP service go to Control Panel > System and Security > Administrative Tools and open Services. Locate Microsoft FTP Service and click Restart service.5
Adding FTP Site
To a Web Site
If you want to add FTP server to manage your web site remotely, locate your web site node in IIS Manager and:
- Click Add FTP Publishing action.
- In Add FTP Site Publishing wizard:
- On an initial Binding and SSL Settings step, select Require SSL to disallow non-encrypted connections and select your certificate.
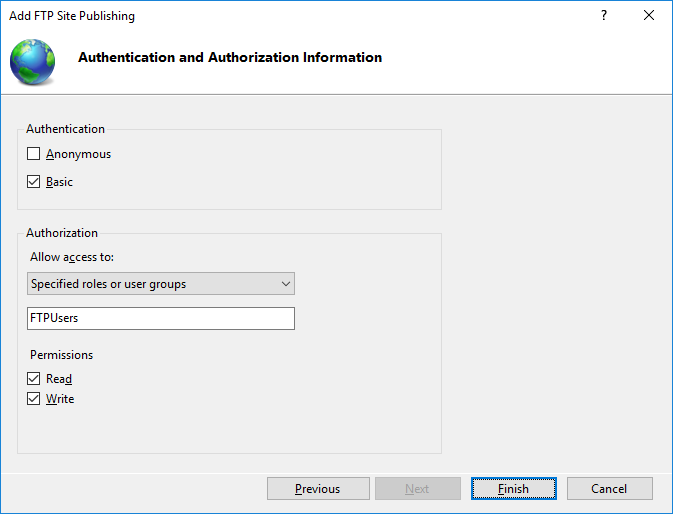
- On Authentication and Authorization Information step, select Basic authentication and make sure Anonymous authentication is not selected. Select which users (Windows accounts) you allow to connect to the server with what permissions. You can choose All users or select only some. Do not select Anonymous users.
- Submit with Finish button.
Your secure FTPS server is now running and can be connected to.
Standalone FTP Site
If you want to add a standalone FTP server to store/exchange files, locate Sites node (folder) of your Windows server in IIS Manager and:
- Click Add FTP Site action.
- In Add FTP Site wizard:
- On an initial Site Information step, give a name to your FTP site (if it’s the only site you are going to have, simple “FTP site” suffice) and specify a path to a folder on your server’s disk that is going to be accessible using FTP.
- On a Binding and SSL Settings step, select Require SSL to disallow non-encrypted connections and select your certificate.
- On Authentication and Authorization Information step, select Basic authentication and make sure Anonymous authentication is not selected. Select which users (Windows accounts) you allow to connect to the server with what permissions. You can choose All users or select only some. Do not select Anonymous users.
- Submit with Finish button.
Your secure FTPS server is now running and can be connected to.
Connecting to Your FTPS Server
For connecting to a Microsoft Azure Windows instance, see a specific guide.
Start WinSCP. Login Dialog will appear. On the dialog:
- Select FTP protocol and TLS/SSL Explicit encryption.
- Enter your Windows server hostname to Host name field. Avoid using an IP address to allow WinSCP to verify that the hostname matches with host the server’s certificate was issued to (not applicable to self-signed certificates).
- Specify username and password for Windows account you want to connect with (when using domain accounts, you need to specify a full username with format domain\username ).
- You may want to save your session details to a site so you do not need to type them in every time you want to connect. Press Save button and type site name.
- Press Login to connect.
- If you are using self-signed certificate, you will be prompted to accept it.


