- Установка и настройка загрузчика GRUB ОС Linux
- Введение
- Что представляет собой загрузочный сектор?
- Особенности загрузочного сектора
- Включение устройства
- Для чего важно создать копию MBR?
- Инсталляция в MBR жёсткого диска
- Инсталляция на USB-накопитель
- Заключение
- Ubuntu Documentation
- GRUB 2 Initial Installation
- Installation Options (LiveCD)
- Using the Entire Drive ( «Erase disk and install Ubuntu» ):
- Installing Ubuntu to a Specific Partition («Something Else»):
- BIOS/MBR Notes
- BIOS/GPT Notes
- Post-Installation
- Reinstalling GRUB 2
- Reinstalling GRUB 2 from a Working System
- Fixing a Broken System
- via Boot-Repair Graphical Tool
- via GRUB2 Rescue mode
- via the LiveCD terminal
- via Partition Files Copy
- via ChRoot
- Boot repair after a Windows Upgrade on Ubuntu 14.04 (non-RAID)
- Purging & Reinstalling GRUB 2
- via Boot-Repair Graphical Tool
- via Terminal Commands
- Post-Restoration Commands
- Moving GRUB 2
- GRUB Legacy Upgrades and Downgrades
Установка и настройка загрузчика GRUB ОС Linux
Введение
Как правило, дополнительная настройка GRUB не требуется, все необходимые файлы устанавливаются на компьютер самостоятельно во время инсталляции ОС Linux. Нет необходимости заново устанавливать загрузчик, если, например, пользователю нужно провести конфигурацию, так как в этом случае следует только редактировать содержимое /boot/grub/ menu.lst.
Как произвести правильную установку и настройку — в статье ниже
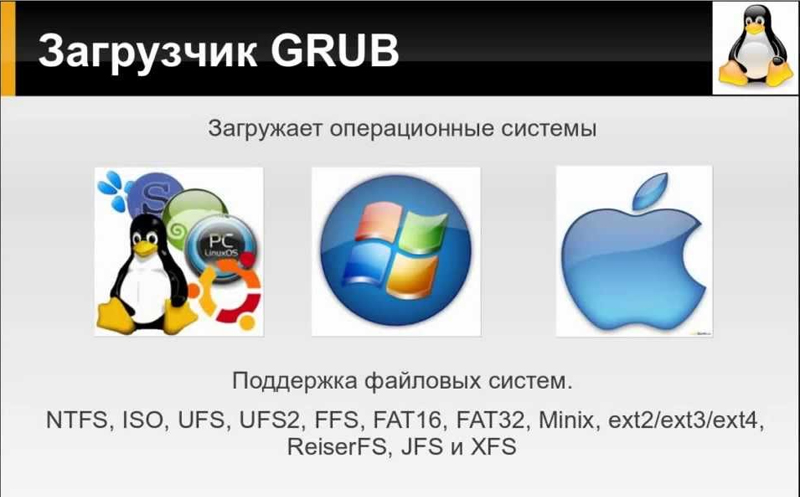
Установка GRUB целесообразна в том случае, если его физически не существует на устройстве, иными словами, он может быть стёрт после инсталляции другой системы (чаще всего Windows). Иногда случается и такое, что копии загрузчика не функционируют должным образом или GRUB, по желанию владельца ПК, заменяется другим типовым загрузчиком. Какими бы ни были причины, установка GRUB, в любом случае, должна производиться исключительно с «живой» системы (Knoppix, например). Дело в том, что без функционирующего загрузчика, запустить на ПК дистрибутив Linux, который располагается на жёстком диске, попросту не выйдет. В статье рассмотрим способы установки и настройки загрузчика GRUB.
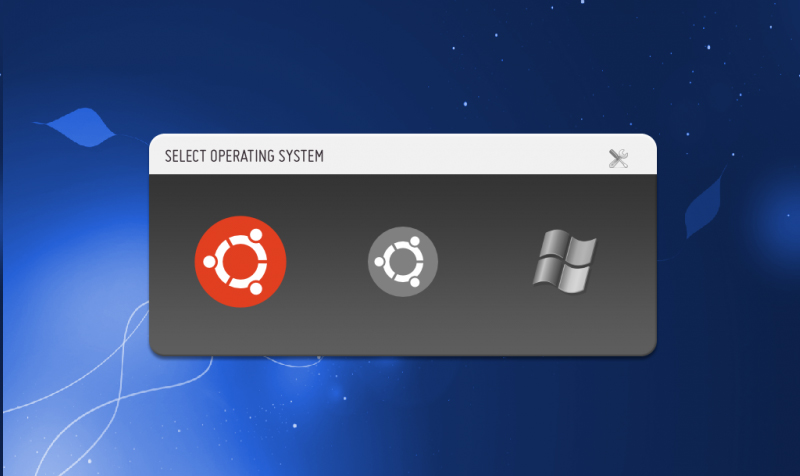
Загрузчик позволяет выбрать, какую запустить операционную систему
Что представляет собой загрузочный сектор?
Если владелец ПК уверен в своих силах и знаниях, ему будет достаточно прочесть лишь раздел, в котором пошагово расписан процесс установки загрузчика GRUB, однако тем юзерам, которые впервые сталкиваются с подобной проблемой, лучше предварительно узнать об особенностях BIOS и MS DOS.
Жёсткий диск разделён на несколько секторов, в первом из которых осуществляется основная запись диска (пользователи привыкли именовать её как MBR). Для этого требуется всего 512 байт, в которых «спрятана» небольшая программка. Следующий сектор занимает таблица разбиения диска, которая, по обычаю, состоит из четырёх главных разделов, объёмом 64 байта, и цифровой подписи (только 2 байта).
Особенности загрузочного сектора
Загрузочный сектор можно назвать основой основ, так как он находится в MBR и во всех остальных разделах. Как показывает практика, его заключают во все 16 секторов, на которые разделён любой жёсткий диск. Несмотря на тот факт, что в большинстве современных файловых систем, данные, которые включает загрузчик, располагаются не в первом секторе: система XFS, например, нуждается во всех работоспособных секторах диска. Поэтому, в случае, когда данные загрузчика стираются, файловая система полностью разрушается.
Включение устройства
В момент запуска компьютера, в первую очередь начинает запускаться непосредственно сам BIOS. В этот момент происходит считывание данных, хранящихся в MBR первого диска. Спустя несколько секунд, содержимое «идёт» к оперативной памяти, где происходит проверка на наличие в последних байтах шестнадцатеричных кодов 55 АА. Такая проверка заключается в необходимости идентифицировать носители для их последующей загрузки. Небольшая программка, хранящаяся в MBR, необходима при совпадении представленных кодов. Первая программа «цепляет» следующую, расположенную в загрузочном секторе активного раздела, чтобы впоследствии активировать её, и, как следствие, запустить ОС Windows.
В случае наличия не одного жёсткого диска, пользователь может настроить в BIOS порядок, согласно которому будет производиться запуск конкретных жёстких дисков в момент загрузки системы. Благодаря этой особенности, новые ПК имеют возможность загружать систему как с внешнего диска, так и с USB-накопителя. Естественно, изменив порядок загрузки в BIOS, юзер может загружать систему посредством CD и DVD-дисков.
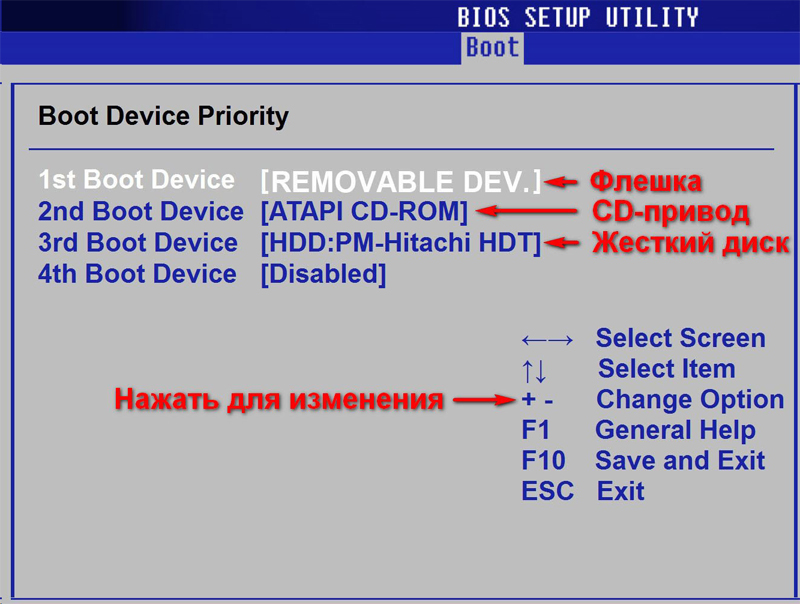
С помощью BIOS вы можете отрегулировать порядок загрузки носителей
Чтобы в будущем не приходилось разбираться с загрузчиками и думать о том, каким образом должна осуществляться настройка GRUB, пользователь должен знать, как установить две операционные системы от разных производителей таким образом, чтобы они не конфликтовали между собой. Как показывает практика, разумнее всего установить изначально загрузчик системы Linux, чтобы впоследствии иметь возможность выбора относительно запускаемой системы.
Однако, если на устройстве стоит одна из последних версий ОС от компании Microsoft (позднее 9х/ME), то в загрузчике системы можно сделать так, чтобы он самостоятельно «беспокоился» о GRUB. Огромным преимуществом такой возможности является отсутствие необходимости лишний раз разбираться с особенностями MBR. Правда, далеко не каждый современный юзер сможет самостоятельно произвести такую манипуляцию, так как процесс этот достаточно сложный. Всё придётся делать вручную.
Среди прочих способов, настроить нормальную работоспособность двух систем, можно прибегнув к дополнительной установке GRUB. Загрузчик необходимо расположить непосредственно в загрузочном секторе главного раздела и впоследствии отметить его в качестве активного. Этот метод также исключает необходимость использовать MBR, однако он может сработать только с основными разделами и файловыми системами, не влияющими на загрузочный сектор раздела.
Для чего важно создать копию MBR?
После того, как будет принято решение совершить GRUB install, пользователю необходимо создать резервную копию MBR. Дело в том, что неправильно внесённые изменения «помогут положить» как Windows, так и Linux. В этом случае неизбежно понадобится система Knoppix или установочный DVD-диск для Windows, которые помогут отредактировать загрузочный сектор. Исправить свои действия можно будет в несколько раз быстрее, если в наличие будет резервная копия MBR. Для этого следует выполнить нижеприведённые команды:
root# dd if=/dev/sda of=/boot/bootsektor.scsi bs=1 count=446
Восстановление загрузочного сектора может быть осуществлено только посредством команды:
root# dd if=/boot/bootsektor.scsi of=/dev/sda bs=1 count=446
Однако, следует учесть, что посредством этих команд пользователю удастся изменить лишь 446 байт MBR.
Инсталляция в MBR жёсткого диска
GRUB install можно производить сразу же, как только будет создан соответствующий конфигурационный файл (задаётся посредством команды /boot/grub/menu.lst). В каталоге grub в обязательном порядке должны присутствовать такие файлы, как stage1, stage2 и *_stagel_5. В случае их отсутствия, в этот раздел следует записать файлы, содержащиеся в GRUB.
Дальнейшие манипуляции заключаются в запуске загрузчика GRUB и выполнении команды setup. Значения hdl,12 должны быть заменены на имя устройства GRUB раздела диска, содержащего /boot. Следует быть предусмотрительным, так как раздел /boot может располагаться не в системной папке, а в другой. Hd0 отвечает за область хранения загрузочного сектора основного жёсткого диска.
SUSE во время инсталляции пополняется файлом /etc/grub.conf., в котором содержатся команды, относящиеся непосредственно к GRUB install. Если что-то пошло не так, пользователь ПК может в любой момент процедуры заново запустить установку. Помочь в этом может команда grub root# grub grub> root (hd1,12)
grub> setup (hd0,6) (Установка в загрузочный сектор /dev/sda7) grub> quit
Прежде чем осуществить GRUB install, следует учесть одну особенность некоторых файловых систем, так как иногда загрузочные сектора раздела не могут быть использованы загрузчиком или иным типовым приложением. В частности, одной из таких систем является XFS — инсталлированный в её загрузочный сектор GRUB, попросту разрушит всю файловую систему.
Инсталляция на USB-накопитель
Благодаря современным технологиям, каждый желающий может загрузить операционную систему посредством USB-накопителя. Если GRUB install будет производиться непосредственно с внешнего носителя информации, а не с помощью Windows или Linux, пользователь должен проверить правильность распознавания накопителя материнской платой.
Прежде чем начать работу, следует отформатировать флешку одним из двух известных способов. Посредством первого метода она очистится как superfloppy, другим — как жёсткий диск. Выбирать вариант очистки следует исходя из особенностей BIOS.
Следующим шагом должна стать активизация поддержки USB-накопителя, для чего в BIOS предусмотрен отдельный параметр. При распознавании USB-накопителя как отдельного загрузочного диска, в BIOS будет изменён список, согласно которому GRUB поочерёдно списывает данные с носителей. В качестве первого диска станет USB-накопитель, остальные жёсткие диски станут доступны посредством hdl и hd2. Если возникнет необходимость, перед GRUB install можно изменить /boot/grub/devices.map.
Если всё сделать правильно, установка GRUB с внешнего носителя будет более чем успешной. GRUB распознаёт флеш-накопитель как hdn+1, где n является числом, соответствующим последнему внутреннему жёсткому диску. Последующая установка GRUB в MBR посредством внешнего накопителя информации нуждается в выполнении нижеприведённой команды:
grub> setup (hd2) (инсталляция в MBR флеш-накопителя) grub> quit
Дальнейшая перезагрузка ПК должна помочь GRUB появиться в MBR и запустить все имеющиеся системы, которые содержатся в menu.lst. В случае возникновения ошибок, следует зайти через меню загрузчика в интерактивный режим, нажимая кнопку С. Активация команды, состоящей из слова cat и нажатия на клавишу табуляции, помогает узнать пользователю о тех названиях, которые загрузчик присвоил всем жёстким дискам. С помощью клавиши Esc можно выйти назад в меню, а кнопка Е поможет изменить ранее написанные для загрузки команды и вновь их исполнить.
Если ОС Linux хранится на флеш-накопителе или внешнем жёстком диске, который можно подключить к компьютеру исключительно через USB-порт, пользователю следует учесть несколько важных проблем. Дело в том, что GRUB install может быть осуществлён не с первого раза, вероятнее всего, придётся несколько раз изменять настройки BIOS и обозначения приводов. Будет лучше, если все свойства, хранящиеся в файле menu.lst, будут настраиваться только вручную.
Кроме того, в файле Initrd следует хранить все важные USB-модули. При работе с Ubuntu в разделе /etc/fstab и строке kernel, расположенной в menu.lst, нужно указывать не сами названия устройств, так как после перезагрузки системы они могут быть изменены, а номера UUID. Пользователь может самостоятельно в menu.lst посредством uuid указать именно тот каталог, в который впоследствии будут помещены ядро и файл Initrd.
Заключение
Несмотря на кажущуюся сложность, произвести GRUB install может каждый. Содействие с новомодными материнскими платами предусматривает простую и беспроблемную работу любой операционной системы, в том числе и Linux, которая может быть инсталлирована непосредственно на самом USB-накопителе. Настроить правильно все параметры и создать все условия для бесперебойного существования двух различных систем нелегко, кроме свободного времени и знаний, пользователь должен обладать немалым опытом, которого нет у тех, кто только начинает знакомство со средой Linux.
Ubuntu Documentation
This page details the procedures for installing and reinstalling GRUB 2. The information applies to most versions of GRUB 2, but is specifically written for version 1.99. GRUB 1.99 is included on Ubuntu releases 11.04 (Natty Narwhal) and later. For more information on a variety of GRUB 2 topics, please visit the GRUB2 main page. For information on converting to or from GRUB Legacy, please view the Grub2/Upgrading community doc.
The GRUB 2 bootloader is included on all currently-supported versions of the Ubuntu family. GRUB 2 can accomodate traditional computer firmware such as BIOS as well as the newer EFI/UEFI standards. It is compatible with MBR, GPT and other partitioning tables.
All references to GRUB pertain to GRUB 2. Where GRUB 0.97 is discussed, it will be referred to by version number or as GRUB Legacy.
GRUB 2 Initial Installation
GRUB 2 installation is automatically incorporated into a normal Ubuntu installation. Input required by the user for the initial setup is very simple. If the installation will use the entire disk no specific GRUB selections are necessary. If the user wants to use a specific partition for Ubuntu the user must select the Ubuntu partition and the drive on which to embed the bootloader information.
The main GRUB 2 folder locations include /boot/grub/ and /etc/grub.d/. User preferences are stored in the /etc/default/grub file. The GRUB 2 menu is built by information contained in /boot/grub/grub.cfg.
Installation Options (LiveCD)
Using the Entire Drive ( «Erase disk and install Ubuntu» ):
Install on entire drive: The user should select a drive on which Ubuntu and GRUB 2 will be installed. GRUB 2 will overwrite the drive’s boot information and place the GRUB 2 files in the appropriate locations.
Installing Ubuntu to a Specific Partition («Something Else»):
When using the «Something Else» option, you will be offered to choose the «Device for bootloader installation». Please select: * either the disk (eg /dev/sdX, not /dev/sdXY) on which the BIOS is setup to boot (recommended for normal use) * OR the partition (eg /dev/sdXY, not /dev/sdX) on which Ubuntu (/boot, else /) will be installed (only if you want to chainload it from another bootloader; if any doubt, do NOT choose this)
 Never choose any other partition! (this may break the boot of your other systems, see Bug #1049549).

 On a system with multiple drives and OS’s, the user can preserve the original bootloader by installing GRUB 2 on another drive. To accomplish this:
- specify the disk (eg /dev/sdX, not /dev/sdaXY) not currently used to boot the system for the bootloader location.
- After the installation is complete, change the boot order (via BIOS setup) so that the disk to which the GRUB information was written is the one booted first.
- If the user wishes to restore booting with the original bootloader, change the boot order back to the original drive.
BIOS/MBR Notes
GRUB 2 normally writes its bootloader information to an area just beyond the Master Boot Record and before the first partition. Some software on non-Linux operating systems also used this embedded area and broke the system by overwriting the GRUB 2 information on dual-boot systems. GRUB 2 now can recognize this potential problem and avoid it.
The bootloader information does not have to be installed to the embedded area of the MBR. It may also bypass the MBR entirely and be installed to a specific partition. In doing this, the location of the GRUB 2 files are specified by using blocklists. This option is not available via an Ubuntu GUI installation but can be made via the terminal after installation. Even then this method is not as reliable as writing to the MBR and is not recommended by the GRUB developers.
BIOS/GPT Notes
If the BIOS is setup to boot the disk in Legacy/mbr mode, installing GRUB2 on a GPT (GUID Partition Table) disk requires a dedicated BIOS boot partition with a recommended size of at least 1 MiB. This partition can be created via GParted or other partitioning tools, or via the command line. It must be identified with a bios_grub flag. The necessary GPT modules are automatically included during installation when GRUB 2 detects a GPT scheme.
GRUB 2 is compatible with EFI/UEFI and will load the necessary modules during installation. For information on this topic, please visit the UEFI community documentation.
Post-Installation
At the conclusion of a normal installation using the default entries:
- GRUB 2 will be the default bootloader for the computer.
- If another Ubuntu/Linux distribution controlled the boot process, it will be replaced by the GRUB 2 settings in the new installation.
- If the boot was controlled by Windows, the MBR information will now point to the Ubuntu installation and GRUB 2 will control the boot process. The GRUB 2 menu will include an entry for Windows if it found what it considers the necessary Windows boot files.
- Windows boot files in the Windows partition are not affected by the GRUB 2 installation. Only the MBR data is changed. Windows control of the boot process can be obtained by selecting a Windows entry in the GRUB 2 menu during boot.
- GRUB 2 will have written information to the designated drive’s boot area pointing to the Ubuntu installation’s GRUB 2 files. On earlier versions of GRUB 2 on a BIOS systems any information previously contained in the area just beyond MBR will have been overwritten. An improvement to GRUB 2 allows it to write the boot information to another area if a non-Linux application has already used this area.
The GRUB 2 files will normally be located in the /boot/grub and /etc/grub.d folders and the /etc/default/grub file in the partition containing the Ubuntu installation.
To view the GRUB 2 file system and configuration options please refer to Grub 2 community documentation page.
Reinstalling GRUB 2
The user may wish to reinstall GRUB 2 for a variety of reasons, including:
- After installing another operating system which installed its own bootloader, reinstall GRUB2 to return control to the desired OS. When an operating system is added on a multiboot computer it will generally take command of the boot process. Reinstalling GRUB 2 from a within the desired OS will return control of the boot process to that OS.
- Add the boot information to an additional drive. GRUB 2 can be installed on multiple drives — all pointing to the same operating system. This provides a backup in case the MBR or boot record data on a particular drive becomes corrupted.
- Replace missing files
- Repair a broken system, such as when the user sees only «GRUB» on a black screen with no prompt or when the user cannot boot using GRUB 2’s rescue mode options.
- Upgrade from Grub Legacy
When using the grub-install command, the boot information is updated and written to the designated drive, missing — but not corrupted or intentionally deleted — files are restored. Specifically the core.img, grubenv, and device.map are updated and missing modules restored. If missing, the grub folder will be recreated. The grub-install command does not generate a new GRUB 2 menu (grub.cfg).
Reinstalling GRUB 2 from a Working System
If Ubuntu is operating normally, boot into the working installation and run the following command from a terminal.
X is the drive (letter) on which you want GRUB to write the boot information. Normally users should not include a partition number, which would produce an error message as the command would attempt to write the information to a partition.
This will rewrite the MBR information to point to the current installation and rewrite some GRUB 2 files (which are already working). Since it isn’t done during execution of the previous command, running sudo update-grub after the install will ensure GRUB 2’s menu is up-to-date.
Fixing a Broken System
If a system has become unbootable due to a GRUB 2 failure or corrupted MBR/boot sector, there are various methods for reinstalling GRUB 2. The simplest is listed first, followed by more complicated methods.
via Boot-Repair Graphical Tool
Boot-Repair is a GUI application which can fix a variety of GRUB 2 problems. It can be used either from a LiveCD, its own CD, or during a normal Ubuntu session. In addition to providing a simple user interface, Boot-Repair also includes the ability to run a script to gather details of the system which can be used for troubleshooting help on various forums and IRC channels.
Please refer to the Boot-Repair community documentation for instructions on how to install and run this application.
via GRUB2 Rescue mode
GRUB 2 provides a rescue mode which allows the user to attempt to repair GRUB 2 from a special GRUB terminal during boot. Refer to the Grub2 Command_Line_and_Rescue_Mode section for information on GRUB terminal operations.
via the LiveCD terminal
This method uses the terminal from a LiveCD. The user must know the device name/partition of the installed system (sda1, sdb5, etc), which is then mounted from the LiveCD. GRUB 2 files are copied from the LiveCD libraries to the proper locations and MBR.
This operation will write to the MBR and restore the modules and core.img to /boot/grub. It will not replace or restore grub.cfg or fix corrupted files. Boot the LiveCD, select «Try It», and open a terminal.
When using a LiveCD, due to GRUB 2 changes between Ubuntu releases, it is recommended that the user boots a LiveCD of the same release (11.10, 12.04, etc) as the release to be repaired. If the user has installed a different version of GRUB 2, use a LiveCD with the same GRUB 2 version.
If necessary, use the fdisk command to help determine the partition on which Ubuntu is installed. The fdisk option «-l» is a lowercase «L». Look for one of the appropriate size or formatting. Running sudo blkid may provide more information to help locate the proper partition, especially if the partitions are labeled. The ‘
In the following commands:
Use the partition number of the Ubuntu installation with mount command.
Do not use the partition number with the grub-install command.
X is the drive letter (a, b, c, etc.); Y is the partition number (1, 5, etc).
—boot-directory is the folder in which the GRUB folder is located. This is normally /boot but should be changed if the grub folder is located elsewhere.
On systems with a separate /boot partition, that partition should be mounted to /mnt/boot. For instance: sudo mount /dev/sda6 /mnt/boot
grub-install will restore missing files in the grub folder but will not restore intentionally deleted or corrupted files. To accomplish these tasks GRUB 2 must be completely removed and reinstalled.
If Ubuntu is installed on B-tree file system i.e. btrfs then /boot changes to /@/boot in above commands such that :
For GRUB 2 version 1.98 and earlier (Ubuntu 10.04), the installation command is slightly different. Rather than designating the —boot-directory, the switch is —root-directory. In this case, the location changes to /mnt
If the user wishes to explore why the system failed, refer to Post-Restoration Commands section below.
via Partition Files Copy
This method does not work if GRUB has not already been installed, or if GRUB files have been deleted.
This method talks about 9.10, so it may be obsolete.
It consists in locating and mounting the problem boot partition from the LiveCD. The files are then copied from the broken system’s /boot/grub directory to the proper locations and MBR. It requires fewer steps and fewer command line entries than the following CHROOT method. For users with separate system partitions, such as a separate /boot partition, or other special circumstances, using the CHROOT method may provide better results.
- Boot to the LiveCD Desktop.
- Mount the partition with your Ubuntu installation.
From the Places menu, select and click the partition containing your Ubuntu installation to mount it.

If the partition isn’t recognized, look for apartition of the appropriate size or label.Once mounted, the user should see Ubuntu system directories such as /boot

Open a terminal by selecting Applications, Accessories, Terminal from the menu bar.
Run the grub-setup -d command as described below. This will reinstall the GRUB 2 files on the mounted partition to the proper location and to the MBR of the designated device.
Determine the mount point by referring to the location box in Places. Replace XXXX in the command with the UUID, or replace /media/XXXX with the correct location if the partition is not mounted in /media. The designation may be a UUID, or a label, if the user has created one (see note).
If the location window is not in the format shown, click on the icon to the left to change the presentation.

When ready to copy the UUID/location, by highlighting it with the mouse. Paste it into the terminal by pressing the middle mouse button. If using the keyboard, use CTRL-SHIFT-arrow to select and CTRL-C to copy the location and CTRL-SHIFT-V to paste it into the terminal.
The device/drive is designated by sdX, with X being the device designation. sda is the first device, sdb is the second, etc. For most users the MBR should be installed to sda, the first drive on their system. Example:
sudo grub-setup -d /media/7848138a-41a0-4eba-8aed-d1b625ac8759/boot/grub /dev/sda
If the user gets a «error: Cannot open /boot/grub/device.map» message, add the -m switch and path to the device.map to the command as follows: Example:
sudo grub-setup -d /media/7848138a-41a0-4eba-8aed-d1b625ac8759/boot/grub -m /media/7848138a-41a0-4eba-8aed-d1b625ac8759/boot/grub/device.map /dev/sda
Other switches are available for use with the grub-setup command. In a terminal, type grub-setup —help for a list of available options.
You may find you get a repeated «error: Cannot open /boot/grub/device.map» message. If this happens try rebooting. The UUID method may actually work but throws an error message falsely. Using the label name does not seem to evoke the same repeated error message.
Reboot
Refresh the GRUB 2 menu with sudo update-grub
If the user wishes to explore why the system failed, refer to Post-Restoration Commands section below.
Disk Utility, introduced in Ubuntu 9.10, can easily assign labels to existing partitions. Access Disk Utility from the System, Administration menu or DASH.
via ChRoot
This method of installation uses the chroot command to gain access to the broken system’s files. Once the chroot command is issued, the LiveCD treats the broken system’s / as its own. Commands run in a chroot environment will affect the broken systems filesystems and not those of the LiveCD.
- Boot to the LiveCD Desktop. The CD should be 64bit (not 32bit) if the system to fix is 64 bit.
- Open a terminal. The method varies depending on the release.
Assuming the normal system partition(s) are on a software RAID (otherwise skip this step): make sure the mdadm tools are installed in the Live CD environment (e.g. by executing sudo apt-get install mdadm). Then assemble the arrays:
If using bcache:
Determine your normal system partition. The following commands may be helpful. The fdisk switch is a lowercase «L».
Mount your normal system partition. X is the drive letter. Y is the partition number:
- Substitute the correct partition: sda1, sdb5, etc.
Example 1: sudo mount /dev/sda1 /mnt
Example 2: sudo mount /dev/md1 /mnt
Only if you have a separate boot partition (where sdXY is the /boot partition designation):
Example 1: sudo mount /dev/sdb6 /mnt/boot
Example 2: sudo mount /dev/md0 /mnt/boot
Only if (some) of the system partitions are on a software RAID (otherwise skip this step): make sure the output of mdadm —examine —scan agrees with the array definitions in /etc/mdadm/mdadm.conf.
Reinstall GRUB 2 (substitute the correct device with sda, sdb, etc. Do not specify a partition number):
If the system partitions are on a software RAID install GRUB 2 on all disks in the RAID. Example (software RAID using /dev/sda and /dev/sdb):
Recreate the GRUB 2 menu file (grub.cfg)
Boot repair after a Windows Upgrade on Ubuntu 14.04 (non-RAID)
Boot repair may be required when updating Windows (e.g. Windows 8 to Windows 8.1). This will be required for example if the computer has been configured such that Windows/Ubuntu is selected by entering the bios and changing the boot mode between «secure boot»/UEFI and CMS respectively. To manually repair grub (http://howtoubuntu.org/how-to-repair-restore-reinstall-grub-2-with-a-ubuntu-live-cd / http://askubuntu.com/questions/88384/how-can-i-repair-grub-how-to-get-ubuntu-back-after-installing-windows );
- Insert Ubuntu installation media (e.g. Ubuntu 14.04 LTS 64 bit DVD)
- Ensure the bios boot order is set to read the media first (consult your motherboard/computer manual) and restart the computer
- Select Ubuntu Live/Try mode (do not install)
- Click on the purple Ubuntu search button — enter «gparted» and click on its icon
- Determine the name of your linux partition (/dev/sdXY) — you should be able to identify it by recognising its format (most likely ext4) and size (number of GB)
- Click on purple Ubuntu search button — enter «gnome-terminal» and click on its icon
sudo mount /dev/sdXY /mnt [where sdXY has previously been identified using gparted]
for i in /dev /dev/pts /proc /sys /run; do sudo mount -B $i /mnt$i; done
sudo chroot /mnt
sudo grub-install /dev/sdX [note this is sdX not sdXY!]
exit
Purging & Reinstalling GRUB 2
The difference between using the grub-install command and purging & reinstalling GRUB 2 is that the latter completely removes all GRUB 2 files and system settings. Purging GRUB 2 is also a method to reset all configuration settings to the default values on a working system. This may correct GRUB 2 failures due to corrupted files and improper configurations as well as for missing folders/files deleted by the user. The GRUB 2 packages removed and reinstalled via this procedure include grub-pc, grub-common and, in Grub 1.99 and later, grub-gfxpayload-lists.
During this operation the user will be temporarily left with no bootloader. Ensure you have a working Internet connection and access to the repositories before purging the GRUB 2 packages.
This procedure can be accomplished very simply via Boot-Repair, or via the terminal procedure below.
Remark: the Boot-Repair procedure will also remove custom files that may block the boot. It is also able to purge and reinstall GRUB2 for UEFI / LVM / RAID systems.
via Boot-Repair Graphical Tool
* Run Boot-Repair either from liveCD or from your installed session * Click «Advanced options» —> «GRUB options» tab * Tick the «Purge GRUB and reinstall it» option —> Apply
via Terminal Commands
The commands from a working Ubuntu installation or once within the ChRoot of a LiveCD are the same.
If using the LiveCD, complete the steps up to and including the sudo chroot command (Step 9) in the previous section.
Run the following commands as root. If not in a ChRoot environment, preface each command with sudo.
- Update the repositories to get a list of the most recent packages available. Ensure you have a working Internet connection and access to the repositories. If you do not, STOP!
The following command will completely remove grub-pc and grub-common. In GRUB 1.99 and later, grub-gfxpayload-lists will also be removed.
You will be warned you are removing the bootloader. TAB to OK and press ENTER.
- You will be given the opportunity to add kernel options. TAB to OK. You will be given the opportunity to select the devices/drives on which to install GRUB 2. Select the appropriate drive(s) with the SPACEBAR. Normally you do NOT want to select any partitions. TAB to OK after selecting the drive(s), then press ENTER.
If using the ChRoot procedure, Exit chroot then continue the ChRoot procedure at Step 13:
Post-Restoration Commands
Once the user can boot to a working system, the following commands may prove useful in locating and/or fixing the problem.
To refresh the available devices and settings in /boot/grub/grub.cfg
sudo update-grub
To look for the bootloader location.
grub-probe -t device /boot/grub
To install GRUB 2 to the sdX drive’s MBR or boot sector (sda, sdb, etc.)
sudo grub-install /dev/sdX
Moving GRUB 2
The command to change the GRUB 2 installation device or boot files is grub-install run as root. This command allows the user to modify the installation by setting the ROOT directory, preload modules, run specific setup files and more. When executed, grub-install may run one or more other commands, such as grub-probe, grub-mkimage, and grub-setup. Here are some considerations when running grub-install:
The grub-install command should be used rather than grub-setup under normal circumstances. grub-setup will be called by grub-install when needed.
The command should specify a device and when executed will install the required GRUB files to the location called for in the options.
If only the device is specified (sda, sdb, etc), the boot information will be written to the specified device’s boot record. (example: sudo grub-install /dev/sda )
If the —boot-directory= switch is used, the grub folder will will become a subfolder of the location specified. The —boot-directory switch is available in GRUB 1.99 and later.
If the user attempts to run the command with a specific partition (example: sudo grub-install /dev/sda6 ) a warning will be issued. Specifying a partition is not recommended due to the use of blocklists, which the developers consider unreliable. An option is provided on how to override this recommendation if the user still wishes to do so.
The list of options available for grub-install can be displayed in a terminal with grub-install —help
An alternative command to install or move GRUB 2 from a particular device is to use the dpkg-reconfigure command. As the command runs, the user will be offered the opportunity to add kernel options on the first page and to specify the devices/drives on the second screen. Use the TAB key to highlight OK and press ENTER to continue.
Add the desired kernel options (such as ‘noapic’), TAB to OK when finished, and press ENTER.
Select the drive(s) with the SPACEBAR. It is not recommended to select any partition. TAB to OK when finished and press ENTER.
GRUB Legacy Upgrades and Downgrades
For information on how to switch from GRUB Legacy to GRUB 2, or from GRUB 2 to GRUB Legacy, please refer to the Grub2/Upgrading community documentation.


