- Apache Kafka Installation on Windows and MacOS
- Kafka Installation on Windows
- Install JDK 1.8 or higher
- Install Kafka
- Run Kafka
- Kafka Installation on Mac
- Summary
- Kafka – Install Apache Kafka on Mac
- Install Kafka on Mac OS
- Install Java
- Install Apache Kafka on Mac
- Start Zookeeper
- Start Apache Kafka Server
- Conclusion
- Apache Kafka Installation on Mac using Homebrew
- jarrad / install-kafka.txt
- This comment has been minimized.
- Serha31 commented Dec 26, 2017
- This comment has been minimized.
- jitendra3109 commented Jan 10, 2018
- This comment has been minimized.
- springheeledjak commented Jan 17, 2018
- This comment has been minimized.
- abhayakumarsethy commented Mar 19, 2018
- This comment has been minimized.
- dosentmatter commented Mar 20, 2018
- This comment has been minimized.
- base698 commented Jun 14, 2018
- This comment has been minimized.
- vglushak commented Aug 31, 2018 •
- This comment has been minimized.
- jitendrakalyan commented Sep 21, 2018
- This comment has been minimized.
- mayank-dixit commented Dec 10, 2018 •
- This comment has been minimized.
- abusizhishen commented Jan 31, 2019
- This comment has been minimized.
- longtt2512 commented Mar 12, 2019
- This comment has been minimized.
- sauravrout commented Jul 1, 2019
- This comment has been minimized.
- rmannhx commented Jan 21, 2021
- DEV SOFT LIFE FREE .
- Какую проблему решает?
Apache Kafka Installation on Windows and MacOS
Last Modified: May 17, 2021
In this tutorial, We’ll learn how to install and run Apache kafka broker in local machine running on Windows or Mac operating system.
Running kafka broker in local machine helps developer to code, debug and test kafka application in initial phase of development when Kafka infrastructure is not ready.
Kafka Installation on Windows
If you are using Windows, then you can follow these steps to install Kafka:-
Install JDK 1.8 or higher
JDK 1.8 or higher version is prerequisite for Kafka Installation. You can download and install JDK based on your OS and CPU architecture from here:-
https://www.oracle.com/sg/java/technologies/javase-downloads.html
Once your JDK installation is complete, you must configure PATH and JAVA_HOME environment variables. You can set up your environment variables using the following steps:-
- Start system settings in the control panel. You can directly start it by pressing Win + Pause/Break key.
- Click on Advanced System Settings.
- In the advanced tab, click the environment variable button.
- In the user variables section, add new JAVA_HOME environment variable as your Java installation directory. In a typical case, your Java installation directory should be something like C:\Program Files\Java\jdk1.8.0_191 . However, if you have installed JDK as per the steps defined above, you should have noted down your JDK location as advised earlier.
- Now you can add a new PATH environment variable and specify the path as %JAVA_HOME%\bin
The final step is to test your JDK installation. Start windows command prompt and test JDK using below command. You should see the installed version:-
Thats it! Your JDK in installed successfully.
Install Kafka
Download and install Kafka binaries from here:-
https://kafka.apache.org/downloads
Note: At the time of writing this article, latest kafka version was kafka_2.13-2.8.0.tgz. It is recommended to use latest version available.
Download and install 7-zip (required to un-compress the Kafka binaries) from here:-
http://www.7-zip.org/download.html
Un-compress the kafka_2.13-2.8.0.tgz file using 7-zip, and you may have to use it twice to extract the files correctly.
For example, after exraction, my kafka location is as follow:-
Next, we need to change Zookeeper configuration zookeeper.properties as follows:-
Open the property file:-
and change the Zookeeper dataDir location config to a valid windows directory location. An example value is given below.
Make sure that zookeeper_data directory exist in specified location. If not, create one.
We also need to make some changes in the Kafka configurations server.properties as follows:-
Open the property file:-
and change/add following configuration properties.
Make sure that kafka_logs directory exist in specified location. If not, create one. Also note that we are setting topic defaults to 1, and that makes sense because we will be running a single node Kafka on our machine.
Finally, add Kafka C:\apache\kafka_2.13-2.8.0\bin\windows directory to the PATH environment variable. This directory contains a bunch of Kafka tools for the windows platform. We will be using some of those in the next section.
Run Kafka
Start Zookeeper in new terminal using:
Start Kafka in new terminal using:
Create a test kafka topic in new terminal using:
Publish messages to test kafka topic by initializing a producer in new terminal using:
Consume messages from test kafka topic by intializing a consumer in new terminal using:
You can List the available Kafka topics using:-
Kafka Installation on Mac
If you are using MacOS, then you can install Homebrew package manager and run following commands from terminal:-
To install Java (Prerequisite for Kafka), run
To install Kafka, run
Here are the brew logs of Kafka Installation, Note that brew also installs Zookeeper as Kafka dependency:-
Edit the server.properties file
Uncomment the listeners property and update the value from
listeners=PLAINTEXT://:9092
to
listeners=PLAINTEXT://localhost:9092
Start Zookeeper in new terminal using:
Start Kafka in new terminal using:
Create a test kafka topic in new terminal using:
Publish messages to test kafka topic by initializing a producer in new terminal using:
Consume messages from test kafka topic by intializing a consumer in new terminal using:
Delete the kafka logs if there is any issue in starting Kafka server
Summary
You have successfully installed and run a single-node Kafka broker on your local machine running on Windows or Mac operating system. This installation will help you to execute your Kafka application code locally and help you debug your application from the IDE.
Источник
Kafka – Install Apache Kafka on Mac

Install Kafka on Mac OS
To install Apache Kafka on Mac, Java is the only prerequisite. First we shall look into the installation steps of Java and then we shall setup Apache Kafka and run it on the Mac.
Install Java
- Open a browser and hit the url [http://www.oracle.com/technetwork/java/javase/downloads/index.html].
- Click on JDK, check “Accept License Agreement” and download .dmg file for installation on Mac.
- Double click on the downloaded file and proceed with the installation steps.
- You have successfully installed Java. You may delete the .dmg file, as memory is costly on Mac.
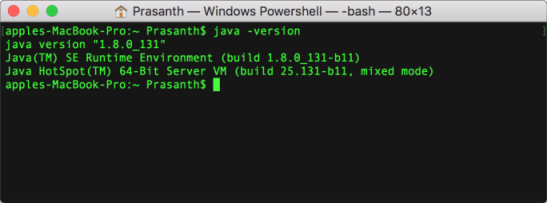
You may verify the installation of Java on Mac, by running the following command on a Terminal.
Install Apache Kafka on Mac
1. Download the latest Apache Kafka from [https://kafka.apache.org/downloads] under Binary downloads.
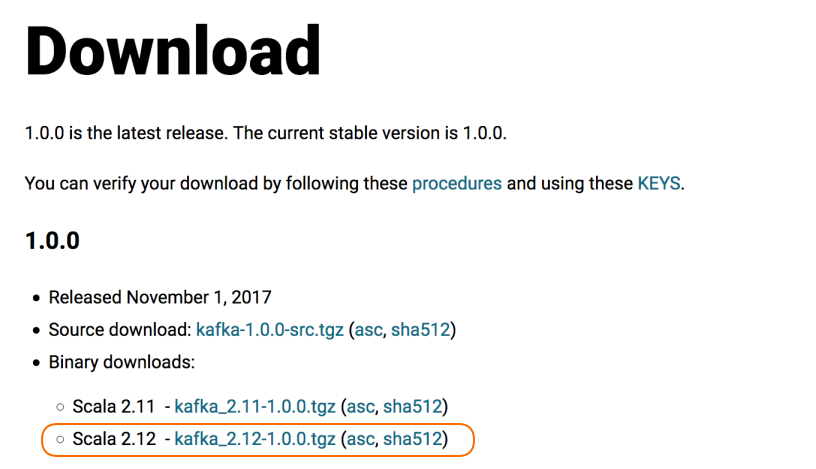
2. Click on any of the binary downloads, or choose a specific scala version if you have any dependency with scala in your development.
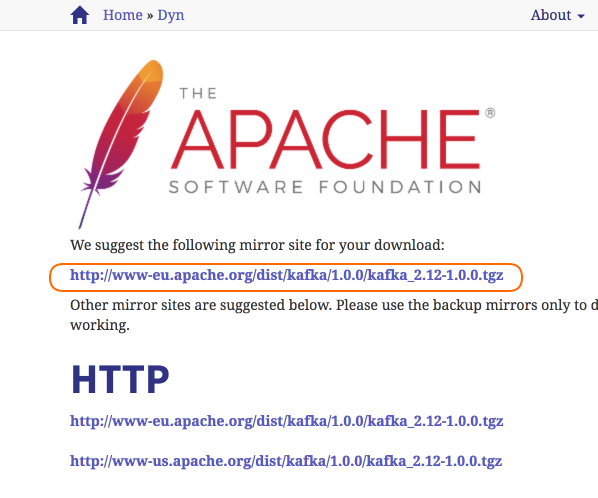
3. Go with the recommended mirror site.
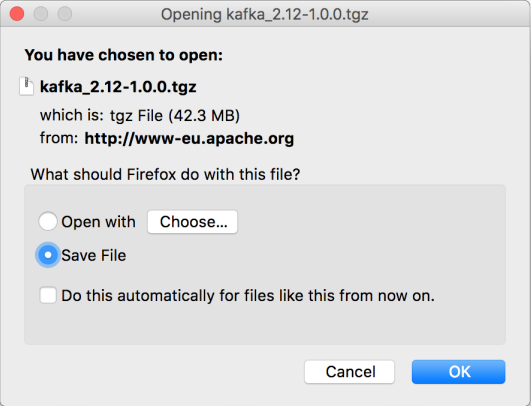
4. Extract the contents.
Navigate to root of Apache Kafka folder and open a Terminal. Or Open a Terminal and navigate to the root directory of Apache Kafka.
Start Zookeeper
Apache Kafka depends on Zookeeper for cluster management. Hence, prior to starting Kafka, Zookeeper has to be started. There is no need to explicitly install Zookeeper, as it comes included with Apache Kafka.
From the root of Apache Kafka, run the following command to start Zookeeper :
The zookeeper should be started with a similar following trace in the output.
Start Apache Kafka Server
Open another Terminal and run the following command from the root of Apache Kafka to start Apache Kafka.
Following should be the end of trace stating that Kafka server is started.
Conclusion
In this Apache Kafka Tutorial, we have successfully learnt to install Apache Kafka on Mac and start Kafka along with Zookeeper.
Источник
Apache Kafka Installation on Mac using Homebrew

Aug 28, 2018 · 3 min read
I have started following the apache kafka documentation, but later thought to find the homebrew installer of Kafka. So to install Kafka on Mac using Homebrew:
Here are the logs:
Now start Zookeeper and Kafka:

Start Kafka server:

During server start, you might be facing connection broken issue.
To fix this issue, we need to change the server.properties file.
Here uncomment the server settings and update the value from
and restart the server and it will work great.
Create Kafka Topic:
A topic is a category or feed name to which records are published. Topics in Kafka are always multi-subscriber; that is, a topic can have zero, one, or many consumers that subscribe to the data written to it.
Here we have created a topic name test
Initialize Producer console:
No w we will initialize the Kafka producer console, which will listen to localhost at port 9092 at topic test :
Initialize Consumer console:
Now we will initialize the Kafka consumer console, which will listen to bootstrap server localhost at port 9092 at topic test from beginning:
Congratulations everyone, hopefully it is helpful.
Источник
jarrad / install-kafka.txt
| $> brew cask install java |
| $> brew install kafka |
| $> vim |
/bin/kafka
/bin/kafka
/bin/kafka
This comment has been minimized.
Copy link Quote reply
Serha31 commented Dec 26, 2017
thank you a lot
This comment has been minimized.
Copy link Quote reply
jitendra3109 commented Jan 10, 2018
After enter VIM I did not get what to do?
zkServer start
kafka-server-start.sh /usr/local/etc/kafka/server.properties
Please anybody can guide to install Kafka.
This comment has been minimized.
Copy link Quote reply
springheeledjak commented Jan 17, 2018
Homebrew has a services manager and can manage its own Java installation, so an easier way to do this is just
That’s it. If you want to stop Kafka, just run the brew services commands in reverse:
This comment has been minimized.
Copy link Quote reply
abhayakumarsethy commented Mar 19, 2018
how to check the port number on which kafka is running ?
This comment has been minimized.
Copy link Quote reply
dosentmatter commented Mar 20, 2018
@abhaykmr52, the default port for kafka should be 9092. The homebrew uses port 9092. If you are setting up mutliple brokers, you will have multiple server.properties files and each one will specify the port.
This comment has been minimized.
Copy link Quote reply
base698 commented Jun 14, 2018
How do you install and older version?
This comment has been minimized.
Copy link Quote reply
vglushak commented Aug 31, 2018 •
Followed this instruction and got an error while trying to publish some messages into topic:
[2018-08-31 19:10:47,854] WARN [Consumer clientId=consumer-1, groupId=console-consumer-42143] Error while fetching metadata with correlation id 32 :
Looks like default server.properties is not valid for kafka 2.0.0.
It works after adding following lines:
This comment has been minimized.
Copy link Quote reply
jitendrakalyan commented Sep 21, 2018
Thanks this helped!
This comment has been minimized.
Copy link Quote reply
mayank-dixit commented Dec 10, 2018 •
This comment has been minimized.
Copy link Quote reply
abusizhishen commented Jan 31, 2019
This comment has been minimized.
Copy link Quote reply
longtt2512 commented Mar 12, 2019
This comment has been minimized.
Copy link Quote reply
sauravrout commented Jul 1, 2019
This comment has been minimized.
Copy link Quote reply
rmannhx commented Jan 21, 2021
On first startup after performing
brew install kafka
and executing in separate terminal sessions
Kafka shut down immediately after getting the following error:
Источник
DEV SOFT LIFE FREE .
Apache Kafka – это один из самых популярных брокеров сообщений на рынке IT. Когда-то был разработан LinkedIn для своих внутренних нужд, позже был передан в OpenSource. В настоящее время главным мэинтейнером Apache Kafka является компания Confluent. Думаю на истории можно остановиться. Подробнее о Apache Kafka можно почитать здесь https://kafka.apache.org.
Какую проблему решает?
С одной стороны, когда мы имеем один источник данных и одного потребителя данных, то Kafka и другие брокеры сообщений нам вообще ни к чему. Примерно выглядит это вот так:

С другой стороны, в реальных проектах современного мира все выглядит немного по-другому. Примерно вот так:

Получается, имея 4 источника и 4 системы потребителя, нужно написать 16 интеграций. Apache Kafka – решает эту проблему, агрегирую внутри себя сообщения от источников, которые потом прочитываются потребителями.

Детально о том как устроена Kafka поговорим как-нибудь в другой раз, а сейчас давайте перейдем к практике и за 5 минут развернем “Кафку” у себя на MacOS.
Всего необходимо сделать следующие шаги:
- Установить brew
- Скачать и установить Java 8 JDK
- Скачать и разархивировать Apache Kafka
- Установить Kafka с помощью brew
- Настроить конфигурационные файлы Zookeeper и Kafka
- Запустить Zookeeper и Kafka
- Создать Topic
- Запустить потребителя и поставщика данных и отправить сообщения в Kafka
1. Чтобы установить brew просто введите эту строку в терминале
Источник


