- Getting Started/Build/Historic/KDE4 Windows
- Содержание
- KDE Installer for Windows
- Summary of Steps
- Download needed packages
- Issues with KDE Installer for Windows
- Additional software that you may want to install
- Testing your installation
- Startup, shutdown, and diagnosing problems
- Fine-tuning
- How to Install KDE in Windows
- Download
- Install
- Configure and Use
- How to run KDE on Windows
Getting Started/Build/Historic/KDE4 Windows
Содержание
KDE Installer for Windows
You can use this installer to download and install the various binary packages that you need to run KDE applications on MS Windows. KDE is free and open source so you can build all the applications «from scratch» from their source code; but as a convenience for others, volunteers create these pre-compiled packages and make them available on the Internet.
Disclaimer These are early days for KDE4 on Windows, some programs work better than others and some fail to run altogether.
If you experience any problems please have a look into our mailing list.
You can also use the KDE Installer for Windows to install source code and the packages that you need to build KDE4 on Windows (although if you are building KDE4 on Windows you may prefer to use the emerge system to build KDE and its requirements from latest source); see Getting Started/Build/Windows.
Summary of Steps
- Download and save the latest version of the installer from here to a directory, e.g. C:\KDE4
- Run the installer, download and install what you need (see Download needed packages below).
- Try to run a KDE application from the windows start menu (see for KDE x.x.x Release entry)
Download needed packages
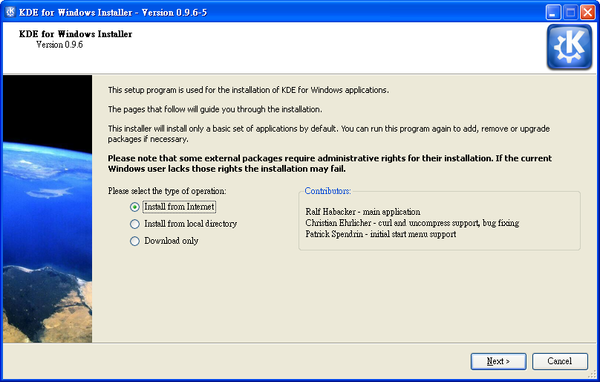
When you run KDE-installer for the first time, you’ll see the welcome screen. Since it’s your first launch leave the checkbox below unchecked.
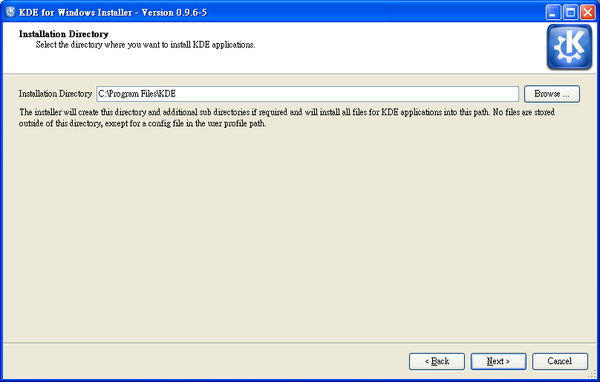
Proceed to the next screen, where you choose the KDE4 installation directory. It can be anything you prefer, e.g. C:\KDE4.
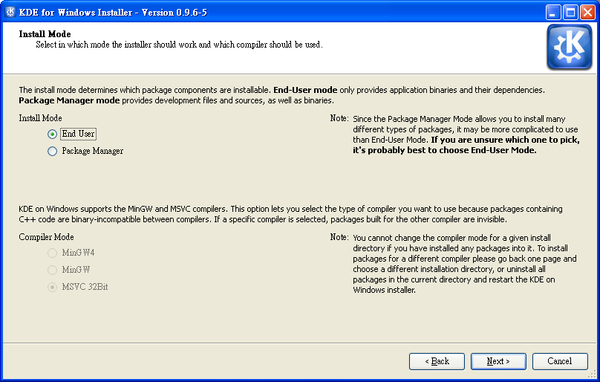
On the next screen, define who you are: End User or Developer. The End User installation installs only binary packages and libraries needed to run KDE application. Package Manager mode provides you also with the source code for all packages needed to build KDE from scratch.
Then you need to decide what compiler to use — MinGW or MSVC.
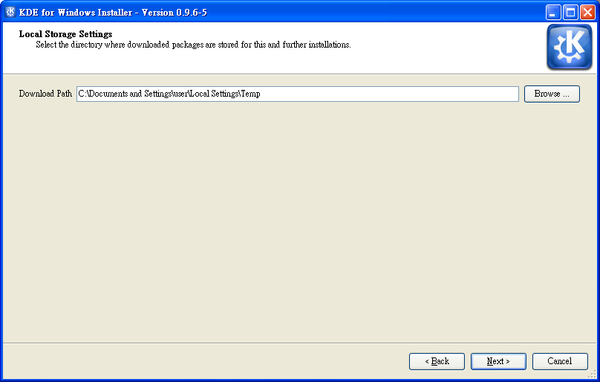
Proceed to the next screen and there choose the directory where all the downloaded packages will be stored. Let it be something like C:\KDE4-tmp or C:\KDE4-packages.
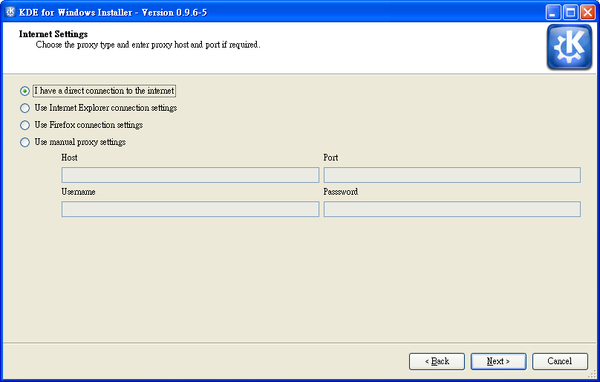
The next screen will ask you to choose your internet connection type, particularly whether or not you’re using a proxy. If you don’t use a proxy server, just click ‘Next’. If you are unsure of whether you’re using proxy or if you have web browser configured to work with it properly, choose the second or the third option, according to your favourite web-browser. If you’d like to set all the settings manually — choose the last option and go ahead.
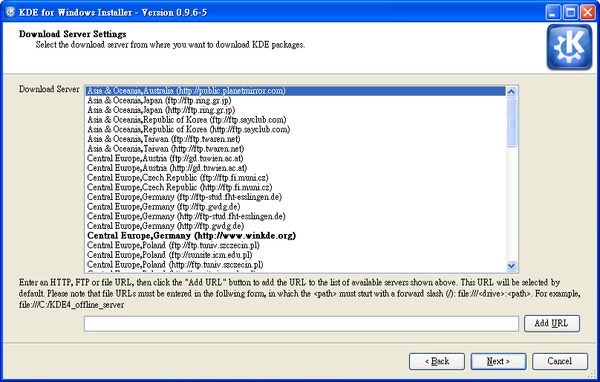
When you click the ‘Next’ button the (currently, rather short) list of available servers will be loaded and you could choose the one closest to you.
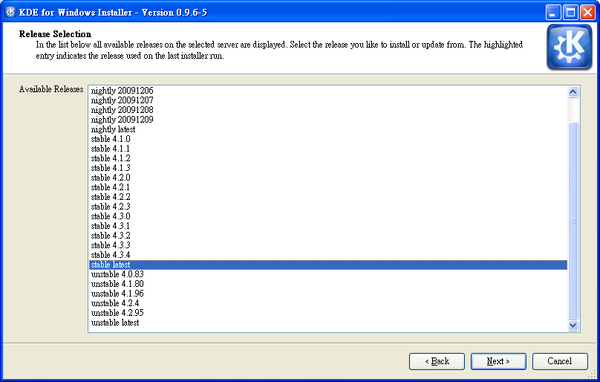
When you click ‘Next’, a list of available releases on the selected server will be shown. Depending on the server there may be stable and/or unstable release available. Some unstable releases may only be available from www.winkde.org because the kde mirrors provides only a limited range of unstable releases.
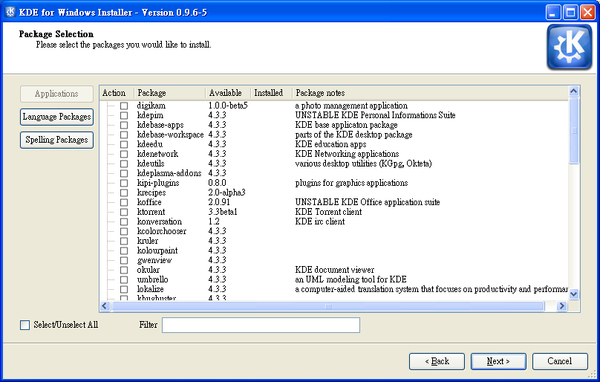
After selecting a release an a click on the ‘Next’ button, the list of all available packages will be loaded and processed, providing you with the list of package groups you can select for further installation. The short description next to each group of packages should make your choice easier. Select the packages you need. Proceed to the next screen.
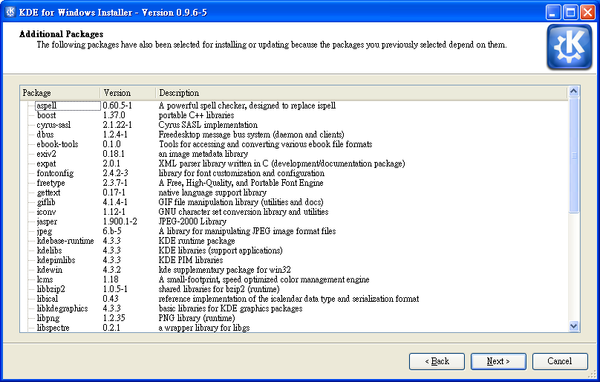
Here you can see all the required dependencies, or software necessary to support the choices you’ve made. Click ‘Next’ to download them all.
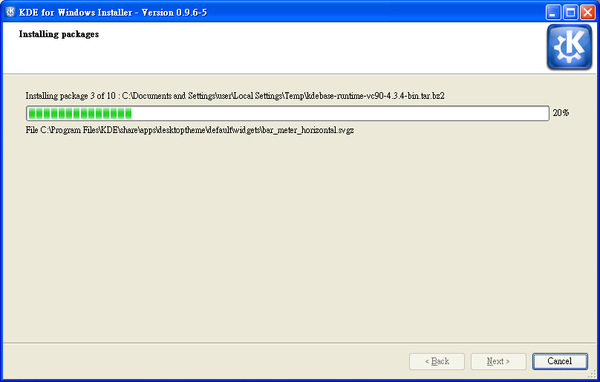
After all the packages are downloaded they’ll be unpacked and processed by the installer.
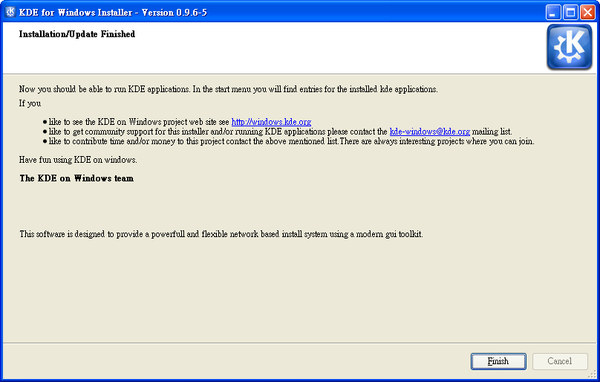
The final window will tell that your KDE installation for Windows is complete.
Issues with KDE Installer for Windows
If something goes wrong during installation, for example a file can’t be replaced because it is still in use, the installer may still report successful completion. If you see any alert or failure message from the installer, when it completes, quit and re-run it.
If that didn’t help and you think it’s a bug, please report to [2]
Additional software that you may want to install
In a few special cases applications included in the KDE on Windows Installer need additional software to be fully functional. You will have to install this, manually.
Testing your installation
Navigate to the bin directory.
See if you can run the Qt program assistant.exe. Qt programs have fewer dependencies than a full-blown KDE application.
If that works, try running a simple KDE application, such as lskat.exe from the kdegames package.
Look into your start menu: there will be a new entry KDE 4.XX.XX Release. Below that folder you can find all the apps you installed.
Startup, shutdown, and diagnosing problems
The first KDE program you run should automatically invoke kdeinit4.exe, the KDE initialization app, which starts background KDE applications and services like dbus-daemon, klauncher and kded4. http://techbase.kde.org/Projects/KDE_on_Windows/Installation The first time you save or open, another background application, kioslave, will start.
These background KDE applications and services remain running after you close KDE applications. If you want you can shut them down by running kdeinit4 --terminate from a command prompt.
You can run kdeinit4 --list from a command prompt to see what processes are running. kdeinit4 has other useful options documented elsewhere.
Fine-tuning
Find some useful information on how to modify the behavior of KDE applications here.
How to Install KDE in Windows
For over a decade, KDE has supplied Linux and Unix users with a graphical desktop environment and a suite of useful applications. It has become one of the most popular desktop environments and is the default on many Linux distributions. With the coming of KDE 4, developers promised native KDE applications running on Windows. While the current release is still not ready for production, as of KDE 4.3.3, it is coming closer and worth trying. What follows is a brief guide to getting KDE running on Windows.
Download
The Windows download for KDE is not very obvious on the main KDE download page. It is not clear if this is deliberate, since it is still unstable, but the Windows installer for KDE is actually available on the KDE website. Download the .exe file and save it. Double-click it to run the installer, just as you would for any other Windows program.
Install

At this point you have only downloaded the small installation file and not the actual KDE packages. Therefore, select the first option in the installation window “Install from Internet”. The next screen will present you with several options about how to install KDE. Unless you are a developer or have some specific reason to choose the other options, just choose “End User”. This will install the binary packages for KDE, whereas the other options all require you to compile KDE from source.

On the next screen, you can choose which KDE programs to install. As you will see, there are quite a few KDE applications now available, although some are still missing. Select as many or as few as you like. Even if you realize that you want to install more software, the installer will let you install just those later on, without having to reinstall the previous ones.

Click next and follow the rest of the instructions just as you would with a normal installer. When it is complete, it will ask you if you want to run System Settings. Check the box and proceed.
Configure and Use

The System Settings program is currently functional, although many settings are not yet available to Windows users. Click on the “Advanced” tab and then click the “Platform” button. This is a unique non-Unix feature that allows you to select the level of Windows integration. Currently, Plasma is not available but apparently will be in the future.
Next, click on the “General” tab and click “Appearance“. Click the “Style” button and choose the widget style you prefer. KDE can integrate with the default Windows style or use the default KDE style: Oxygen.

Finally, run KDE applications just like you run regular Windows ones: directly from the Start Menu. KDE games work particularly well, as does the KDE text editor, Kate, which we covered two weeks ago. Always keep in mind that this software is not yet complete, but what they do have available works pretty well. For information and customization options, be sure to read the KDE TechBase documentation on Windows. KDE is free and open source software, which you can freely download, install, and redistribute.

Tavis J. Hampton is a freelance writer from Indianapolis. He is an avid user of free and open source software and strongly believes that software and knowledge should be free and accessible to all people. He enjoys reading, writing, teaching, spending time with his family, and playing with gadgets.
How to run KDE on Windows
Use Linux apps on your Windows PC without a reboot
One of the best things about open-source software development is that anyone with the inclination and a modicum of talent can have a go. You don’t need expensive software, you don’t need developer accreditation and you don’t need planning meetings.
With Linux, coding is as easy as installing a development environment and firing up a text editor – as long as you can program, of course. Linux itself is the result of this anarchy, but there are thousands of other apps that have grown from similar origins.
Audacity, GIMP, Inkscape, Pidgin, Scribus, Ardour and numerous other applications have all been through the porting process to bring some of their goodness to Windows. But earlier this year, something far more ambitious happened: a large chunk of the KDE desktop was ported across.
KDE is one of the two most frequently used Linux desktop environments, and it includes desktop widgets, an instant messenger client, multipaned file and web browsing, the Amarok music player and the Digikam photo manager – some of the best that open source has to offer.
KDE has accumulated a huge userbase, and the last 18 months have seen it move from version 3.5 to version 4.2. The toolkit that has always provided most of the functionality behind KDE is called Qt, a commercial suite of libraries and APIs released using both open-source and proprietary licences.
Fourth-generation KDE applications use fourth-generation Qt, and part of that upgrade involves a commitment to cross-platform compatibility. Despite the fact that Qt has been mostly cross-platform for some time, it still takes a considerable amount of effort to create portable KDE applications out of the older code base.
That’s why the move to true portability has taken so long, and why the February release of KDE is so significant.
Getting started with KDE
1. After obtaining the KDE installer and launching it, you have the option of either installing from online package repositories or using packages within a local directory. You can also download the packages without installing them, which is handy if you’re going to install KDE on several machines.
The download location for these files is one of the options in the configuration panel. After clicking on ‘Next’, you’ll be asked for KDE’s installation directory. This can safely be left at the ‘Program Files\KDE’ default.

The next page asks whether you want an End User installation or a Package Manager installation. The first option is the most straightforward, as it’s for people who just want to use the KDE desktop; you should only select Package Manager if you’re intending to build your own packages for the Windows project.
The installer can also create a GCC-based tool chain for compiling your own software; you can select between the two supported compiler modes in the section in the lower half of the window. You should only attempt this if you’re a competent C++ programmer and understand something of the KDE/Qt APIs.
For the End User installation, select a download path (where the packages will be temporarily stored on your local disk). Skip over the Internet Settings page unless there’s something unusual about your connection.
You now need to select a download server as close to your geographical location as possible. Clicking on ‘Next’ will grab the package list from that server. If successful, you’ll see a list of KDE packages you can install. We recommend selecting either ‘Stable latest’ or ‘Stable 4.2.1’, the current package at the time of writing.
Installing KDE
2. Clicking ‘Next’ should now fill the window with dozens of package names. These are the various components of the KDE desktop. The easiest installation is accomplished by simply clicking on the ‘Select all’ box.
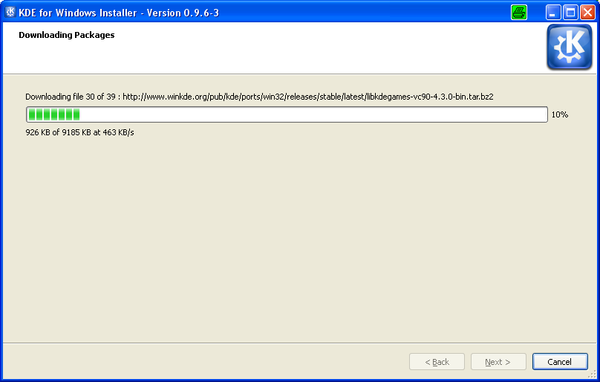
Despite its name, this option won’t install everything. For example, it doesn’t include non-English spelling and localisation packages, so if you need support for another language, you’ll need to add both the spelling and languages packages manually. Click ‘Next’ a couple more times and the download process will commence.
The time this takes is obviously dependent on your internet connection. If you’ve selected a complete install, there will be around 130 files, which weigh in at about 270MB in total. After the download has completed, each package will be installed automatically onto your system before a post-processing script configures the KDE environmental variables and adds all the packages to your Window Start menu. That’s where you should find the fresh applications of your new KDE desktop after the installation has completed.
If you’ve not used KDE before, it’s worth spending a bit of time learning about a few things that it does differently. An excellent Help file is included in the installation, although it’s a little dated for the current release. But before diving into the menagerie of KDE application proper, it makes sense to configure the KDE GUI to improve its look on Windows.
There’s a slight problem in the translation between KDE’s native widgets and those used by Windows, for example, and the default font also looks a little clunky when compared with other Windows apps. Fortunately, both can be changed quite easily.


