- Install linux on an external drive without modifying Windows EFI partition
- Requirements
- Instructions
- Comments
- Tried this on my system with Windows on M2 drive
- Resetting the primary disk flags
- Thanks for taking the time to write this article!
- Followed these instructions…
- started again but added a…
- Will it work on Mac too?
- Mac uses EFI. This trick…
- Oh, What an informative…
- How to Install Ubuntu on an External Hard Drive
- Requirement:
- How to Install Ubuntu 20.04 on an External Hard Disk Drive:
- Step 1: Making a Bootable USB With Ubuntu ISO:
- Step 2 – Installation Process:
- Step 3: Running Ubuntu:
- Conclusion:
- About the author
- Sam U
Install linux on an external drive without modifying Windows EFI partition
This article explains how to install Ubuntu Linux (or any other distribution) on a removable USB drive or stick without overwriting the EFI partition of your main hard disk and without using any shell commands, only graphical interfaces.
Live Linux USB drives are nice for testing purposes and with the new persistence modes they can also remember a few things between sessions. Unfortunately some features like the ability to update the OS or install drivers can only be accomplished with a full Linux installation.
It is possible to run a full Linux system in a removable drive but the installation process is tricky, even if you select the correct destination drive and the the correct destination for the boot loader you might end up with your main hard-drive boot partition overwritten and a USB stick that does not boot at all.
The main reason for this «unexpected behavior» are the extremely confusing and poorly implemented UEFI standards: the computer BIOS picks the EFI partition it finds first (on any disk) and boots from there. The lazy dumb Linux installers do not verify the location of this partition an simply load the boot instructions there without asking the user. Although this is OK for dual boot systems it will cause problems for users that do not want to contaminate their main disks.
One of the ways to prevent this is unplug the HD cable before the installation. Unfortunately newer computers and laptops use M.2 connectors without cables, removing and reinstalling the fixed HD is not that practical. Another alternative widely spread in forums is to perform the installation as usual and then repair the boot sequence of both the removable drive and the fixed drive, this procedure is complex and requires at least two devices, one for reading the instructions and the other to type the commands.
The procedure I will explain here does not require any shell commands, does not require rebooting the computer several times, does not require the main OS recovery disk (Windows or Mac), can be memorized just by reading this page, works with most graphical Linux installers based on Debian (Ubuntu, Kali, Lubuntu, Kubuntu, Mint, etc. ) and has a lower probability of failing.
Everything perfect? Definitely not! You can still damage your main disk boot if you don’t follow all the steps according to the instructions.
Requirements
This procedure is applicable for systems that use UEFI Mode (most of the computers shipped after Windows 7) with GPT. Devices that run on BIOS Legacy mode (MBR) do not require this procedure because the Linux Installer will place the boot loader where he is told to.
If you are not sure if your computer is using UEFI or Legacy mode just check the BIOS configuration menu.
Instructions
- Connect the destination drive and the source drive (Live Linux USB stick).
- Boot from the Live Linux stick.
- Select «Try Linux»
- When the graphical user interface loaded, run GParted (Partition Manager). If GParted is not available you can use the package manager from the live distro to install in the memory (it will be lost after reboot).
- Load the main Hard Disk drive (usually /dev/sda) and select the EFI partition (usually a FAT32 system).
- Edit the the flags of the EFI Partition and uncheck the «ESP» flag. Other flags will automatically change so take a note of the initial state before clicking anything.
- Apply the changes and do not reboot the computer until you revert that settings.
- Run the Linux installer from the desktop icon.
- Pick whatever partition scheme you want but remember to install the boot loader in the removable drive.
- When the installation ends, do not reboot the computer!
- Go back to the GParted application, select the the EFI partition and check back the «ESP» flag. Check other flags that were eventually turned off.
- Now reboot the computer and enjoy the new OS and the original untouched OS.
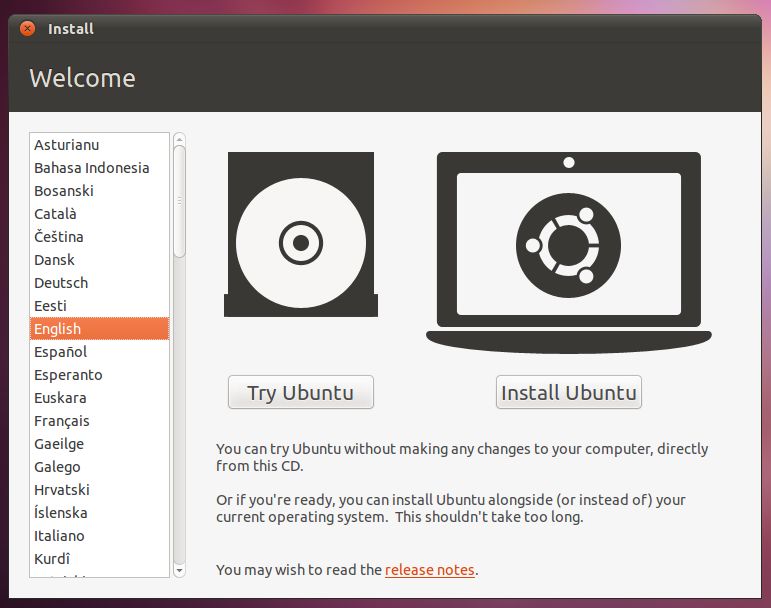 Select «Try Linux» option
 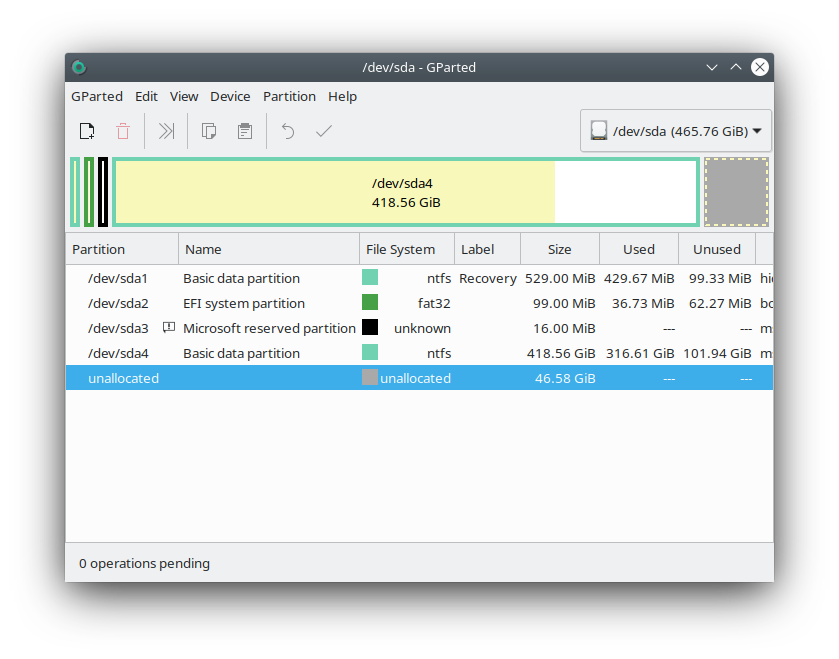 Look for the fat32 EFI partition and manage it’s flags
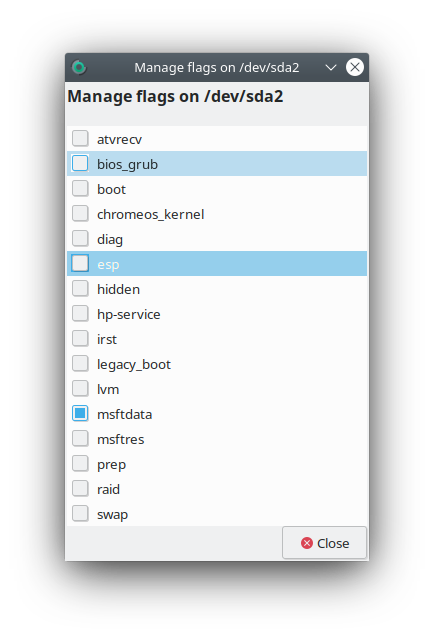 Disable the ESP flag in the EFI partition
 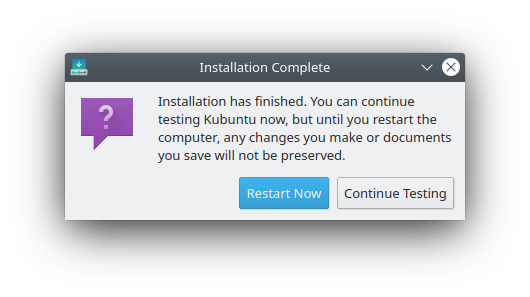 Do not reboot after installing Linux, re-enable the ESP flags before
 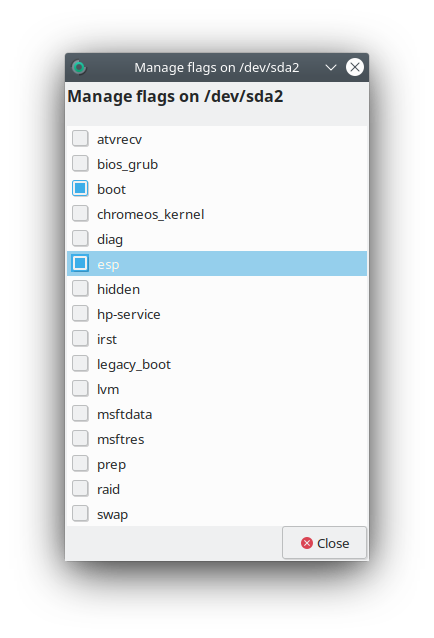 Re-enable the ESP flag in the EFI partition
Comments
Tried this on my system with Windows on M2 drive
Great article. I used this technique to install Linux on a second SSD with my main Windows installation on my primary M2 drive. Worked amazingly well (with two varieties of Linux). I had been looking for something like this for a long time; never liked the way Linux grub would overwrite the windows MBR. In the past, I would just disconnect my Windows drive when installing Linux. However, with Windows now on an M2 drive I didn’t want to take the risk of unplugging (and possibly breaking) it. From now on, this will be my main Linux installation tool. Thanks again.
Resetting the primary disk flags
I’ve been using this method to install several different Linux systems on a second SSD. My primary Windows drive is an M.2 drive. I like the way Linux will keep its «grubby» hands off of my windows MBR with this technique. I noted that on several occasions, I forgot to reset the Esp and Boot flags on my M.2 drive after installing Linux. However. . . it didn’t seem to make any difference. Windows booted up normally without issue. Anyone have ideas if the resetting of the flags is always necessary?
Thanks for taking the time to write this article!
Seriously you are a rockstar. The amount of time I have wasted trying to make this work with UEFI is mind numbing and now I can have external bootable Linux drives of different distros with ease. Thank you so much
Followed these instructions…
Followed these instructions but now I get a grub rescue terminal when I try to boot from the external sdb drive . If I remove the drive windows 10 boots normally. Is there an easy fix for this?
started again but added a…
started again but added a bootable partition on the secondary drive and now works! Thanks for the article
Will it work on Mac too?
Will this work on Mac too or it will mess the VRAM/PRAM? I found a lot of guides talking about this but none of those worked for me without messing the VRAM/PRAM. BTW, thanks for your guide!! It’s a very creative trick removing the ESP flag ;-p
Mac uses EFI. This trick…
Mac uses EFI. This trick should work.
Oh, What an informative…
Oh, What an informative article and the one thing I like in your article is the way of writing. I love your article, so please post some more related topics for information.
Источник
How to Install Ubuntu on an External Hard Drive
So, the question is how to get Linux on an external storage device? First, don’t panic. The method is quite simple, and you just have to take care of a few things while installing.
This write-up covers the complete process of installing Linux on an external hard drive. You can install any Linux distribution. I am going to install Ubuntu because it is stable and relatively simple to install. Note that the process of installation of many other Debian-based distributions would be the same.
WARNING: Installing Operating Systems is a high risk activity. Any mistakes or misunderstandings, may cause you to lose your current system completely or partially. Please review these instructions carefully and ensure you have a solid understanding and proper backups of your data before taking an action on your operating system.
Requirement:
You need the following items to begin with the installation process:
- A USB/Pen drive minimum of 4GB for Ubuntu ISO
- A hard drive on which you want to install Ubuntu
- Ubuntu ISO
- PC to make bootable USB and to install Linux on the hard drive
Once you have the required items, it is time to begin the process.
How to Install Ubuntu 20.04 on an External Hard Disk Drive:
I am breaking down the entire process into steps and all steps are very crucial. Therefore, follow them carefully:
Step 1: Making a Bootable USB With Ubuntu ISO:
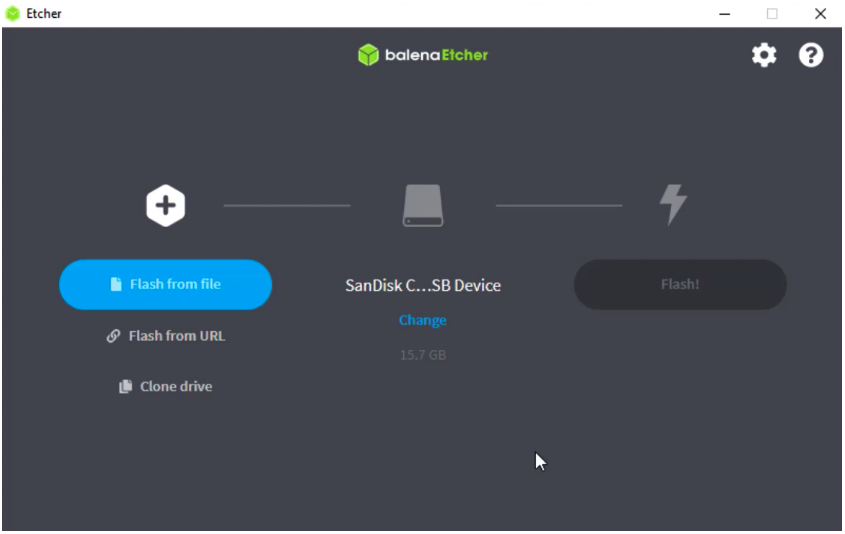
In this step, you need to create a bootable USB installation media with Ubuntu’s ISO. There are many apps that can be used to create bootable USB, I am using balenaEtcher . There are many reasons to use it: open-source, cross-platform, less complex, and a very quick app.
Ensure that the USB drive is plugged in. Once the app is downloaded, open it.
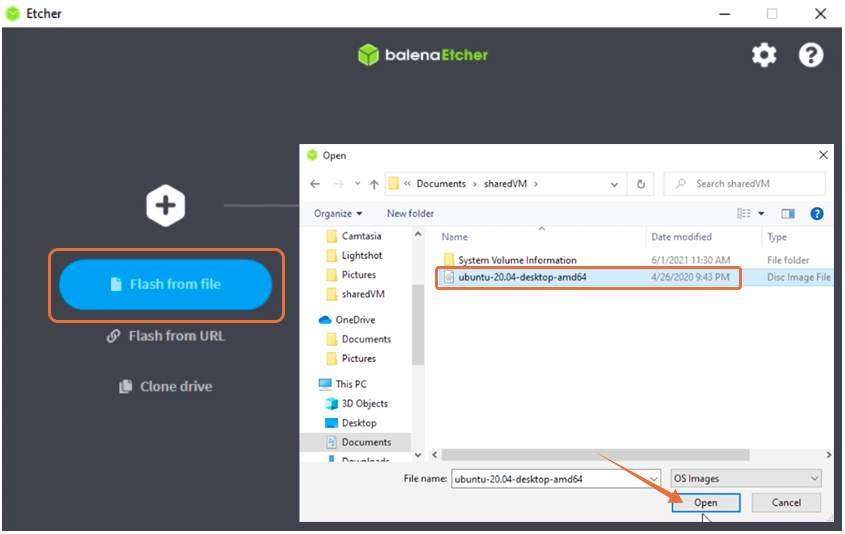
Click on “Flash from file”, and select Ubuntu’s ISO:
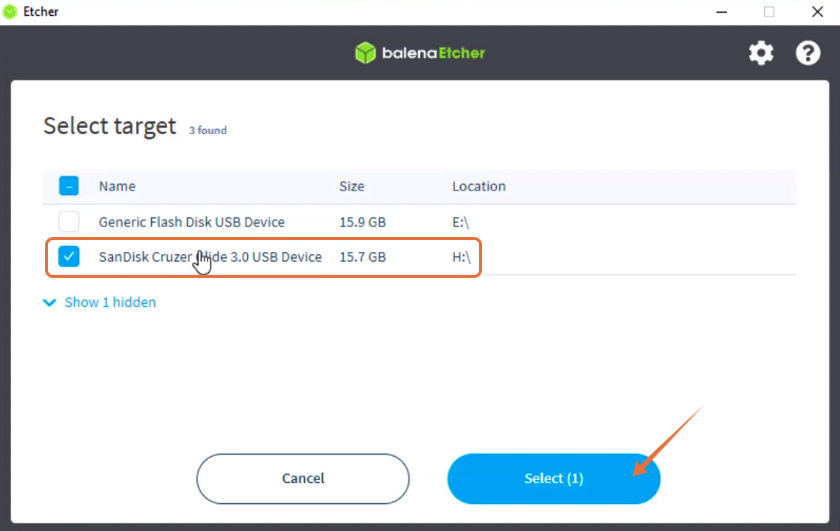
Select the target drive, which is your USB:
Now, you are all set. Click on “Flash”, the procedure will take few minutes:

Now, your bootable USB with Ubuntu’s ISO is ready.
Step 2 – Installation Process:
This step is a bit tricky, and the procedure will vary according to your operating system. Since I am using Windows, I have to make some changes in BIOS to boot Ubuntu from the bootable USB.
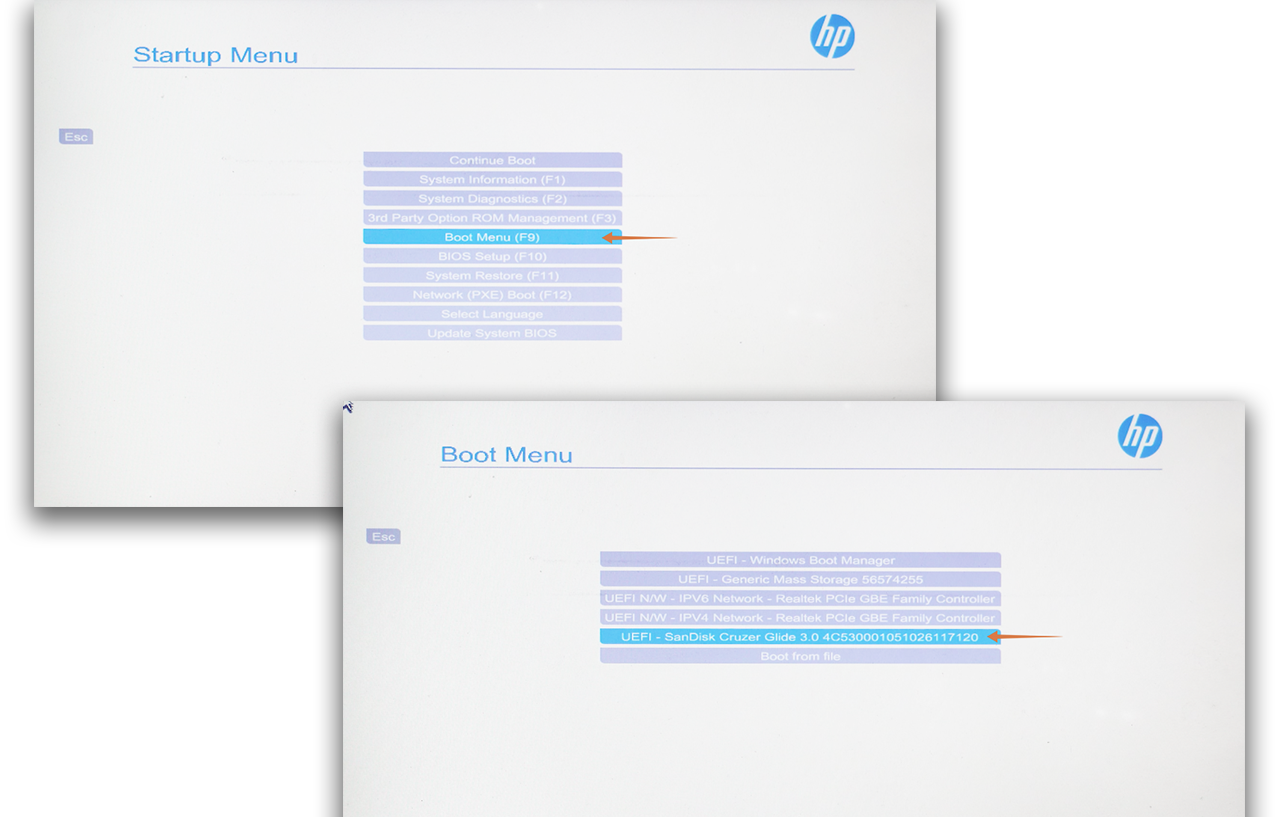
To enter the BIOS of your system, restart it and press the F12 key. BIOS key is set by the manufacturers so that it could be any from F1, F2, F10, F12, or DEL.
There is another way to access BIOS in Windows:
- Open “Settings”
- In “Updates & Recovery”, select “Recovery” and choose “Restart Now”
- Select “Troubleshoot” after your system restarts
- Select “Advanced Options” and then “UEFI Firmware Settings”
If you are a macOS user, turn off your system. Now, turn it on and press and hold the “options/alt” key until you see all the attached storage media.
In Linux, upon restarting, keep on pressing the F12 key. The key could be F1, F2, F10, DEL, or ESC.
Once you are in the boot menu, you have to select your bootable USB and press “Enter”.
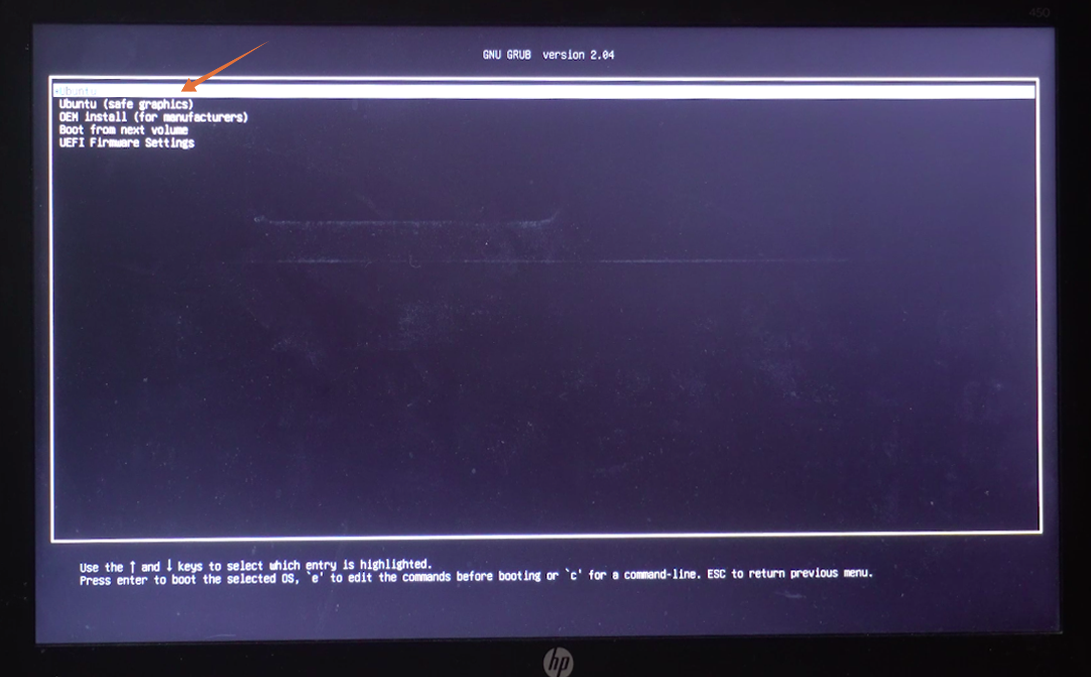
A Ubuntu menu will appear, and press “Enter” to continue the process.
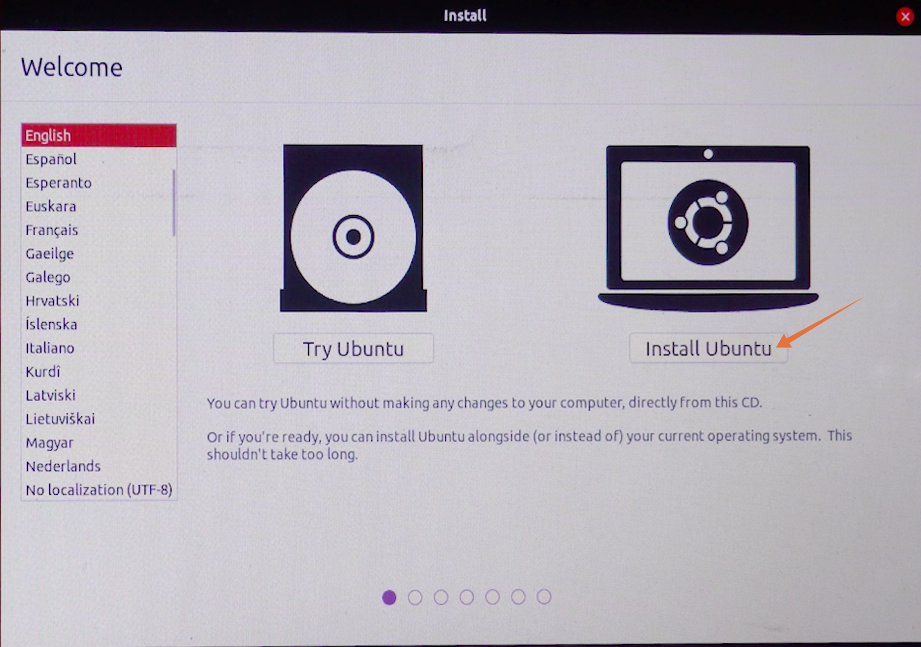
Now on the installation window, you can try Ubuntu or install. Since we are installing it on a hard drive, we will select “Install Ubuntu”. Make sure your external hard drive is plugged in:
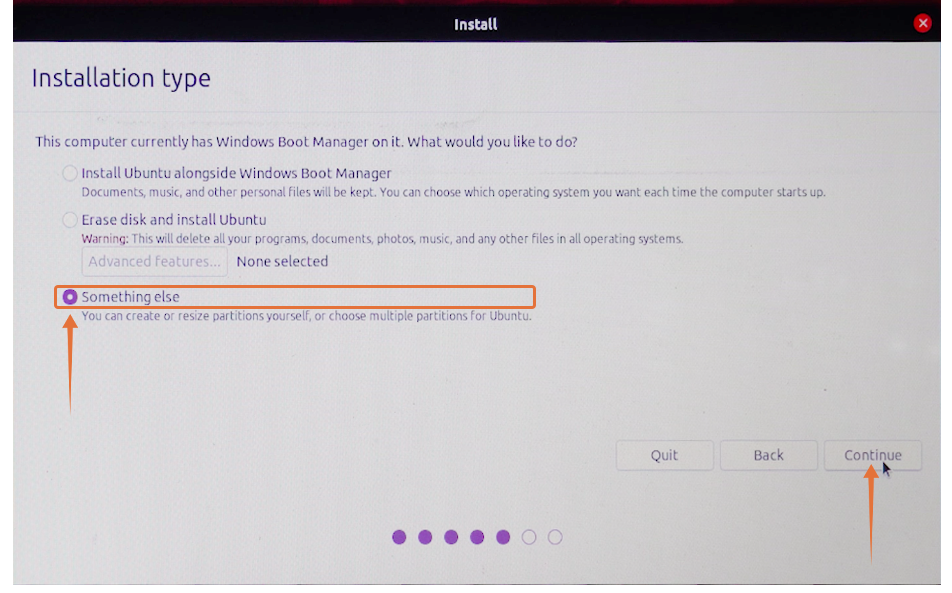
You will be asked to check some prerequisites before the installation process. In the “Installation Type” category, there will be multiple options one could install on the same drive from where Ubuntu is booted. But as we are installing on an external drive, we will check the “Something else” option and click on “Continue“:
Now, a very crucial menu will appear. The menu will be showing different storage devices. One will be containing the original Windows (Operating System). Others would be our USB and hard drive. You can easily find your external drive by checking the size. In my case, it is “/dev/sdc”, select it and click on the “-” icon to delete it:

Now, the name of the device would be replaced with “free space”.
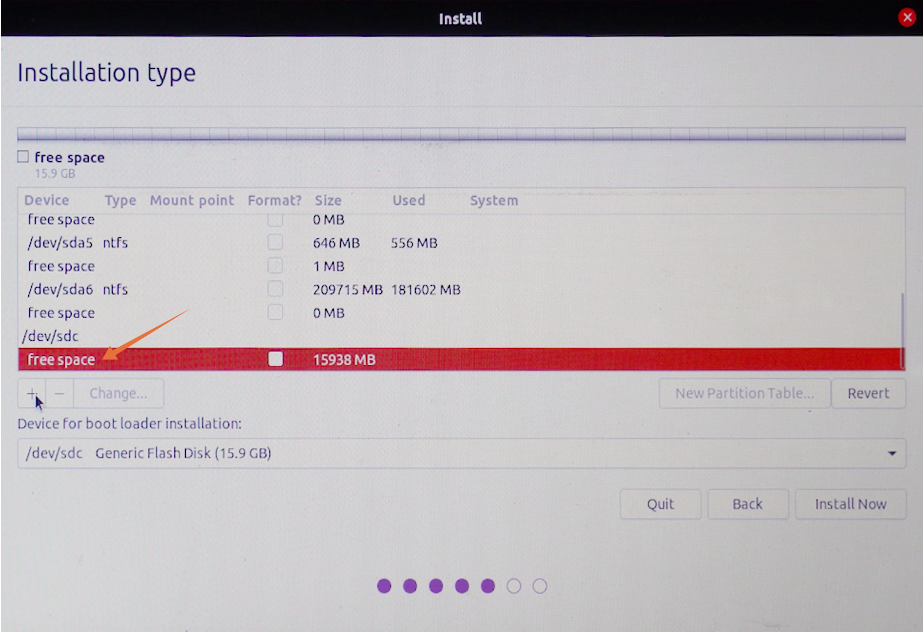
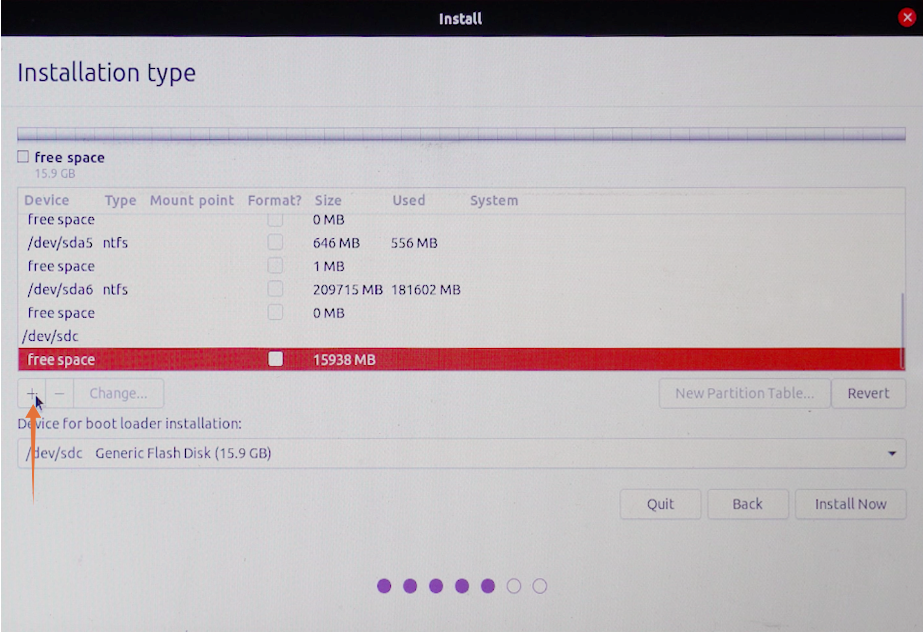
Select it and click on the “+” icon:
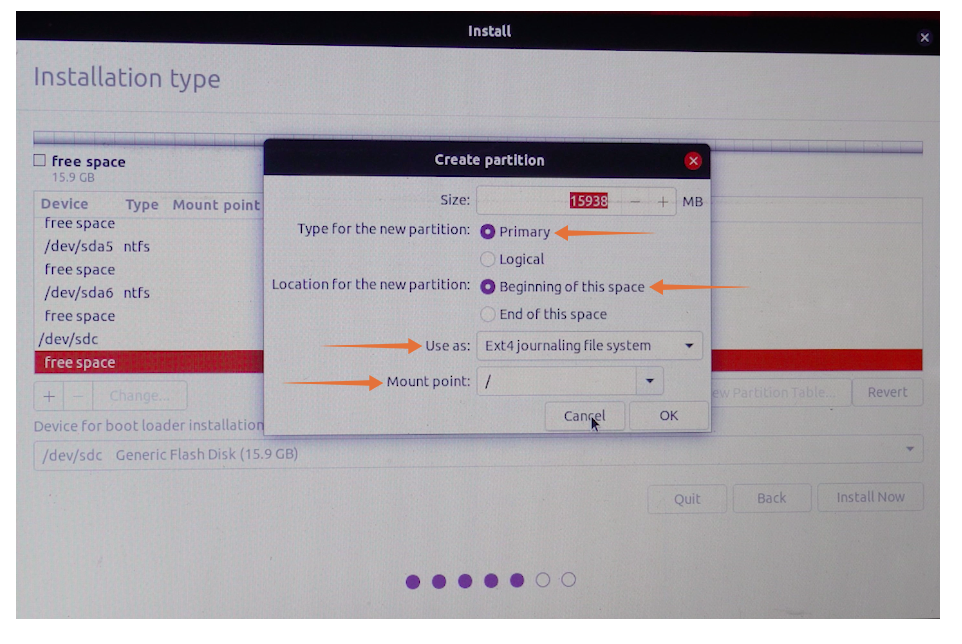
There is no need to change the size. Keep the type “Primary”, and set location “Beginning of this space”. In the “Use as” drop-down menu, choose “Ext4 journaling file system”, and the most important is the mount point, set it as “/”, once done click on “OK”.
Now in the “Device for boot loader installation” menu, choose the external storage media and press on the “Install now” button.
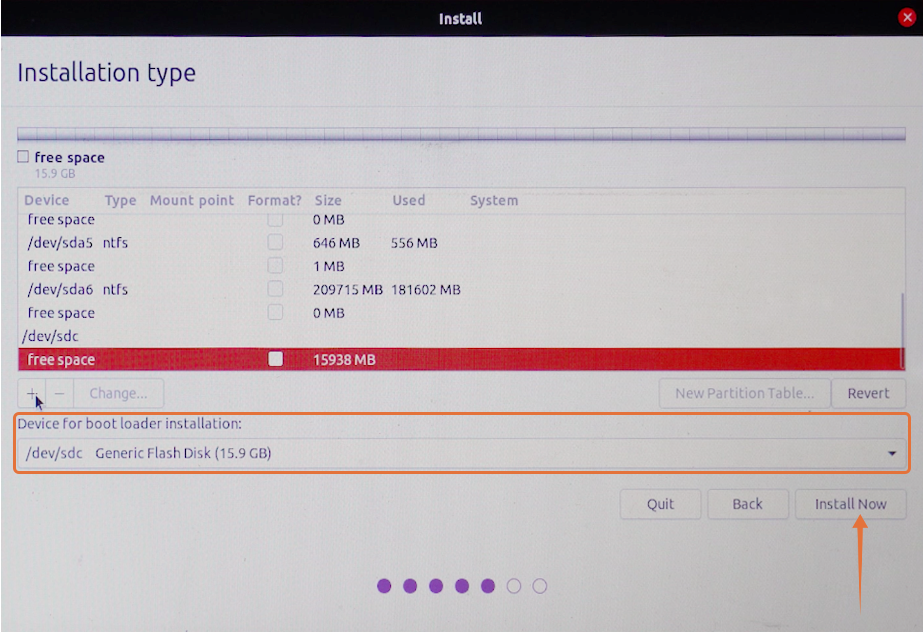
A prompt will appear to confirm about changes, click “Continue”:

Set your location and then enter your name, device name, and set password to begin installation on an external drive.

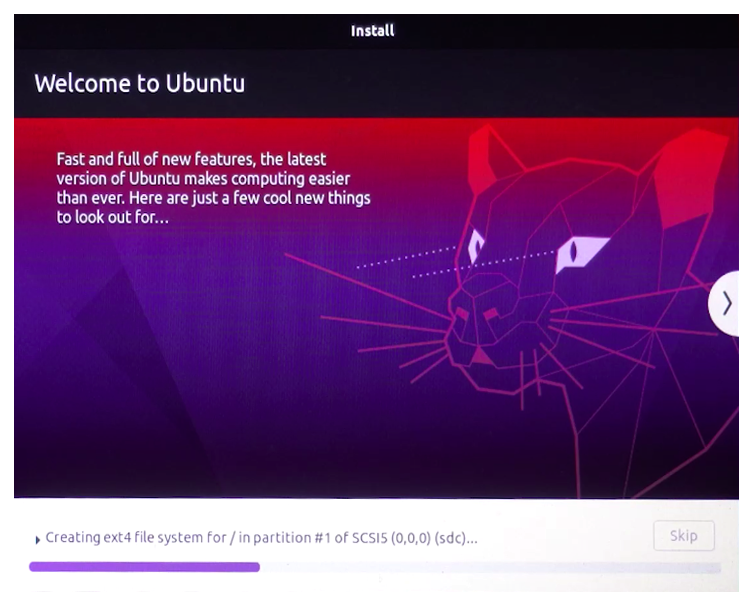
That’s it! Ubuntu will be installed on your external drive.
Step 3: Running Ubuntu:
Now, you can remove the bootable USB because that is no required. Reboot your device and again enter in the BIOS. Select the storage drive that contains the Ubuntu from the boot menu of the system.

Here we go! So, that’s how you can install Ubuntu on the external storage disks.
Conclusion:
Having Ubuntu on an external device has a number of advantages. First, it saves a lot of your internal storage, and there are fewer chances of it messing up with the other files. Second, you will no longer be limited to the storage size of your internal hard drive.
This write-up covers a complete procedure of installing Ubuntu on an external hard disk in three steps. You must be aware of how to use the BIOS of your machine because some critical steps of the procedure are performed in BIOS. Ubuntu from an external hard drive can be booted from the BIOS menu. But it can be prevented by setting the priority of bootable drives.
About the author

Sam U
I am a professional graphics designer with over 6 years of experience. Currently doing research in virtual reality, augmented reality and mixed reality.
I hardly watch movies but love to read tech related books and articles.
Источник


