- Создание загружаемого установщика для macOS
- Что нужно для создания загружаемого установщика:
- Загрузка macOS
- Использование команды createinstallmedia в приложении «Терминал»
- Install mavericks on windows
- Как установить OS X Mavericks на Windows-ПК [инструкция]
- Как установить OS X Mavericks на PC:
- Install mavericks on windows
- Featured Images
- Ads Below Tabs
- January 3, 2014
- How to install OS X Mavericks on your PC with Niresh
Создание загружаемого установщика для macOS
В качестве загрузочного диска для установки операционной системы на компьютер Mac можно использовать внешний диск или дополнительный том.
Эти расширенные инструкции предназначены в первую очередь для системных администраторов и других пользователей, имеющих опыт работы с командной строкой. Загружаемый установщик не требуется для обновления macOS или переустановки macOS, но он может оказаться удобен, если требуется выполнить установку на несколько компьютеров, не загружая установщик заново каждый раз.
Что нужно для создания загружаемого установщика:
- USB-накопитель или другой дополнительный том, отформатированный в Mac OS Extended, на котором есть не менее 14 ГБ свободного пространства;
- загруженный установщик для macOS Big Sur, Catalina, Mojave, High Sierra или El Capitan.
Загрузка macOS
- Загрузка macOS Big Sur, macOS Catalina, macOS Mojave или macOS High Sierra
Эти элементы загружаются в папку «Программы» в виде приложения с именем «Установка macOS [ название версии ]». Если после загрузки запустится установщик, завершите его работу без продолжения установки. Чтобы получить подходящий установщик, выполняйте загрузку с компьютера Mac, на котором используется macOS Sierra 10.12.5 или более поздней версии либо El Capitan 10.11.6. Корпоративным администраторам следует производить загрузку с сайта Apple, а не с сервера обновления ПО, размещенного в локальной сети. - Загрузка OS X El Capitan
В результате этого действия загрузится образ диска с именем InstallMacOSX.dmg. На компьютере Mac, совместимом с El Capitan, откройте образ диска и запустите с него установщик с именем InstallMacOSX.pkg. Приложение с именем «Установка OS X El Capitan» будет установлено в папку «Программы». Загружаемый установщик создается именно из этого приложения, а не из образа диска или установщика .pkg.
Использование команды createinstallmedia в приложении «Терминал»
- Подключите USB-накопитель или другой том, используемый для загружаемого установщика.
- Откройте приложение «Терминал» в подпапке «Утилиты» папки «Программы».
- Введите или вставьте в приложение «Терминал» одну из следующих команд. Предполагается, что установщик находится в папке «Программы», а имя MyVolume обозначает USB-накопитель или другой используемый вами том. Укажите вместо MyVolume имя своего тома в следующих командах.
Big Sur*:
Catalina*:
Mojave*:
High Sierra*:
El Capitan:
* Если на компьютере Mac установлена операционная система macOS Sierra или более ранней версии, включите аргумент —applicationpath и путь установки аналогично тому, как это делается в случае команды для El Capitan.
После набора команды
- Нажмите «Ввод», чтобы ввести команду.
- При появлении запроса введите пароль администратора и нажмите клавишу «Ввод» еще раз. При вводе пароля приложение «Терминал» не отображает вводимые символы.
- При появлении запроса нажмите клавишу Y , чтобы подтвердить удаление всех данных на томе, затем клавишу «Ввод». Приложение «Терминал» показывает прогресс по мере стирания тома.
- После стирания тома может быть отображено предупреждение о том, что приложению «Терминал» требуется доступ к файлам на съемном томе. Нажмите «OK», чтобы продолжить копирование.
- Когда приложение «Терминал» сообщит о завершении процесса, имя тома будет совпадать с именем загруженного установщика, например «Установка macOS Big Sur». После этого можно закрыть приложение «Терминал» и извлечь том.


Install mavericks on windows
Многие, в том числе и студенты Web Academy, задаются вопросом как установить Xcode на Windows? Так как для программирования под iPhone/iPad/Mac, Вам обязательно нужна программа Xcode, которая работает только на MacBook и не у всех изначально есть возможность приобрести себе MacBook. Как программировать на Objective-c под iPhone/iPad/Mac без Macbook?
Для решения проблемы с Xcode на Windows есть два варианта:
- Установка виртуальной машины с операционной системой OS X
- Установка хакинтош (тут важны параметры Вашей машины).
В данной статье мы рассмотрим первый вариант.
Выполните следующие действия для установки рабочей OS X 10.9 Mavericks. Для этого будем использовать образ VMware OS X 10.9 Mavericks для Windows 7, 8 или 8.1, данный мануал подходит для машин с процессорами Intel. Сам процесс установки чистой OS X 10.9 является сложным, по этому мы и будем использовать метод несколько попроще. Мы просто скачаем образ VMware OS X 10.9 Mavericks, которая была раннее установлена на другую VMware Workstation и подключим ее к нашей VWware Workstation.
Пошаговая инструкция для использования образа VMware OS X 10.9 Mavericks на Windows 8 (7, 8.1):
1) Первым делом нужно убедится, что Ваша физическая машина поддерживает hardware virtualization technology ( vt-x). В большинстве случаев эта опция включена по-умолчанию, в противном варианте ее нужно включить в BIOS. Устанавливаем на Windows 8 (7, 8.1) VWware Workstation http://goo.gl/GOl6I8
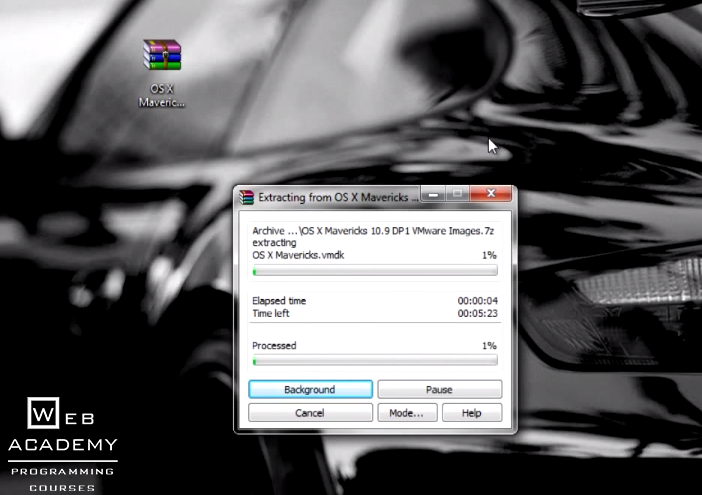
2) Скачиваем и распаковываем образ VMware OS X 10.9 Mavericks http://goo.gl/8H6AYP (торрент файл)
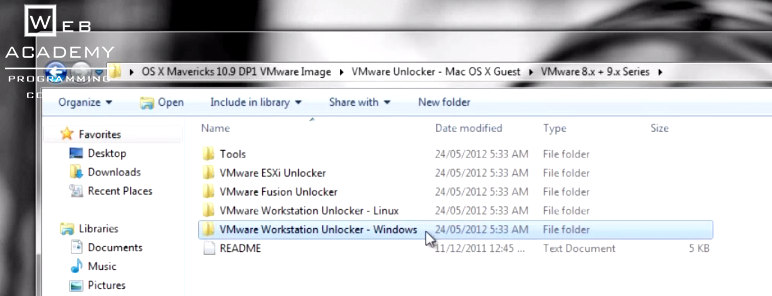
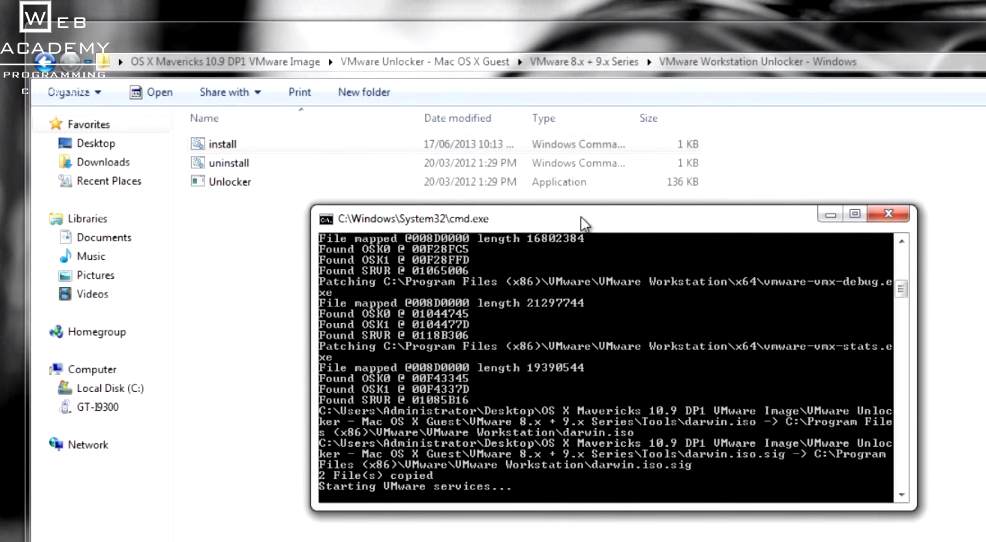
3) Нужно использовать Unlocker patch, что бы VMware Workstation поддерживала OS X 10.9 Mavericks, как geust OS. Для этого запускаем скрипт, которые лежит в папке (см. ниже)
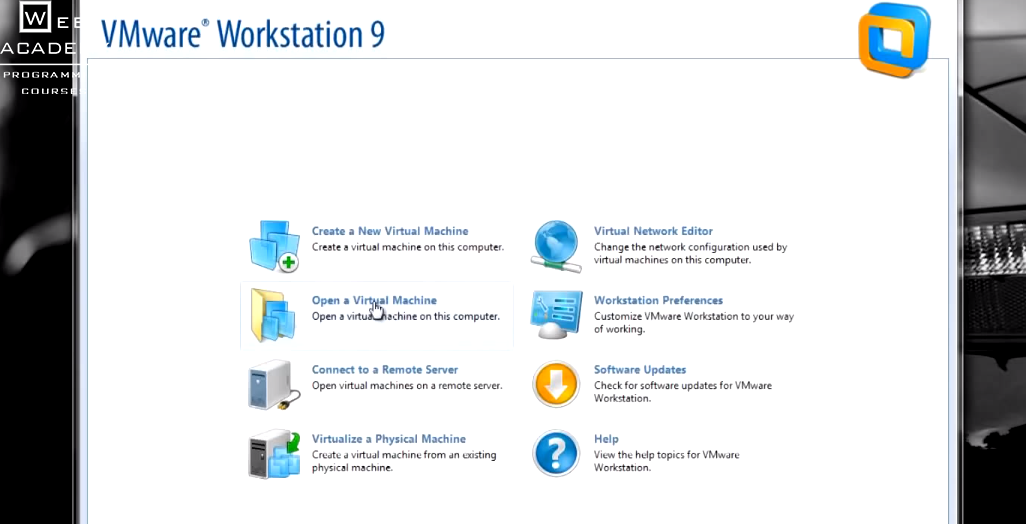
4) Подключаем образ VMware OS X 10.9 Mavericks к вашей VMware Workstation (см. ниже):

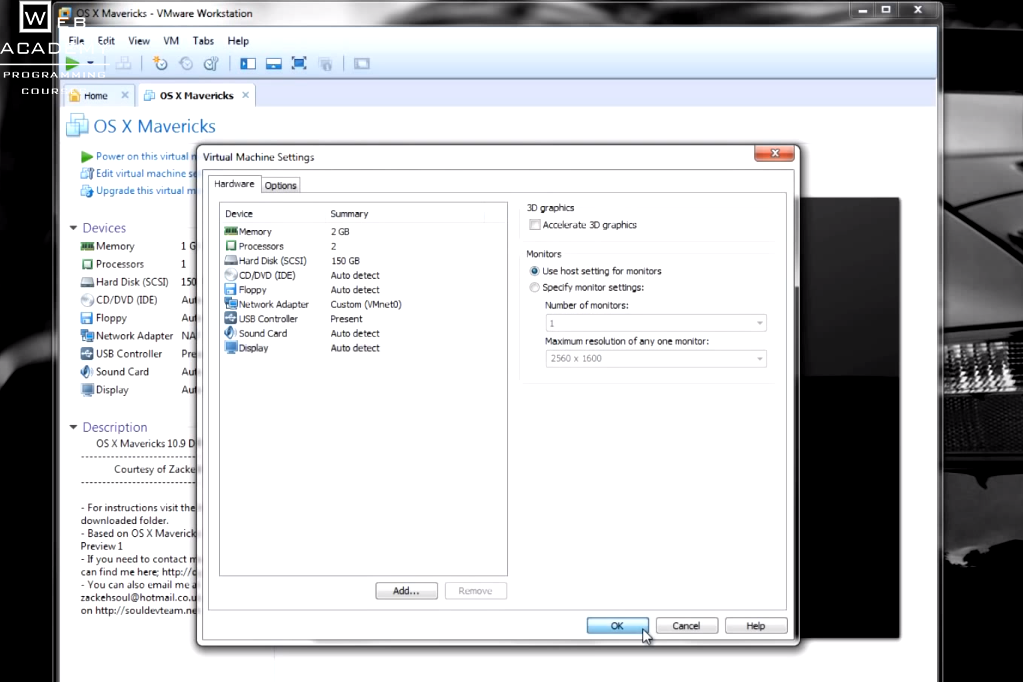
5) Перед запуском виртуальной машины, кликнем Edit virtual machine settings (желательно изменить ее настройки), нужно минимум 2 Gb ОЗУ и количество процессоров увеличить к 2 (см. ниже):
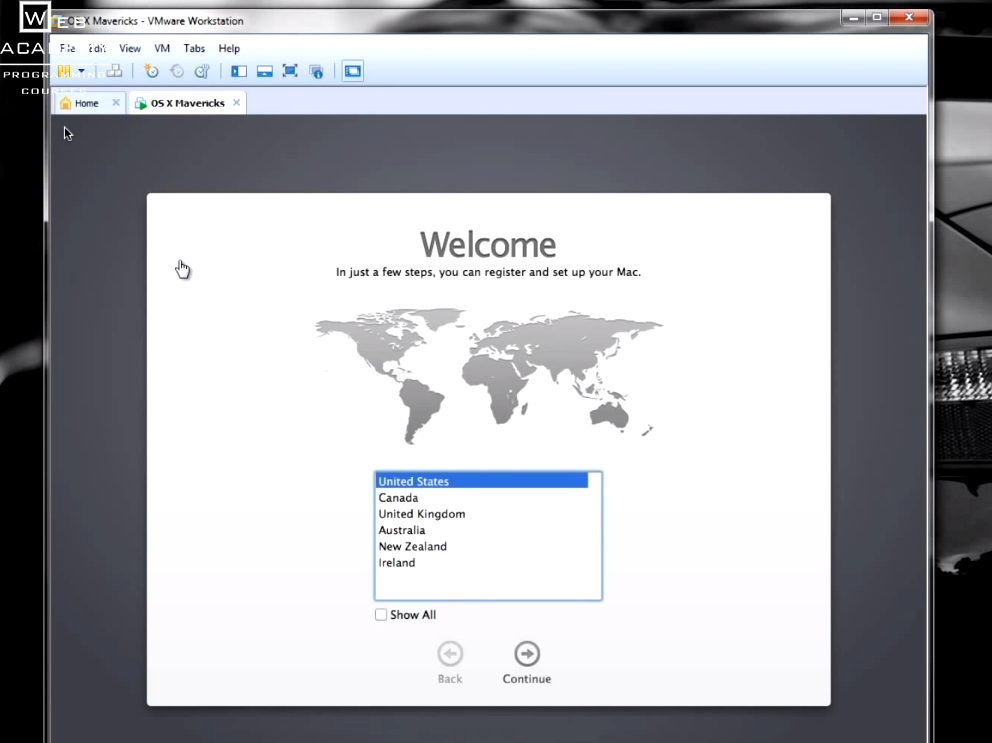
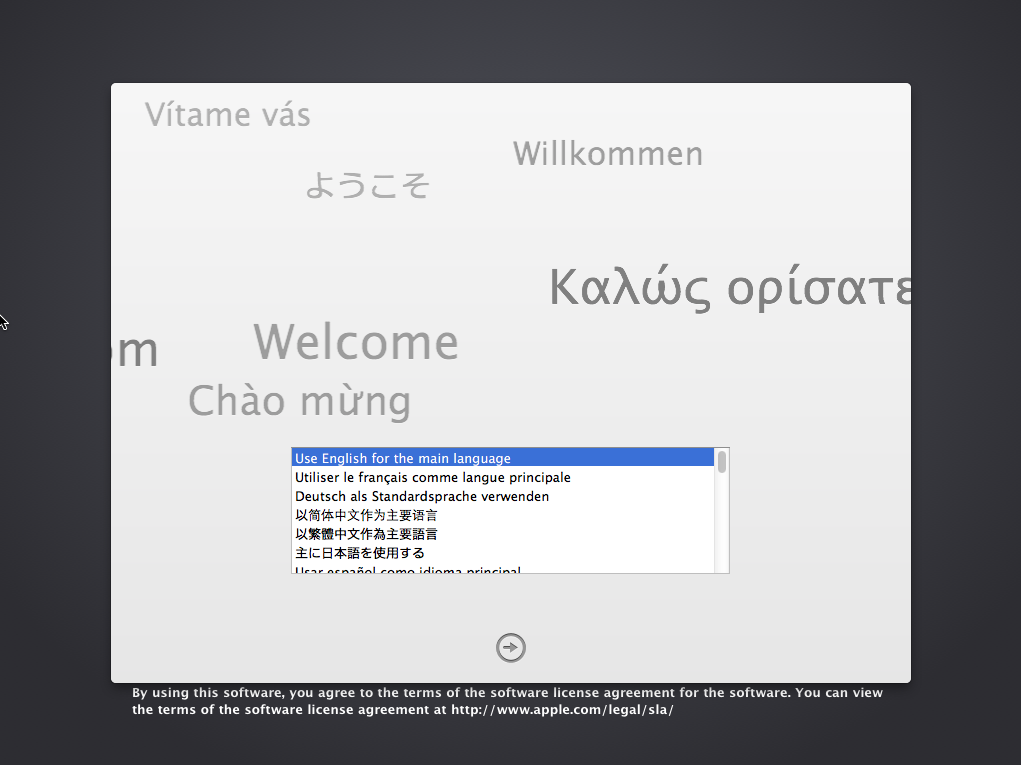
6) Запускаем виртуальную машину, если все ок, должны увидеть заставку выбора языка для установки OS X 10.9 (см. ниже):
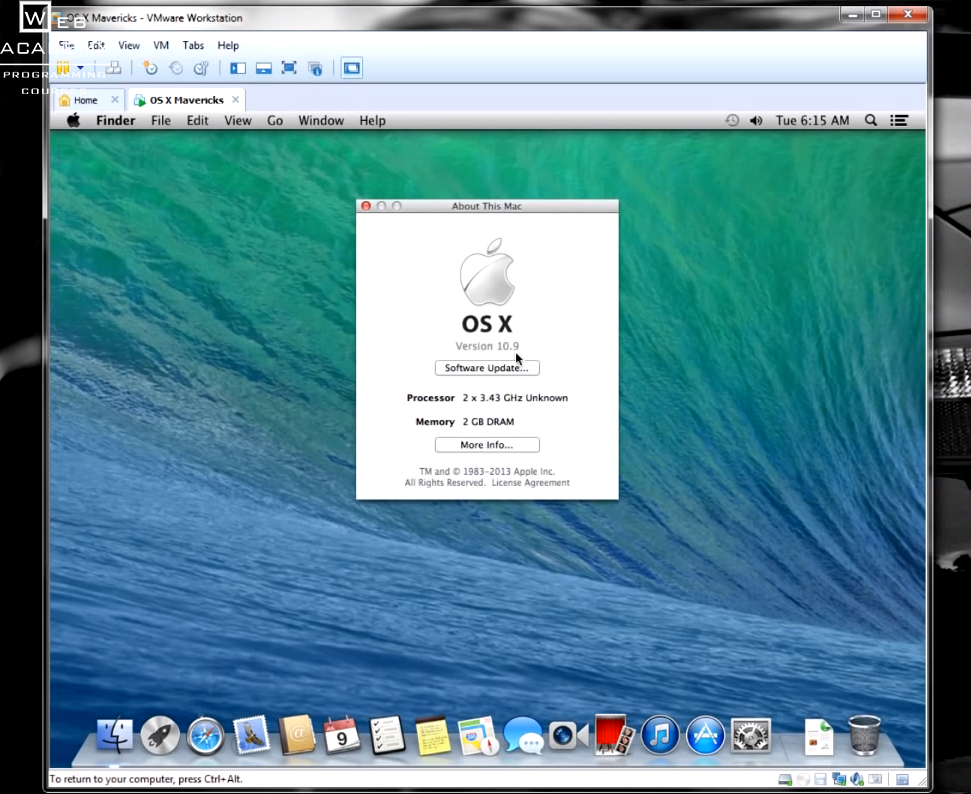
7) Проходим установку заполняя нужную информацию в соответствующих полях в конце должен загрузиться рабочий стол OS X 10.9, клацаем Apple>About this Mac(см.ниже):
N.B. Помните эта установка OS X 10.9 Mavericks только для целей тестирования и обучения. В виртуальной среде вы не получите все плюшки OS X, они доступны только на Apple Hardware устройствах. Но для запуска, например, Xcode (среда разработки под iOS, OS X) вполне хороший вариант.
8) Установка VMware Tools for OS X 10.9 Mavericks
Хочу отметить, что звук и сеть работают даже без установки VMware Tools, по этому не вижу смысла устанавливать их, но если нужно сделать общую папку для OS X 10.9 и Windows, то VMware Tools обязательно нужны.
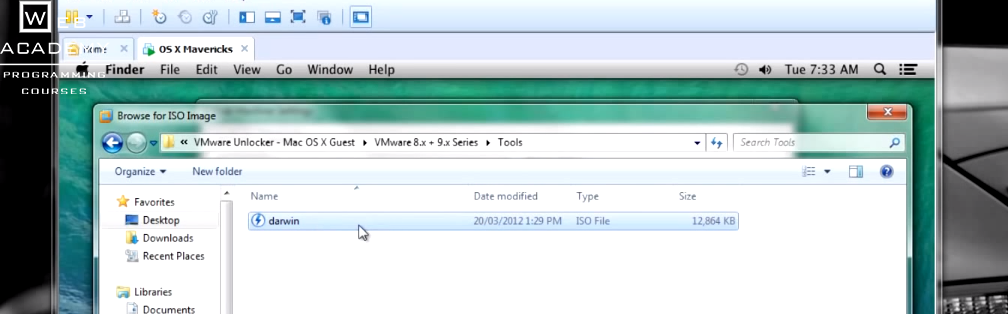
Заходим в настройки виртуальной машины и выбираем CD/DVD привод и клацаем Use ISO image file>Browse (см. ниже):

Находим файл установки VMware Tools (darwin.iso):
Далее, как мы подключили darwin.iso в настройках VMware, нужно запустить этот образ, справа внизу клацаем connect (см. ниже):

Дальше должна запуститься установка VMware Tools (проходим установку по заданному алгоритму установки) (см.ниже):

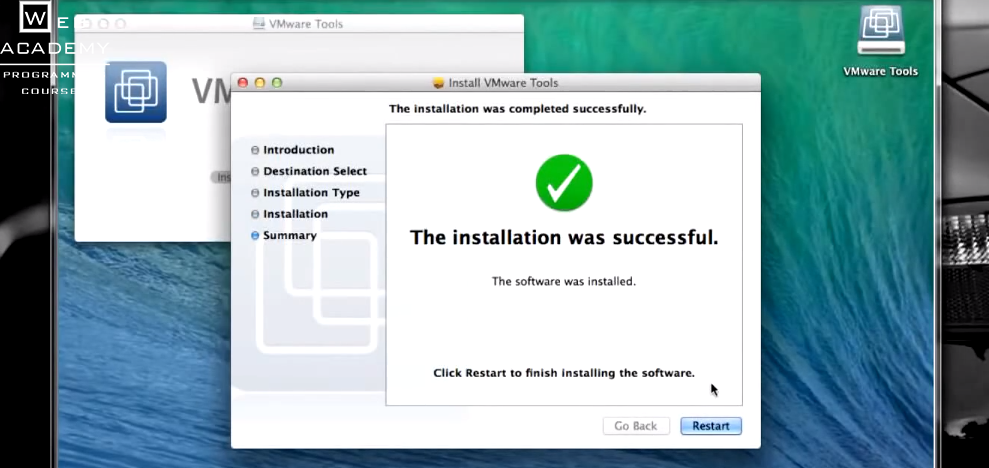
Далее клацаем Restart, после перезагрузки пакет VMware Tools должен работать и вы сможете подключать общие папки.
N.B. После прохождения этого мануала вы сможете использовать OS X 10.9 Mavericks для тестирования или обучения.
Теперь Вы можете работать, программировать в Xcode на своей виндусовой машине.
Также Web Academy предоставляет услугу ВИРТУАЛЬНЫХ СЕРВЕРОВ С Xcode. То есть Вы сможете работать в программе Xcode в интернете, фактически Вы получаете виртуальный доступ к Xcode. За более подробной информацией обращайтесь по адресу Этот адрес электронной почты защищён от спам-ботов. У вас должен быть включен JavaScript для просмотра.
Как установить OS X Mavericks на Windows-ПК [инструкция]
Если вы когда-то пробовали устанавливать OS X на PC, то наверняка сталкивались с большими трудностями. Процесс создания хакинтоша требует определенной подготовки и часто заканчивается неудачей.
Для того чтобы установить новейшую редакцию Apple-платформы OS X Mavericks на Windows-ПК и пользоваться «яблочной операционкой» на стороннем железе, можно обратиться к разработкам проекта tonymacx86, посвященного хакинтошу. Обновленные инструменты UniBeast и MultiBeast позволяют без особого труда поставить OS X Mavericks на Windows-ПК с помощью USB-флешки. В отличие от предыдущих способов для создания хакинтоша вам не потребуется оптический привод.
Используя наше пошаговое руководство, вы сможете установить OS X Mavericks на PC простейшим из возможных способов.
Требования:
- Образ OS X Mavericks, загруженный из Mac App Store.
- Программное обеспечение UniBeast и MultiBeast.
- USB-флешка емкостью 8 Гб или больше.
- PC с процессором Intel для запуска OS X Mavericks.
Как установить OS X Mavericks на PC:
Шаг 1: Скачайте OS X Mavericks из магазина приложений Mac App Store по этой ссылке.
Шаг 2: Скачайте бесплатные приложения UniBeast и MultiBeast на этой странице.
Шаг 3: Создаем загрузочный флеш-накопитель с помощью UniBeast. Откройте Программы –> Утилиты –> Дисковая утилита и кликните флешку в боковом меню.
Шаг 4: Переключитесь на вкладку Раздел диска, затем Текущая и выберите опцию Раздел: 1. Сделайте клик на кнопке Параметры, переключите пункт Основная загрузочная запись и нажмите ОК.
Шаг 5: Измените название на USB и выберите формат Mac OS X Extended (журнальный). Подтвердите изменения кнопкой Раздел диска.
Шаг 6: Запустите UniBeast, загруженный на шаге 2. Пропустите первые экраны, кликами по кнопке Продолжить и нажмите Принимаю.
Шаг 7: На шаге Размещение в качестве места установки выберите USB-флешку и щелкните Продолжить.
Шаг 8: На экране с выбором пакетов для установки убедитесь, что галочка Mac App Store Mavericks – 10.9 на месте. Дополнительно нужно отметить пункт Legacy USB Support, если вы используете старую систему с Socket 1156. Воспользуйтесь опцией Laptop Support, если устанавливаете Mavericks на ноутбук. Нажмите Далее.
Шаг 9: Введите пароль и кликните Установить. В зависимости от быстродействия вашей системы и флешки процедура может занять до 15 минут.
Шаг 10: Теперь вы можете вставить флешку с OS X Mavericks в USB-порт своего Windows-ПК и запустить установку хакинтоша. Для этого нужно зайти в BIOS и указать внешний накопитель в качестве загрузочного диска. На экране Chimera выберите USB и нажмите Enter для продолжения.
Шаг 11: С помощью инсталлятора OS X форматируйте HDD в нужный формат. В верхней строке зайдите в меню Утилиты –> Дисковая утилита. Слева выберите свой диск, а справа переключитесь на вкладку Раздел диска, затем Текущая и кликните Раздел: 1. Сделайте клик на кнопке Параметры. Переключите пункт Схема разделов GUID и нажмите ОК. Назовите диск Macintosh HD и выберите формат Mac OS X Extended (журнальный). Подтвердите изменения кнопкой Раздел диска.
Шаг 12: После завершения закройте Дисковую утилиту и вернитесь к инсталлеру. Укажите диск Macintosh HD для установки OS X Mavericks. Установите операционную систему.
После окончания установки вам нужно сделать HDD загрузочным с помощью MultiBeast. Эта утилита позволяет также установить необходимые драйверы для звуковой карты, Wi-Fi, графики, сети и т.д.
Шаг 13: Перезагрузите компьютер, снова запустив его с USB-флешки. С экрана Chimera выберите Macintosh HD.
Шаг 14: Запустите MultiBeast, подберите необходимые для вашего PC драйвера и нажмите кнопку Build, а затем Install для завершения установки.
Это все, вы можете пользоваться OS X Mavericks на своем PC!
Install mavericks on windows
Featured Images
Ads Below Tabs
January 3, 2014
How to install OS X Mavericks on your PC with Niresh
If you’re interested in running Mac OS X, but you don’t want to pay ridiculous prices for a normal Mac, then a Hackintosh just might be for you. Right now, the newest iteration of OS X is 10.9, known as Mavericks. In this guide, we’ll show you how to install Mavericks on your PC with the newly released «Niresh» distro (also known as «Mavericks Zone»).
The advantages of Unibeast vs. Niresh
Niresh is a distro, which is a pirated copy of Mac OS X that has been modified to work with a PC. Distros are a popular Hackintosh alternative to Unibeast, a better-known installation tool which requires a retail copy of Mac OS X instead. If you don’t have any qualms with the legal issues regarding distros, they’re actually the most convenient way to set up your Hackintosh.

Unlike previous versions of Mac OS X, Apple released OS X Mavericks onto the Mac App Store for free, meaning that the Unibeast method is now 100% free to use. However, using a distro to install Mac OS X still offers a far share of advantages:
- You don’t need a real Mac. Unibeast is a Mac app, so you need to have an existing Mac OS X installation for it to work. This usually means that you either have to find a real Mac, or set up a Mac virtual machine. However, with Niresh, you can just set up everything from a Windows computer.
- The post-installation is easier. By default, Niresh will automatically install necessary Hackintosh-specific kexts and drivers for your computer when you boot your Mac OS X installation for the first time. Unibeast requires you to do this manually, using the Multibeast tool. While the post-installation in Niresh isn’t perfect (you’ll probably have to use Multibeast anyways), it’s still a nice convenience.
- You can install it on a hard drive that already has Windows installed. By default, the Mac OS X installer will not work with hard drives that were originally formatted in Windows. Therefore, if your computer’s hard drive already has Windows installed on it, you won’t be able to install Mac OS X on there. Normally, you can bypass this limitation on Unibeast by applying the MBR patch; however, Niresh does this for you automatically, saving you one extra step.
- Niresh supports AMD. Normally, computers that use AMD processors are unsupported by Mac OS X. However, Niresh includes experimental «patched» kernels that may allow Mac OS X to work with these processors regardless.
Interested? Here are the requirements:
- An existing Windows computer/Mac/Hackintosh: This is the computer where you will download and set up Niresh. The computer can run either Windows or Mac OS X; both operating systems will work.
- A Hackintosh-compatible computer with an empty hard drive: This is the computer where you will install OS X Mavericks. It can be the same computer as the one mentioned in the previous point. If your computer already has Mac OS X installed, Niresh will just update OS X normally, without deleting any of your apps or files.
However, not every computer will work with Mac OS X. Be sure to read the Hackintosh compatibility guide very carefully, to check whether or not your computer qualifies. Also, Mac OS X needs its own hard drive— a minimum of 10 GB of space is required, but at least 50 GB of space is recommended. It’s preferred that you use a completely empty hard drive for this, but if your computer already has Windows installed on your hard drive, be sure to create an appropriate hard disk partition for OS X Mavericks beforehand (by following Step 1 of our guide to MBR partitions).
1a. Create your Niresh USB drive (Mac)

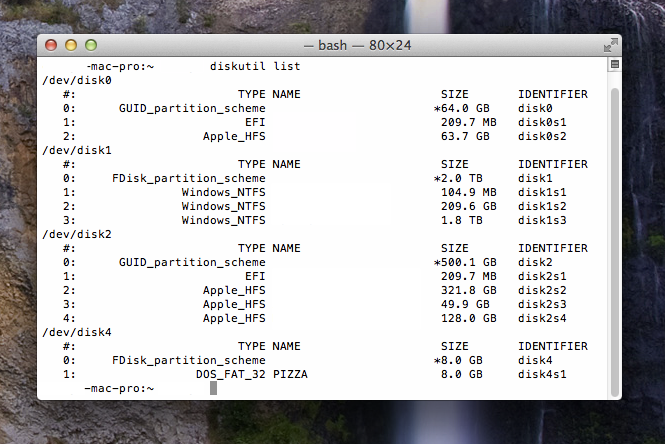
Press the enter/return key. This command will output a list of drives currently connected to Mac OS X, including your USB drive. Each drive is labeled with an identifier such as «disk0», «disk1», etc. In the screenshot below, my USB drive (which is named «PIZZA») has the identifier «disk4». Remember this identifier.
Next, type the following commands:
diskutil unmountdisk /dev/»identifier»
sudo dd if=»location of Niresh disk image» of=/dev/r»identifier» bs=1m
Replace «identifier» with the actual identifier of your USB drive (don’t include the quotation marks), and replace «location of Niresh disk image» with the actual file path of the Niresh disk image that you downloaded (also without quotation marks). In the screenshot above, my Niresh disk image is located in the «Downloads» folder of my «Kitten» hard drive, so I type if=/Volumes/Kitten/Downloads/OSX-Mavericks.dmg as part of the second command. Meanwhile, my USB drive had the disk4 identifier, so I type of=/dev/rdisk4 (don’t forget the letter «r» before the identifier).
Press the enter/return key. Terminal will ask for your system password. After you enter your password, it will begin writing the Niresh disk image onto the USB drive. This will probably take 15-30 minutes, though it may take longer, depending on the speed of your USB drive. The terminal screen will be frozen during the whole process— this is normal! Once it finishes, your USB drive will contain a fully bootable version of the OS X Mavericks installer.
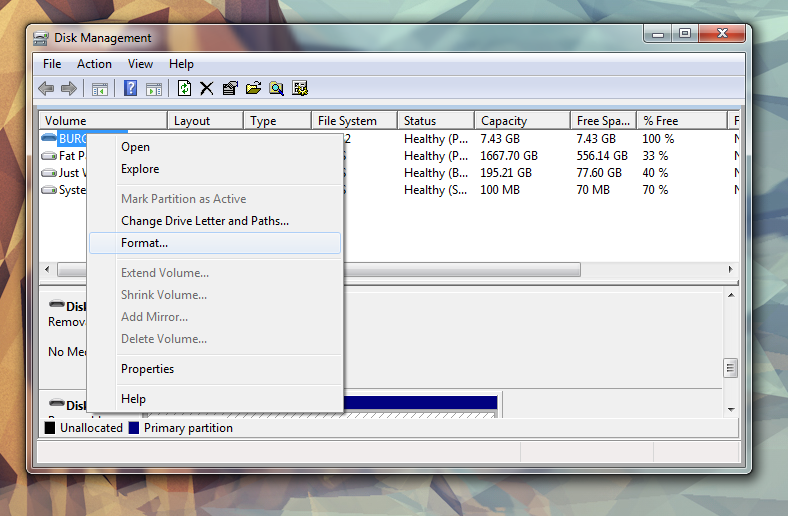
Follow this step if you’re setting up Niresh on Windows. Plug your USB drive into your computer, and open Window’s built-in Disk Management utility. You can easily do this by typing «partition» into your Start Menu search bar and choosing the «Create and Format hard drive partitions» option.
You will see a list of drives connected to Windows. Right-click on your USB drive, and click «Format». From here, erase the USB drive (you can rename and format the drive any way you want— it doesn’t really matter).
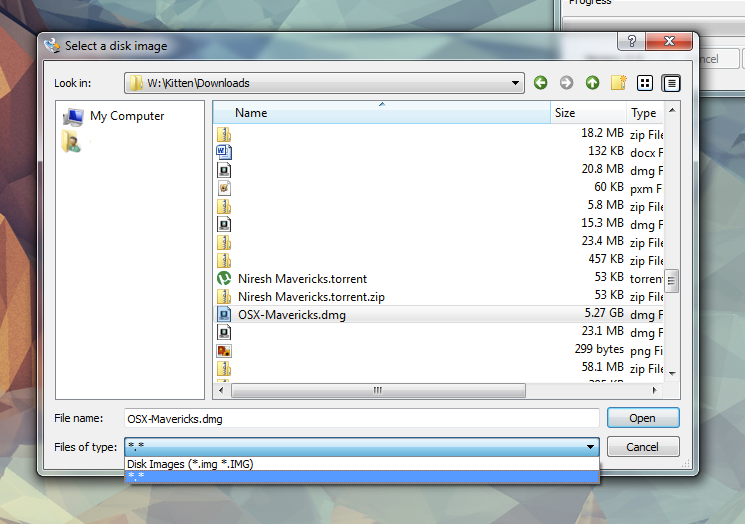
Next, open Win32 Disk Imager. Click the blue file icon on the app’s main screen. In the Windows Explorer window that pops up, select your downloaded Niresh disk image; this file will probably be named «OSX-Mavericks.dmg». (You will only be able to see the file when you select the «*.*» option in the «Files of type» field— the default «Disk Images» option won’t work)
Next, select the device letter of your USB drive, and click «Write».
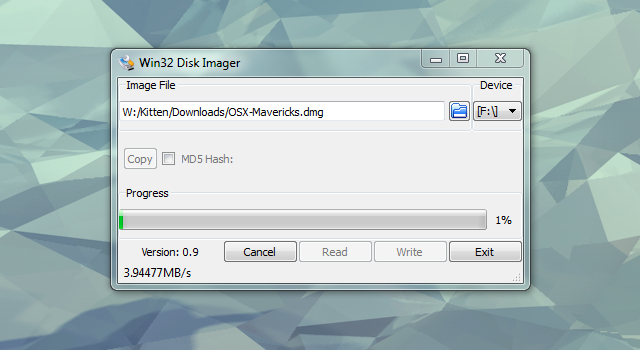
Win32 Disk Imager will begin writing the Niresh disk image onto your USB drive. This will probably take 10-15 minutes, though it may take longer, depending on the speed of the drive. Once it finishes, your USB drive will contain a fully bootable version of the OS X Mavericks installer.
2. Set up the parts of your PC
I covered these steps in my Snow Leopard guide, but they’re worth mentioning again:
- Unplug all USB-connected devices from your computer before you begin the setup (except your keyboard and mouse). A faulty external USB hard drive can cause your Hackintosh bootloader to give you EBIOS errors on startup.
- Open up your computer and unplug any extra internal hard drives that your computer has, besides the hard drive that you’re installing OS X on. (Just unplug the hard drive SATA cables from your motherboard.)
- If possible, connect your monitor to the DVI port of your computer’s graphics. The Mac OS X installer sometimes has problems with HDMI and VGA.
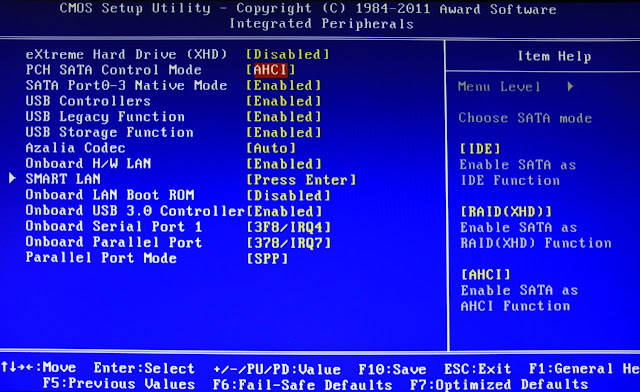
3. Set up your motherboard’s BIOS
The BIOS is basically a settings page for your motherboard. To enter the BIOS on my own computer’s Gigabyte P67A-D3-B3 motherboard, I have to press the delete key when it boots (before the operating system starts). Different manufacturers set different keys for opening the BIOS.
NOTE: If you have a newer Gigabyte motherboard that uses the UEFI interface instead of BIOS, check out our guide for setting up the UEFI instead.

If your Hackintosh already has Mac OS X Snow Leopard, Lion, or Mountain Lion installed, the only thing you’ll need to change in the BIOS is the «Boot Device», so that your Niresh USB drive has highest priority.
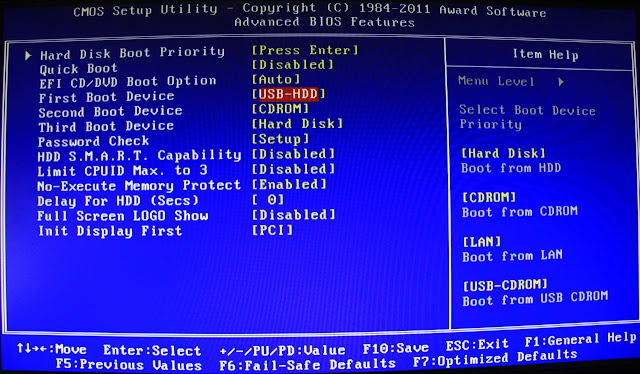
If your Hackintosh doesn’t have any version of Mac OS X installed yet, you have to change a few extra BIOS settings. Before starting, reset all of your BIOS settings to their factory defaults. On Gigabyte motherboards, you can reset your BIOS settings to their default by selecting «Load Optimized Defaults» on the main page of the BIOS. Once your BIOS is running on its defaults, you need to change these three settings:
Boot Device — Change the boot device of your computer so that «USB-HDD» is first. You need to do this for Niresh to work. After you finish installing Mac OS X, you should change this setting back to default, so that «Hard Disk» is the first boot device (this optional, but it will speed up your boot times).
Keep in mind that the BIOS on most motherboards do not support using a mouse, so you’ll probably have to navigate through the BIOS with the arrow keys on your keyboard. Press «Enter» to change a selected option in the BIOS. On my Gigabyte motherboard, I have to press F10 to save my changes.
4. Boot into Niresh
Restart your Hackintosh, and plug in your Niresh USB drive. If things go well, your computer will boot from the USB drive instead of booting from your normal hard disk. You will then be able to view the Niresh menu.

If you do not manage to reach the Niresh menu, check your motherboard’s BIOS settings to make sure that the changes you made in Step 3 were properly applied. If they were, but you still cannot boot from the Niresh USB drive, unplug your USB drive, and go back to Step 1. Reformat your USB drive with Disk Utility and try again. If all else fails, try using a different USB drive for Niresh.
At the Niresh menu, press the enter key (or return key) to start the OS X Mavericks installer. The installer screen will take several minutes to load. If you are trying to install OS X Mavericks on a computer using an AMD processor, you’ll have to type the boot flag «amd» or «amd64» (without quotation marks)— which flag you need depends on your specific processor, so test one flag a time. Type the boot flag «amdfx» (also without quotation marks) if your AMD processor has «FX» in its model name.
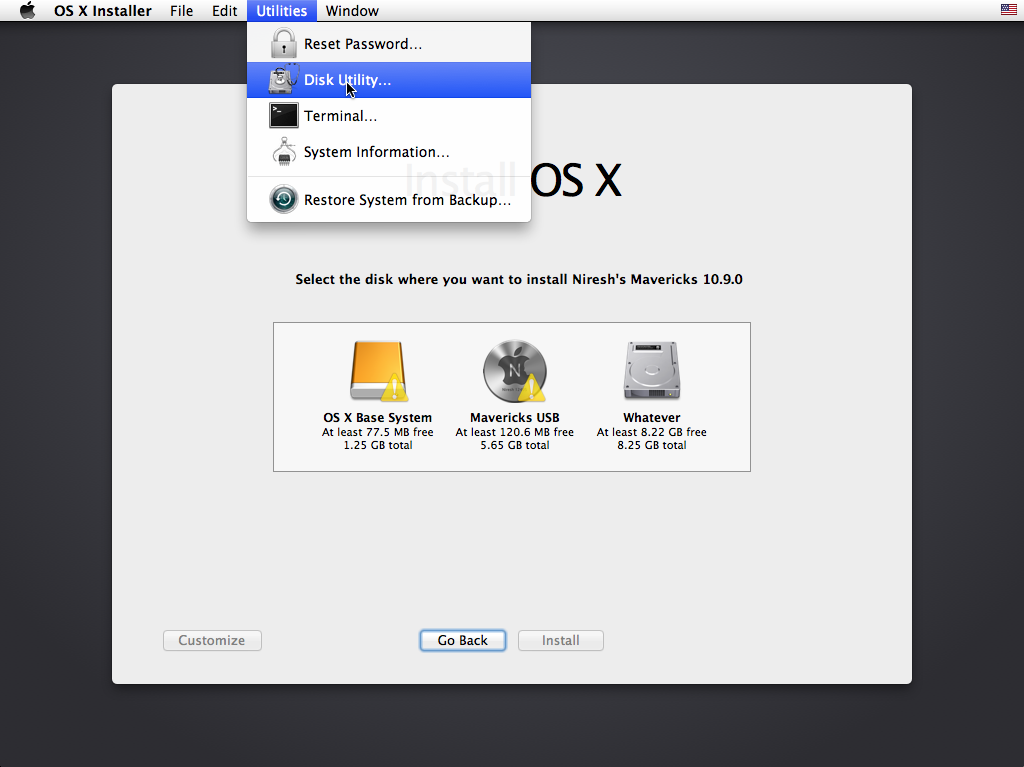
You need to use Disk Utility to erase a hard drive partition so that OS X Mavericks can install itself on it. In the sidebar of Disk Utility, choose the hard drive partition where you want Mavericks installed, and erase it by using the «Erase» tab. You can also just erase the entire hard drive (this is the preferred solution if you don’t plan to dual-boot Windows and Mac OS X from the same hard drive). In the screenshot below, my two hard drive partitions are called «Stuff» and «More Stuff», while my entire hard drive is called «21.47 GB VMware Virtual».

When erasing, the format should be set to «Mac OS Extended (Journaled)». You can also partition the hard disk by using Disk Utility’s Partition tab.
NOTE: Mac OS X cannot boot from a partition that’s larger than 1 TB in size, so if you have a 2 TB hard drive, you will have to partition it.
On the installation page for Mac OSX, the hard disk/disk partition should now be showing up. Select it, and then click the «Customize» button on the bottom left. This is where using a distro becomes really useful: Niresh allows you to install extra Hackintosh drivers and kexts, straight from the OS X Mavericks installer. The «Customize» page essentially does the same thing as Multibeast, though the layout (and most of the names of the options) are different.
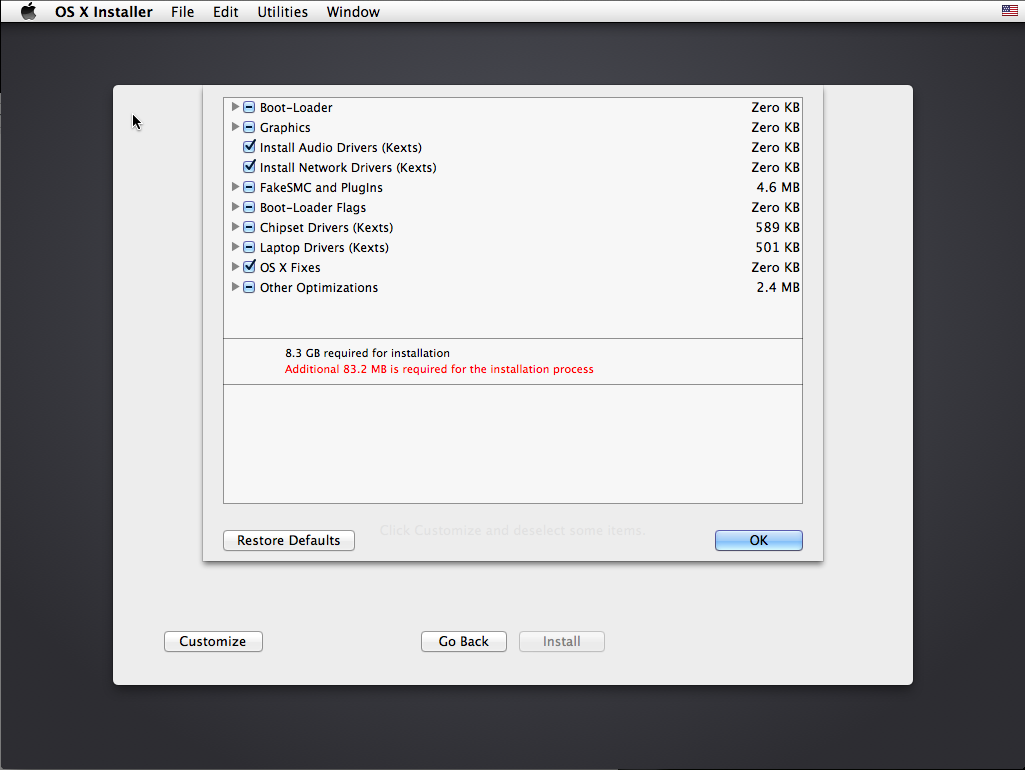
However, choosing the right options from this page can be really tricky, so unless you’re absolutely certain about which drivers and kexts you need to install for your computer, I don’t recommend installing too much stuff from here. The default selection will enable Mac OS X to boot from the hard drive without any assistance, and automatically enable audio and ethernet. For most computers, that will be enough.
If you wish to install more, refer to our guide to Multibeast. Otherwise, you can figure out the rest in Step 7, where you’ll actually set up your Hackintosh with Multibeast.
If your computer already has Mac OS X installed and you are simply updating it to Mavericks, you can just uncheck all of these options. Mac OS X treats Mavericks as just another update— there’s no need to reinstall all of your kexts and drivers.
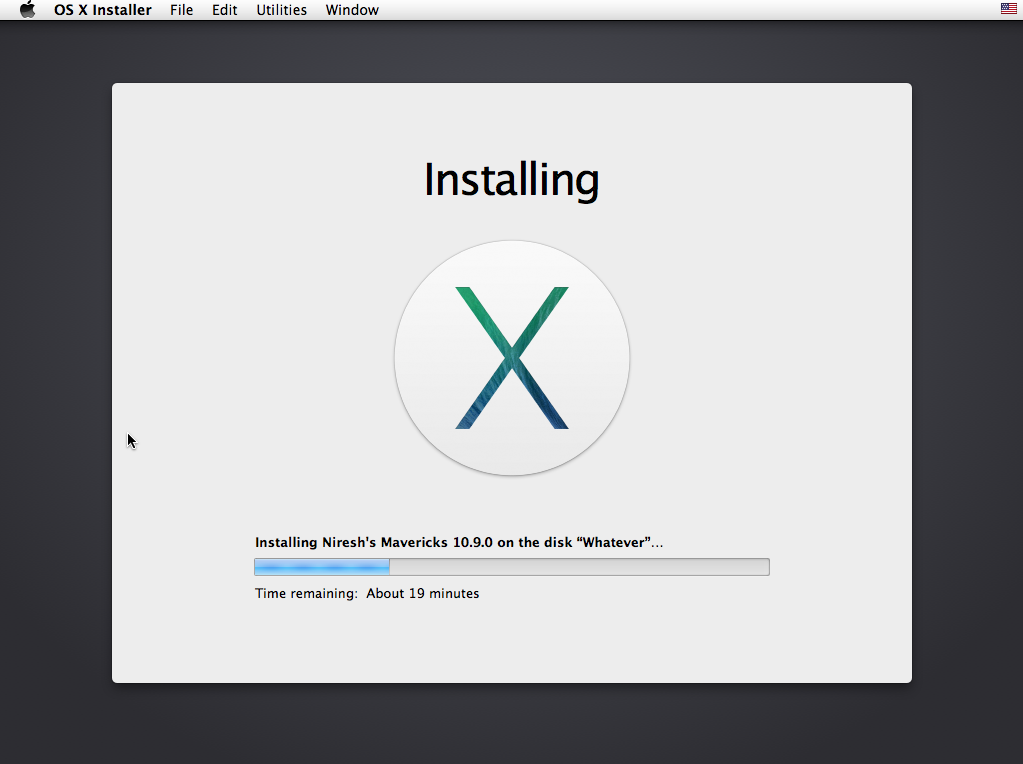
Once you’re done with the «Customize» page, install Mavericks. This will take at least 30 minutes.
6. Boot into Mac OS X
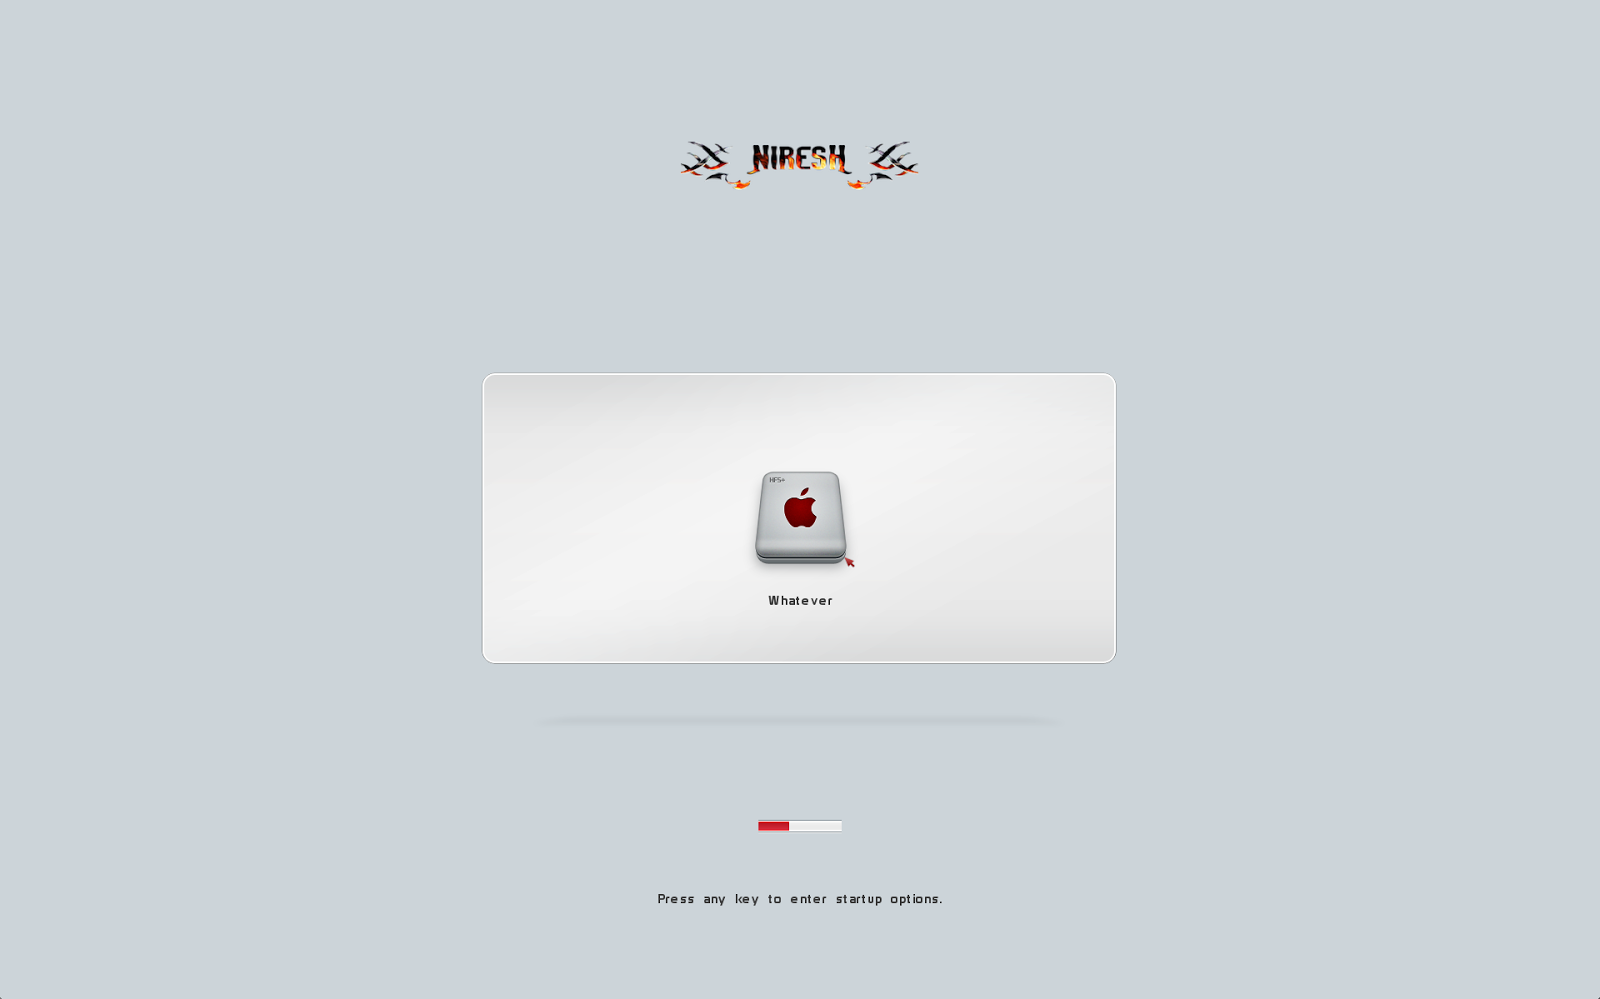
Once the installation finishes, remove your Niresh USB drive, and restart your computer. At the boot screen, you’ll see an icon for the hard drive where you installed Mavericks. Select it (use the arrow keys on your computer) and press «Enter».
Mavericks will boot. Mission accomplished! Once again, if you get a kernel panic/loading error when you try to boot your new Mavericks installation (or if the installation simply won’t start within 10 minutes), you’ll need to enter some boot flags. To enter boot flags, manually restart your computer by pressing your computer’s power button. Then, once you’ve booted back into the Niresh menu, try type any necessary boot flags before pressing the enter/return key. Check out our list of common boot flags and our guide to fixing boot problems with verbose mode for reference.
Once Mavericks has booted successfully, click through through the Mac OS X setup screens until you reach the desktop. From here, Niresh will work its magic, and automatically install the rest of the Hackintosh-specific kexts and drivers from Step 5.

Wait several minutes, while this process works in the background. Once you receive a notification saying that the installation has been completed, restart your computer.
7. Multibeast
Multibeast is a collection of kext files that you usually need to install for your Hackintosh to have sound, internet, a high resolution screen, and more. Different Hackintosh builds require different Multibeast setups, though most setups are very similar. Find out what Multibeast options you need to install. If you have a Gigabyte GA-P67A-D3-B3 motherboard like me, check out my own Multibeast setup.

Since Niresh already installs a lot of necessary kexts for your Hackintosh automatically, you probably won’t have to manually install audio or ethernet kexts with Multibeast. However, you may still want to use Multibeast to run UserDSDT, apply a few extra fixes, etc.
If you’re just updating your Hackintosh from an older version of Mac OS X, you don’t have to reinstall UserDSDT, Easybeast, or Chimera in Multibeast after installing Mavericks. Mac OS X treats Mavericks as just another update. You might also have to reinstall miscellaneous kexts, such as TRIM Enabler (for SSDs).
To run Multibeast in OS X Mavericks, you have to go the «Security» section of System Preferences in Mac OS X, go to the «General» section, and check «Anywhere» in the «Allow applications» section. After running Multibeast, you’ll also probably want to change your BIOS settings back to normal (from Step 3).
Once that’s done with, you should be running a fully functional copy of OS X Mavericks on your PC. If you plan on updating Mac OS X in the future, check out our guide to updating your Hackintosh. Congratulations!


