- Как установить/обновить PHP 8.0 (Debian/Ubuntu/Mint)
- Изменения расширений и зависимостей в PHP 8.0
- Изменения в файле INI PHP 8.0
- Установка PHP 8
- Установка PHP8 fpm
- Смена установленной версий PHP по умолчанию.
- Как установить PHP 7.3 / PHP 7.3-FPM на Linux Mint 19
- Как мне установить PHP 7.3 на Linux Mint 19 ?
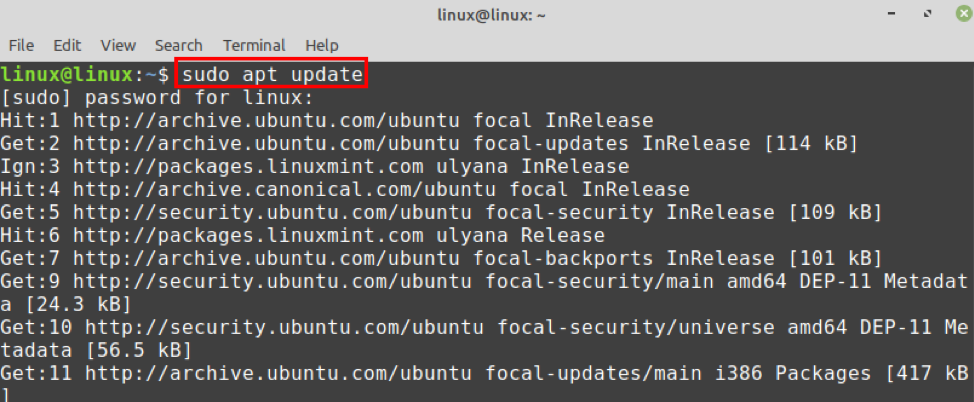
- Шаг 1: Обновите Linux Mint 19
- Шаг 2: Добавьте репозиторий PHP 7.3 в Linux Mint 19
- Шаг 3: Установите PHP 7.3 на Linux Mint 19
- Шаг 4: Установка расширений PHP 7.3
- Установка PHP7.3 FPM на Linux Mint
- Install php linux mint
- Установка веб сервера Apache на Linux Mint, Debian, Ubuntu.
- Установка базы данных MySQL на Linux, Mint Debian, Ubuntu.
- Установка PHP на Linux Mint, Debian, Ubuntu.
- Установка phpMyAdmin на Linux Mint, Debian, Ubuntu.
- How to Install PHP 8 on Linux Mint 20?
- Installing PHP 8 on Linux Mint 20
- Installing the PHP extensions on Linux Mint 20
- Remove PHP 8 from Linux Mint 20
- Conclusion
- About the author
- Kamran Sattar Awaisi
- Install php linux mint
Как установить/обновить PHP 8.0 (Debian/Ubuntu/Mint)
Как установить PHP 8 на Linux
Релиз PHP 8 состоялся 26 ноября 2020 года, и в этом посте мы установим новую версию или обновим вашу старую версию PHP до 8
PHP 8.0 содержит много новых функций и улучшений производительности, синтаксиса, безопасности и стабильности. Установка PHP 8.0 практически на любой сервер упрощается благодаря предварительно скомпилированным пакетам, доступным во всех поддерживаемых в настоящее время версиях Debian и Ubuntu.
Изменения расширений и зависимостей в PHP 8.0
Несмотря на огромное количество изменений в PHP 8.0, в принципе было произведено не так много изменений в его зависимостях и структуре расширений.
Расширение JSON теперь всегда доступно , и нет флага компиляции для его исключения. Это означает, что больше нет необходимости явно устанавливать пакет php-json.
Расширение xmlrpc перемещено в PECL по уважительным причинам. Репозитории программного обеспечения, упомянутые в этом посте, не включают xmlrpc расширения для PHP 8.0.
Кроме того, в Windows название расширения GD было изменено с php_gd2.dll на php_gd.dll.
Изменения в файле INI PHP 8.0
Также есть несколько изменений в файле INI.
- По умолчанию утверждения вызывают исключения — ( assert.exception=1)
- Отображение ошибок по умолчанию установлено на E_ALL — ( error_reporting=-1)
- При запуске теперь по умолчанию ошибки включены — ( display_startup_errors=1)
- Новая функция JIT в PHP 8.0 добавляет несколько новых директив INI.
- Параметр zend.exception_string_param_max_len для настраиваемой длины строки трассировки стека исключений
Установка PHP 8
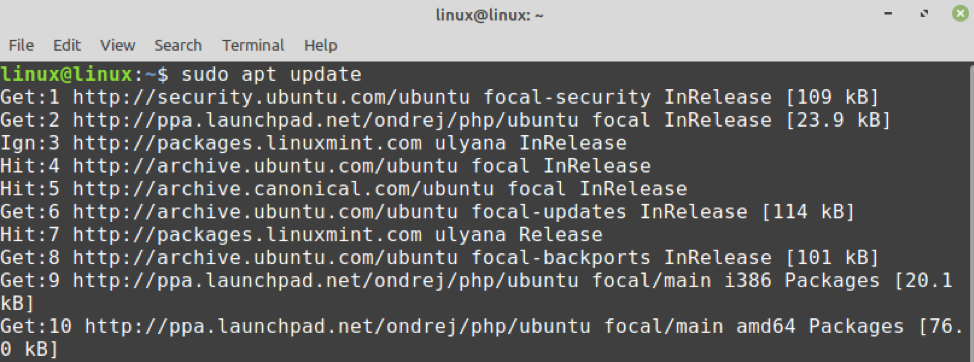
1. Необходимо добавить репозиторий ondrej/phpPPA
Приведенные выше шаги добавят PPA в качестве источника пакетов, который содержит все пакеты PHP и их зависимости, такие как argon2 и libzip.
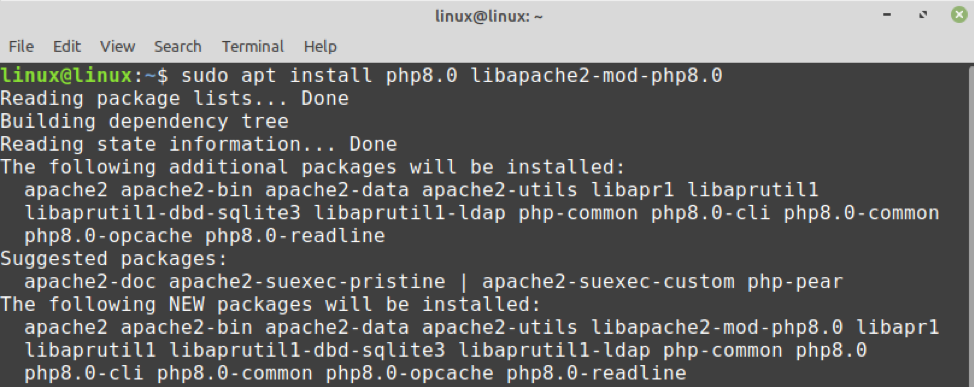
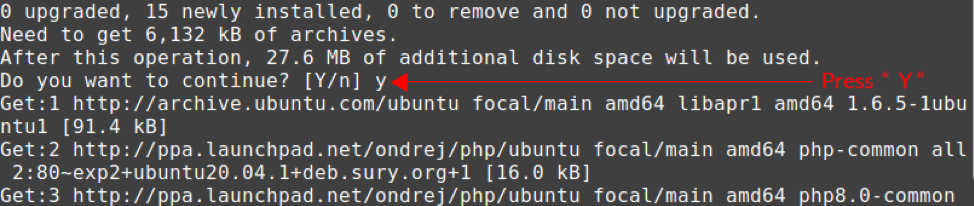
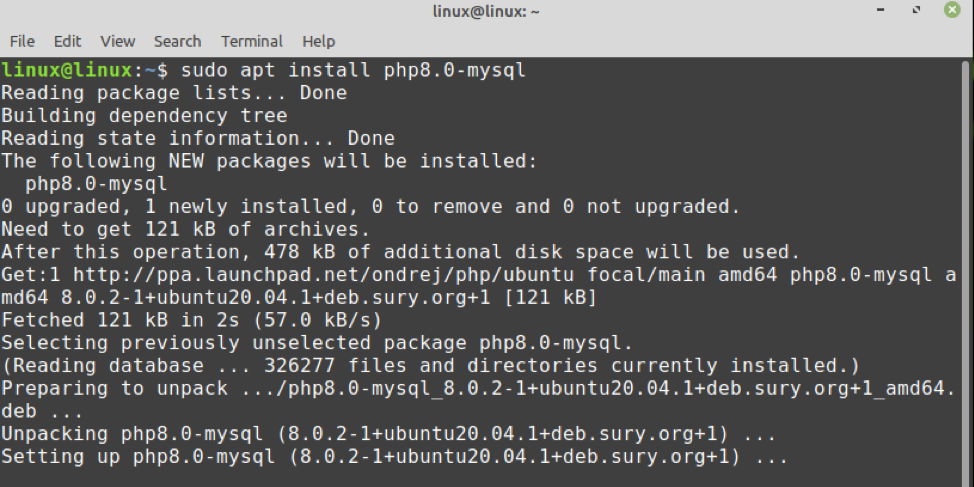
2. Установите PHP 8.0 и нужные расширения
Все пакеты PHP 8.0 следуют шаблону php8.0-имя_расширения , и пакет php8.0-common включает необходимый набор расширений по умолчанию.
Установите PHP 8.0 CLI для работы в консоли
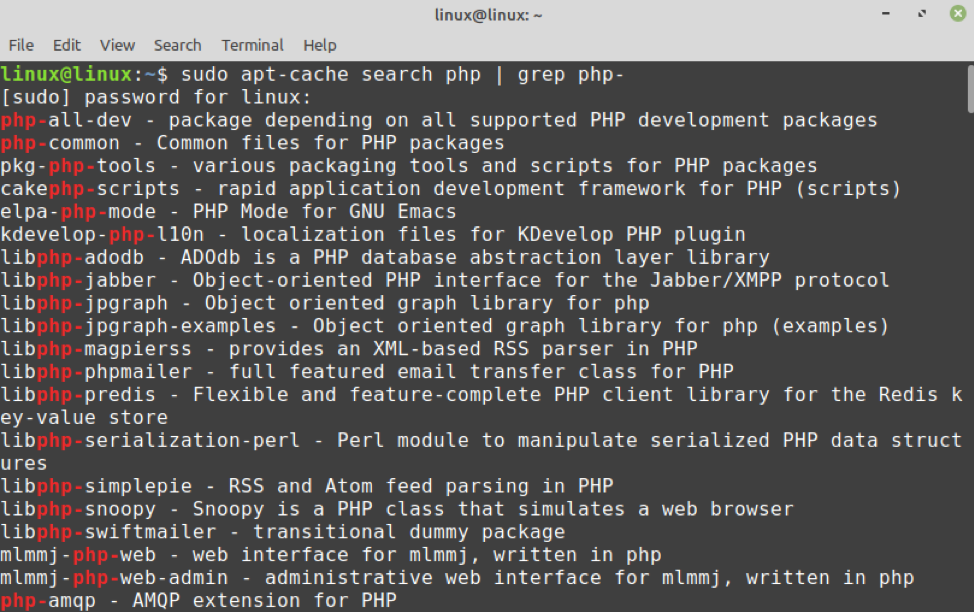
Вы можете установить дополнительные расширения по тому же шаблону php8.0-имя_расширения. Обратите внимание, что вам не нужно устанавливать, так php8.0-json, так как теперь он включен по умолчанию.
Пример установки еще нескольких полезных расширений:
Для разработки также могут быть установлены инструменты покрытия кода или отладчик Xdebug.
Установка PHP8 fpm
В зависимости от используемого веб-сервера вам необходимо будет установить дополнительные пакеты для интеграции с веб-сервером.
Для использования Apache mpm_event, Nginx, Litespeed и т. д. нужно будет установить php8.0-fpm
Для использования Apache mod_php установите libapache2-mod-php8.0
Чтобы проверить установку PHP и расширений, выполните следующие команды:
Если вам потребуется удалить старые пакеты PHP, можно воспользоваться командой
Это предполагает, что вы используете PHP 7.4 в качестве предыдущей версии. Но будьте осторожны, сначала сто раз проверьте что вы больше не используете старые версии в своих проектах.
Смена установленной версий PHP по умолчанию.
Если вдруг вас не устраивает новая установленная версия PHP, вы можете сменить другую версию по умолчанию, командой:
И введя номер нужной вам предыдущей версии PHP.

Веб-разработчик со стажем программирования более 9 лет, всегда в процессе учебы и созидания.
Источник
Как установить PHP 7.3 / PHP 7.3-FPM на Linux Mint 19

Как мне установить PHP 7.3 на Linux Mint 19 ?
В декабре 2018 года команда PHP выпустила PHP 7.3 для общей доступности (GA), и все подробности о выпуске находятся на странице PHP ChangeLog.
Версия PHP по умолчанию, доступная в репозиториях Linux Mint 19, – это PHP 7.2.
Это руководство проведет вас через шаги по установке PHP 7.3 на Linux Mint 19.
Для пользователей веб-сервера Apache вы установите libapache2-mod-php в качестве зависимости.
Но для пользователей Nginx вместо этого вы установите PHP 7.3-FPM.
Шаг 1: Обновите Linux Mint 19
Убедитесь, что вы используете обновленную версию Linux Mint. Если у вас запущены важные программы и вы не хотите их обновлять, вы можете просто обновить список пакетов.
Рекомендуется перезагрузить компьютер после обновления, если у вас установлена более новая версия ядра.
Шаг 2: Добавьте репозиторий PHP 7.3 в Linux Mint 19
Поскольку Linux Mint 19 основан на Ubuntu 18.04, добавляемый репозиторий предназначен для Ubuntu 18.04.
Добавьте ondrej / php PPA-репозиторий с пакетами PHP 7.3 и другими необходимыми расширениями PHP.
Шаг 3: Установите PHP 7.3 на Linux Mint 19
После добавления репозитория установите PHP, выполнив следующие команды на своем терминале.
Версию можно проверить с помощью команды php.
Шаг 4: Установка расширений PHP 7.3
Установите расширения PHP 7.3, используя синтаксис
Смотрите пример ниже
Вы можете подтвердить установленную версию расширения php с помощью команды apt policy:
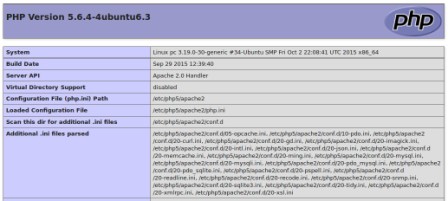
Конфигурационный файл PHP для настройки среды: /etc/php/7.3/cli/php.ini и /etc/php/7.3/apache2/php.ini.
Установка PHP7.3 FPM на Linux Mint
Если вы используете Nginx Web Server, вам нужно установить php7.3-fpm для страниц PHP.
Файлы конфигурации PHP-FPM доступны в папке /etc/php/7.3/fpm/
Вам может потребоваться перезагрузить ваш веб-сервер после установки PHP.
Счастливой PHP-разработки и хостинга приложений.
Источник
Install php linux mint
В этой статье речь пойдет о том, как установить и настроить web-сервер Apache в связке с базой данных MySQL и PHP, получившей название LAMP на ОС Linux Mint, Debian, Ubuntu, xUbuntu, а также об установке phpMyAdmin, популярного инструмента для администрирования базы данных MySQL.
Попробую описать установку LAMP как можно более подробно. Давайте начнем с установки веб сервера Apache.
Установка веб сервера Apache на Linux Mint, Debian, Ubuntu.
Apache на сегодняшний день является самым популярным бесплатным веб сервером в мире. Для его установки выполним следующие команды из терминала:
Проверяем, стартовал ли «apache».
Теперь проверим работоспособность «apache». Для этого запускаем браузер и переходим по ссылке «http://localhost/», должна открыться страничка с тексом «It’s Works!».

По умолчанию путь к файлам веб сервера расположен в директории «/var/www/html/».
Для дальнейшего удобства работы с веб сервером, установим нужные права на директорию «/var/www/».
Установка базы данных MySQL на Linux, Mint Debian, Ubuntu.
MySQL — это бесплатная база данных, достаточно популярная в среде web-програмистов. Для ее установки выполним следующие команды из терминала:
Во время установки необходимо установить пароль для пользователя «root” в MySQL.
Проверяем, стартовал ли «mysql».
Установка PHP на Linux Mint, Debian, Ubuntu.
PHP является одним из самых популярных языков для разработки веб-приложений. Для его установки выполним из терминала следующие команды:
Установка дополнительных модулей:
Для проверки работоспособности «php», создадим файл «index.php» в директории «/var/www/html/».
И впишем в этот файл следующий код:
Сделать это можно используя любой текстовый редактор например «nano» или «mc».
Набираем код, нажимаем «Ctrl+О» для сохранения и «Ctrl+X» для выйхода из текстового редактора «nano».
Далее нужно перезапустить «apache».
Запускаем браузер и переходим по ссылке «http://localhost/index.php», должна открыться страничка с тексом «PHP Version».
Установка phpMyAdmin на Linux Mint, Debian, Ubuntu.
Для установки «phpMyAdmin» в терминале набираем следующие команды:
В процессе установки выбираем «apache2» и «Нет».
По умолчанию «phpMyAdmin» установиться в папку «/usr/share/phpmyadmin». Для того, чтобы «phpMyAdmin» заработал из деректории нашего сервера, необходимо создать символьную ссылку (symbolic link).
Теперь «phpMyAdmin» будет доступен по ссылке «http://localhost/phpmyadmin/index.php».
Для подключения в качестве пользователя вводим «root» и пароль, который задали при установке «MySQL».

На этом процесс установки и первоначальной настройки LAMP закончен. Надеюсь, что эта статья была полезной. Комментируем, подписываемся, ну и всем пока:)
1″ :pagination=»pagination» :callback=»loadData» :options=»paginationOptions»>
Источник
How to Install PHP 8 on Linux Mint 20?
Installing PHP 8 on Linux Mint 20
PHP 8 is not included in the Linux Mint 20 standard repositories. However, it can be installed on Linux Mint 20 from the Ondřej Surý PPA repository.
Complete the below-given steps to install PHP 8 on Linux Mint 20:
Step 1: Update apt cache
Fire up the terminal and update the apt repository cache with the command:
Step 2: Install dependencies
Next, install the required dependencies for PHP 8:
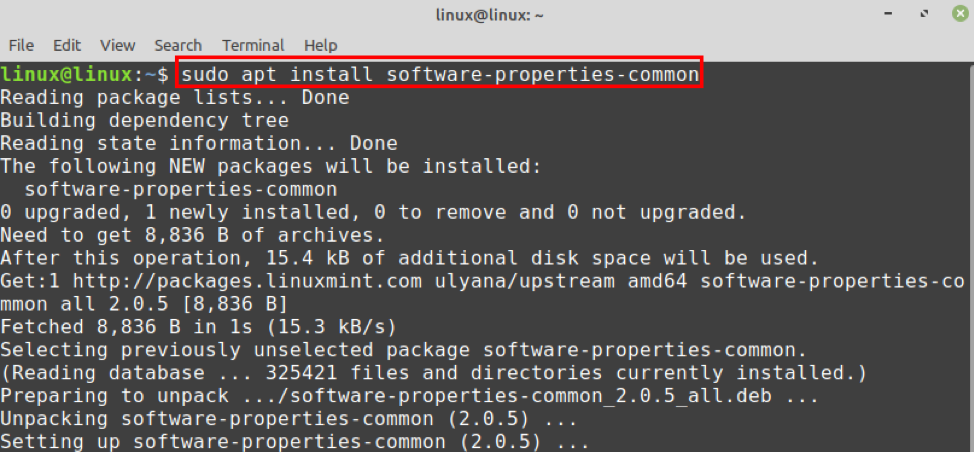
The required dependencies are installed successfully.
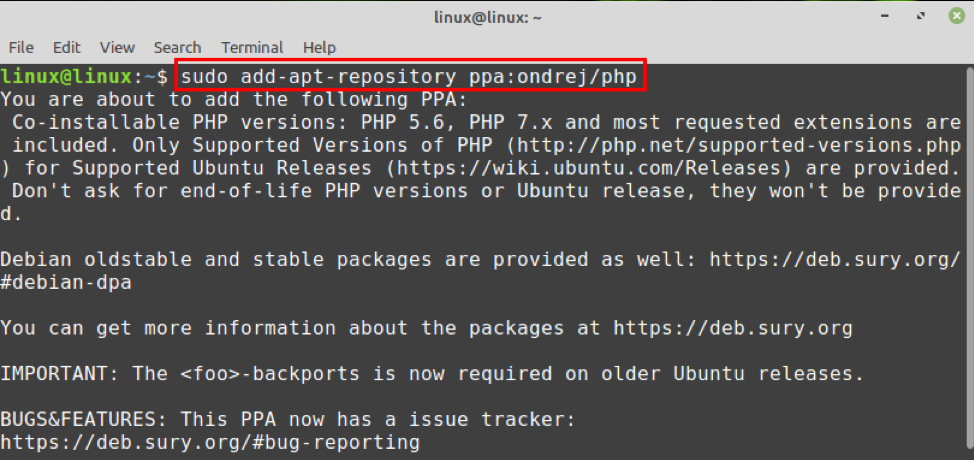
Step 3: Add Ondřej PPA repository
Now, add the Ondřej Surý PPA repository with the command:
Once the Ondřej Surý PPA repository is successfully added, update the apt repository cache again with the command:
Step 4: Install PHP 8 on Linux Mint 20
Install PHP 8 on Linux Mint 20 with the command:

The PHP 8 will be installed on Linux Mint 20.
Type the below-given command if you want to get PHP 8 as Apache Module:
Press ‘y’ to continue installing PHP 8 on Linux Mint 20.
Both above-mentioned commands will install PHP 8 on Linux Mint 20
Once the PHP 8 is successfully installed, check the installed version and verify the installation with the command:

The PHP 8.0.2 is installed on Linux Mint 20.
If you have installed PHP as an apache module, restart the apache server when the PHP is installed:

Installing the PHP extensions on Linux Mint 20
The PHP extension enhances the functionality of PHP. Extensions are the PHP libraries and can be installed on Linux Mint 20 using the apt command as follows:
Have a look at the available PHP extensions with the command:
Let’s install the PHP MySQL extension with the command:
The MySQL extension will be installed successfully.
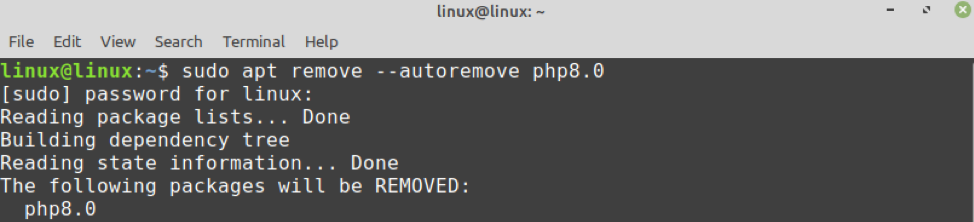
Remove PHP 8 from Linux Mint 20
At any point, if you wish to remove PHP 8 from Linux Mint, run the below-given command to do so:
Press ‘y’ to continue removing PHP 8.

Conclusion
A lot of programmers use PHP for creating websites. Installing PHP 8 on Linux Mint 20 is easy and straightforward. PHP 8 is available from the Ondřej Surý repository. This article explains PHP 8 installation on Linux Mint 20.
About the author

Kamran Sattar Awaisi
I am a software engineer and a research scholar. I like to write article and make tutorial on various IT topics including Python, Cloud Computing, Fog Computing and Deep Learning. I love to use Linux based operating systems.
Источник
Install php linux mint
thank you, that what i am searching for long time 😀
Thank you!! so straight forward to follow. The part with msql.so should be mysql.so on the machine I am running that worked.
Oops, Mint Mate 17.2 Rafaela is my distribution.
By the way, when you type «localhost» to test the apache installation, it will go to the file /var/www/html/index.html — only firefox does not show the complete url in the browser bar — that is why it is easy to overlook, where the root of the webserver is .
I guess it took me a two or three hours trying various other options, before I found the solution. My guess is that the apache directory for web root changed a while ago, and so this looks as if php install is not working, but it is. If the writer of this tutorial mysoomro could change it to the new root, that could be most useful .
HOW TO FIX «The requested URL /phpMyAdmin was not found on this server.»
I hit the obstacle, that in the above instruction the test file is not created in the directory, where the apache server has its root .
The root is not in /var/www — but in /var/www/html !!
This can be seen or set differently in the /etc/apache2/sites-available/000-default.conf file, where apache gets its directions from.
That cannot work, right? Either create the file in the test procedure above in the right directory, or copy it with sudo cp into the root directory /var/www/html .
Happily found that one out, so simple. Did not find that hint on the web, so I wanted to add it here. Maybe others can benefit from it. Go mint.
sudo gedit /var/www/html/testphp.php
Or copy the file testphp.php into the directory «html»
This is the root directory for the apache server — at least it was in my MATE 14.2 installation, when I had followed all of the above steps.
Thanks pal, nice topic. Works fine in Rafaela
Hi, good but needs to be updated and a number of changes for mine to work.
I’m not sure how or if I’m allowed to edit this walkthrough to correct it?
Isn’t it easier to just use the Software Manager to install the components. That just leaves testing that the install worked, setting the mySQL root password and any configuration file changes.
I’m not criticizing the tutorial, just suggesting that rather than using APT directly, it may be easier to use the Software Manager.
I’m so sorry guys for being absent for a long time.
actually I’m stuck somewhere else.
Only can see the notification when someone sends me a message.
@lhs182 about it. are you sure this has permanently changed for all mints??
I haven’t checked it. And if we change it we have to be positive that it has changed or it’ll create some problem for other people.
why is gksudo gedit /etc/mysql/my.cnf used instead of simply sudo vi /etc/mysql/my.cnf ? Is there a reason or they are interchangeable on this occasion? Thanks for the tutorial.
Check the permissions of the files in /etc/apache2 using «ls -l» from a terminal window (of course, you have to be *inside* the directory for that to help you! 🙂 )
If the «httpd.conf» file’s permissions are different, make them the same and then try again.
Another note that I discovered while trying to install WordPress, (and this may be the same for other installed apps in your web server’s «www» directory).
**You must change the user and group of all these files to be the default «apache2» user, or you will get strange and bizarre errors involving permissions.
The way you do this is:
First: Go to your /etc/apache2 directory and there should be an apache2.conf file there.
(Note that I do **NOT** have my box up or open right now, so I am doing this from memory!!)
Second: Somewhere in that file, down near the bottom I think, should be something that mentions the default user name. In my case it was something like «www_data» or «www_user» (or something like that, again, I’m doing this from memory)
Third: Once you discover what that default user is, chown everything in your /var/www directory — and all subdirectories — to that user.
Viz.: (as root, or «sudo» all these commands)
«cd /var/www» (or wherever your web root directory is.)
Note that before executing the next command, you **must** be within the /var/www directory, or wherever your web root directory is!
«chown -R www_data:www_data ./*»
The «-R» tells chown (change owner) to recursively go into every sub-directory and make changes there too.
The «www_data:www_data» tells chown to change the user:group to www_data, or whatever your apache default user is, though my money’s on it being something like «www_data»
The «./*» part tells chown to start *in the current directory*, and change *everything there* If you remember, the «-R» tells it to keep going into all the sub-directories underneath «./» — the current directory — and change that stuff too.
Bottom line, if you run into weird issues, make sure you check ownership and permissions in each directory for all files you make, since «sudo» and root make files with «root:root» as the owner.
This was a very helpful set of notes, including the recent comments @jharris1993 which I also read through first before beginning the install.
I did not have any major problems with installing the following stack.
Linux Mint 16
Apache 2.4.6
MySQL 5.5
PHP 5.5.3-1ubuntu2.3
Here are a few notes, some reiterating what other commenters have already said but still current as of the above versions.
I’m very new to Linux, so I’d appreciate others correcting my misunderstandings of how things work under the hood.
——
(a) Enabling the PHP extension mysql.so
Installing MySQL 5.5 appears to take care of this through the *.ini files found in /etc/php5/apache2/conf.d so that there’s no need to hand edit the php.ini file to activate this extension as well as others.
——
(b) libapache2-mod-auth-mysql «is not available . «
While installing phpMyAdmin using the command,
# apt-get install libapache2-mod-auth-mysql php5-mysql phpmyadmin
got the error msg that libapache2-mod-auth-mysql «is not available . » etc etc.
So I installed without it. So far the stack seems to be working fine without that package.
——
(c) Browsing to the url http://localhost/phpmyadmin
Installing phpMyAdmin apparently created the file
which aliases the url to /usr/share/phpmyadmin
——
(d) Setting the MySQL root password.
During the install of MySQL, a keyboard-based dialog box popped up in the terminal window to prompt for a password for the root user. So there’s no need at all to set the password after the install by using the mysql command line utility.
——
A very nicely written tutorial with some good details and explanations.
First, I owe you, bigtime! I’ve been trying to bring up a LAMP server on Mint-13 (Mate, 64 bit) for about two days or so, and was getting nothing but grief. Then I found your tutorial and I accomplished more in two hours than I had in the previous two days!!
A couple of additional notes that you might want to include:
1. I did the steps in ths tutorial *before performing ANY updates* on my system after a fresh install, since I noticed that the update mamager wanted to update Apache2 — and I didn’t know if that would help or hinder. Maybe it does not matter, maybe it does, I don’t know. What I *DO* know is that it worked when I did it this way.
2. After installing Apache2, it’s a virtual certenty that you will get a «Could not reliably determine the server’s fully qualified domain name, using 127.0.0.1 for ServerName» error.
The fix is easy, just «sudo gedit /etc/apache2/httpd.conf», and add the one line «ServerName (whatever your hostname is)». Don’t include the quotes, (Doh!), and replace «(whatever your hostname is)» with the name you gave to your computer when you set it up. If you don’t remember, just type «hostname» in a terminal window, and it will tell you.
Restart Apache2 and this annoying warning goes away.
3. In my case, (Mint 13, Mate), there was no need to edit the /etc/php5/apache2/php.ini file. The commented line was not there, and apparently was not needed, since phpAdmin works anyway.
4. When you go to install phpMyAdmin, it will ask you to create a database for phpMyAdmin to play with, and I selected «Yes». It asks for the password for the «administrative user» — and it sounds like it wants to create another password for yet another user. What it *really* wants is the password you created for the root user when you installed MySQL. If you get this wrong, you get a really scary warning. If you get that warning, just allow it to «retry», and carefully type in the root password you created before.
5. I did not have to do anything to configure Apache2 to work with phpMyAdmin. It worked wonderfully right out of the box.
6. I noticed that phpMyAdmin *does not require any credentials* to access the MySQL databases! Maybe that’s a result of the database I created before, I don’t know. It *IS* scary!
In any event, I feel like I should send you a case of the finest Kentucky Sour-Mash Bourbon Wiskey — you saved me so much grief!
Источник


