- Installing network printers under Linux
- Joining the network:
- Installing a printer on Debian/Ubuntu Linux based distributions (graphical way):
- Installing a printer on Debian/Ubuntu Linux based distributions (cups):
- About the author
- David Adams
- MNorin.com
- Блог про Linux, Bash и другие информационные технологии
- Настройка принтера в Linux.
- Установка CUPS
- Настройка принтера в Linux
- How To Install Almost Any Printer On Ubuntu
- Is It Already There?
- Your Printer Is Listed
- What If Your Printer Is Not Listed?
- Check Your Printer Hardware
- Ubuntu Drivers
- Download Your Driver
- Use The “Additional Drivers” Tool
- Configure Manually Using CUPS (Common Unix Printing System)
Installing network printers under Linux
Joining the network:
Step 1. Check for the IP range and Gateway from a Windows device by running “ipconfig” (the DOS command equivalent to ifconfig)
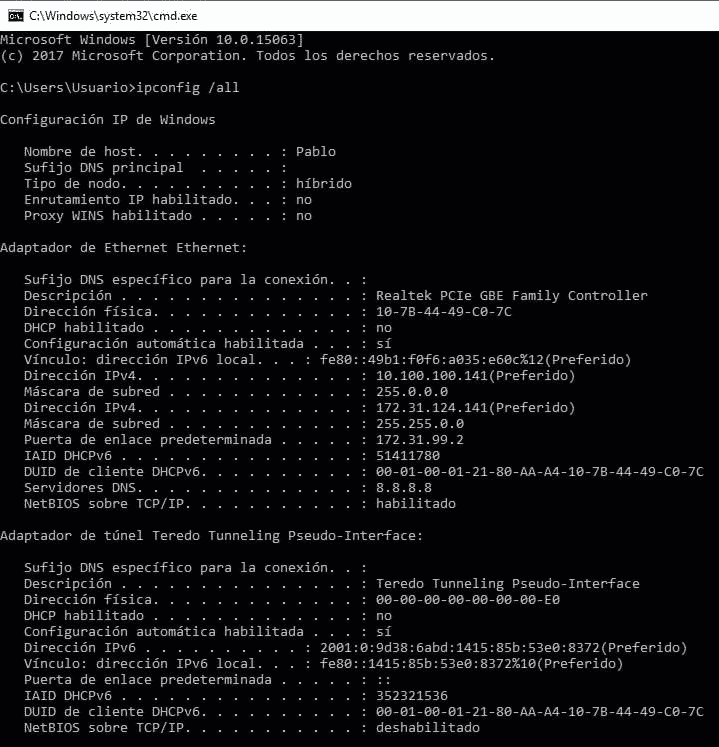
I apologize but the network belongs to a Latin American company and all workstation are in Spanish. Where “Direcciòn” means “address” and “Puerta de enlace determinada” means “gateway”.
Step 2.
Then we assign an ip address and the gateway (ping IP addresses to find a free one). Run:

Replace enp2s0 for your network device and write the proper IP addresses instead.
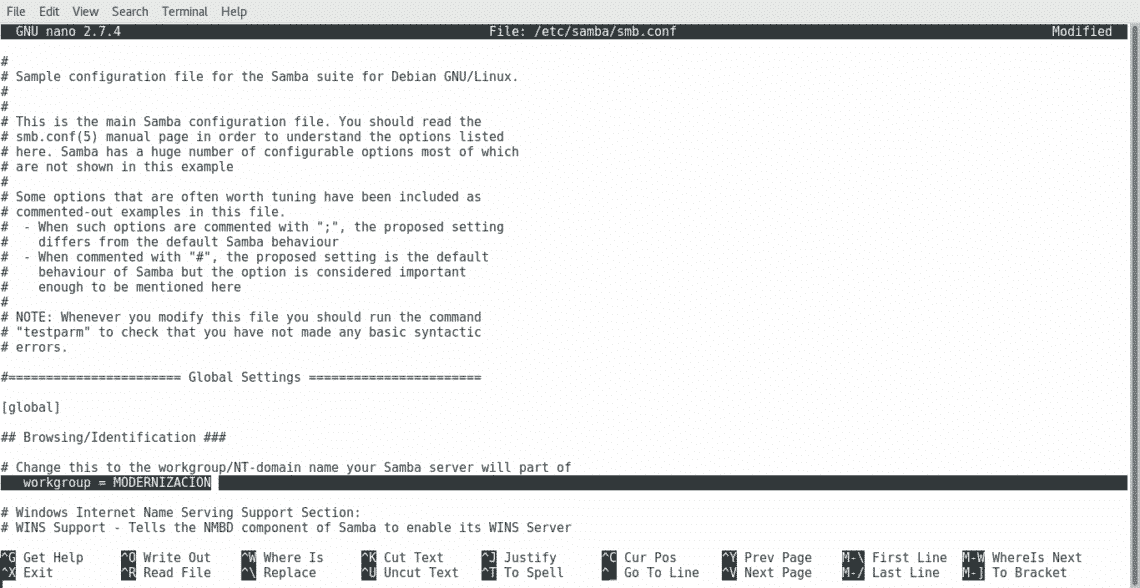
Edit the file nano /etc/samba/smb.conf adding the correct Workgroup. Run:
Installing a printer on Debian/Ubuntu Linux based distributions (graphical way):
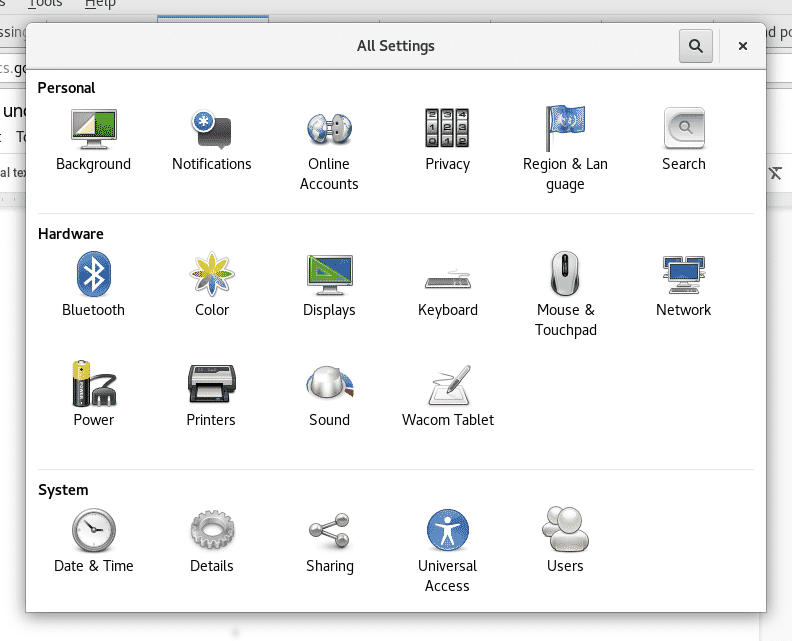
On Debian/Ubuntu Linux based distribution click on Settings>Printers
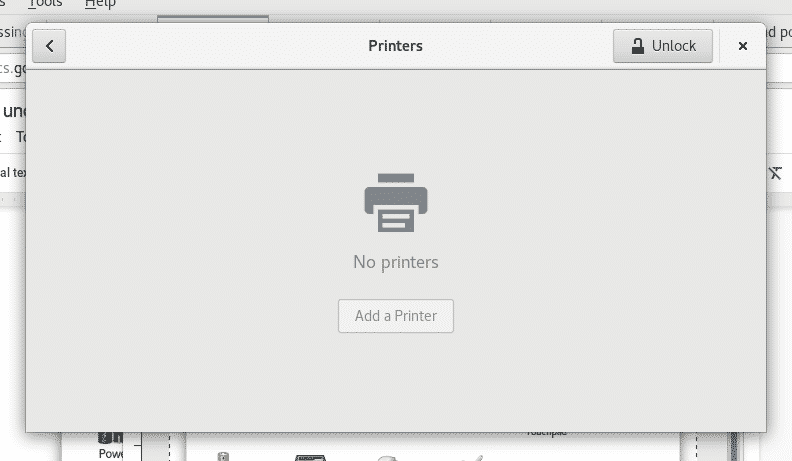
On the emerging window click on Add Printer (probably you’ll need to click the Unlock button and complete your root credentials before).
Note: On some Debian/Ubuntu versions the icon may be called “Network Printers”
Your device will scan for available printers and will list them
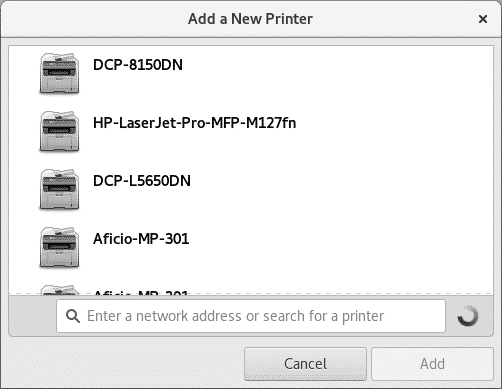
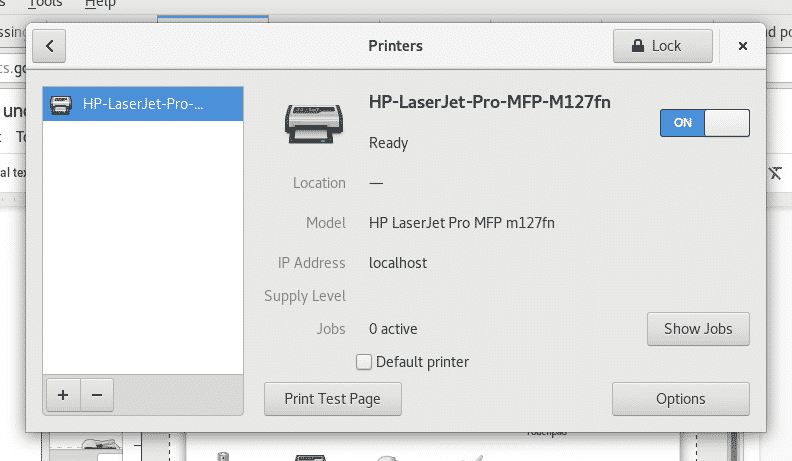
Select your printing device and click on “Add”, your printer will be listed and ready to print
Installing a printer on Debian/Ubuntu Linux based distributions (cups):
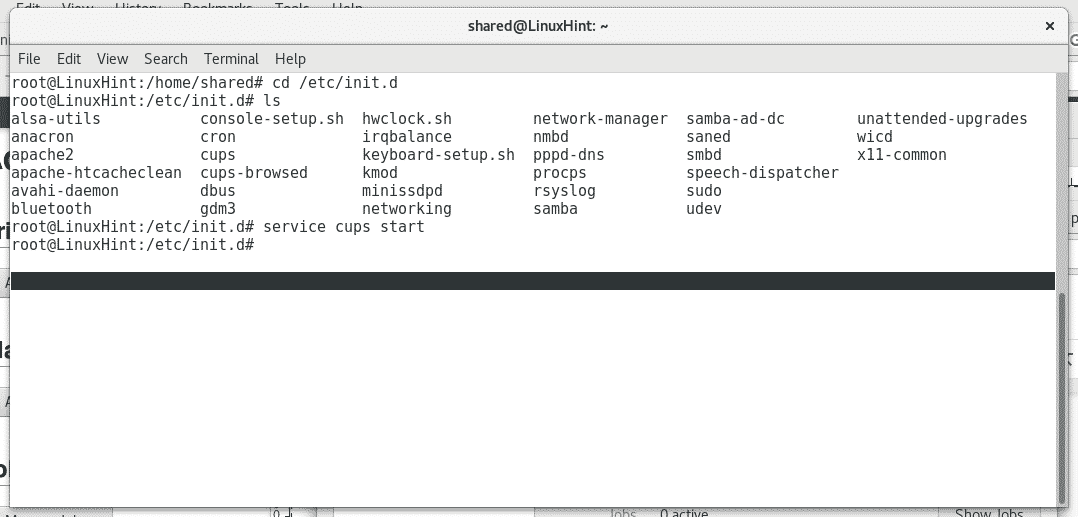
Run as root or using sudo
And press Y when asked.

Start the cups service by running “service cups start” or “/etc/init.d/cups start”
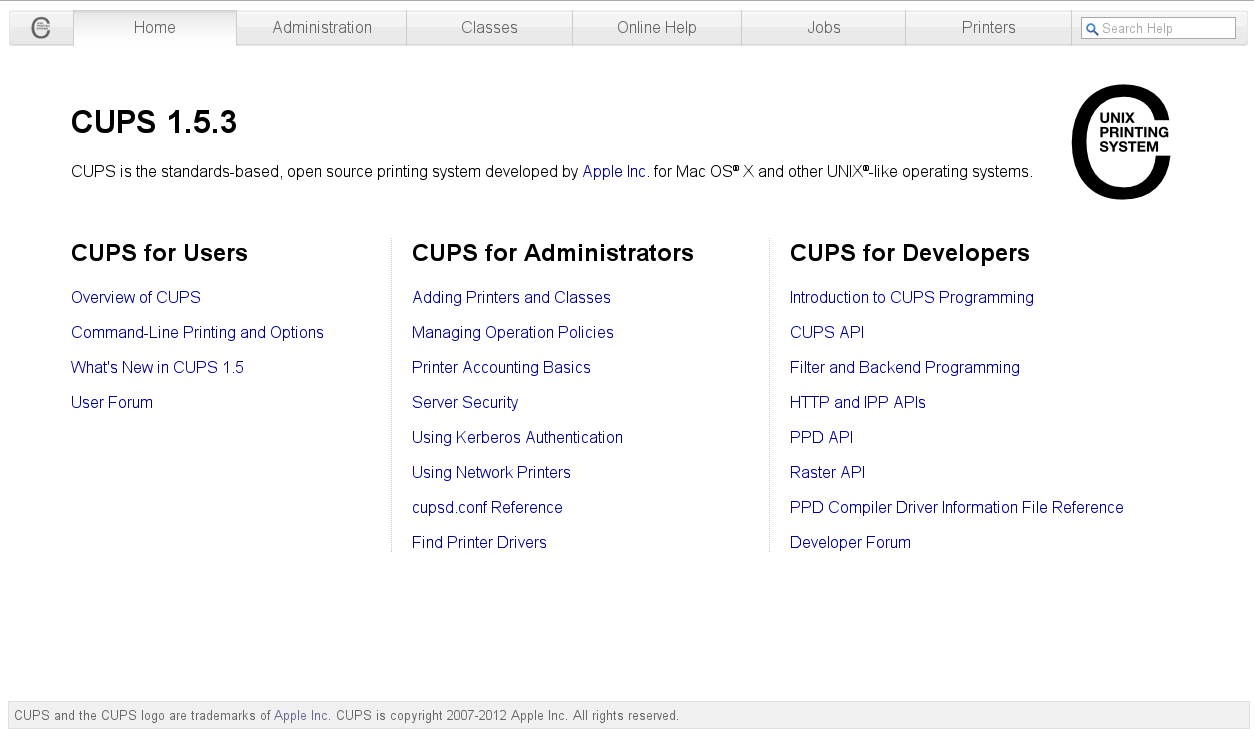
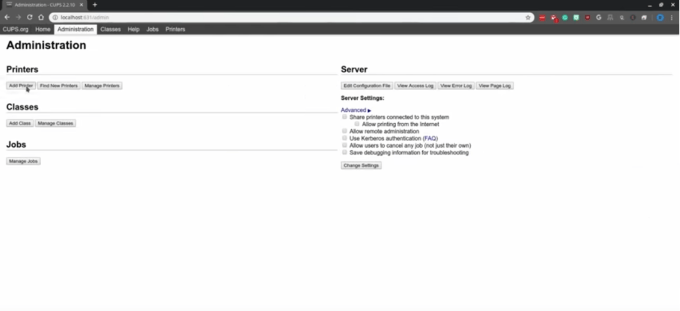
Cups has an intuitive and user friendly web interface to manage printers, open in your browser http://localhost:631/admin
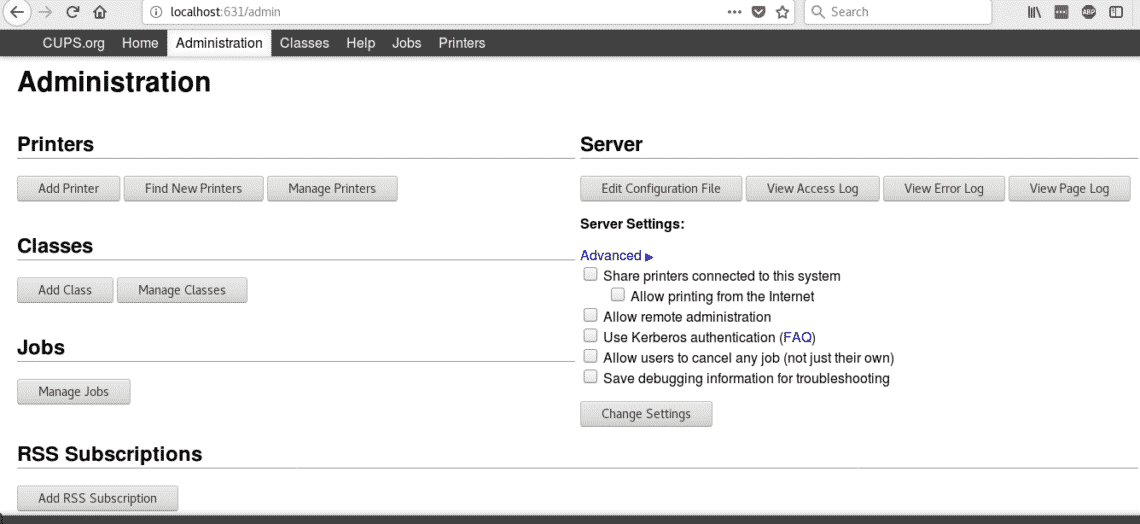
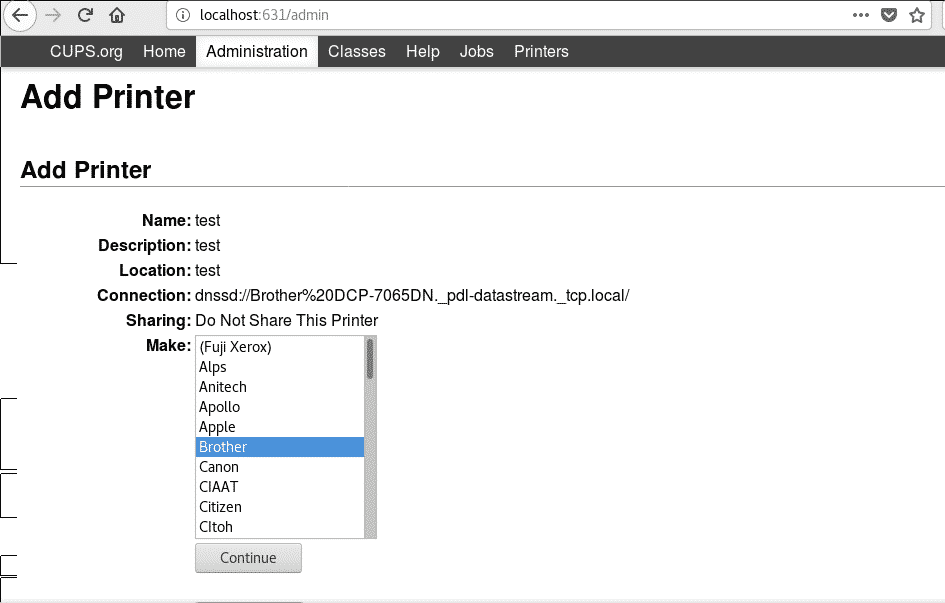
Click on “Add Printer” , it will ask for your root credentials, fill it and cups will list the available printers

Select your devices and press “Continue”, as you see cups allows to install both local and network printers. Next fill the requested information (descriptive information) and press Continue.

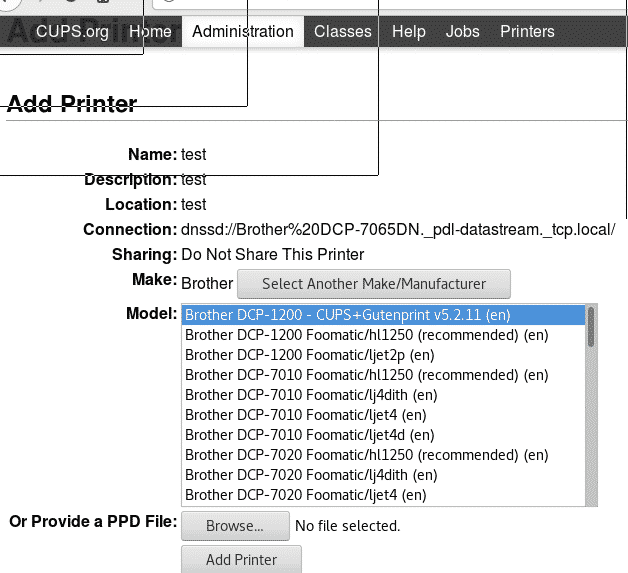
Next, select your printer type and press “Continue”
Select your printer model and press on Add Printer.
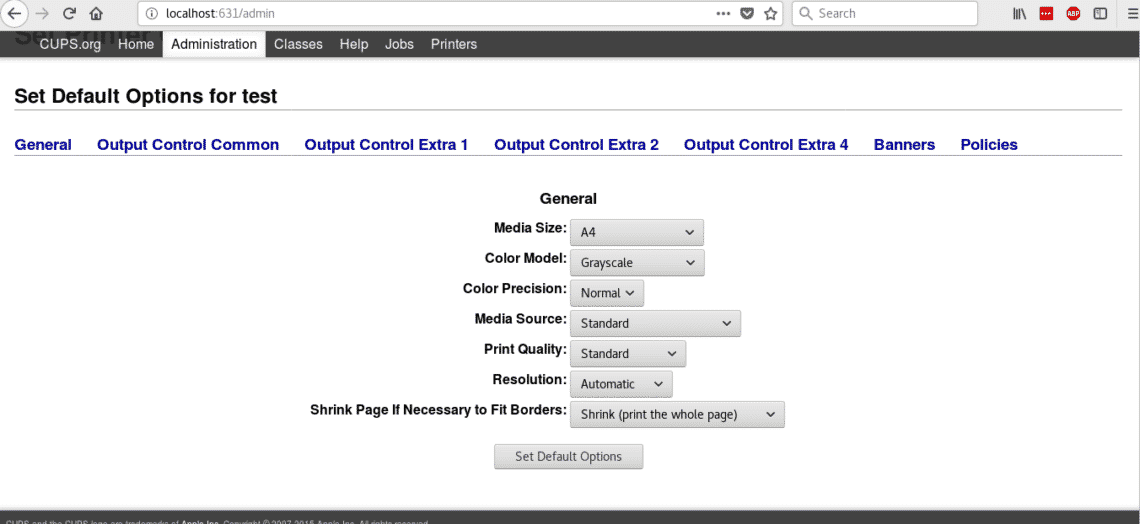
Now your printer is added, and you can determine the default settings for printing.
Now if you open your Open office and click on File>Print you’ll see the printers you just installed.
I hope this tutorial helped you to deal with printers under Linux, keep following LinuxHInt for more tips and resources on Linux.
About the author
David Adams
David Adams is a System Admin and writer that is focused on open source technologies, security software, and computer systems.
Источник
MNorin.com
Блог про Linux, Bash и другие информационные технологии
Настройка принтера в Linux.
 Одна из задач, которую часто выполняют компьютеры под управлением операционных систем на базе ядра Linux — это печать на принтере. На компьютер устанавливается операционная система, подключается принтер, настраивается служба печати, и всё, принтером можно пользоваться. Настройка принтера в Linux обычно не зависит от того, какой дистрибутив вы используете и занимает достаточно мало времени. Давайте посмотрим, как это делается при установке принтера, подключенного к другой машине в сети.
Установка CUPS
В первую очередь необходимо установить систему печати CUPS. Для этого необходимо установить пакет cups, а все зависимости будут установлены автоматически вашим менеджером пакетов.
После установки пакетов сервис cups запускается автоматически. Если он не запустился, то его надо запустить вручную:
В зависимости от того, какой марки у вас принтер, может потребоваться установить дополнительные пакеты. В Debian’е можно сразу установить все доступные драйвера:
В CentOS вам придется ставить драйвера для разных производителей попакетно, найти их можно обычно по словам «CUPS driver». Если вы по какой-то причине не нашли в пакетах подходящего драйвера, вы можете попробовать найти его на странице http://www.openprinting.org/drivers.
Настройка принтера в Linux
Откройте в браузере адрес http://127.0.0.1:631. У вас будет запрошен пароль пользователя root, либо пароль пользователя, если пароль root не задан (как, например, в Ubuntu). Вы должны увидеть следующую страницу:
Кликните на вторую вкладку (Administration)

Нам нужно добавить принтер. Можно попробовать найти принтер автоматически, нажав на кнопку «Find New Printers», но это не всегда работает. Поэтому кликаем по кнопке «Add Printer».

Выбираем, каким образом принтер должен быть подключен к компьютеру. В моем случае это принтер, который подключен к другому компьютеру и настроенный как принтер общего доступа. Поэтому я выбираю «Windows Printer via SAMBA». Нажимаем кнопку «Continue».

Примера задания пути для принтера с доступом по SAMBA нет. Вводим руками: smb://192.168.0.7/RX610 (принтер подключен к хосту 192.168.0.7 и называется RX610). Нажимаем кнопку «Continue». Если принтер подключен к локальному компьютеру, то он обычно может быть определен автоматически.

Теперь Нужно ввести имя принтера, под которым он будет виден в системе (обязательно), также его описание и местоположение (необязательно). Вот как это должно в итоге выглядеть:

Теперь можно нажать кнопку «Continue».

Теперь нам нужно выбрать производителя и модель принтера. В первую очередь выбираем производителя (в моем случае это Epson).

Нажимаем кнопку «Continue».

Теперь выбираем драйвер, который будем использовать (драйвер, соответствующий вашему принтеру) и нажимаем кнопку «Add Printer». Теперь надо установить настройки принтера по умолчанию (как минимум установить формат бумаги A4).

После этого нажимаем кнопку «Set Default Options». После сообщения о том, что принтер был успешно добавлен вы увидите страницу с информацией о принтере.

Для проверки вы можете сразу отправить тестовую страницу на печать, выбрав пункт «Print test page» в первом выпадающем меню (Maintenance).
Если страница успешно выведена на печать, значит настройка произведена правильно.
Источник
How To Install Almost Any Printer On Ubuntu
And one thing to keep in mind
Are you trying to install a printer on your Ubuntu system? Luckily, Ubuntu now recognizes most printer brands and will automatically install the related drivers when connected.
Many printer manufacturers such as Brother and HP support Linux distributions and release their own printer drivers. But before installing a printer from another brand, you should look at their website to see if they support Linux.
Keep in mind that your desktop environment is what dictates the configuration tool you need to use to set up your printer, not the Linux distribution.
Is It Already There?
Many modern printers have powerful network capabilities. What this means is that when you go the add printer area, your printer will already be listed.
How can you find out if it is? Note that you will need administrative privileges on the system to set the default printer.
- Type Printers in the Activities overview. Moving your mouse to the top-left corner of your screen will show Activities.
- Or you can press the Super key on your keyboard. The super key is the one that looks like the Windows logo on most computers.
- Go to system settings. You can find it on your toolbar or Ubuntu dock.
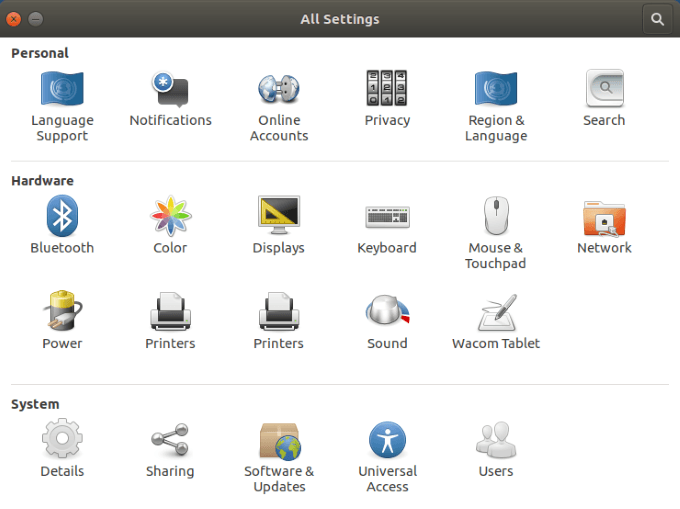
- Click on Printers to see which – if any – printers are listed.
Your Printer Is Listed
If you see your printer listed under devices, the following steps will help you finish the printer installation.
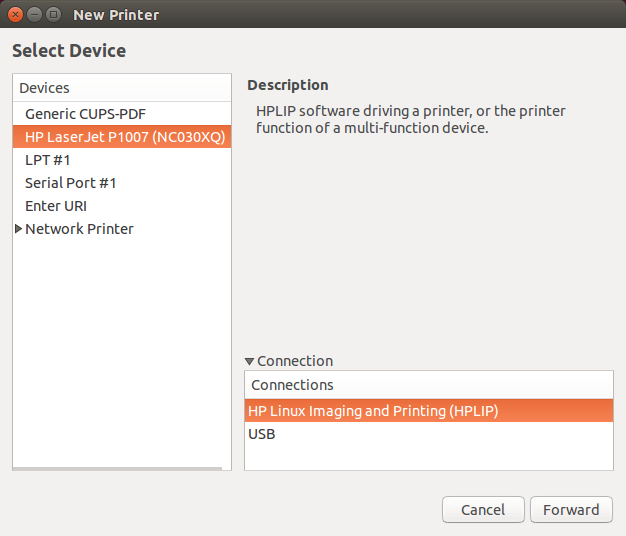
- If your printer is listed, it is because you have a network-savvy printer. Select it and then click on properties.
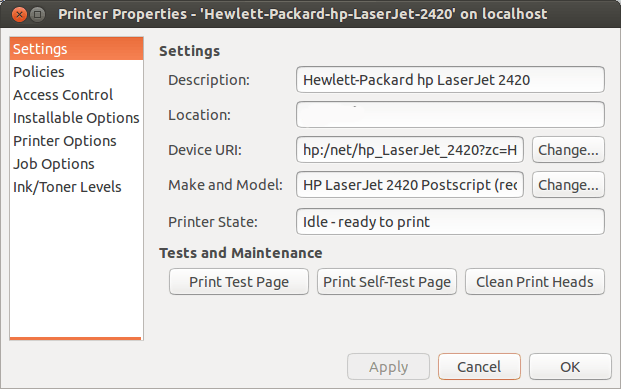
As you can see in the image above, you can:
- Change the name of the printer.
- Print a test page to make sure it is working properly.
- Troubleshoot your issues if you have a problem.
You should also check the Printer Options to make sure the default settings are consistent with the capabilities and features of your printer.
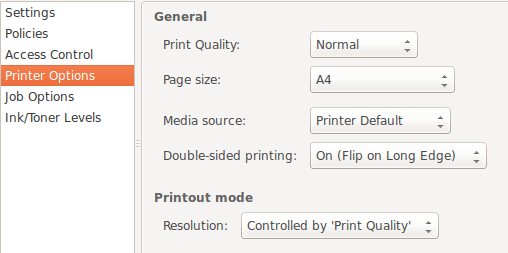
Keep in mind that every printer is going to be slightly different. However, the main principles are the same across all printers.
Pay attention to the Output Mode in the image above. If you are looking to save money because print cartridges can be expensive, you might want to only use Color when necessary.
When you don’t need a color copy, you can change that option to Black and White or Grayscale.
What If Your Printer Is Not Listed?
There will be times when your Ubuntu OS won’t find a connected printer. There are various reasons for this that range from simple to complex.
You can either look at the printer manufacturer documentation or follow the steps below.
Check Your Printer Hardware
One of the simplest things to check is the connection. Did you properly connect the power cables and USB (if the printer is not using wireless)?
If you have an older printer or have moved it from one location to another, you could have a loose connection. Check both ends of the USB cable to make sure the connection is secure.
Ubuntu Drivers
Some older printers were not designed to work with the open-source operating system or the latest version of Ubuntu.
Alternatively, if your printer is very new, it might not have been added yet to Ubuntu’s database. So, what can you do?
Download Your Driver
You can go to the printer manufacturer’s official website to find and download the appropriate driver based on the model number.
Each printer’s brand installation will vary so be sure to follow the directions carefully.
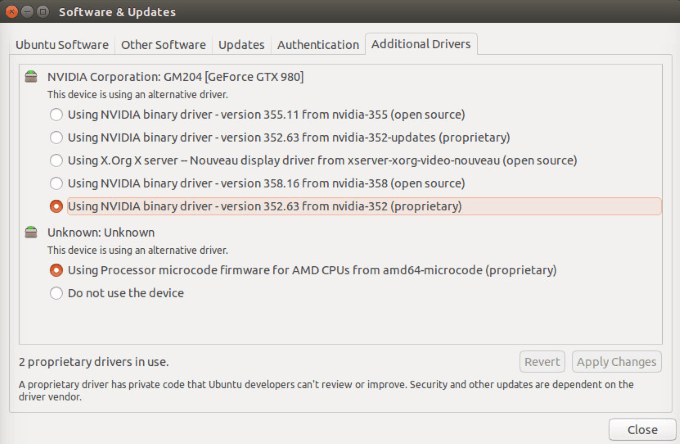
Use The “Additional Drivers” Tool
Some printer manufacturers have their own proprietary and closed-source drivers. This means that that Linux distributions won’t be able to automatically enable them for you.
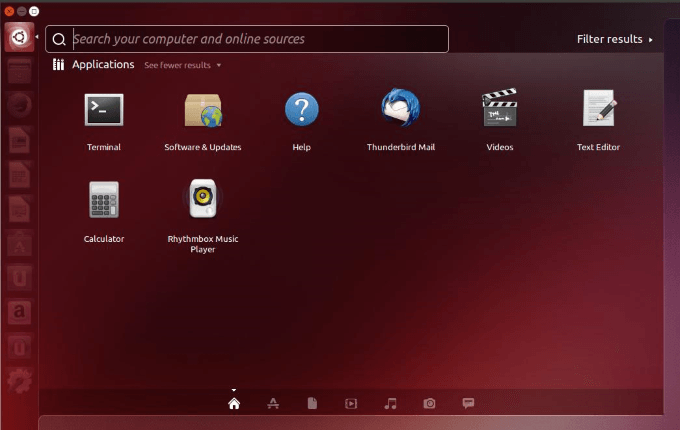
- Ubuntu-based distributions have an Additional Drivers tool to enable you to install proprietary drivers. First, open your dash.
- Then do a search for Additional Drivers and launch it.
- Your system will detect the proprietary drivers you need for your printer and let you install them.
Configure Manually Using CUPS (Common Unix Printing System)
Developed by Apple, CUPS enables your system to detect your printer if it isn’t automatically found. You can use it with a single computer or a group of networked computers.
- If you don’t already have CUPS installed, you can install from Terminal with the following command:
- Now you need to enable CUPS:
- Use the following command to start CUPS:
- After you authenticate with your user password, the CUPS server will start automatically.
- Now that you have enabled and started the CUPS service, exit Terminal. Launch into CUPS in local host:
- Add your printer from the CUPS for Administrators.
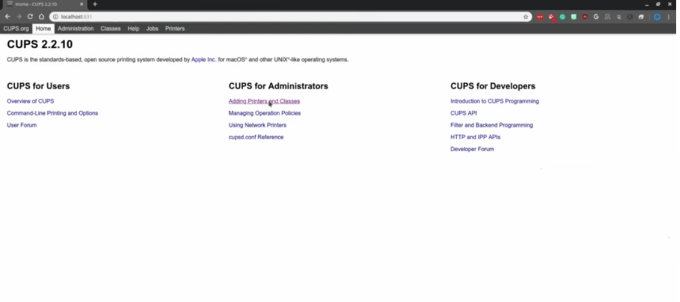
- From the Administration section, under Printers, click Add Printer.
- Find your printer from the locally installed printer.
Keep in mind that CUPS is specifically for printing and not scanning or other functions some printers might perform.
To learn more about CUPS, visit the official page.
Unless your printer is very new or old, most of the time, setting up a printer on Ubuntu is not that difficult.
David has a background in small business and lives in Australia. He is a WordPress and Ubuntu Developer who enjoys design, CSS and tech tool integration. Read David’s Full Bio
Источник


