- linux-notes.org
- Установка pip/setuptools/wheel в Unix/Linux
- Установка pip/setuptools/wheel в Fedora
- Установка pip/setuptools/wheel в CentOS/RHEL
- Установка pip/setuptools/wheel в openSUSE
- Установка pip/setuptools/wheel в Debian/Ubuntu
- Установка pip/setuptools/wheel в Arch Linux
- Установка pip/setuptools/wheel в Mac OS X
- Установка pip/setuptools/wheel с исходного кода.
- Установка pip/wheel с исходного кода
- Установка setuptools с исходного кода
- Установка easy_install с исходного кода
- Использование PIP
- Добавить комментарий Отменить ответ
- Установка pip/setuptools/wheel в Unix/Linux
- Установка pip/setuptools/wheel в Unix/Linux
- Установка pip/setuptools/wheel в Fedora
- Установка pip/setuptools/wheel в CentOS/RHEL
- Установка pip/setuptools/wheel в openSUSE
- Установка pip/setuptools/wheel в Debian/Ubuntu
- Установка pip/setuptools/wheel в Arch Linux
- Установка pip/setuptools/wheel в Mac OS X
- Установка pip/setuptools/wheel с исходного кода.
- Установка pip/wheel с исходного кода
- Установка setuptools с исходного кода
- Установка easy_install с исходного кода
- Использование PIP
- Getting Started With setuptools and setup.py В
- Installing setuptools and easy install
- Bootstrapping setuptools
- Setting up setup.py В
- Directory Structure
- README
- Classifiers
- Using setup.py В
- Intermezzo: .pypirc file and gpg
- Registering Your Project
- Uploading Your Project
- Putting It All Together With The Full Windows Script
- Packaging and distributing projects
- Requirements for packaging and distributing
- Configuring your project
- Initial files
- setup.py
- setup.cfg
- README.rst / README.md
- MANIFEST.in
- LICENSE.txt
- setup() args
- version 
- description 
- author 
- license 
- classifiers 
- keywords 
- project_urls 
- packages 
- py_modules 
- install_requires 
- python_requires 
- package_data 
- data_files 
- scripts 
- entry_points 
- Choosing a versioning scheme
- Standards compliance for interoperability
- Scheme choices
- Pre-release versioning
- Local version identifiers
- Working in “development mode”
- Packaging your project
linux-notes.org
В этой статье «Установка pip/setuptools/wheel в Unix/Linux» описывается, как установить pip, setuptools и wheel в Unix/Linux ОС.
Установка pip/setuptools/wheel в Unix/Linux
Приведу установку на различные Unix/Linux ОС.
Установка pip/setuptools/wheel в Fedora
Чтобы установить Python 2 на Fedora 21, используйте следующие команды.
Для начала обновим тулзы:
Чтобы установить Python 3 на Fedora 21, используйте следующие команды:
Чтобы установить Python 2 на Fedora 22, используйте следующие команды.
Для начала обновим тулзы:
Чтобы установить Python 3 на Fedora 22, используйте следующие команды:
Чтобы получить новые версии pip, setuptools и wheel для Python 2, вы можете включить PyPA Copr репозиторий:
И после чего, выполнить:
Установка pip/setuptools/wheel в CentOS/RHEL
Чтобы установить pip и wheel, существует два варианта:
1. Включите репозиторий EPEL, используя эти инструкции:
После чего, вы можете установить pip следующим образом:
На EPEL 7 (но не EPEL 6), вы можете установить wheel следующим образом:
2. Включите репозиторий PyPA Copr репозиторий:
После чего, вы можете установить pip следующим образом:
Чтобы обновить setuptools, запустите:
Чтобы установить Python 3.4 на CentOS7/RHEL7, используйте:
Установка pip/setuptools/wheel в openSUSE
Чтобы установить Python 2:
Чтобы установить Python 3:
Установка pip/setuptools/wheel в Debian/Ubuntu
Чтобы установить Python:
Чтобы установить Python 3:
Установка pip/setuptools/wheel в Arch Linux
Чтобы установить Python 2:
Чтобы установить Python 3:
Установка pip/setuptools/wheel в Mac OS X
Добавляем HOMEBREW на Mac OS X ( устанавливаем его):
После чего, можно приступать к установке:
Или, чтобы установить python 3:
Установка pip/setuptools/wheel с исходного кода.
И, чтобы получить самое новое ПО, НЕОБХОДИМО КОМПИЛИРОВАТЬ ЕГО!
Установка pip/wheel с исходного кода
Очень простая установка:
Установка setuptools с исходного кода
Смотрим где лежит нужный питон (у меня это 3.4):
И выполняем сборку:
ИЛИ, все в одной строке:
Установка easy_install с исходного кода
easy_install позволяет установить pip и его компоненты.
Смотрим где лежит нужный питон (у меня это 3.4):
И выполняем сборку:
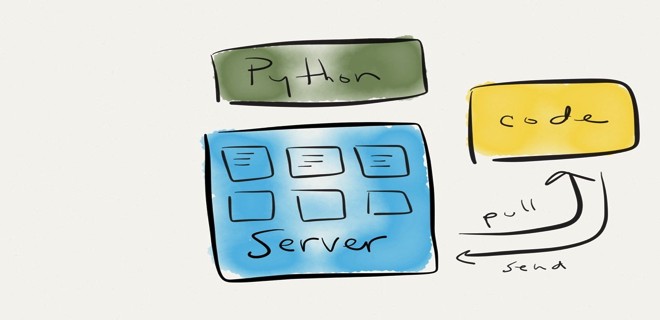
Использование PIP
Поиск пакета Python с помощью команды pip:
Установка пакета с помощью команды pip:
- Установка по имени пакета:
- Установка по имени пакета (но, определенной версии):
- Установка пакета по URL:
Список пакетов Python, которые уже установлены в системе, можно проверить с помощью команды pip:
Показать информацию о пакете Python:
Вот полезное чтиво:
А на этом, у меня все. Тема «Установка pip/setuptools/wheel в Unix/Linux» завершена.
Добавить комментарий Отменить ответ
Этот сайт использует Akismet для борьбы со спамом. Узнайте, как обрабатываются ваши данные комментариев.
Источник
Установка pip/setuptools/wheel в Unix/Linux

Установка pip/setuptools/wheel в Unix/Linux
В этой статье «Установка pip/setuptools/wheel в Unix/Linux» описывается, как установить pip, setuptools и wheel в Unix/Linux ОС.
Установка pip/setuptools/wheel в Unix/Linux
Приведу установку на различные Unix/Linux ОС.
Установка pip/setuptools/wheel в Fedora
Чтобы установить Python 2 на Fedora 21, используйте следующие команды.
Для начала обновим тулзы:
Чтобы установить Python 3 на Fedora 21, используйте следующие команды:
Чтобы установить Python 2 на Fedora 22, используйте следующие команды.
Для начала обновим тулзы:
Чтобы установить Python 3 на Fedora 22, используйте следующие команды:
Чтобы получить новые версии pip, setuptools и wheel для Python 2, вы можете включить PyPA Copr репозиторий:
И после чего, выполнить:
Установка pip/setuptools/wheel в CentOS/RHEL
Чтобы установить pip и wheel, существует два варианта:
1. Включите репозиторий EPEL, используя эти инструкции:
Как включить EPEL репозиторий на CentOS
После чего, вы можете установить pip следующим образом:
На EPEL 7 (но не EPEL 6), вы можете установить wheel следующим образом:
2. Включите репозиторий PyPA Copr репозиторий:
После чего, вы можете установить pip следующим образом:
Чтобы обновить setuptools, запустите:
Чтобы установить Python 3.4 на CentOS7/RHEL7, используйте:
Установка pip/setuptools/wheel в openSUSE
Чтобы установить Python 2:
Чтобы установить Python 3:
Установка pip/setuptools/wheel в Debian/Ubuntu
Чтобы установить Python:
Чтобы установить Python 3:
Установка pip/setuptools/wheel в Arch Linux
Чтобы установить Python 2:
Чтобы установить Python 3:
Установка pip/setuptools/wheel в Mac OS X
Добавляем HOMEBREW на Mac OS X ( устанавливаем его):
Установка HOMEBREW на Mac OS X
После чего, можно приступать к установке:
Или, чтобы установить python 3:
Установка pip/setuptools/wheel с исходного кода.
И, чтобы получить самое новое ПО, НЕОБХОДИМО КОМПИЛИРОВАТЬ ЕГО!
Установка pip/wheel с исходного кода
Очень простая установка:
Установка setuptools с исходного кода
Смотрим где лежит нужный питон (у меня это 3.4):
И выполняем сборку:
ИЛИ, все в одной строке:
Установка easy_install с исходного кода
easy_install позволяет установить pip и его компоненты.
Смотрим где лежит нужный питон (у меня это 3.4):
И выполняем сборку:
Использование PIP
Поиск пакета Python с помощью команды pip:
Установка пакета с помощью команды pip:
Установка по имени пакета:
Установка по имени пакета (но, определенной версии):
Установка пакета по URL:
Список пакетов Python, которые уже установлены в системе, можно проверить с помощью команды pip:
Показать информацию о пакете Python:
Вот полезное чтиво:
Установка virtualenv + virtualenvwrapper в Unix/Linux
Обновить Python до последней версии в Unix/Linux
А на этом, у меня все. Тема «Установка pip/setuptools/wheel в Unix/Linux» завершена.
Источник
Getting Started With setuptools and setup.py В
setuptools is a rich and complex program. This tutorial will focus on the bare minimum basics you need to get setuptools running so you can:
- Register your package on pypi.
- Build egg, source, and window installer ‘distributables’.
- Upload these ‘distributables’ to pypi.
Installing setuptools and easy install
To install setuptools visit http://pypi.python.org/pypi/setuptools and follow the instructions for your operating system. Also, check out http://peak.telecommunity.com/DevCenter/EasyInstall for more instructions on how to install setup tools.
Currently (as of November, 2009), setuptools is pretty easy to install for Python version 2.3 through 2.6.
Bootstrapping setuptools
If you are having trouble setting up setuptools for your platform, you may want to check out the ‘bootstrap’ setuptools script at http://peak.telecommunity.com/dist/ez_setup.py.
You can run this like this:
and it will install setuptools for whichever version of Python python refers to. For example on windows:
will install a setuptools for your python24 distribution.
Setting up setup.py В
All the features of what can go into a setup.py file is beyond the scope of this simple tutorial. I’ll just focus on a very basic and common format needed to get this project onto pypi.
The contents of setup.py is just pure python:
Directory Structure
The directory structure, so far, should look like this:
README
A nice idea stolen from http://pypi.python.org/pypi/Sphinx-PyPI-upload is to include a README text file which your code. This would be visible when someone, say, cloned your repo.
Using the simple read function, it is easy to include this in the long_description keyword arg for the setuptools.setup() function.
Classifiers
A really nice website is http://pypi.python.org/pypi?%3Aaction=list_classifiers which lists all the classifiers you can use in the setup call.
A sample of this website is:
Using setup.py В
The basic usage of setup.py is:
To see all commands type:
And you will get:
Intermezzo: .pypirc file and gpg
In order to interact with pypi, you first need to setup an account. Go to http://pypi.python.org/pypi and click on Register .
Now, once registered, when you run setup.py commands that interact with pypi you’ll have to enter your username and password each time.
To get around this, place a .pypirc file in your $HOME directory on linux. On windows, an you’ll need to set a HOME environ var to point to the directory where this file lives.
The structure of a .pypirc file is pretty simple:
There’s probably away around having your plain text password in this file, but I don’t know of the solution and haven’t looked into it.
Also, you often want to sign the files using gpg encryption. Visit http://www.gnupg.org/ on linux or http://www.gpg4win.org/ on windows to install this software.
Registering Your Project
With your setup.py and .pypirc in place, registering your project is pretty simple. Just type:
I would say more, but it is just that simple.
Uploading Your Project
There are three major setup.py commands we will use:
- bdist_egg : This creates an egg file. This is what is necessary so someone can use easy_install your_project .
- bdist_wininst : This will create an .exe that will install your project on a windows machine.
- sdist : This create a raw source distribution which someone can download and run python setup.py directly.
A key point here is you need to run these commands with the version of python you want to support. We’ll cover this in the Putting It All Together With The Full Windows Script below.
You can run these commands by themselves and simply create the files but not upload them. However, for this project, we always marry these commands with the upload directive which will both build and upload the necessary files.
Putting It All Together With The Full Windows Script
This project was build on a windows machine. To best understand how it all works and the other options used when using setup.py let’s just look at the .bat file I use to build the package and upload it to pypi:
For linux, it would be pretty much the same commands, just changing around the directories to point to the correct python versions.
I use the set HOME=C:\Users\Owner\ instead of setting an environ variable on windows
Источник
Packaging and distributing projects
This section covers the basics of how to configure, package and distribute your own Python projects. It assumes that you are already familiar with the contents of the Installing Packages page.
The section does not aim to cover best practices for Python project development as a whole. For example, it does not provide guidance or tool recommendations for version control, documentation, or testing.
For more reference material, see Building and Distributing Packages in the setuptools docs, but note that some advisory content there may be outdated. In the event of conflicts, prefer the advice in the Python Packaging User Guide.
Requirements for packaging and distributing
First, make sure you have already fulfilled the requirements for installing packages .
You’ll need this to upload your project distributions to PyPI (see below ).
Configuring your project
Initial files
setup.py
The most important file is setup.py which exists at the root of your project directory. For an example, see the setup.py in the PyPA sample project.
setup.py serves two primary functions:
It’s the file where various aspects of your project are configured. The primary feature of setup.py is that it contains a global setup() function. The keyword arguments to this function are how specific details of your project are defined. The most relevant arguments are explained in the section below .
It’s the command line interface for running various commands that relate to packaging tasks. To get a listing of available commands, run python setup.py —help-commands .
setup.cfg
setup.cfg is an ini file that contains option defaults for setup.py commands. For an example, see the setup.cfg in the PyPA sample project.
README.rst / README.md
All projects should contain a readme file that covers the goal of the project. The most common format is reStructuredText with an “rst” extension, although this is not a requirement; multiple variants of Markdown are supported as well (look at setup() ’s long_description_content_type argument).
Projects using setuptools 0.6.27+ have standard readme files ( README.rst , README.txt , or README ) included in source distributions by default. The built-in distutils library adopts this behavior beginning in Python 3.7. Additionally, setuptools 36.4.0+ will include a README.md if found. If you are using setuptools, you don’t need to list your readme file in MANIFEST.in . Otherwise, include it to be explicit.
MANIFEST.in
A MANIFEST.in is needed when you need to package additional files that are not automatically included in a source distribution. For details on writing a MANIFEST.in file, including a list of what’s included by default, see “ Including files in source distributions with MANIFEST.in ”.
For an example, see the MANIFEST.in from the PyPA sample project.
MANIFEST.in does not affect binary distributions such as wheels.
LICENSE.txt
Every package should include a license file detailing the terms of distribution. In many jurisdictions, packages without an explicit license can not be legally used or distributed by anyone other than the copyright holder. If you’re unsure which license to choose, you can use resources such as GitHub’s Choose a License or consult a lawyer.
For an example, see the LICENSE.txt from the PyPA sample project.
Although it’s not required, the most common practice is to include your Python modules and packages under a single top-level package that has the same name as your project, or something very close.
For an example, see the sample package that’s included in the PyPA sample project.
setup() args
As mentioned above, the primary feature of setup.py is that it contains a global setup() function. The keyword arguments to this function are how specific details of your project are defined.
The most relevant arguments are explained below. Most of the snippets given are taken from the setup.py contained in the PyPA sample project.
This is the name of your project, determining how your project is listed on PyPI . Per PEP 508, valid project names must:
Consist only of ASCII letters, digits, underscores ( _ ), hyphens ( — ), and/or periods ( . ), and
Start & end with an ASCII letter or digit.
Comparison of project names is case insensitive and treats arbitrarily-long runs of underscores, hyphens, and/or periods as equal. For example, if you register a project named cool-stuff , users will be able to download it or declare a dependency on it using any of the following spellings:
version 
This is the current version of your project, allowing your users to determine whether or not they have the latest version, and to indicate which specific versions they’ve tested their own software against.
Versions are displayed on PyPI for each release if you publish your project.
See Choosing a versioning scheme for more information on ways to use versions to convey compatibility information to your users.
If the project code itself needs run-time access to the version, the simplest way is to keep the version in both setup.py and your code. If you’d rather not duplicate the value, there are a few ways to manage this. See the “ Single-sourcing the package version ” Advanced Topics section.
description 
Give a short and long description for your project.
These values will be displayed on PyPI if you publish your project. On pypi.org , the user interface displays description in the grey banner and long_description in the section named “Project Description”.
description is also displayed in lists of projects. For example, it’s visible in the search results pages such as https://pypi.org/search/?q=jupyter, the front-page lists of trending projects and new releases, and the list of projects you maintain within your account profile (such as https://pypi.org/user/jaraco/).
A content type can be specified with the long_description_content_type argument, which can be one of text/plain , text/x-rst , or text/markdown , corresponding to no formatting, reStructuredText (reST), and the Github-flavored Markdown dialect of Markdown respectively.
Give a homepage URL for your project.
author 
Provide details about the author.
license 
The license argument doesn’t have to indicate the license under which your package is being released, although you may optionally do so if you want. If you’re using a standard, well-known license, then your main indication can and should be via the classifiers argument. Classifiers exist for all major open-source licenses.
The license argument is more typically used to indicate differences from well-known licenses, or to include your own, unique license. As a general rule, it’s a good idea to use a standard, well-known license, both to avoid confusion and because some organizations avoid software whose license is unapproved.
classifiers 
Provide a list of classifiers that categorize your project. For a full listing, see https://pypi.org/classifiers/.
Although the list of classifiers is often used to declare what Python versions a project supports, this information is only used for searching & browsing projects on PyPI, not for installing projects. To actually restrict what Python versions a project can be installed on, use the python_requires argument.
keywords 
List keywords that describe your project.
project_urls 
List additional relevant URLs about your project. This is the place to link to bug trackers, source repositories, or where to support package development. The string of the key is the exact text that will be displayed on PyPI.
packages 
Set packages to a list of all packages in your project, including their subpackages, sub-subpackages, etc. Although the packages can be listed manually, setuptools.find_packages() finds them automatically. Use the include keyword argument to find only the given packages. Use the exclude keyword argument to omit packages that are not intended to be released and installed.
py_modules 
If your project contains any single-file Python modules that aren’t part of a package, set py_modules to a list of the names of the modules (minus the .py extension) in order to make setuptools aware of them.
install_requires 
“install_requires” should be used to specify what dependencies a project minimally needs to run. When the project is installed by pip , this is the specification that is used to install its dependencies.
python_requires 
If your project only runs on certain Python versions, setting the python_requires argument to the appropriate PEP 440 version specifier string will prevent pip from installing the project on other Python versions. For example, if your package is for Python 3+ only, write:
If your package is for Python 2.6, 2.7, and all versions of Python 3 starting with 3.3, write:
Support for this feature is relatively recent. Your project’s source distributions and wheels (see Packaging your project ) must be built using at least version 24.2.0 of setuptools in order for the python_requires argument to be recognized and the appropriate metadata generated.
In addition, only versions 9.0.0 and higher of pip recognize the python_requires metadata. Users with earlier versions of pip will be able to download & install projects on any Python version regardless of the projects’ python_requires values.
package_data 
Often, additional files need to be installed into a package . These files are often data that’s closely related to the package’s implementation, or text files containing documentation that might be of interest to programmers using the package. These files are called “package data”.
The value must be a mapping from package name to a list of relative path names that should be copied into the package. The paths are interpreted as relative to the directory containing the package.
data_files 
Although configuring package_data is sufficient for most needs, in some cases you may need to place data files outside of your packages . The data_files directive allows you to do that. It is mostly useful if you need to install files which are used by other programs, which may be unaware of Python packages.
Each (directory, files) pair in the sequence specifies the installation directory and the files to install there. The directory must be a relative path (although this may change in the future, see wheel Issue #92), and it is interpreted relative to the installation prefix (Python’s sys.prefix for a default installation; site.USER_BASE for a user installation). Each file name in files is interpreted relative to the setup.py script at the top of the project source distribution.
For more information see the distutils section on Installing Additional Files .
When installing packages as egg, data_files is not supported. So, if your project uses setuptools , you must use pip to install it. Alternatively, if you must use python setup.py , then you need to pass the —old-and-unmanageable option.
scripts 
Although setup() supports a scripts keyword for pointing to pre-made scripts to install, the recommended approach to achieve cross-platform compatibility is to use console_scripts entry points (see below).
entry_points 
Use this keyword to specify any plugins that your project provides for any named entry points that may be defined by your project or others that you depend on.
For more information, see the section on Advertising Behavior from the setuptools docs.
The most commonly used entry point is “console_scripts” (see below).
console_scripts 
Use console_script entry points to register your script interfaces. You can then let the toolchain handle the work of turning these interfaces into actual scripts 2. The scripts will be generated during the install of your distribution .
Choosing a versioning scheme
Standards compliance for interoperability
Different Python projects may use different versioning schemes based on the needs of that particular project, but all of them are required to comply with the flexible public version scheme specified in PEP 440 in order to be supported in tools and libraries like pip and setuptools .
Here are some examples of compliant version numbers:
To further accommodate historical variations in approaches to version numbering, PEP 440 also defines a comprehensive technique for version normalisation that maps variant spellings of different version numbers to a standardised canonical form.
Scheme choices
Semantic versioning (preferred)
For new projects, the recommended versioning scheme is based on Semantic Versioning, but adopts a different approach to handling pre-releases and build metadata.
The essence of semantic versioning is a 3-part MAJOR.MINOR.MAINTENANCE numbering scheme, where the project author increments:
MAJOR version when they make incompatible API changes,
MINOR version when they add functionality in a backwards-compatible manner, and
MAINTENANCE version when they make backwards-compatible bug fixes.
Adopting this approach as a project author allows users to make use of “compatible release” specifiers, where name
= X.Y requires at least release X.Y, but also allows any later release with a matching MAJOR version.
Python projects adopting semantic versioning should abide by clauses 1-8 of the Semantic Versioning 2.0.0 specification.
Date based versioning
Semantic versioning is not a suitable choice for all projects, such as those with a regular time based release cadence and a deprecation process that provides warnings for a number of releases prior to removal of a feature.
A key advantage of date based versioning is that it is straightforward to tell how old the base feature set of a particular release is given just the version number.
Version numbers for date based projects typically take the form of YEAR.MONTH (for example, 12.04 , 15.10 ).
Serial versioning
This is the simplest possible versioning scheme, and consists of a single number which is incremented every release.
While serial versioning is very easy to manage as a developer, it is the hardest to track as an end user, as serial version numbers convey little or no information regarding API backwards compatibility.
Hybrid schemes
Combinations of the above schemes are possible. For example, a project may combine date based versioning with serial versioning to create a YEAR.SERIAL numbering scheme that readily conveys the approximate age of a release, but doesn’t otherwise commit to a particular release cadence within the year.
Pre-release versioning
Regardless of the base versioning scheme, pre-releases for a given final release may be published as:
zero or more dev releases (denoted with a “.devN” suffix)
zero or more alpha releases (denoted with a “.aN” suffix)
zero or more beta releases (denoted with a “.bN” suffix)
zero or more release candidates (denoted with a “.rcN” suffix)
pip and other modern Python package installers ignore pre-releases by default when deciding which versions of dependencies to install.
Local version identifiers
Public version identifiers are designed to support distribution via PyPI . Python’s software distribution tools also support the notion of a local version identifier, which can be used to identify local development builds not intended for publication, or modified variants of a release maintained by a redistributor.
A local version identifier takes the form
version identifier>+ version label> . For example:
Working in “development mode”
You can install a project in “editable” or “develop” mode while you’re working on it. When installed as editable, a project can be edited in-place without reinstallation: changes to Python source files in projects installed as editable will be reflected the next time an interpreter process is started.
To install a Python package in “editable”/”development” mode Change directory to the root of the project directory and run:
The pip command-line flag -e is short for —editable , and . refers to the current working directory, so together, it means to install the current directory (i.e. your project) in editable mode. This will also install any dependencies declared with install_requires and any scripts declared with console_scripts . Dependencies will be installed in the usual, non-editable mode.
You may want to install some of your dependencies in editable mode as well. For example, supposing your project requires “foo” and “bar”, but you want “bar” installed from VCS in editable mode, then you could construct a requirements file like so:
The first line says to install your project and any dependencies. The second line overrides the “bar” dependency, such that it’s fulfilled from VCS, not PyPI.
If, however, you want “bar” installed from a local directory in editable mode, the requirements file should look like this, with the local paths at the top of the file:
Otherwise, the dependency will be fulfilled from PyPI, due to the installation order of the requirements file. For more on requirements files, see the Requirements File section in the pip docs. For more on VCS installs, see the VCS Support section of the pip docs.
Lastly, if you don’t want to install any dependencies at all, you can run:
For more information, see the Development Mode section of the setuptools docs .
Packaging your project
To have your project installable from a Package Index like PyPI , you’ll need to create a Distribution (aka “ Package ”) for your project.
Before you can build wheels and sdists for your project, you’ll need to install the build package:
Источник


