- 2 Installing the Linux Operating System
- 2.1 Introduction
- 2.2 Download ISO Image and Burn DVD
- 2.3 Run Ins taller
- 2.4 Set up Disk Part itioning
- 2.5 Netw ork Configuration
- 2.6 Package I nstallation
- 2.7 Post-Installation Wizard
- 2.8 Create Additiona l Users an d Reboot
- 2.9 Verify NTP Dae mon Operation
- Install the linux operating system
- OS Installation Overview
- OS Installation Methods
- Installing Linux Using Sun Installation Assistant
- Installing Linux Using Local CD/DVD Drive
- Installing Linux Using PXE
- Installing Linux Using Remote KVMS Over IP With Virtual CD/DVD
- Before You Begin
- I nstalling the Drivers Using KVMS Over IP
- I nstalling Drivers Directly Onto the Server
- To Install the Sun StorageTek RAID Management Utility Software
- To Install the LSI RAID Management Utilities
- Running the up2date Utility for the RHEL OS
- To Run the upd2date Utility for the RHEL OS
- Running the SuSEWatcher Utility for the SLES OS
- To Run the SuSEWatcher Utility for the SLES OS
2 Installing the Linux Operating System
This chapter describes the procedure for installing Oracle Enterprise Linux 5.3. However, the procedure for installing RedHat Enterprise Linux 5.3 is virtually identical.
2.1 Introduction
The procedure for installing Oracle Enterprise Linux 5. 3 is fully described in the product documentation. This section presents a summary of that procedure, and assumes a sound knowledge of Linux administration.
For information on vendor-specific variations, consult the appropriate documentation. The installation procedure described is based on the use of a DVD media package.
Obtaining the Linux Operating System
The Oracle Enterprise Linux 5. 3 software is available from the Oracle E-Delivery Web site ( http://edelivery.oracle.com/linux ).
2.2 Download ISO Image and Burn DVD
Download the appropriate ISO image. This guide assumes you are using the DVD version of Oracle Enterprise Linux 5.3.
Unzip the files.
Burn the ISO file to DVD. Note that this requires the use of a DVD-burning utility (such as UltraISO or Magic ISO Maker).
According to your corporate policy, the Linux installation procedure may use a different procedure to that described in the following sections.
2.3 Run Ins taller
After installing Linux on the first node, repeat the Linux installation procedure for each system.
Ensure that server system is able to boot from DVD. Insert the Oracle Enterprise Linux DVD, and power on.
When the Oracle Enterprise Linux boot screen appears, press Enter to start the installation process.
When asked to test the DVD media, select Skip . After a short interval, the installer goes into GUI mode. (The media test is not necessary because the DVD burning software would have informed you of any errors on the media).
At the Welcome to Oracle Enterprise Linux screen, click Next .
Select the appropriate options from the Language and Keyboard settings screens.
If the installer detects a previous version of Enterprise Linux, you are prompted to «Install Enterprise Linux» or «Upgrade an existing installation». Select «Install Enterprise Linux», and click Next .
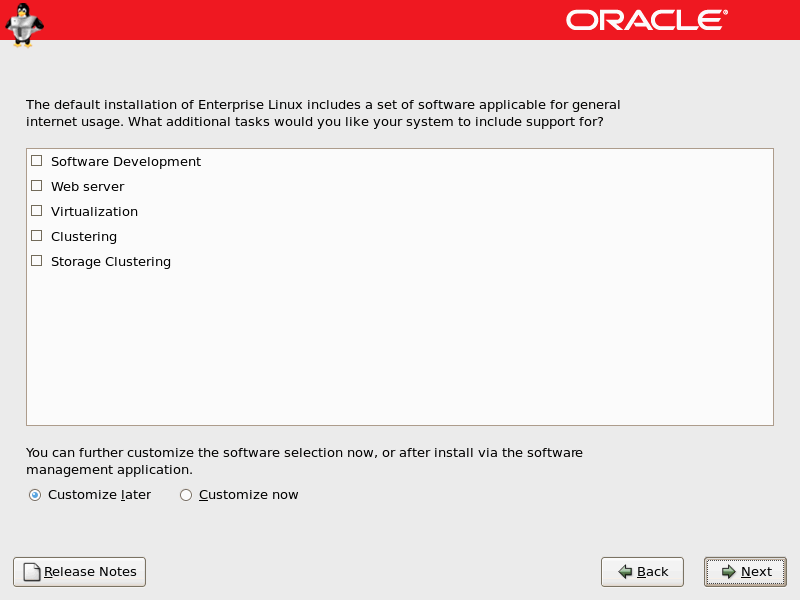
Oracle recommends that you install the Linux operating system with the default software packages (RPMs), and that you do not customize the RPMs during installation. This installation includes most required packages, and helps you limit manual checks of package dependencies.
2.4 Set up Disk Part itioning
When prompted, select the default Remove Linux partitions on selected drives and create default layout option, and check the option Review and modify partitioning layout . When prompted to confirm your selection, select Yes . Click Next to continue.
A check box allows you to encrypt the entire system. If selected, for security reasons, a password is required during booting the system.
When prompted to confirm the removal of all partitions, click Yes .
Review and modify (if necessary) the automatically selected disk partitions.
For most automatic layouts, the installer assigns 100 MB for /boot , 2 GB for swap, and the remainder is assigned to the root ( / ) partition. Ensure the specified SWAP space is sufficient. See Table 2-1 and Table 2-2 for required disk space and swap space requirements.
The installer creates a disk configuration using the Logical Volume Manager (LVM). For example, it will partition the first hard drive ( /dev/sda in the described configuration) into two partitions: one for the /boot partition ( /dev/sda1 ), and the remainder of the disk dedicated to a LVM named VolGroup00 ( /dev/sda2 ). The LVM Volume Group ( VolGroup00 ) is then partitioned into two LVM partitions: one for the root file system ( / ), and another for swap. If you have selected a non-standard layout, ensure that the system meets the required disk space specifications shown in Table 2-1. Ensure enough swap space is allocated for Oracle Enterprise Linux. Its required swap space is shown in Table 2-2.
Table 2-1 Required Disk Space Specifications
| Partition | Minimum Required Disk Space (GB) | |||||||||||||||
|---|---|---|---|---|---|---|---|---|---|---|---|---|---|---|---|---|
| Available RAM | Swap Space Required | |||||||||||||
|---|---|---|---|---|---|---|---|---|---|---|---|---|---|---|


| Note — At the time this document was written, the Sun Fire X4450 server supports Oracle Enterprise Linux (OEL) installation. The Sun Fire X4150 and Sun Fire X4250 servers do not currently support OEL. |
See TABLE 5-1 for the task map for OS installation.
| Note — At the time this document was written, Oracle Enterprise Linux cannot be installed using Sun Installation Assistant. |
Installing Linux Using Local CD/DVD Drive
You can install a Linux OS using the local server DVD drive or a USB connected CD or DVD drive connected to the server.
 To Install Linux Using Local CD/DVD Drive
 See the instructions for basic installation in the document that corresponds to the OS you are installing:
Red Hat Enterprise Linux Installation Guide for the x86, Itanium, and AMD64 Architectures at http://www.redhat.com/docs/manuals/enterprise/ .
SUSE Linux Enterprise Server Administration and Installation at http://www.novell.com/documentation/suse.html .
Installing Linux Using PXE
This section describes how to boot the Linux from a PXE network environment.
Before beginning the installation, take note of the prerequisites for the OS that you plan to install.
When the prerequisites are in place, continue with the installation instructions in To Install Linux Using PXE.
Red Hat Linux and Oracle Enterprise Linux Prerequisites
KickStart is Red Hat’s automated installation tool. It enables a system administrator to create a single image containing the settings for some or all installation and configuration parameters that are normally provided during a typical Red Hat Enterprise Linux or Oracle Enterprise Linux installation. Typically, a KickStart image is placed on a single network server and read by multiple systems for installation.
The following requirements must be met prior to performing the RHEL or OEL PXE installation:
You must have the following media available:
One of the following for OEL:
OEL4 or OEL5 CD or DVD set (internal or external CD/DVD)
OEL4 or OEL5 ISO DVD image or KickStart image (network repository)
One of the following for RHEL:
RHEL4 or RHEL5 CD or DVD set (internal or external CD/DVD)
RHEL4 or RHEL5 ISO DVD image or KickStart image (network repository)
If you are using a KickStart image to perform the installation, you must:
Create a KickStart file.
Create the boot media with the KickStart file or make the KickStart file available on the network.
Follow the KickStart installation instructions in the Red Hat Enterprise Linux 4: Administration Guide ( http://www.redhat.com/docs ).
To use PXE to boot the installation media over the network, you must:
Configure the network ( NFS, FTP, HTTP) server to export the installation tree.
Configure the files on the TFTP server necessary for PXE booting.
Configure the Sun Fire X4150, X4250, and X4450 servers MAC network port address to boot from the PXE configuration.
Configure the Dynamic Host Configuration Protocol (DHCP).
SUSE Linux Enterprise Server Prerequisites
AutoYaST enables you to install the SLES operating system on multiple systems. For information about how to prepare an automated installation using AutoYaST, refer to the Novell SUSE documentation collection at:
The following requirements must be met prior to performing the SLES installation from a PXE network book environment.
You must have the following media available:
SLES9-SP4 or SLES10-SP3 CD or DVD set (internal or external CD/DVD)
SLES9-SP4 or SLES10-SP3 ISO DVD image or AutoYaST image (network repository)
If you are using AutoYaST to perform the installation, you must:
Create the AutoYast profile.
Follow the AutoYaST installation instructions in the SUSE Linux Enterprise 9 or SUSE Linux Enterprise 10 documentation.
To use PXE to boot the installation media over the network, you must:
Configure the network (NFS, FTP, HTTP) server to export the installation tree.
Configure the files on the TFTP server necessary for PXE booting.
Configure the Sun Fire X4150, X4250, and X4450 servers MAC network port address to boot from the PXE configuration.
Configure Dynamic Host Configuration Protocol (DHCP).
To Install Linux Using PXE
1. Ensure that the PXE network environment is properly set up and the SLES installation media is available for PXE boot.
2. Reset the power on the server.
From the ILOM web interface , select Remote Control —> Remote Power Control, then select the Power Cycle option from the Host action drop-down menu.
From the local server, press the Power button (approximately 1 second) on the front panel of the server to power off the server, then press the Power button again to power on the server.
From the ILOM CLI on the server SP, type: reset /SYS
The BIOS screen appears.
| Note — The next events occur very quickly; therefore, focused attention is needed for these steps. Watch carefully for the messages, as they appear on the screen for a brief time. |
3. Press F8 to specify a temporary boot device.
The Please Select Boot Device menu appears listing the available boot device.
4. In the Boot Device menu, select the PXE installation boot device (physical port) that is configured to communicate with your network installation server.
The network bootloader loads and a boot prompt appears. Wait for the five second time-out and the installation kernel will begin to load.
5. Proceed with the installation as described in the OS documentation.
Red Hat Enterprise Linux Installation Guide for the x86, Itanium, and AMD64 Architectures at http://www.redhat.com/docs/manuals/enterprise/
SUSE Linux Enterprise Server Administration and Installation at http://www.novell.com/documentation/suse.html
| Note — When configuring a PXE installation using RHEL or OEL use the GigabitEthernet ports, Net 2 and Net 3. RHEL 4 drivers do not support ports Net 0 and Net 1. |
Installing Linux Using Remote KVMS Over IP With Virtual CD/DVD
This method uses the RKVMS capability of the ILOM or ELOM to install the Linux OS on your server from a remote networked system. The CD/DVD drive of the remote system (virtual CD-ROM) is used to access the OS media, and all output of the server is displayed on the remote system (remote console).
Additional information about the RKVMS can be found in the ELOM or ILOM documentation.
Before You Begin
Requirements for Remote KMVS (RKVMS) over IP installation include:
Remote system connected to the network.
One of the following browsers on the remote system: Internet Explorer, Mozilla, or Firefox.
CD/DVD drive connected to the remote system.
Media for installing the OS of your choice.
SP of your server set up as instructed in the server installation guide.
User must be logged into the remote system as root .
To Install Linux Using Remote KVMS Over IP With Virtual CD/DVD
1. On a remote system, open a browser, and enter the IP address of the service processor for the server on which you want to install the OS.
The ILOM or ELOM login screen appears.
2. At the login screen, enter the user name and password for an account with administrator privileges, and click Login.
The web GUI main menu appears.
3. Disable the session timeout:
a. From the main menu, click the System Information tab, and then click the Session Time-Out submenu tab.
The Session Time-Out screen appears.
b. Click the Disable Timeout radio button, and then click Submit.
4. From the main menu, click the Remote Control tab and select Redirection.
The Screen appears with a Launch Redirection button.
5. Click the Launch Redirection button to open a remote console window.
A screen appears with a Launch button. It also identifies your current host name, IP address, and user name.
7. Mount the OS CD/DVD or ISO file to be installed on the server onto the virtual CDROM.
a. In the Devices menu, select the following:
CD ROM if you are using a physical CD.
CD ROM Image if you are using an ISO file.
b. Depending on your selection, a dialog directs you to select either a CD/DVD drive, or a file.
a. In the remote console screen, select Storage and then select Mount Devices.
The Device Configuration screen appears.
b. In the Storage 1 Source drop-down list, select the CD/DVD drive to be used for installing the OS.
9. Reboot the system.
The system will boot from the virtual CD.
10. Proceed with the installation as described in the OS documentation.
Red Hat Enterprise Linux Installation Guide for the x86, Itanium, and AMD64 Architectures at http://www.redhat.com/docs/manuals/enterprise/
SUSE Linux Enterprise Server Administration and Installation at http://www.novell.com/documentation/suse.html
A driver installation script is available on the Tools and Drivers CD. The CD is included with your server. You can also download the latest Tools and Drivers CD ISO image from one of the following locations:
| Note — The driver installation script also mounts a diagnostic partition. If a diagnostic partition is present and running, the script creates and mounts it on diagpart . |
You can use the methods described in the following sections to install system-specific drivers onto your server:
For a system without a CD/DVD or monitor attached
For a system that has a CD/DVD drive and monitor attached
I nstalling the Drivers Using KVMS Over IP
Before performing a remote installation, use the web GUI to disable the session timeout function. This allows the installation process to proceed without interruption.
To Install the Drivers Using KVMS Over IP
1. Mount the Tools and Drivers CD according to the instructions in Installing Linux Using Remote KVMS Over IP With Virtual CD/DVD.
2. Change to the / mountpoint /drivers/linux/ operating_system directory.
/ mountpoint The directory where the CD is mounted.
operating_system The type of Linux installed on the server ( red_hat or suse ).
| Note — If you have OEL installed on the server, use the drivers in the red_hat directory. |
3. Run the following command to install the drivers:
| Note — If the install.sh script detects the Sun StorageTek controller card, it automatically updates to the latest driver. |
4. Eject the CD after the driver installation is complete.
5. Reboot the server.
I nstalling Drivers Directly Onto the Server
If your server has a CD/DVD drive, you can install the drivers directly onto the server, using the Tools and Drivers CD.
To Install Drivers Directly Onto the Server
1. Log in to the server as root (superuser).
2. Insert the Tools and Drivers CD into the CD/DVD drive and enter:
cd / mountpoint /drivers/linux/ operating_system
/mountpoint is the directory to which the CD is mounted.
operating_system is the type of Linux installed on the server ( red_hat or suse ).
If the directory does not exist, the CD did not automount. In this case, you need to mount the CD and change to the correct directory as shown in Step 3 and Step 4.
If you were able to access the operating_system directory, go to Step 6.
3. If the CD does not automount, open a terminal window and mount the CD by typing the following command:
# mount /dev/cdrom / mountpoint
/ mountpoint The appropriate mount point for the OS and optical drive type.
# mount /dev/cdrom /mnt/dvdrom
4. Change to the / mountpoint /drivers/linux/ operating_system directory.
/ mountpoint The directory where the CD is mounted.
operating_system The type of Linux installed on the server ( red_hat or suse ).
| Note — If you have OEL installed on the server, use the drivers in the red_hat directory. |
5. Run the following command to install the drivers:
| Note — If the install.sh script detects the Sun StorageTek controller card, it automatically updates to the latest driver. |
6. Eject the CD after the driver installation is complete.
7. Reboot the server.
Based on your system controller card, use the one of the methods described in the following sections to install the RAID Management utility software.
For a system with a StorageTek RAID controller card.
For a system with a LSI RAID controller card.
 To Install the Sun StorageTek RAID Management Utility Software
| Note — Perform this procedure only if your server is equipped with a StorageTek RAID controller card. |
 | Caution — If you are installing RHEL5 32-bit Linux, you must install the following package before running the Sun StorageTek Raid Management Utility: linux/ xorg-x11-deprecated-libs-6.8.1-12.FC3.1.i386.rpm . |
1. Insert the Tools and Drivers CD into the CD/DVD drive.
2. Navigate to the /drivers/linux/RAID/SunStorageTEK/ASM/ [32bit|64bit] directory using the following command:
# cd /drivers/linux/RAID/SunStorageTEK/ASM/ [32bit|64bit]
3. Enter the following command:
# rpm -ivh [32bit|64bit] .rpm
To Install the LSI RAID Management Utilities
1. Insert the Tools and Drivers CD in the server’s CD/DVD drive.
2. Navigate to the /RAIDmgmt/lsi/linux/[ 32bit|64bit ] directory and list the directory contents using the following commands:
3. Run the .bin file, and follow the instructions to install the RAID management software.
Choose the section that corresponds to the Linux OS that you have installed:
Running the up2date Utility for the RHEL OS
Run the up2date utility after installing the OS and drivers from the Tools and Drivers CD.
To Run the upd2date Utility for the RHEL OS
1. Set up the up2date utility on the server.
See the documentation included with your RHEL media kit for details.
2. Run the up2date program.
Select the kernel packages in the available package updates section.
Running the SuSEWatcher Utility for the SLES OS
Run the SuSEWatcher utility after installing the OS and drivers from the Tools and Drivers CD.
To Run the SuSEWatcher Utility for the SLES OS
1. Set up the SuSEWatcher utility on the server.
See the documentation included with your SLES 9 media kit for details.
2. Run the SuSEWatcher program.
Select the kernel packages in the available package updates section.
| Sun Fire X4150, X4250, and X4450 Servers Operating System Installation Guide | 820-1853-16 |     |
Copyright © 2009 Sun Microsystems, Inc. All rights reserved.
Источник


