- Начало работы с Tmux
- Что такое tmux?
- Установка Tmux
- Установка Tmux в Ubuntu и Debian
- Установка Tmux на CentOS и Fedora
- Установка Tmux на macOS
- Начало вашей первой сессии Tmux
- Создание именованных сеансов Tmux
- Отключение от сеанса Tmux
- Повторное подключение к сеансу Tmux
- Работа с окнами и панелями Tmux
- Настройка Tmux
- Базовое использование Tmux
- Выводы
- Шпаргалка по работе с Tmux (терминальный мультиплексор)
- 1. Установка
- 2. Конфигурационные файлы
- 3. Работа с Tmux
- How to Install and Use Tmux
- Installing Tmux
- How to use tmux
- Splitting tmux vertically
- Splitting tmux horizontally
- Moving between panes
- Resizing panes
- Zoom panes
- Make a pane into window
- Closing panes
- Detach and Re-attach Tmux
- Create more window
- Rename a window name
- Moving between Window
- Closing Window
- Configuring Tmux
- Change the Prefix Key
- Change the splitting panes
- Change the status bar looks
- Change the numbering system of panes and windows
- Conclusion
Начало работы с Tmux
В этом руководстве описывается установка и базовое использование Tmux, чтобы вы могли начать работу.
Что такое tmux?
Tmux — это терминальный мультиплексор, альтернативный GNU Screen . Другими словами, это означает, что вы можете запустить сеанс Tmux, а затем открыть несколько окон внутри этого сеанса. Каждое окно занимает весь экран и может быть разделено на прямоугольные панели.
С Tmux вы можете легко переключаться между несколькими программами в одном терминале, отсоединять их и повторно присоединять к другому терминалу.
Сеансы Tmux являются постоянными, что означает, что программы, запущенные в Tmux, будут продолжать работать, даже если вы отключитесь.
Все команды в Tmux начинаются с префикса, который по умолчанию — ctrl+b .
Установка Tmux
Вы можете легко установить Tmux с помощью диспетчера пакетов вашего дистрибутива.
Установка Tmux в Ubuntu и Debian
Установка Tmux на CentOS и Fedora
Установка Tmux на macOS
Начало вашей первой сессии Tmux
Чтобы начать свой первый сеанс Tmux, просто введите tmux в консоли:
Это откроет новый сеанс, создаст новое окно и запустит оболочку в этом окне.
Когда вы войдете в Tmux, вы заметите строку состояния внизу экрана, в которой отображается информация о текущем сеансе.
Теперь вы можете запустить свою первую команду Tmux. Например, чтобы получить список всех команд, введите:
Создание именованных сеансов Tmux
По умолчанию сеансы Tmux именуются численно. Именованные сеансы полезны, когда вы запускаете несколько сеансов Tmux. Чтобы создать новый именованный сеанс, запустите команду tmux со следующими аргументами:
Всегда рекомендуется выбирать описательное имя сеанса.
Отключение от сеанса Tmux
Вы можете отключиться от сеанса Tmux и вернуться в обычную оболочку, набрав:
Программа, запущенная в сеансе Tmux, продолжит работу после того, как вы отключитесь от сеанса.
Повторное подключение к сеансу Tmux
Чтобы сначала подключиться к сеансу, вам нужно найти имя сеанса. Чтобы получить список текущих сеансов, введите:
Имя сеанса — это первый столбец вывода.
Как видно из выходных данных, запущено два сеанса Tmux. Первый называется 0 а второй — my_named_session .
Например, чтобы подключиться к сеансу 0 , вы должны ввести:
Работа с окнами и панелями Tmux
Когда вы запускаете новый сеанс Tmux, по умолчанию он создает одно окно с оболочкой в нем.
Чтобы создать новое окно с типом оболочки Ctrl+b c , ему будет присвоен первый доступный номер из диапазона 0. 9 .
Список всех окон отображается в строке состояния внизу экрана.
Ниже приведены некоторые наиболее распространенные команды для управления окнами и панелями Tmux:
- Ctrl+b c Создать новое окно (с оболочкой)
- Ctrl+b w Выбрать окно из списка
- Ctrl+b 0 Перейти в окно 0 (по номеру)
- Ctrl+b , переименовать текущее окно
- Ctrl+b % Разделить текущую панель по горизонтали на две панели
- Ctrl+b » Разделить текущую панель по вертикали на две панели
- Ctrl+b o Перейти на следующую панель
- Ctrl+b ; Переключение между текущей и предыдущей панелями
- Ctrl+b x Закрыть текущую панель
Настройка Tmux
Когда Tmux запущен, он считывает свои параметры конфигурации из
/.tmux.conf если файл присутствует.
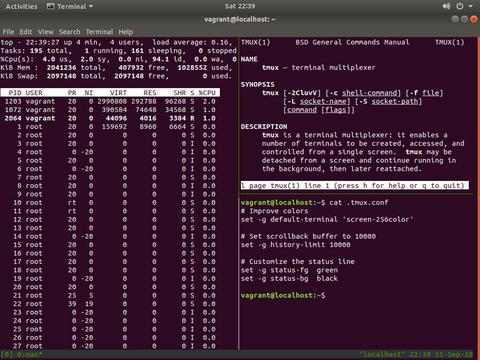
Вот пример конфигурации
/.tmux.conf с настроенной строкой состояния и несколькими дополнительными параметрами:
Базовое использование Tmux
Ниже приведены основные шаги для начала работы с Tmux:
- В командной строке введите tmux new -s my_session ,
- Запускаем желаемую программу.
- Используйте последовательность Ctrl-b + d чтобы отключиться от сеанса.
- tmux attach-session -t my_session набрав tmux attach-session -t my_session .
Выводы
В этом руководстве вы узнали, как использовать Tmux. Теперь вы можете начать создавать несколько окон Tmux в одном сеансе, разбивать окна, создавая новые панели, перемещаться между окнами, отсоединять и возобновлять сеансы, а также персонализировать свой экземпляр .tmux.conf файла .tmux.conf .
Чтобы узнать больше о Tmux, введите man tmux в своем терминале или посетите страницу руководства пользователя Tmux .
Если у вас есть какие-либо вопросы или отзывы, не стесняйтесь оставлять комментарии.
Источник
Шпаргалка по работе с Tmux (терминальный мультиплексор)

На Хабрахабре Tmux (ти-макс) упоминался неоднократно, тем не менее, решил написать еще одну шпаргалку, т.к. в других некоторые важные моменты не показаны.
Tmux (терминальный мультиплексор) позволяет работать с несколькими сессиями в 1 окне. Вместо нескольких окон терминала к серверу — вы можете использовать одно. Позволяет подключаться/отключаться к текущему состоянию сессии. Запущенные программы и процессы продолжают работать. (Можно использовать вместо nohup, dtach).
Например, на работе правим файлы в Vim. Окно терминала с открытыми файлами, процессами. Отключаемся от сессии. Далее подключаемся к этой сессии из дома и получаем те же окна с открытыми файлами в Vim, процессами и т.д. Можно продолжить работу с того же момента, на котором остановились. Также удобно при разрыве связи. Дополнительно можно работать совместно с другими в терминале, если подключены к одной сессии. Каждый видит, что делает другой.
1. Установка
2. Конфигурационные файлы
С версии 2.1 для включения режима мыши (скролл, изменение размера панели, выбор панели и др.) нужно добавить в tmux.conf:
3. Работа с Tmux
Старт
# tmux //без параметров будет создана сессия 0
# tmux new -s session1 //новая сессия session1. Название отображается снизу-слева в квадратных скобках в статус строке. Далее идет перечисление окон. Текущее окно помечается звездочкой.
Префикс (с него начинаются команды)
(CTRL + b)
Новое окно (нажать CTRL+b, затем нажать с)
Список окон
// переключиться курсором вверх-вниз
Переключение
// следующее окно
// предыдущее окно
// переключиться на номер окна
Окна можно делить на панели (Panes)
Как в тайловых (мозаичных) оконных менеджерах.
Деление окна горизонтально
либо команда
# tmux split-window -h
Деление окна вертикально
либо команда
# tmux split-window -v
Переход между панелей
// либо режим мыши
Изменение размеров панелей
// либо режим мыши
Закрытие окон
// нужно подтвердить y
либо
# exit
Отключение от сессии
либо
# tmux detach
Список сессий
# tmux ls
Подключиться к работающей сессии
# tmux attach //подключение к сессии, либо к единственной, либо последней созданной
# tmux attach -t session1 // подключение к сессии session1
Завершение сессии
# tmux kill-session -t session1
Завершить все сессии
# tmux kill-server
Список поддерживаемых комманд
# tmux list-commands
Дополнительная информация
# man tmux
Источник
How to Install and Use Tmux
A Linux system administrator usually works from remote to manage his server. While managing those servers, he may use SSH connection to the servers.
Have you ever face a situation where you need more console at the same time? If you are remote via SSH to the machines, you can open more windows to create more SSH connections. But it may not effective since you can’t see all the windows at the same time. And where the connections is lost, you will lose what you have done before. Now to solve the situation, there is an open-source application called tmux.
Tmux is a Terminal Multiplexer. It enables a number of terminals to be created, accessed and controlled from a single screen.
Here’s a list of some of the features of tmux:
- Create a number of multiple virtual console
- Split console in vertical or horizontal mode into panes
- Resize the size of each panes
- Attach, detach and re-attached window
- Highly configurable with tmux.conf file
- Client-server model
- Zoomed panes
Installing Tmux
Method 1: Binary package
Method 2: Compiling the source
If your Linux repositories does not provide the latest one, you can install the latest one manually. At this article is written, the latest version of tmux is 1.8. To get the latest one, you can download it from tmux website, compile it anda install it. Here are the steps on Linux CentOS 6.4.
1. Download the source file and requirement package
2. Extract the files
3. Install pre-requisites application
Those application is needed to compile the tmux source file.
4. Install libevent2 source
5. Install tmux source
6. Add tmux into path environment
How to use tmux
After the installation is finish, then type tmux on your console to run tmux.

A new session is now started. At the bottom line, you will find a bar contains some information.
Here’s how to read it:
- [0] 0:bash* : is the window number and the window name
- pungki@dev-machine : is the username and the hostname
- 01:30 : tell us the current time
- 12-Jan-14 : tell us the current date
Splitting tmux vertically
To split tmux vertically, just press (Ctrl-b) + % . Then the screen will be separated vertically.

Splitting tmux horizontally
To split tmux horizontally, press (Ctrl-b) + “ . Then the sceen will be separated horizontally.

But of course we can mix them. Here’s another example.

Moving between panes
Of course you will need move between panes. Otherwise, there is no use to create panes. By default, Linux console does not support mouse. So we need to know how to move between panes manually. There are some ways move between panes. Here’s a list how to to that.
- Move Left : (Ctrl-b) + Left arrow OR (Ctrl-b) + <
- Move Right : (Ctrl-b) + Right arrow OR (Ctrl-b) + >
- Move Up : (Ctrl-b) + + Up arrow
- Move Down : (Ctrl-b) + Down arrow
- Move to the next pane : (Ctrl-b) + o
- Show number for each panes and press the number : (Ctrl-b) + b q + pane number. For example : (Ctrl-b) + b q + 1 will move you to pane number 1

Resizing panes
You may want to resize panes to fit your need. Here’s a list how to do that :
- (Ctrl-b) + : then type resize-pane -D (Resizes the current pane down)
- (Ctrl-b) + : then type resize-pane -U (Resizes the current pane upward)
- (Ctrl-b) + : then type resize-pane -L (Resizes the current pane left)
- (Ctrl-b) + : then type resize-pane -R (Resizes the current pane right)
- (Ctrl-b) + : then type resize-pane -D 5 (Resizes the current pane down by 5 cells)
- (Ctrl-b) + : then type resize-pane -U 5 (Resizes the current pane upward by 5 cells)
- (Ctrl-b) + : then type resize-pane -L 5 (Resizes the current pane left by 5 cells)
- (Ctrl-b) + : then type resize-pane -R 5 (Resizes the current pane right by 5 cells)
- (Ctrl-b) + : then type resize-pane -t 2 5 (Resizes the pane with the id of 2 down by 5 cells)
- (Ctrl-b) + : then type resize-pane -t -L 5 (Resizes the pane with the id of 2 left by 5 cells)
Please note that you need to press the colon sign (:) after pressing Ctrl-b
From the screenshot above, we try to resize pane number 1. If the active pane is pane number 1 then we can press (Ctrl-b) + : resize pane -D 13 to make it down for 13 cells.

Zoom panes
This feature is new at 1.8 version. You can now zoomed a pane without need to detach or break it into independent window. At the active pane, press (Ctrl-b) + z to zoom the pane. Pressing it again will bring the zoomed pane back.
Make a pane into window
If you wish to exclude your pane into window, then you can do this by pressing (Ctrl-b) + : then type break pane. Then your pane will become an independent window. Next, you are recommended to give it a name in order to make it easy to remember.
Closing panes
To close a pane, simply type exit from the pane. Then it will close.
Detach and Re-attach Tmux
One of Tmux advantage is you can detach tmux without losing anything you are working on it. Then you can re-attach Tmux with the condition exactly before you detach it. This is very useful if you have to move between computers and don’t want to lose anything.
To detach it, use keystroke (Ctrl-b) + d
While re-attach the same window can be executed by typing tmux attach on your console.
If you — let say — remote your Linux machine from Windows client using putty, you still can use tmux. Here’s a sample of Putty client run Tmux.

Tmux is different from Terminator. Terminator is a local application which run on Linux terminal as a terminal multiplexer. We can’t run Terminator on a remote machine because it’s a local application.
Create more window
We are sure that you won’t mess your window with a lot of panes. 3 — 5 panes are may the maximum panes on a single window. More than 5 panes, can make you uncomfortable. To solve this situation, we can make more tmux window. To create new window, you can press (Ctrl-b) + c . Then you will see at the status bar, an info like this [0] 0:bash — 1:bash*

Rename a window name
To rename a window name, press Ctrl-b + , . (press Ctrl-b and press comma sign). Then provide the name and press Enter to confirm it.


An asterisk sign (*) means the current window.
Moving between Window
To move between window, we can use :
- (Ctrl-b) + n : Move to next window
- (Ctrl-b) + p : Move to previous window
- (Ctrl-b) + w : Interactively choose the window (useful if you have more than 2 window)

Interactively choost the window
Closing Window
If you want to close a window, simply press (Ctrl-b) + &
Configuring Tmux
Tmux is highly configurable. You can edit ‘tmux.conf’ file to do this. If you don’t have the file, you can create it. For system wide, you can put the tmux.conf in /etc folder. Or put it on
/.tmux.conf for user spesific settings. Here some example of tmux.conf content. Here are some example of tmux.conf configuration content.
Change the Prefix Key
By default, tmux prefix is Ctrl-b. Every command in tmux, must begin with Ctrl-b keystroke. If you don’t like it, you can change it. Let say you want to change it into Ctrl-a. Just put this line into your tmux.conf :
Save the file and re-run tmux. Please note, that in order to make tmux.conf changes works, you need to exit all tmux sessions before. If you detach a tmux session, and re-attach it, the changes will not work.
Change the splitting panes
As mentioned above, tmux use % sign and “ sign to split panes. You may don’t like the combination. To change it, just put this line into tmux.conf
The above configuration will change :
- % sign into h letter for vertically split
- “ sign into v letter for horizontally split
Change the status bar looks
The above configuration will highlight the active window with red color.
Change the numbering system of panes and windows
By default, the numbering system of panes and windows starts from 0. If you want to start it from 1, you can put this line on your .tmux.conf file.
There is still a lot of configuration that can be made for tmux. More parameters can be found inside tmux manual section Options.
Conclusion
Tmux may help you boost your productivity whenever you’re working on console-based. As usual, you can always type man tmux on your console to explore more detail or tmux manual in PDF form.
Источник


