- Ubuntu Documentation
- Download Wubi
- Install Ubuntu
- Windows-based Un-installation
- Uninstall from Windows XP
- Uninstall from Windows Vista or Windows 7
- Uninstall from Windows 8
- Selecting Windows or Ubuntu
- External Links
- WUBI – Установка Ubuntu прямо из под Windows
- Ubuntu Documentation
- Automatic process
- Manual process
- The netboot approach
- Windows 95/98/ME (using Loadlin)
- Windows NT/2000/XP (using Grub)
- The CD approach
- The CD image approach
Ubuntu Documentation
The Windows-based Ubuntu Installer (Wubi) allows you to install and uninstall Ubuntu from within Microsoft Windows. It lets a Microsoft Windows user try Ubuntu without risking any data loss due to disk formatting or partitioning.
Wubi requires Windows 98, ME, 2000, XP, Vista, Windows 7.
NOTE: Hibernation is not supported when installing Ubuntu via Wubi.
Download Wubi
Download Wubi from the Ubuntu Windows Installer Download page, this will download the latest version by default. You can download other versions of Ubuntu
Install Ubuntu
- Within Microsoft Windows, place your downloaded ISO in the same directory as the Wubi, and run the installer.

In the Desktop Environment list, select Ubuntu. If you wish to install Kubuntu, Xubuntu or another official derivative of Ubuntu, select your preferred one from the drop-down list.
Select Install. The Ubuntu Setup progress window appears. When Ubuntu has finished installing, the Completing the Ubuntu Setup Wizard window appears.

Select Reboot now and click Finish. Your computer restarts and the Windows Boot Manager appears. 
NOTE: Since Wubi installs Ubuntu on the same file partition as Windows, there may be a slight degradation in Ubuntu’s performance over time due to file fragmentation.
Windows-based Un-installation
When installed from Microsoft Windows, Ubuntu can be uninstalled using Microsoft Window’s standard Add or Remove Programs/Uninstall a program option.
Uninstall from Windows XP
From the Start menu, select Control Panel. The Control Panel appears.

Select Add or Remove Programs. Add or Remove Programs appears.
Select Ubuntu and click Remove. The Wubi Uninstall window appears.
Click Uninstall. Ubuntu uninstalls. The Completing the Wubi Uninstall Wizard appears.
Click Finish. Ubuntu is uninstalled.
Uninstall from Windows Vista or Windows 7
Removing Ubuntu in Windows Vista or Windows 7 follows the standard Uninstall a program option in Microsoft Windows.
From the Start menu, select Control Panel. The Control Panel appears.

Under Programs, select Uninstall a program. The Uninstall or change a program window appears.

Select Ubuntu and then click Uninstall/Change. The Wubi Uninstall window appears.

Click Uninstall. The progress wizard appears. The Completing the Wubi Uninstall Wizard appears.

Click Finish. Ubuntu is uninstalled.
Uninstall from Windows 8

Removing Ubuntu from Windows 8 is done in a similar manner to Windows Vista and Windows 7, however there is a different procedure for accessing the Programs and Features.
- Select any tile by right-clicking any non-store application in your Start screen.
- On the bar that opens at the bottom, select Uninstall. This will open the Programs and Features dialog on your desktop.
- Note: This will not uninstall that application.
Select Ubuntu and then click Uninstall/Change. The Wubi Uninstall window appears.
Click Uninstall. The progress wizard appears. The Completing the Wubi Uninstall Wizard appears.
Click Finish. Ubuntu has been successfully removed from your computer.
Selecting Windows or Ubuntu
If you installed Ubuntu via the Wubi installer, the Windows (NT) Boot Loader (ntldr) loads. You can choose which operating system to «boot-up» into.
To Choose Which Operating System Boots-Up
- Turn on or restart your system. The Windows Boot Manager appears.
NOTE: The default operating system is Microsoft Windows. If you do not choose an operating system, Microsoft Windows will automatically load.
External Links
Wubi (последним исправлял пользователь cariboo 2014-06-26 19:22:56)
The material on this wiki is available under a free license, see Copyright / License for details
You can contribute to this wiki, see Wiki Guide for details
Источник
WUBI – Установка Ubuntu прямо из под Windows
Есть множество способов попробовать Ubuntu. Кому-то больше нравится установить самому рядом с Windows, кто-то меняет жесткие диски, кто-то насилует виртуальную машину. Для меня самый простой способ – Wubi. Windows-based Ubuntu Installer. Приложение, позволяющее установить Ubuntu как обычную программу для Windows.
Суть Wubi очень проста – запускаем программу, она создает папку на жестком диске, куда закачиваются необходимые файлы, скачивается оригинальный образ Ubuntu, небольшие настройки, перезагрузка… И Ваша Ubuntu готова к использованию!
Точно таким же образов можно установить почти все продукты, основанные на Ubuntu – Kubuntu, Xubuntu, Mythbuntu. Раньше так же были Netbook-версии, но на 11.04 осталась только для Ubuntu. Для версии 11.10, скорее всего, появится еще Lubuntu.
Wubi имеется на всех дисках с Ubuntu. Она находится в корневой папке диске, файл wubi.exe. Но этот файл можно и отдельно скачать. На сайте Ubuntu есть прямая ссылка на него.
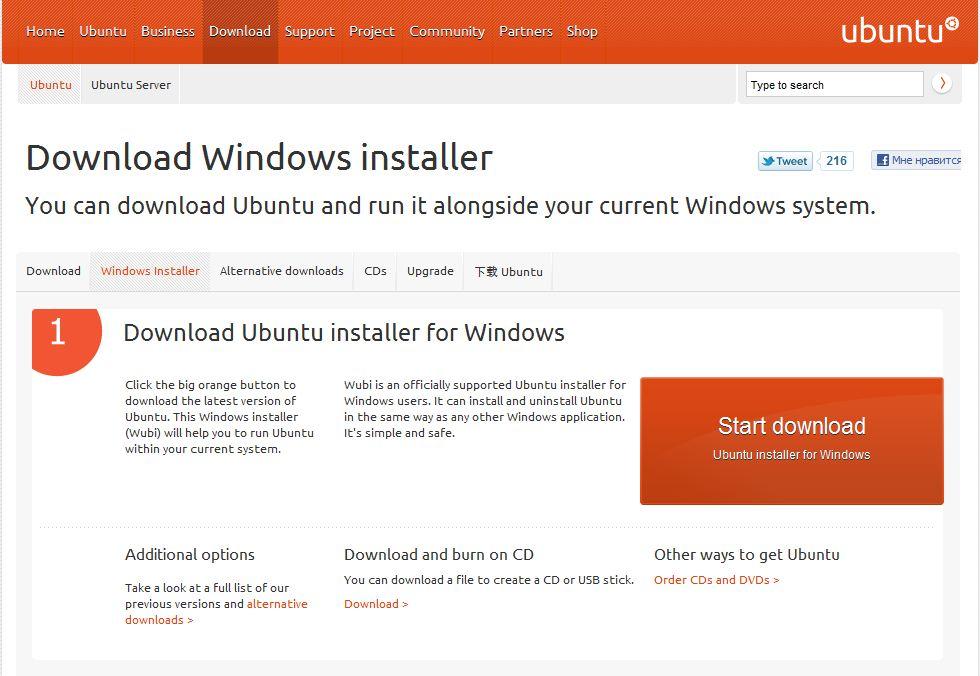
Вот эта оранжевая кнопочка с надписью «Start download» — и начнется закачка. Программа весит совсем ничего, меньше 1,5 мегабайт. Но все же лучше все-таки скачать оригинальный CD-образ. Почему, расскажу позже.
После запуска увидим вот это:
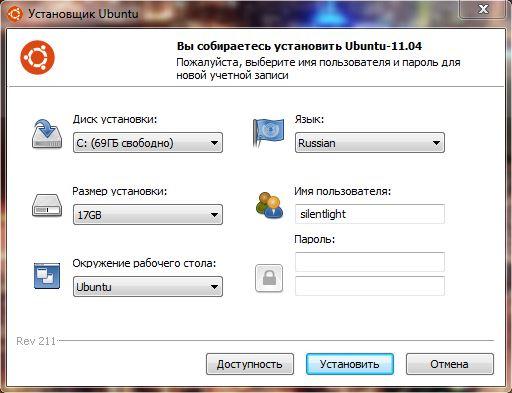
Собственно, главное окно программы. Все очень просто, согласитесь, даже запутаться негде!
В самом первом окошечке выбирается на какой жесткий диск Вы хотите установить Ubuntu. У меня он один, поэтому я его и оставлю.
Чуть ниже выбирается место, которое необходимо для новой Ubuntu. Возможно от 3 до 30 Гб, с шагов в 1 Гб. Сама Ubuntu занимает около 7 Гб, но я ставлю максимум. Мало ли что понадобится…
В нижнем списке выбираем какую систему необходимо установить. Напомню, что на дисках для 11.04 это могут быть Ubuntu, Ubuntu Netbook, Kubuntu, Xubuntu и Mythbuntu. Кому что больше нравится.
В колонке справа выбирается язык будущей системы, вводится имя пользователя (login) и пароль с подтверждение. Получается, что пароль один на всю систему – и для входа пользователя, и для администратора.
Так же возможна настройка особых средств для людей с ограниченными возможностями. Для этого следует нажать кнопочку «Доступность».
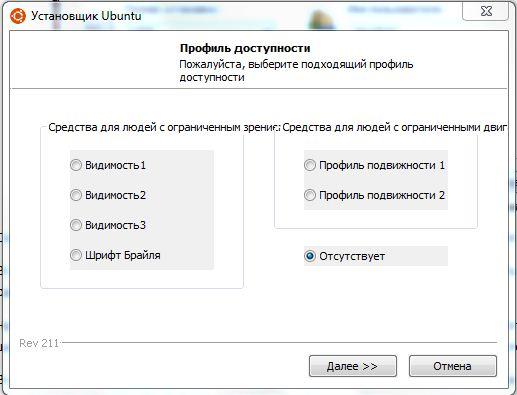
Перед нами появится вот такое окно. Что значит каждый из пунктов, я не знаю, потому что сам не пробовал, не было необходимости. При желании можно поэкспериментировать. По кнопке «Далее» вернемся на предыдущее окно программы.
Больше настаивать нечего. Если все-таки хотите установить Ubuntu – смело жмем «Установить», если не хотите…
Устанавливаем. Начнется загрузка файлов и образа. Я говорил, что скачивать оригинальный образ лучше, потому что можно обойтись без скачивания образа для Wubi, просто пропустив этот момент. Для этого установщик и файл образа должны находиться в одном каталоге, неважно в каком.
Установщик проверит файл образа и, если все в порядке, извлечет необходимые файлы из него. Никаких дополнительных файлов, например MD5, скачивать не надо.
Такой способ удобен для тех, у кого по умолчанию будет скачиваться х64 образ. При желании иметь х86 систему достаточно, чтобы образ и установщик Wubi были в одном месте, и тогда будет установлена х86 система.
Внимание! Файл образа при таком способе должен быть обязательно CD-диском и не альтернативным. С DVD-дисками Wubi, к сожалению не дружит. Хотя сам файл Wubi на DVD-дисках имеется.
Если все прошло правильно, Вы увидите вот такое окно:
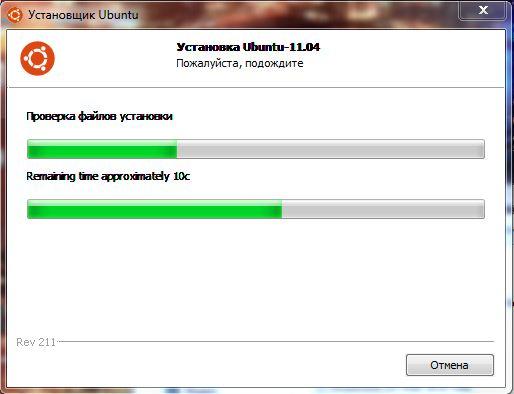
У меня запечатлен как раз момент проверки файла образа диска.
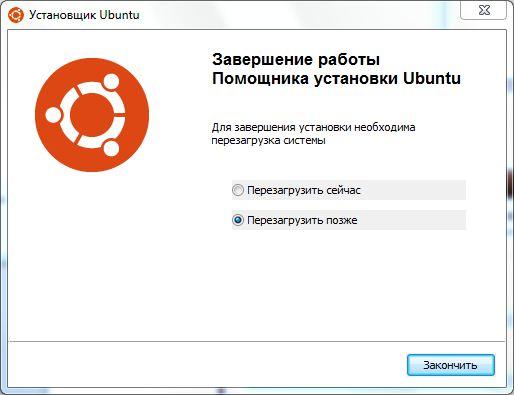
По окончанию установки (1 минута при имеющемся образе, 30 минут при скачивании) достаточно только перезагрузится:
Если что-то пошло не так, или Вам не понравилась Ваша Ubuntu, ее легко можно удалить. Снова запускаем этот же установщик:
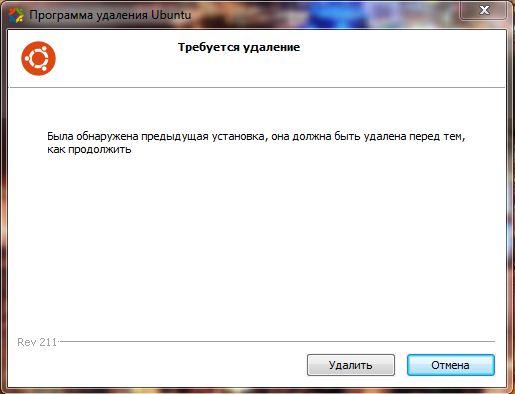
Нажимаем кнопку «Удалить» и система полностью стирается с Вашего компьютера. Как будто никогда и не было!
При желании можно экспериментировать сколько угодно раз.
Источник
Ubuntu Documentation

Style Cleanup Required
This article does not follow the style standards in the Wiki Guide. More info.
Automatic process
UNetbootin is an installer that can do the following automatically. It is available for download at http://unetbootin.sourceforge.net/.
Instlux is an installer that does all of the following for you, however it only supports older versions of Ubuntu. You can download it from http://www.sourceforge.net/projects/instlux.
Wubi is an installer that uses a process similar to what described in this page, but the installation takes place within a file inside Windows, and hence, differently from the other approaches, it does not require to modify the partitions. In any case, if you later want install it to a dedicated partition, you can do it. See https://wiki.ubuntu.com/WubiGuide.
Manual process
The netboot approach
This page will guide you through obtaining the files necessary to boot the Ubuntu installation from a FAT or NTFS partition, thus allowing you to install Ubuntu without any sort of removeable media. This guide assumes that you are running either some NT-based Windows(NT, 2000, XP) or Windows 9x (95, 98, ME).
Create a directory called boot in the root directory of the first primary partition of your hard drive (usually drive c:\, which it will be referred to as from now on).
The following steps depend on which version of Windows you are using:
Windows 95/98/ME (using Loadlin)
Download loadlin.exe.gz from https://passechambre.appspot.com/show/indexothers.html and unpack it to boot (If your default compression/archive program doesn’t like *.tar.gz files, try 7-Zip from http://www.7-zip.org)
Choose Reboot in MS-DOS mode in the shutdown menu orpress F8 (Ctrl for Win98/ME) during boot and choose command prompt only in order to start Windows in DOS mode
Now you should have a network installation going
Note: On some computers the installer has problems with the video card and you may get a «melting screen». I replaced vga=normal with vga=771 and it worked on my laptop Stjepan Stamenkovic
Windows NT/2000/XP (using Grub)
Extract grldr from the archive to c:\.
Create a new folder in c:\boot\ called grub.
Extract menu.lst (Should be in the /boot/grub folder of the archive) to c:\boot\grub The rest of the files in the archive are unnecessary. (If your default compression/archive program doesn’t like *.tar.gz files, try 7-Zip from http://www.7-zip.org or TUGzip from http://www.tugzip.com.)
Append c:\grldr="Install Ubuntu" to c:\boot.ini.
Note: Eventhough c:\boot.ini is not shown by the explorer, this file exists and can be also opened in the notepad. Just write the path c:\Boot.ini at the open dialog.
Open menu.lst in a text editor and paste the following text in the file:
Save menu.lst, reboot, and select «Install Ubuntu» in the windows OS chooser then in GRUB. You now have a network installation of Ubuntu going.
This procedure should be possible using a disk image, but it may be necessary to use a different kernel and pass some special argument in menu.lst to tell it to boot from the CD image (Has been achieved using Knoppix).
It would be nice if someone could automate this process. InstallationUbuntuFromWindows outlines how such an installation system might work.
The CD approach
This approach is documented in the Installation notes, however it seemed appropiate to put a reference to it here.
Note: This method only works with the Alternate Ubuntu install CD.
If you can’t boot from the CD-ROM directly it is possible to use the above approach to boot the kernel from the HDD and have the installation follow through on the CD-ROM.
Create a directory called ubuntu in the root directory of the first primary partition of your hard drive (usually drive c:\, which it will be referred to as from now on).
Download the ALTERNATE ubuntu-installer CD from http://www.ubuntulinux.org/download/ and burn the CD, then copy the contents of the CD to ubuntu.
Note: If you can’t/don’t want to burn a cd you can also mount the iso with a program like Daemon Tools or Alcohol 120% or simply open the iso file using 7-Zip
Extract grldr from the archive to c:\grldr. The rest of the files in the archive are unnecessary. (If your default compression/archive program doesn’t like *.tar.gz files, try 7-Zip from http://www.7-zip.org.)
Append c:\grldr="Install Ubuntu" to c:\boot.ini.
Note: Eventhough c:\boot.ini is not shown by the explorer, this file exists and can be also opened in the notepad. Just write the path c:\Boot.ini at the open dialog.
Create a new text file called menu.lst and save it to the first primary partition of your hard drive.
Open menu.lst in a text editor and paste the following text in the file:
Save menu.lst, reboot with the Ubuntu installer CD in the drive, and select «Install Ubuntu» twice. You now have a CD installation of Ubuntu going.
The CD image approach
Note: This method only works with the Alternate Ubuntu install CD.
If for some reason you can not (do not want to) write the CD it is possible to use the ISO image to do the installation from hard disk.
Create a directory called ubuntu in the root directory of the first primary partition of your hard drive (usually drive c:\, which it will be referred to as from now on).
Download the ALTERNATE ubuntu-installer CD from http://www.ubuntulinux.org/download/ and save the .iso file in the root directory of first partition of your hard drive .
Extract grldr from the archive to c:\grldr. The rest of the files in the archive are unnecessary.
Append c:\grldr="Install Ubuntu" to c:\boot.ini.
Note: Eventhough C:\boot.ini is not shown (by default) by Windows Explorer, this file exists and can be also opened in the notepad. Just write the path C:\boot.ini at the open dialog.
Create a new text file called menu.lst and save it to the first primary partition of your hard drive.
Open menu.lst in a text editor and paste the following text in the file:
Save menu.lst, reboot, select «Install Ubuntu» twice. You now have a CD image installation of Ubuntu going.
If you are installing onto the disk that is hosting the installer, and during partitioning the installer says that the kernel cannot read the new partition table, and that you should reboot your system, don’t. The partitioner has already flagged the new Linux partition as the boot partition, so the system will be unbootable. If you’re dealing with a system with no floppy or CD drive, you will be stuck. Instead, use Alt-F2, Enter to open a console and use cfdisk to set the boot partition back to the partition which hosts the installer, then go back to the installer using Alt-F1, as many times as needed to get to the menu, then select «Abort Installation» to reboot.
Installation/FromWindows (последним исправлял пользователь yousef-el-sayed 2014-07-03 06:57:04)
The material on this wiki is available under a free license, see Copyright / License for details
You can contribute to this wiki, see Wiki Guide for details
Источник


