- How to Download & Install Unreal Engine 4
- Step 1: Creating Your Own Epic Games Account.
- Help! The file did not download automatically for me.
- Step 2: Signing into your Epic Launcher using your Epic Account.
- Step 3: Installing Unreal Engine 4.
- How long will the download and installation take?
- Help! It looks like it is not downloading. I don’t see any progress.
- Step 4: A-last, It is here! Launching the Unreal Game Engine.
- Academic Installation
- An overview of how to install the Launcher and Unreal Engine 4 in academic environments.
- Installing UE4 and Content
- Using the Launcher
- From GitHub
- Performing Updates
- Using the Launcher
- Copying UE4 and Content
- Disabling Automatic Updates
- Best Practices for Students
- During Network Outages
- Preparing for Memory Wipes
How to Download & Install Unreal Engine 4

Thinking of building the next Fortnite?
Whether you’re an indie game developer or whether you just want to create your own virtual world and just have fun, Epic Games’ Unreal Engine is one of the two finest game engines out there along with the Unity Engine.
In this little guide, I’ll show you step-by-step on how you can install Unreal Engine 4 onto your Windows or Mac.
There are certain conditions, however, that you will need to understand before you install the Unreal Engine. These conditions are not covered in the official tutorial by Epic Games.
Let’s dive right in.
Step 1: Creating Your Own Epic Games Account.
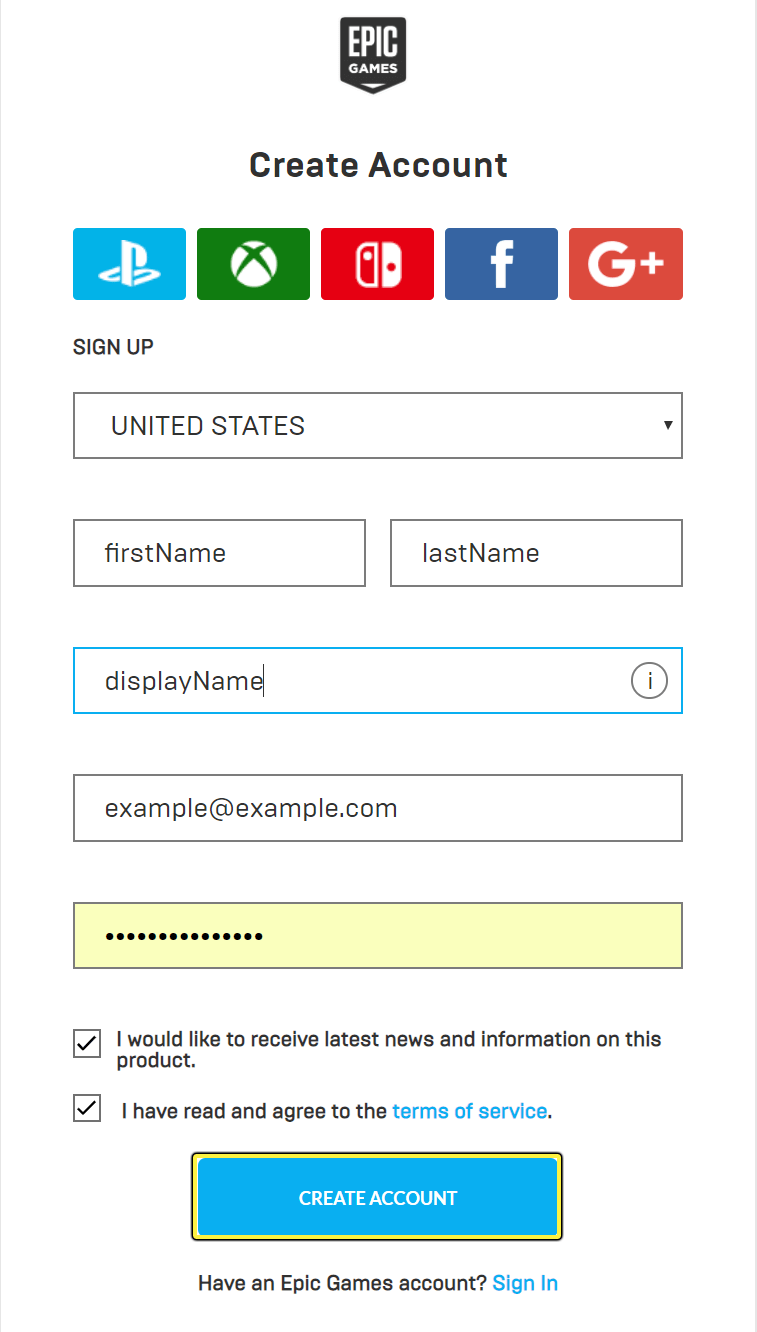
- Jump into Epic Games’ Unreal Engine page and then click the Get Started Now button.

- Now, fill out the usual crap, like your username (Display Name), your email address, password. You can uncheck the “I would like to receive the latest news and information on this product” if you wish to not be spammed with emails from Epic Games. You must, however, check the “I have read and agree to the terms of service.”
Note
If you’re planning to sell your creations in the future, it is important to read the terms of service beforehand. Epic Games takes a royalty fee of 5% from all the revenue generated by your product(s) as well as 2% late fees if you don’t pay in time. If you don’t want to be stuck in such a relationship where you lose a lot of money in fees, then I strongly recommend that you go for Unity as your game engine. Here’s a great guide:
- Lastly, hit Create Account when you’re done and then click to Proceed to Download. The download should start automatically.
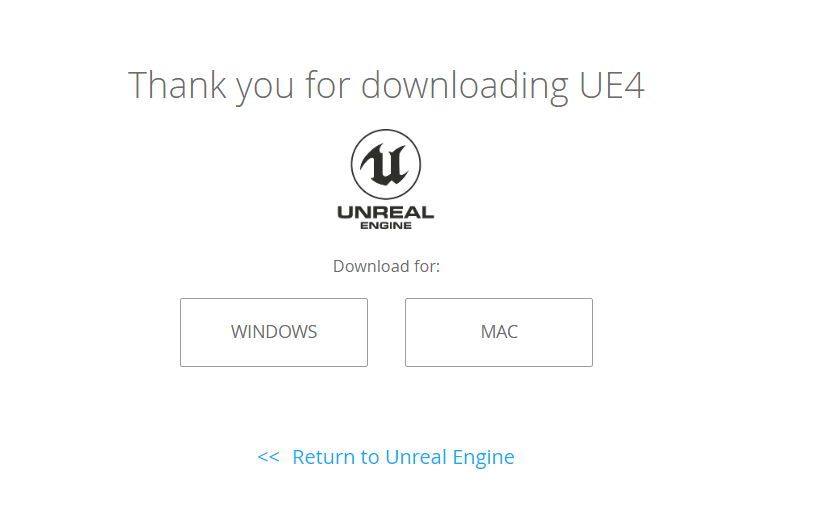
Help! The file did not download automatically for me.
If the download did not automatically happen, then simply choose the desired operating system ( Windows or Mac ) from the “Thank you for downloading UE4” page.
- Once the download is complete, simply Run the Installer. Hit the Install button when the Epic Games Launcher Setup window (as shown below) appears
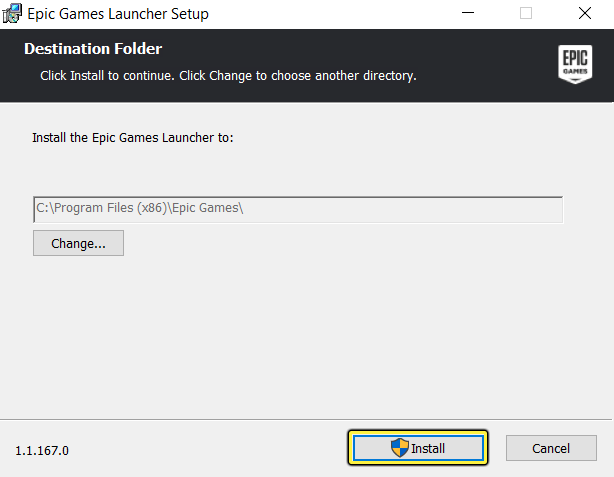
- This will install the launcher which launches the Epic Games dashboard. From inside this dashboard, we will be able to download and install the Unreal Engine 4.
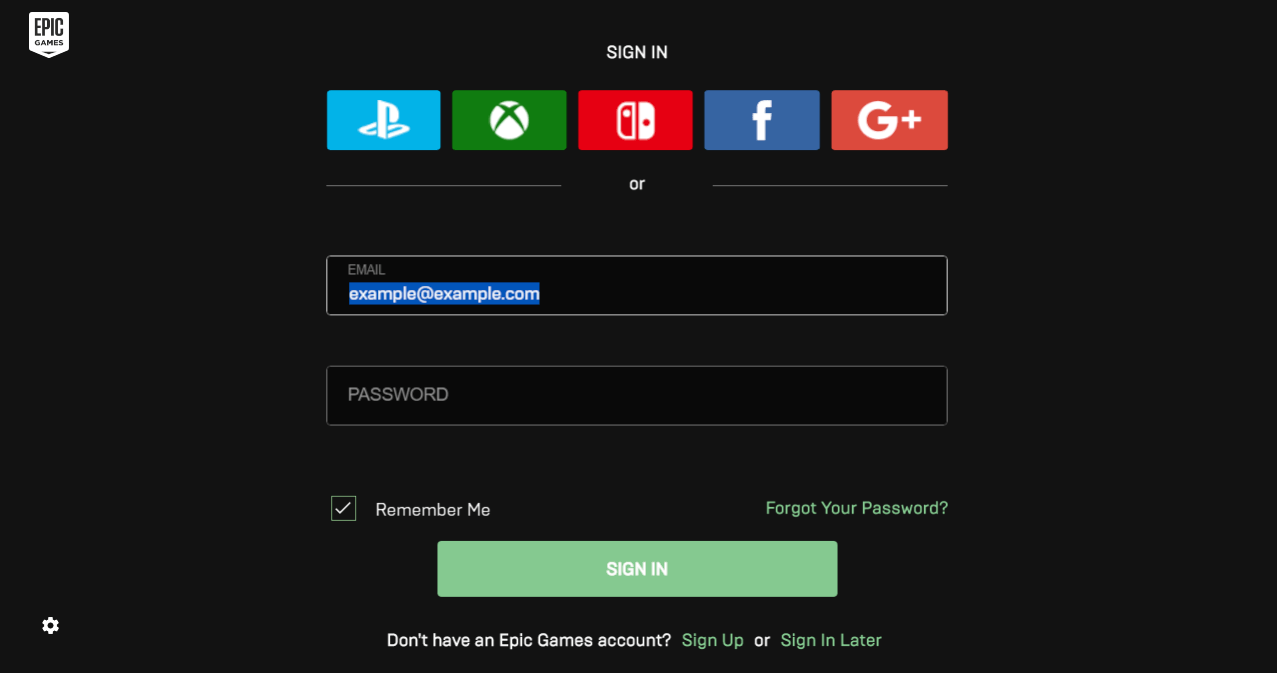
Step 2: Signing into your Epic Launcher using your Epic Account.
Once you see the Epic Games Launcher is, well, launched. Simply Sign In using your Epic Games Account that you had created earlier.
Step 3: Installing Unreal Engine 4.
Now that you’re signed in, you’re ready to install Unreal Engine 4.
Note
Unreal Engine takes up almost 8 gigabytes of disk space on your machine. This can add up if you have multiple versions of the engine installed previously (which should be removed). Make sure you have enough storage space before you install Unreal Engine.
Here’s how to download and install Unreal Engine 4:
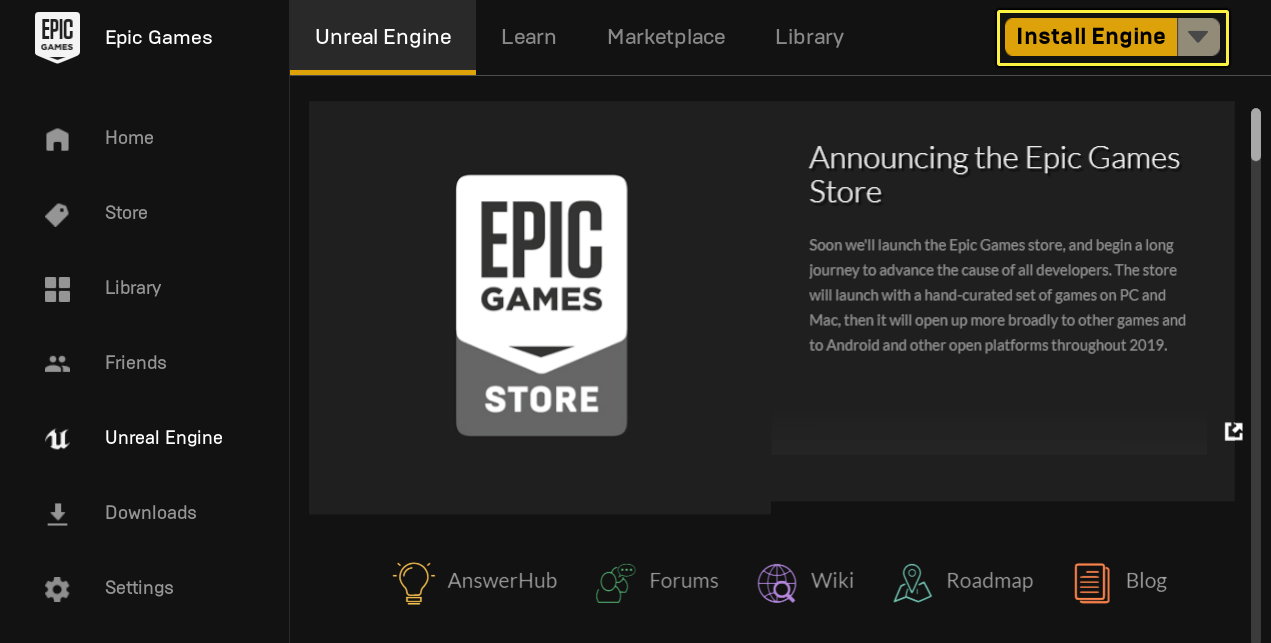
- Do you see the sidebar to your left? There will be a section called Unreal Engine. Click on the Unreal Engine tab.

- Next, click the yellow Install Engine button that is to your top right corner. This will begin downloading and installing the latest version of the Unreal Engine.
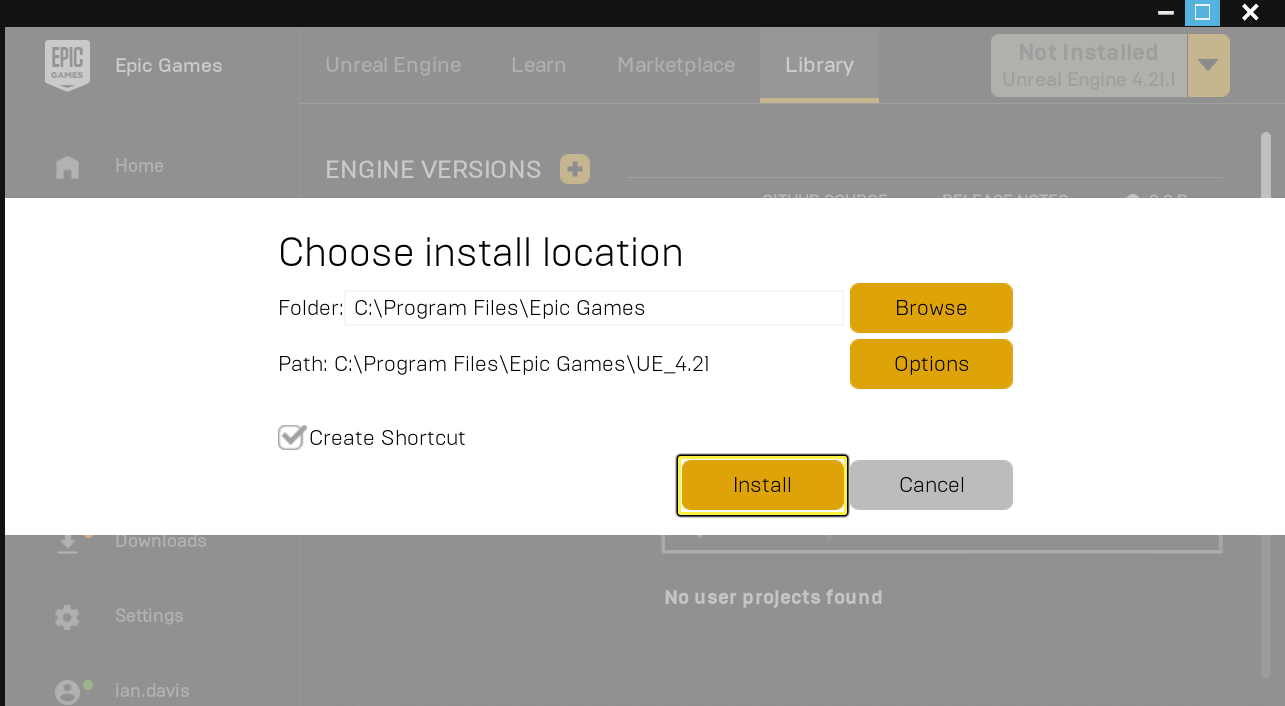
- Now you’ll see a pop-up asking you to Choose install location. Don’t panic. 🙂 You can choose a location on your machine (if you want to). The way I would personally do it is to just accept the default location shown and just hit Install.
How long will the download and installation take?
It depends. If your machine fulfills the system’s specifications , then downloading and installing Unreal Engine will take anywhere between 10-40 minutes. As I said, it really depends since your Internet connection speeds also play a part too. Be patient.
Help! It looks like it is not downloading. I don’t see any progress.
At times the download progress meter can just stop working. It did for me.
Although the download speed and process can stop showing, you can pay attention to the top right-hand corner under Download, the progress (%) to see if that is moving.
Also, make sure to check your internet connection if that is causing any problems. If you’re positive that nothing works, then simply cancel the download, restart the Epic Games launcher and start again by hitting the Download button.
Step 4: A-last, It is here! Launching the Unreal Game Engine.
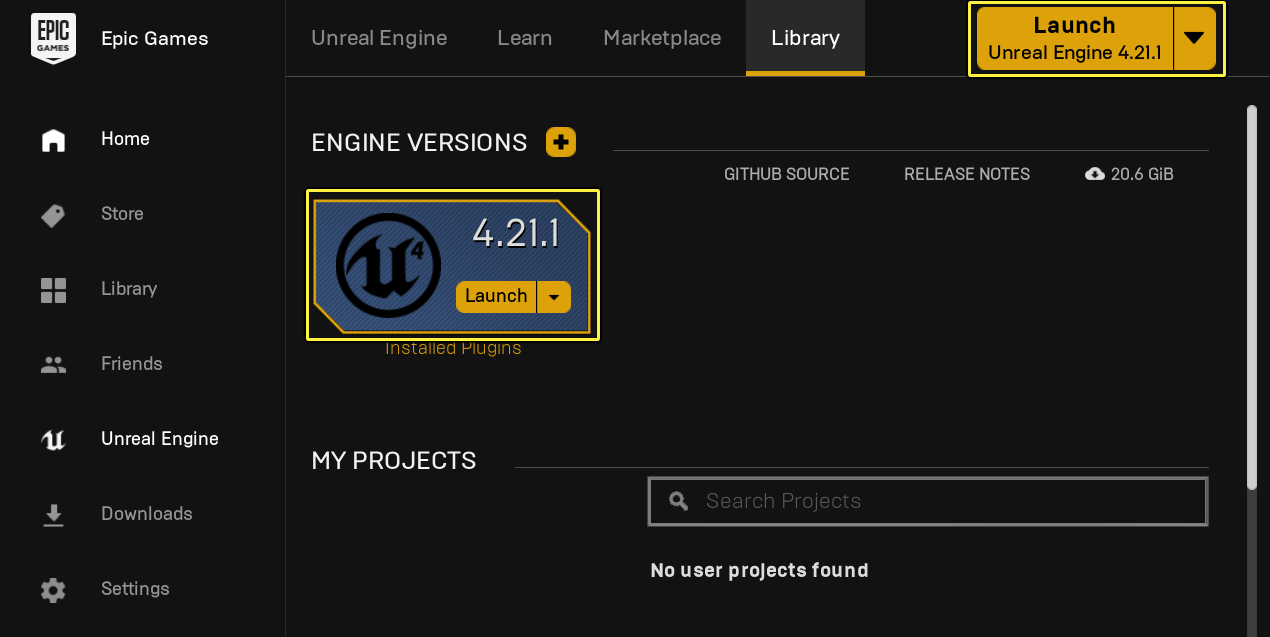
Great work. Now that the Unreal Engine is completely downloaded and installed, you should see a Launch button. From there, simply hit the Launch button to get started.
This wraps our guide on how to download and install Unreal Engine 4 on both Windows 10 and Mac machines. If you have any questions, please feel free to comment below, and we will try out best to help.
If this guide helped you, please share it. 🙂
Academic Installation
An overview of how to install the Launcher and Unreal Engine 4 in academic environments.


As universities, colleges, and trade schools continue to offer Unreal Engine 4 (UE4) to students and faculty, one of the most frequently asked questions we get from these users is how to distribute UE4 on school computers without exposing the academic account being used to access the engine. If you are installing UE4 in an academic environment, this document describes how deployment automation can be used to distibute academic installations of UE4.
Installing UE4 and Content
Typically, schools install UE4 on several computers, for example, in a computer lab or instruction room.В At this time, we do not provide a silent (or one-step) installer for UE4, which means that the installer needs to be manually run at least once on a machine in the academicВ environment. Rather thanВ mirroring the install machine or manually running the installer on the rest of the computers in the classroom, we automated part of the deployment process.В
Perform the following steps to install UE4 in an academic environment:
Using the Launcher
If your school’s network is behind a proxy server, it is a best practice to use the UE4 on GitHub build because the Launcher will not run behind the server. If, however, you prefer to use the Launcher version behind theВ proxy server, contact your IT department to have them open port 7777 or 7778. Keep in mind, though, that opening these ports does not always enable the Launcher to open or update behind aВ proxy server.
Download the latest installers using the following links:
Run the installer on the machine you want to makeВ an image from.
After the installer finishes its routine, the Launcher automatically runs, enabling you to log in with your Epic Games credentials.
If the latest version of UE4 does not download automatically, you can either select the Install EngineВ button (1) orВ select the Library sidebar option (2)В to download engine version you want your students to use.В

Click for full image.
As an example, downloadВ Unreal Engine 4.20.2 В by first selecting the Library sidebar option.

Click for full image.
Now, selectВ the Engine Versions (+) icon.

Open the drop-down list to select the engine version you want to download. For purposes of illustration, select version 4.20.2.

Finally, select the Install button and follow the Installer’s promptsВ to get Unreal Engine 4.20.2 onto your machine.

Some instructors use our learning samples in their curricula, and let us suppose, for example, an instructor teaching side-scrolling gameplay wants to use our platformer sampleВ as a teaching tool. To download a side-scrolling platformer, they will need to select the Learn sidebar option (1) and scroll down to select Platformer Game В (2).

Click for full image.
From Platformer Game’s Content Detail menu, select Create ProjectВ to start setting up the project.

Click for full image.
Before downloading a learning sample, refer to the Supported Platforms and Supported Engine Version sections of the Content Detail menu, which we update when deploying new releases.
Set the project’s name, its installation folder, and engine version (we are using version 4.20) before selecting Create.

When Platformer Game is done installing, you will see it in the Library > Vault menu.

Click for full image.
If you see any automatically created projects in the Library > My Projects menu, delete them.
If you do not delete projects that the Launcher automatically creates for you, it may cause problems for users on share-machines using the same projects.
After removing all of the automatically-created projects, you can mirror this machine’s setup to the rest of your class’s computers. Alternatively, you can save this machines image so that you can distribute it out to your lab’s computers.
From GitHub
Visit the following pages (in order) to learn how to download, install, and update UE4 from GitHub:
Performing Updates
After installing UE4, you are ready to use the engine and some free content in an academic environment. It is important, however, to plan for updates because when new versions of UE4 are released, or when engine content is released, you can update the mirror or push out new content to install machines by copying the relevant files, which you can automate with a script.
Read through the following sections to learn how to update UE4 and engine content in an academic environment:
Using the Launcher
From a central machine, open the Launcher and navigate to theВ LibraryВ menu.
SelectВ theВ Engine VersionsВ (+) icon.
After the Launcher downloads the the latest version of UE4, you can update the mirror.
If you do not want to perform updates using the Launcher, read through the following section to learn how to copy updates to labВ machines with UE4.
Copying UE4 and Content
Copy the following directories from the base machine to every machine that you want to update:
[Local Directory]\Epic Games\Launcher\VaultCache
[Local Directory]\Epic Games
In some cases, it is possible to install the Launcher in the C:\Program Files (x86) folder.
If you are copying a specific version, for example, version 4.20, you can copy C:\Program Files (x86)\Epic Games\4.20 , otherwise, you can use the wildcard character ( * ) to automate the copy operation for all engine versions, which looks like C:\Program Files (x86)\Epic Games\* .
Make the following directory on every machine that you want to update, [Local Drive Letter]\ProgramData\Epic\EpicGamesLauncher\Data\Manifests .
Assuming you recently downloaded the engine, copy the most recently downloaded manifest from [Local Drive Letter]\ProgramData\Epic\EpicGamesLauncher\Data\Manifests to the machine’s local manifest directory (from the previous step).
As an example, the manifest file might look something like,
To verify you have a copy of the most recently downloaded manifest, open the manifest file in a text editor and search for «AppNameString».
After following these steps, the Launcher automatically detects updates when a user runs the Launcher. This is true for new engine versions and downloaded content from the Marketplace.В
If you want to disable the Launcher from automatically detecting updates, read through the following section.
Disabling Automatic Updates
By default, the Launcher automatically checks for updates during its launch routine. To prevent Launcher updates from taking up class time, perform the following steps:
Right-click the EpicGamesLauncher — Shortcut to open the Launcher’s Right Click menu.
Select the Properties command to open the file’s Properties menu.
Locate the Target: property and add the -noselfupdate command to the end of the target line.
Do not forget to re-enable Launcher updates when class is not in session.
Best Practices for Students
There are scenariosВ that might impact your students’ ability to access UE4 (or downloaded content). For example, yourВ school might regularly wipe computers for security (or resource) reasons, which might affect a student’s progress in-class.В To help thoseВ students, we have collected the following best practices for some common scenarios they might face while using UE4 in an academic environment.
During Network Outages
Students can run the Launcher during network outages by selecting the Skip Sign In option, which is located in the Launcher’sВ network connectivity dialog window.

Click for full image.
After signing-in Offline mode, students can access UE4, their projects, and previously downloaded content.
Preparing for Memory Wipes
If your school has a policy of wiping computer (or drive) memory on a regular schedule, returning student computers to their base image, students must save their work in a directory that will not be wiped (or cleared).В
For example, suppose aВ student creates a new Strategy GameВ project fromВ their Vault on the Library tab.

When creating the new project, the studentВ should specify a folder (or network directory, such as a Sandbox drive) that will not be removed when theirВ computer is re-imaged.

As long as your school’s policy allows it, students typically download additional content using the Launcher, however, if the downloaded content is not saved off the mirrored drive, the content will most likely be wiped during re-imaging.


