- Installing Windows 10 on a Mac without Bootcamp
- What You Will Need
- Downloading Boot Camp Drivers
- Creating a Bootable USB Windows 10 Installer
- Formatting Your USB Stick
- Turning Your USB Stick into a Windows Installer
- Finishing Up
- Partitioning Your Drive
- Ensuring that a Hybrid MBR is not used
- Installing Windows
- Disconnecting All Devices From USB Ports
- Booting From the USB Stick
- Correcting Your Windows Hard Disk Partition
- Completing the Installation
- Installing Boot Camp Support Software
- What You Will Need to Configure Windows
- Configuring Windows
- Mapping Your Mac Keyboard
- Switching to Natural Scrolling
- Enabling Num Lock on Boot
- Completing Configuration
- Cleaning up a Windows Installation
- Removing the Windows Partitions
- Removing the Boot Entry
- Способы установки Windows на macOS
- Устанавливаем Windows на macOS
- Способ 1: Использование виртуальной машины
- Способ 2: Инсталляция посредством BootCamp
- Способ 3: Гибридная инсталляция
- Заключение
Installing Windows 10 on a Mac without Bootcamp
Installing Windows on a Mac should be a piece of cake with Bootcamp, but that rarely is the case. In fact, I would personally say that Boot Camp Assistant is one of the worst apps that comes with OS X and unlike the rest, it doesn’t work seamlessly.
A few of its drawbacks:
- It only supports a drive with a single partition.
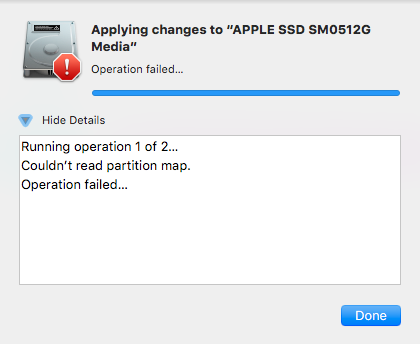
- It often throws very obscure error messages with limited detail.
- It re-downloads 1.6 GB Windows drivers every single time it runs. These are placed under /Library/Application Support/BootCamp/WindowsSupport.dmg and deleted and re-downloaded each time Boot Camp Assistant starts processing.
This post did take a lot of work to complie and I did bone my hard drive a few times while trying certain ideas, so please throw out a thanks if it helped you out 🙂
Disclaimer: This guide below contains procedures which can potentially destroy your partitions and data. I accept no responsibility for such loss so please proceed at your own risk.
Update (2016-07-20): I have updated this post with further improvements relating to downloading of Boot Camp drivers and ensuring that a Hybrid MBR is not used (which would cause issues when installing Windows).
What You Will Need
- An 8 GB or larger USB stick
- A copy of the Windows 10 ISO
- A valid Windows 10 license
- A downloaded copy of unetbootin
Downloading Boot Camp Drivers
- Start Boot Camp Assistant
- Select Action / Download Windows Support Software
- Choose your Downloads directory, enter your password and then click Save
This will be the only step that we will use Boot Camp Assistant for.
Creating a Bootable USB Windows 10 Installer
Formatting Your USB Stick
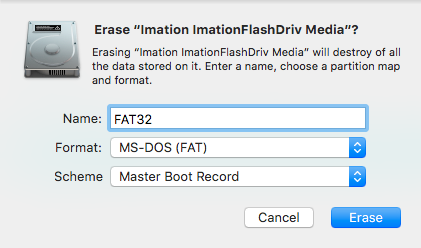
Attach your USB stick and start Disk Utility, select your USB drive in the left panel under External, click Erase and set the options as follows (exactly) and click Erase:
Name: FAT32
Format: MS-DOS (FAT)
Scheme: Master Boot Record
Turning Your USB Stick into a Windows Installer
Open unetbootin, enter your password, set the options as follows and click OK:
Diskimage: checked, set to ISO and browse to your Windows 10 ISO
Type: USB Drive
Drive: Your USB drive (you should only see one entry here)

If you see more than one drive listed, you may confirm which is your USB drive by opening the Terminal and typing:
You’ll see your USB drive in the output and it should look something like this:
Once you have kicked off unetbootin, grab a snack while the Windows ISO is copied to the USB stick. This process takes around 15 minutes to complete.
Finishing Up
When this has completed, you may right click on the USB stick in Finder, select Rename “FAT32” and rename it as you like (I’ll call mine “WINDOWS 10”).
Finally, copy the WindowsSupport in your Downloads directory to the Windows 10 USB stick so it’s easy to get to after our installation.
Partitioning Your Drive
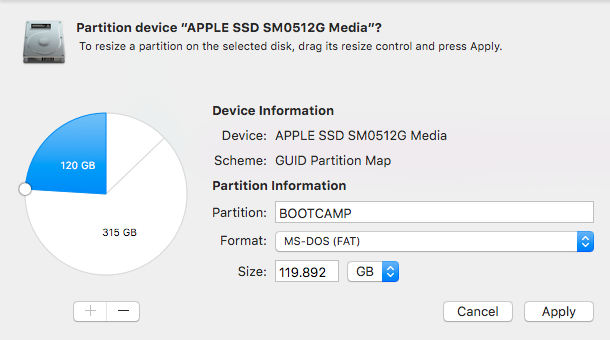
In Disk Utility, select your internal hard drive on the left panel, and click on Partition.
Click the + button and create a new partition of your desired size for your Windows installation and name it as you wish (I’ll call mine “BOOTCAMP”). Ensure that the Format is set to MS-DOS (FAT) and click on Apply.
Ensuring that a Hybrid MBR is not used
Huge thanks to Rod’s post from the superuser post titled Windows detects GPT disk as MBR in EFI boot.
Once you add a FAT32 partition with either Boot Camp Assistant or Disk Utility, your disk is converted into a hybrid GPT / MBR disk which is actually not supported by newer versions of Windows. In this step, we revert this additional change made by Disk Utility by switching back to a pure GPT partition table.
- Dowload the latest version of GPT fdisk by browsing to the version, then gdisk-binaries and clicking the file with the *.pkg extension (e.g. gdisk-1.0.1.pkg).
- Install GPT fdisk by running the installer you downloaded
Open a Terminal and check the state of your MBR
If your MBR partition is set to hybrid, please continue with step 4, otherwise if it is set to protective, you may skip the rest of this section. Simply type q and hit return to exit GPT fdisk.
Type p to view the existing partition table and verify you’re working on the correct disk
Type x to enter the expert menu
Type n to create a fresh protective MBR
Type w to save your changes and confirm the change when asked
Type q to exit GPT fdisk
Run GPT fdisk to show your disk layout:
Your partition table should look something like this:
Installing Windows
Disconnecting All Devices From USB Ports
This step is critical as I have had rather serious problems during Windows installation when certain external drives are connected.
Unplug everything from your Mac except your keyboard (if wired) and your bootable Windows USB stick (which we prepared earlier).
If your Mac contains multiple physical drives, you will need to disconnect all disks except the one which you intend to install Windows on or you may encounter the following error:
Windows could not prepare the computer to boot into the next phase of installation. To install Windows, restart the installation.
Booting From the USB Stick
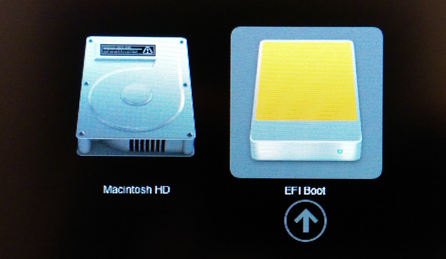
Ensure that the USB stick containing the Windows installer is inserted and then restart your Mac while holding down the option (alt) key.
You should now be presented with a list of bootable drives. Select the USB drive (usually titled “EFI Boot”) to begin installing Windows.
Correcting Your Windows Hard Disk Partition
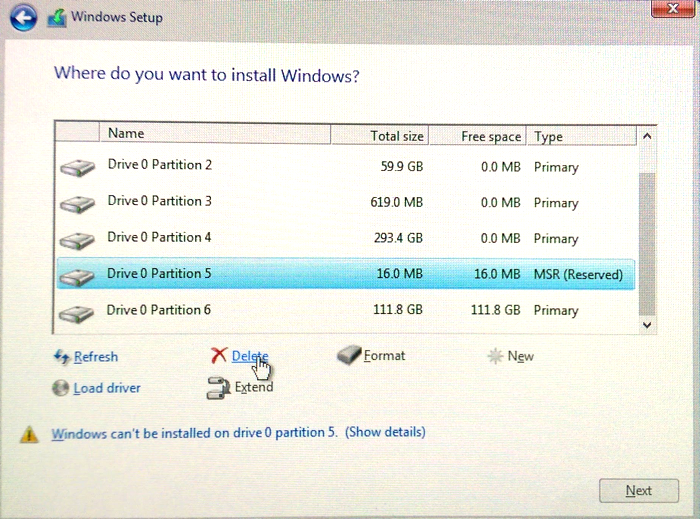
When you are asked Where do you want to install Windows?, select the Windows partition created earlier (which I called “BOOTCAMP”) and click Delete.
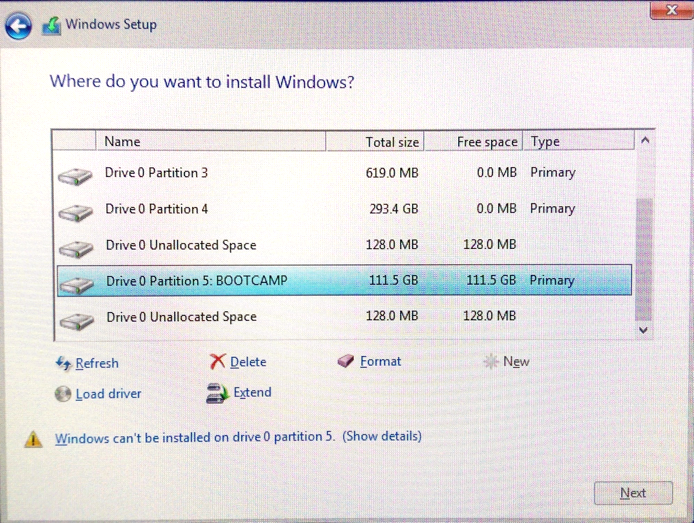
Next, select the chunk of Unallocated Space and click on New to create a proper Windows NTFS partition.
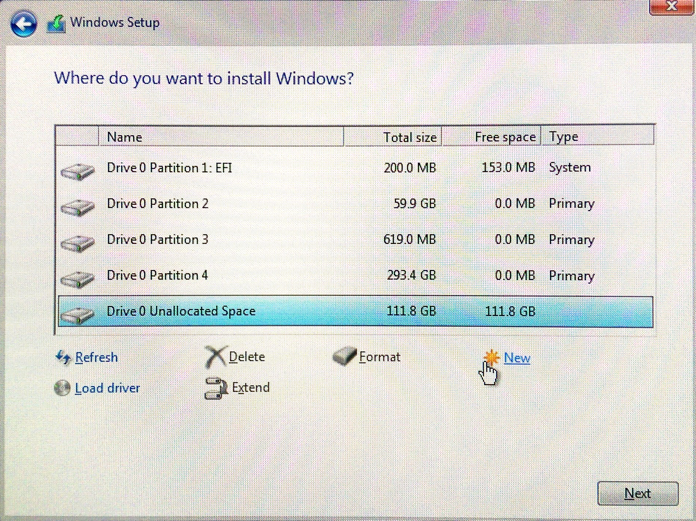
Note: OS X only supports creation of FAT filesystems, so this is why we need to re-create the partition ourselves during install.
Completing the Installation
Allow the installer to complete and boot into Windows.
Installing Boot Camp Support Software
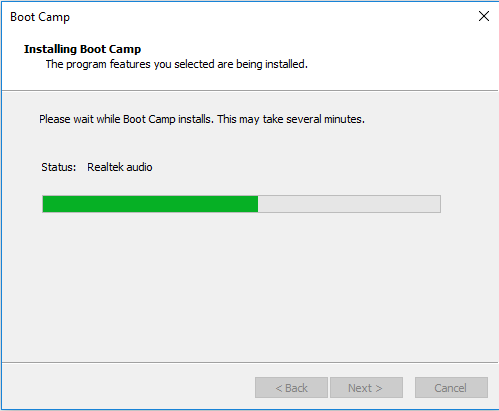
Once Windows is up and running, install the Boot Camp Support software running WindowsSupport/BootCamp/Setup.exe on your USB stick.
Note: The installer takes a little while to show up, so please be patient.
You may encounter a known issue whereby the Boot Camp Support Software installer locks up while installing Realtek audio.
If this occurs, you will need to open Task Manager and kill the RealtekSetup.exe process.
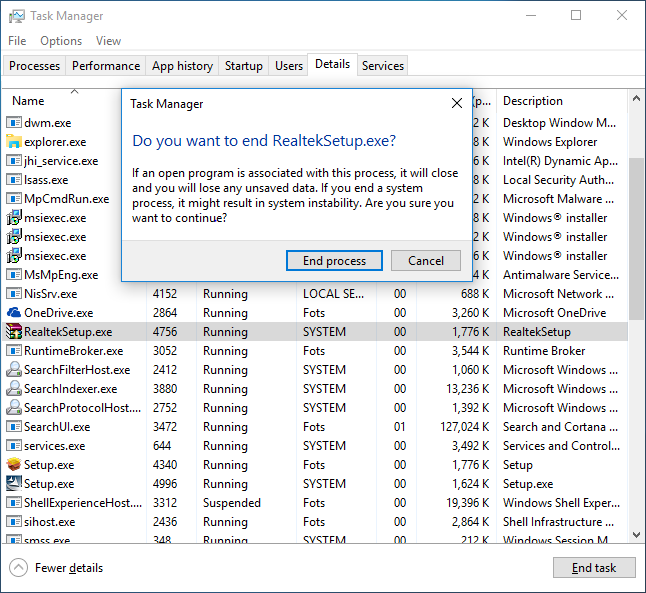
After the installer has completed, answer No when prompted to reboot and install the Realtek drivers manually by running %USERPROFILE%\AppData\Local\Temp\RarSFX0\BootCamp\Drivers\RealTek\RealtekSetup.exe. If you can’t find this file, check any other directories starting with RARSFX under %USERPROFILE%\AppData\Local\Temp.
Once complete, reboot Windows.
What You Will Need to Configure Windows
- The latest version of SharpKeys
- The flipflop-windows-sheel binary (see README for a download link)
Configuring Windows
Mapping Your Mac Keyboard
Install and run SharpKeys and then configure the following mappings to correct your Mac keyboard so that it behaves like a regular Windows keyboard:
Function: F13 -> Special: PrtSc
Special: Left Alt => Special: Left Windows
Special: Left Windows => Special: Left Alt
Special: Right Alt => Special: Right Windows
Special: Right Windows => Special: Right Alt
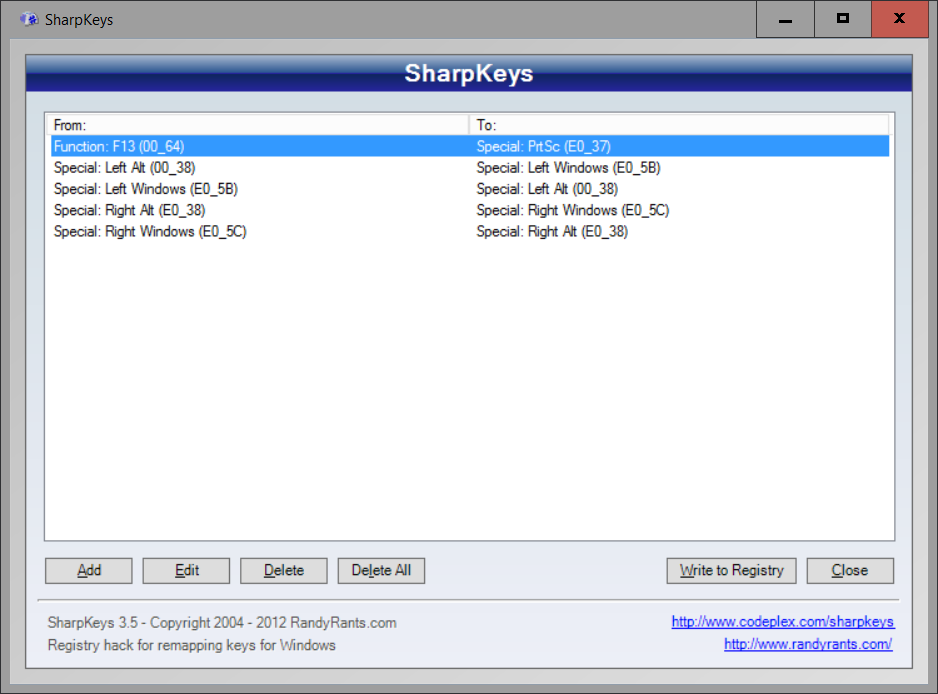
Note: for F13, you’ll need to select Press a key and click F13 on your keyboard.
Switching to Natural Scrolling
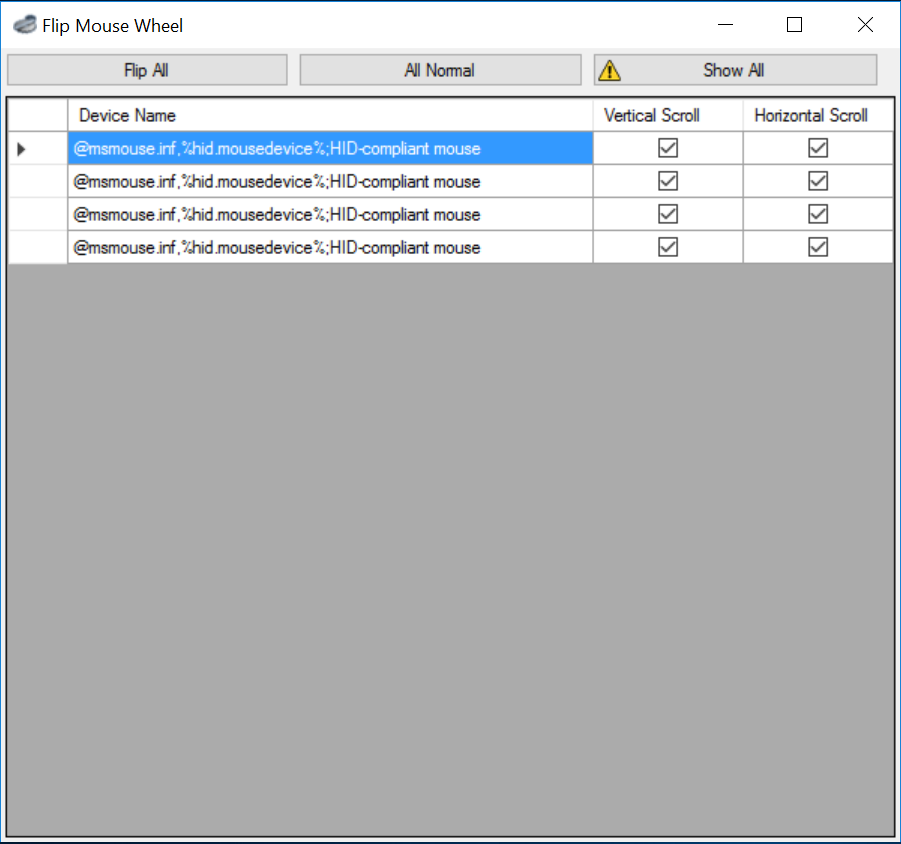
If you wish to flip scrolling direction to match that on OS X, run FlipWheel.exe and then click on Flip All.
Enabling Num Lock on Boot
Paste the following into a file named Enable NumLock on Boot.reg then import this into the registry to enable NumLock when Windows boots up (it doesn’t by default).
Completing Configuration
That’s it, give your machine one last reboot and you’ll have a fully working Windows 10 installation.
Note: I have found Apple’s Magic Mouse to be extremely unreliable using the Boot Camp drivers from Apple. As such, I recommend purchasing a Logitech (or similar) mouse for use in Windows. I have no trouble plugging the wireless receiver for my Logitech mouse into one of the USB ports of my wired Apple Keyboard and it’s so tiny that you can’t see it at all.
Cleaning up a Windows Installation
Removing the Windows Partitions
If you decide to remove Windows, you may find that Disk Utility doesn’t allow you to delete the two partitions that have been created by the Windows installer.
This happens due to the fact that the first small partition created is of a type called Microsoft Reserved which OS X’s Disk Utility doesn’t support.
The safest way to delete these partitions is through the Windows installer. So simply boot from your USB stick as we did before and when you reach the Where do you want to install Windows? question, you may delete your “BOOTCAMP” partition and the small 16 MB partition of type MSR (Reserved) just above the BOOTCAMP partition.
Once done, simply quit the installer by clicking the X in the top right corner of each Window and reboot back into OS X.
Removing the Boot Entry
Even though we have removed the Windows partition, a boot entry will still be present when holding down option (alt) during boot.
You may remove these items by running the following in your Terminal:
Способы установки Windows на macOS

Устанавливаем Windows на macOS
Всего доступно три способа инсталляции ОС от Microsoft на компьютер Apple – использование виртуальной машины, установка на отдельный раздел посредством Boot Camp и режим слияния, при котором ОС, установленную через Boot Camp, можно запускать без перезагрузки машины. Рассмотрим все их по порядку.
Способ 1: Использование виртуальной машины
Если Виндовс требуется использовать для несложных задач вроде офисной работы или лишь время от времени, лучшим вариантом будет установка этой ОС на виртуальную машину, Таковых для макОС существует три: Parallels, VirtualBox и VMvare. В примере далее показана инсталляция ОС от Майкрософт в среде VirtualBox.
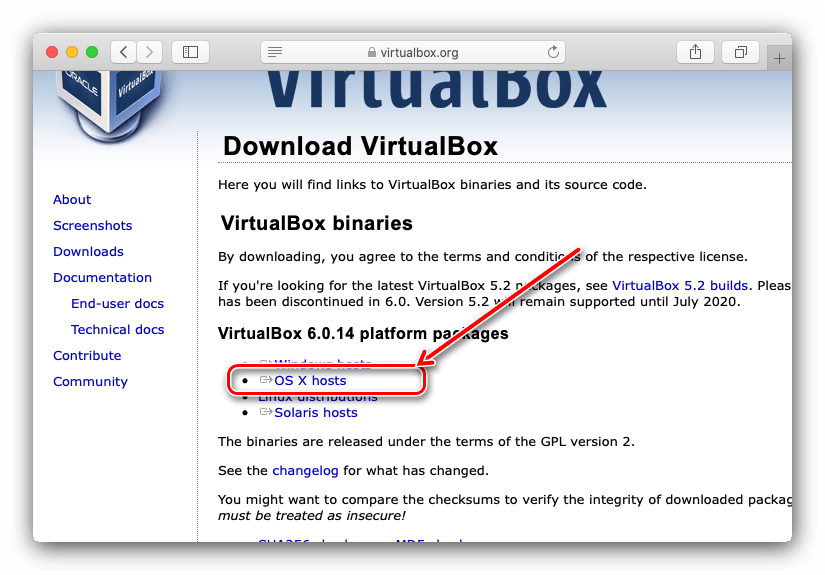
- Чтобы скачать инсталлятор ВиртуалБокс для Мака, на странице загрузки щёлкните по ссылке «OS X Hosts».
После скачивания установщика запустите его. Процесс инсталляции ничем не отличается от такового для любой другой программы в macOS. По окончании установки запустите приложение – по умолчанию оно устанавливается в каталог «Программы».
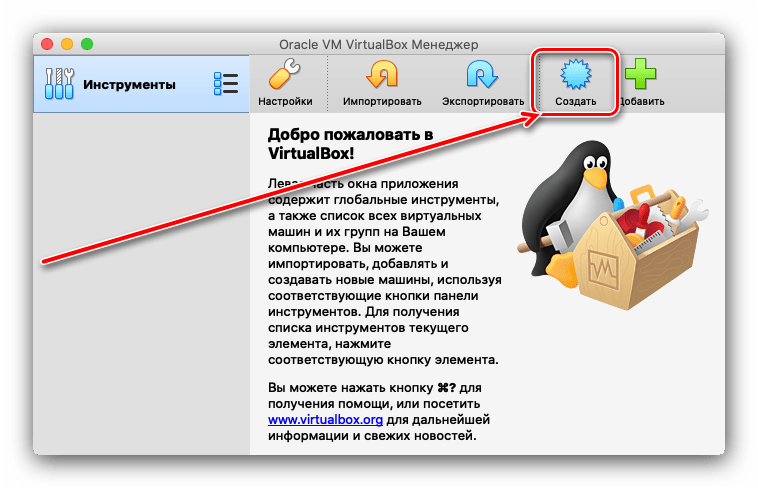
В главном меню VirtualBox воспользуйтесь кнопкой «Создать».
На этом этапе нужно задать объём RAM, которым будет пользоваться виртуальная среда. Рекомендуется устанавливать значения, равные 50-60% от имеющегося количества: например, при 4 Гб ОЗУ разумным будет установить значение в 2048 Мб.

Далее потребуется выбрать один из форматов HDD, которым будет пользоваться виртуальная «десятка». Чтобы инсталлировать систему, следует выбирать вариант «Создать новый виртуальный жесткий диск».

Теперь установить тип используемого Virtual HDD. Вариант по умолчанию установлен как VDI, его можно оставить.

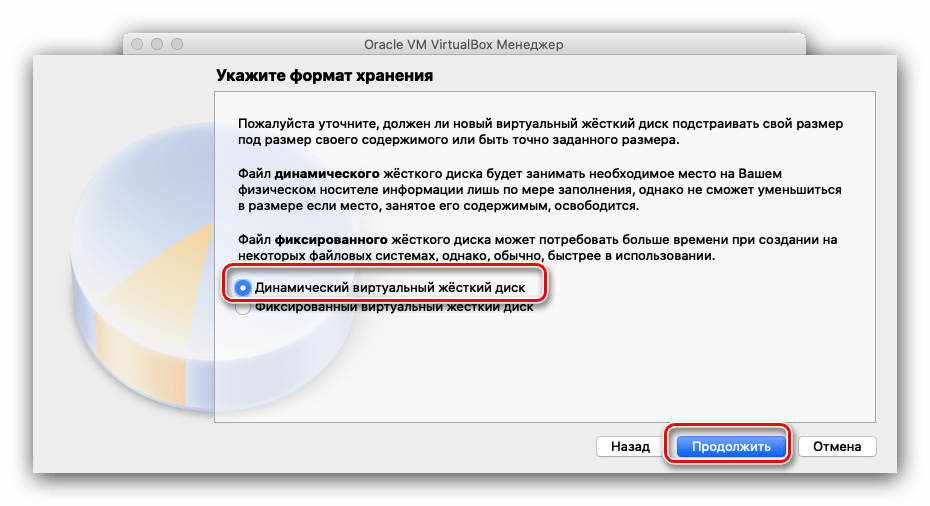
Формат хранения данных также оставьте как «Динамический виртуальный жёсткий диск».
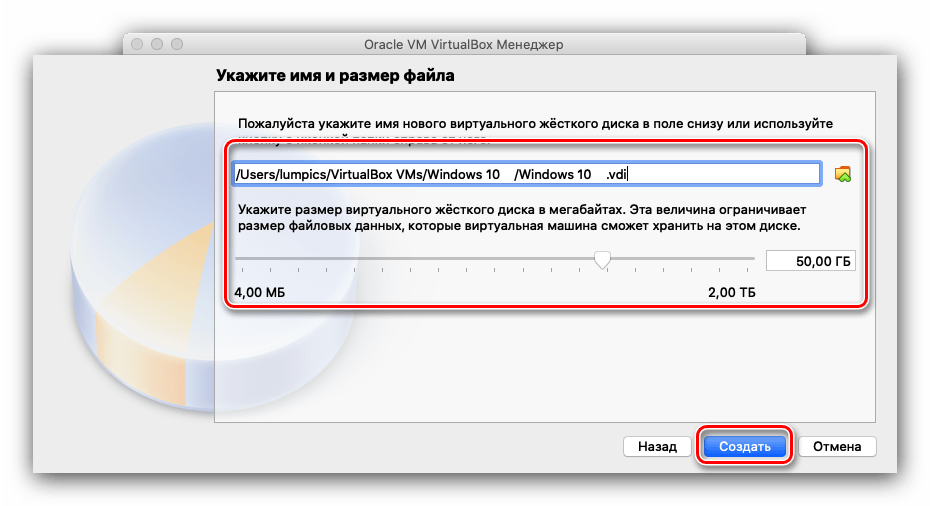
Установите объём накопителя, размера в 50 Гб будет достаточно. Не пугайтесь больших цифр, реальный размер файла VDI будет в несколько раз меньший.
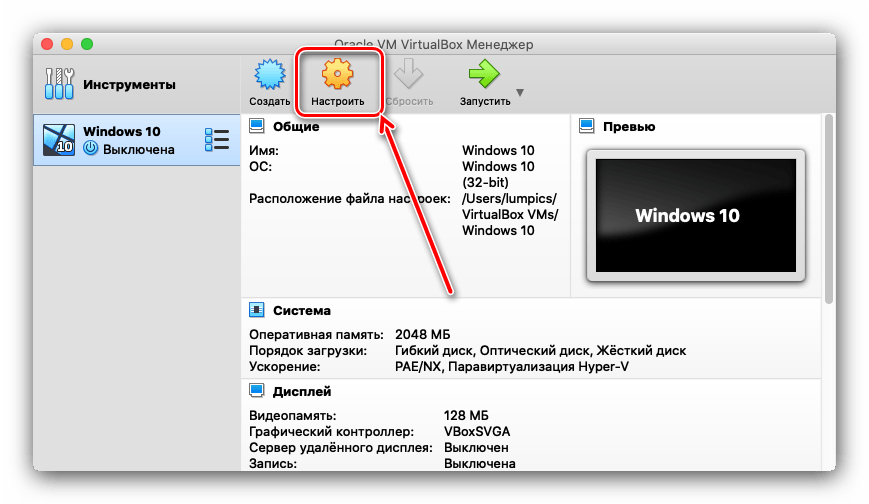
После этих действий будет создана новая виртуальная машина. На неё потребуется установить «десятку» как на обычный компьютер, и вот здесь всё не так просто. Для начала среду следует подготовить: выделите пункт нужной машины в соответствующем меню и нажмите на кнопку «Настроить».
Первым делом откройте закладки «Система» – «Материнская плата» и в разделе «Порядок загрузки» уберите галочку с опции «Гибкий диск». Также не забудьте активировать вариант «Включить EFI».

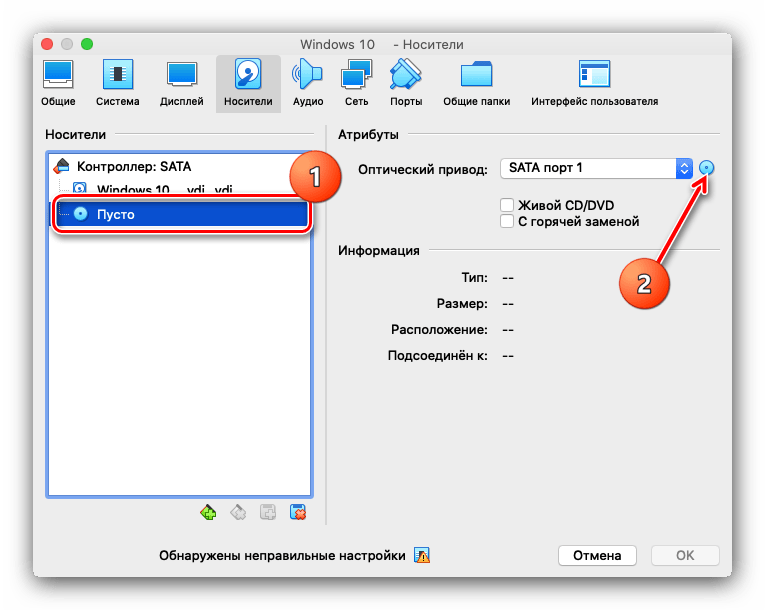
Далее откройте вкладку «Носители». Щёлкните мышкой по записи контроллера, затем найдите пункт «Оптический привод» и кликните по кнопке со значком диска.
Во всплывающем меню воспользуйтесь пунктом «Выбрать образ оптического диска…».
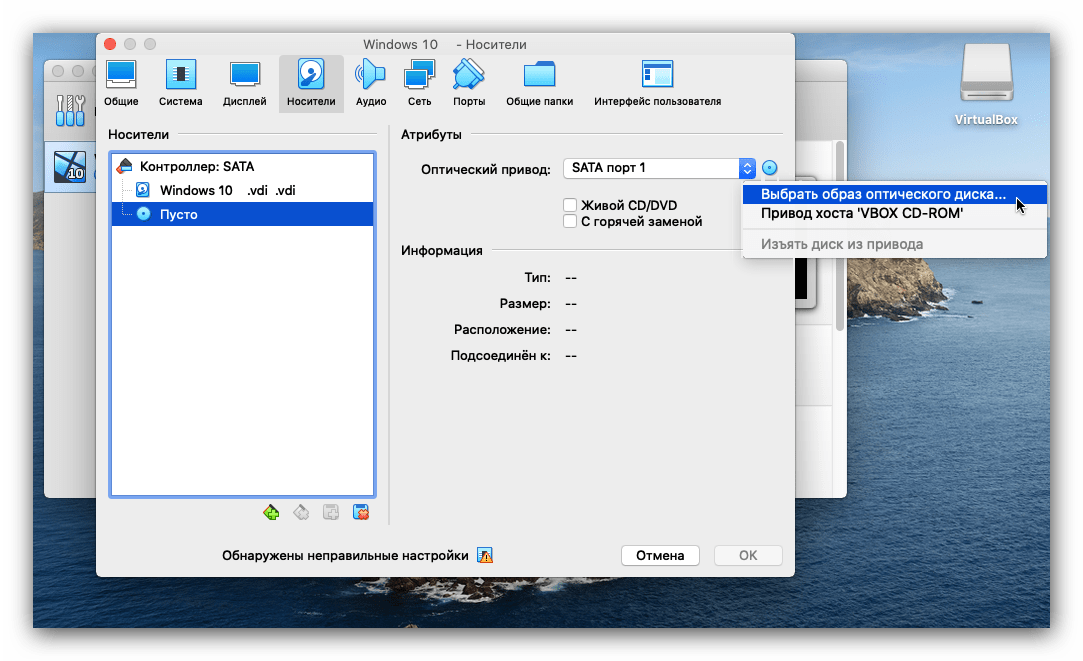
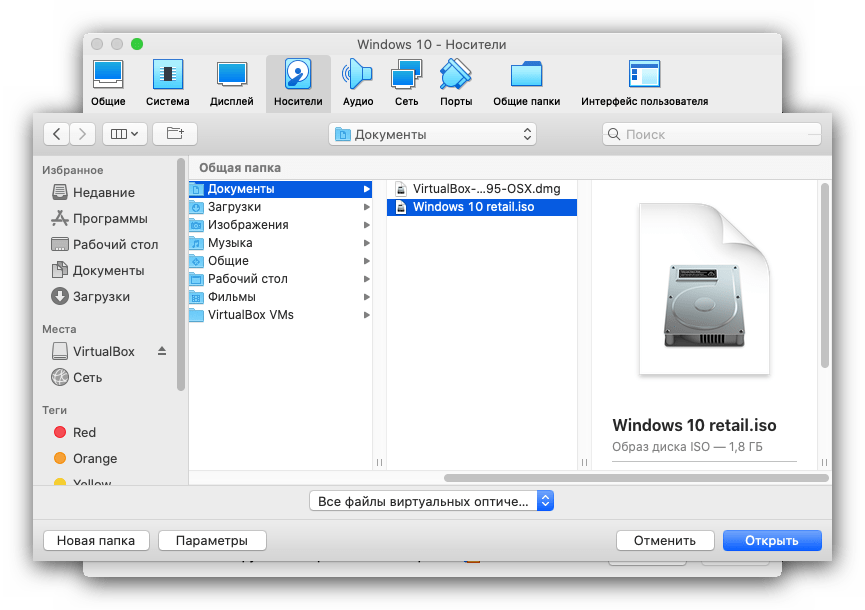
В диалоговом окне Finder перейдите к местоположению требуемого ISO-образа и выберите его.
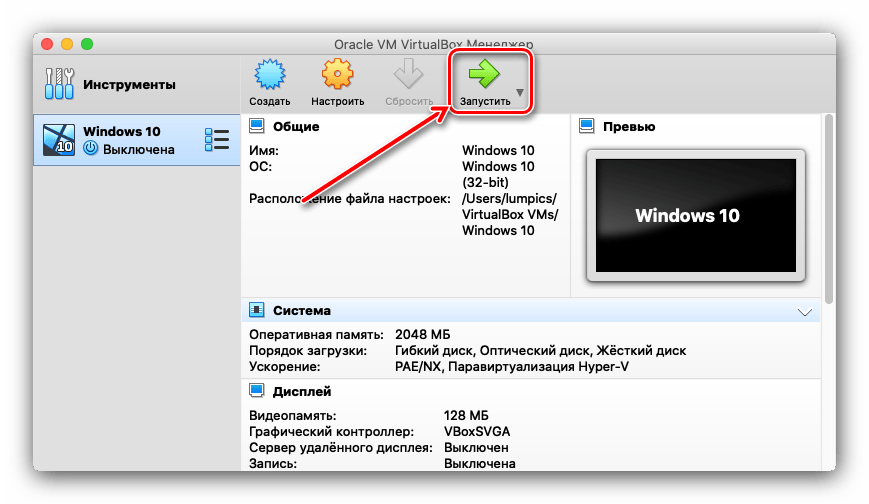
Затем нажмите «ОК» для сохранения всех внесённых изменений и закройте средство настройки. По возвращении в основное приложение используйте кнопку «Запустить».
Если вы всё сделали правильно, начнётся установка Windows 10.
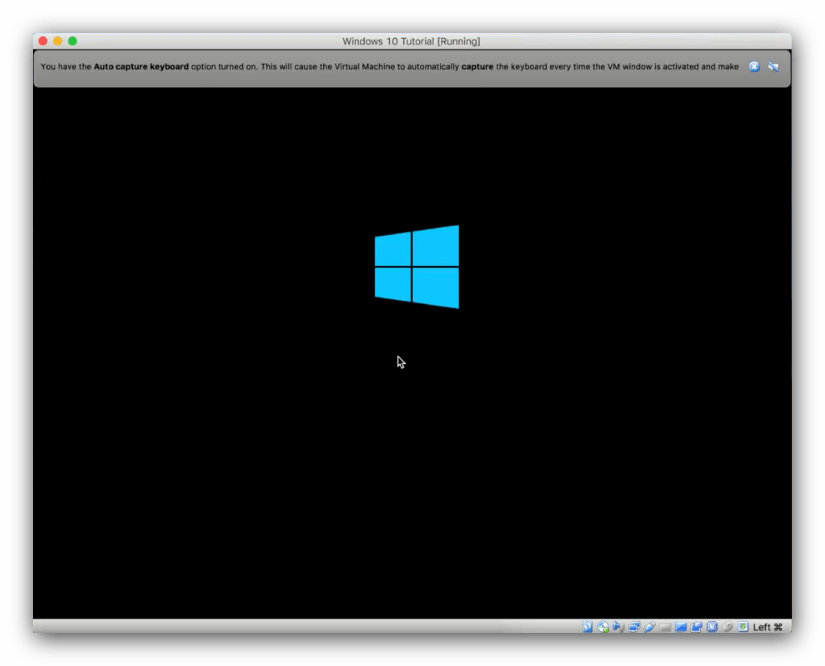
Дальнейшая процедура ничем не отличается от установки на настоящий компьютер, поэтому подробно останавливаться на ней не будем.
Данный вариант позволяет пользоваться «десяткой» без перезагрузки, однако для запуска игр или иных ресурсоёмких приложений не подходит.
Способ 2: Инсталляция посредством BootCamp
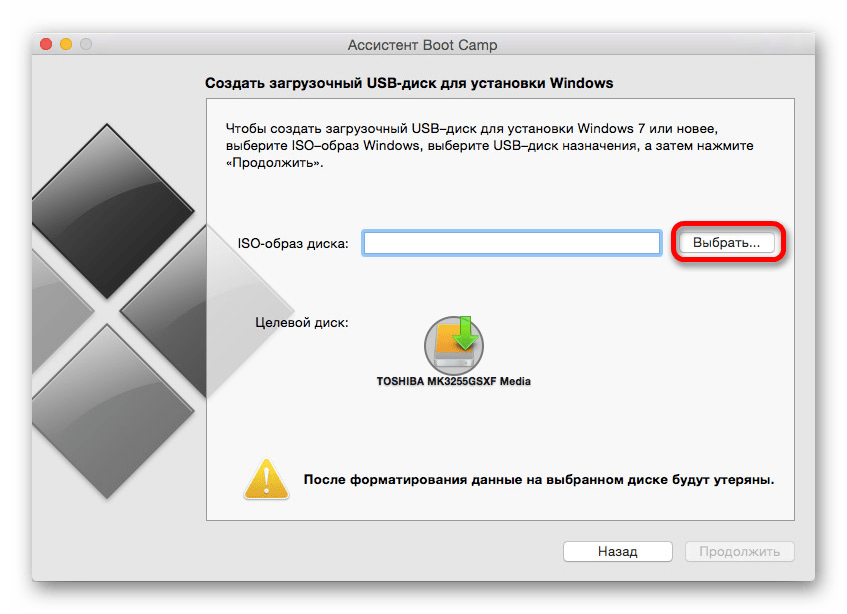
Порой пользователям macOS требуется Windows для запуска специфического софта. Как показывает практика, редкие и узкоспециализированные приложения на «виртуалке» часто отказываются работать нормально. В таких случаях целесообразной выглядит инсталляция полноценной Виндовс на отдельный раздел жесткого диска посредством инструмента Boot Camp. Все особенности процедуры описал один из наших авторов в отдельном материале, поэтому рекомендуем воспользоваться ссылкой далее.
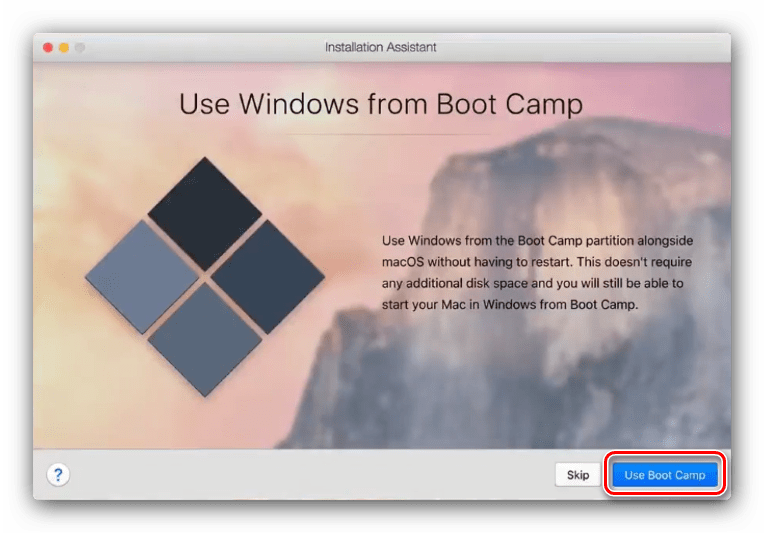
Способ 3: Гибридная инсталляция
Также существует метод, который позволяет совместить виртуализацию и полноценную установку через Boot Camp.
- Первым делом инсталлируйте ОС от Майкрософт на ваш Мак через Бут Кемп, сделать это поможет инструкция выше.
- Для включения гибридной системы можно использовать как VMware, так и Parallels. Последний вариант намного удобнее, поэтому им и воспользуемся.
Внимание! Oracle VirtualBox официально не поддерживает гибридную систему!
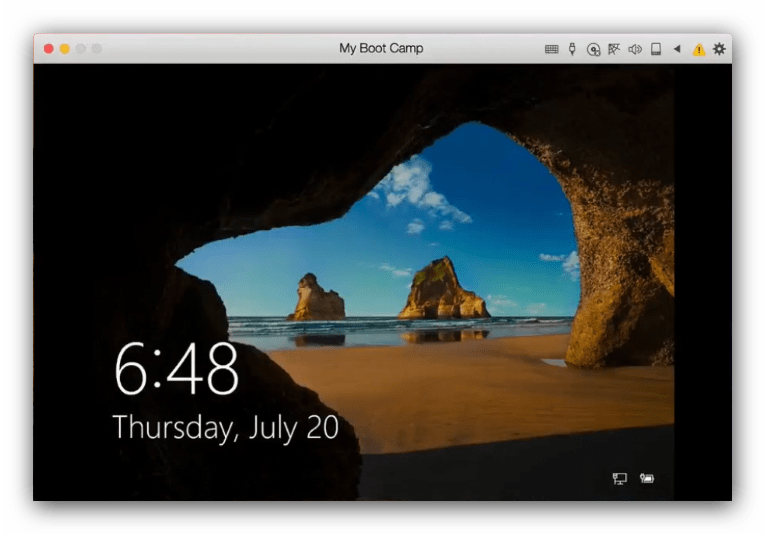
Запустится процесс инсталляции. Он обычно занимает длительное время, поэтому запаситесь терпением.

По окончании процедуры автоматически запустится установленная Windows 10, сконфигурированная и готовая к работе.
Этот вариант сочетает в себе достоинства первых представленных методов, но требует наличия платного программного обеспечения.
Заключение
Итак, мы рассмотрели методы установки Windows 10 на компьютер Mac и можем сделать следующие выводы: доступно три метода решения задачи, каждый из которых имеет свои достоинства и недостатки, поэтому выбирать следует исходя из целей, которые преследует пользователь.


