- How To Install iPhone Drivers In Windows 10
- Install iPhone drivers in Windows 10
- Install iPhone driver in Windows 10
- Если компьютер не распознает iPhone, iPad или iPod
- На компьютере Mac
- На компьютере PC с ОС Windows
- Если вы загрузили iTunes из магазина Microsoft Store
- Если вы загрузили iTunes с веб-сайта Apple
- Если устройство по-прежнему не распознается
- Если драйвер Apple Mobile Device USB Driver не отображается или отображается «Неизвестное устройство»:
- Если драйвер Apple Mobile Device USB Driver отображается с символом ошибки:
- Set up and use iCloud for Windows
- Before you begin
- Set up iCloud for Windows
- Download and share your photos
- Share your photos
- See your files and folders with iCloud Drive
- Keep your apps up to date
- On your PC
How To Install iPhone Drivers In Windows 10
Last Updated on September 28, 2020 by admin 20 Comments
Windows 10 PC users never had to manually install iPhone drivers in order to backup or sync iPhone in Windows 10 PC using iTunes. This seems to have changed with the Store version of the iTunes app for Windows 10.
Users who have installed iTunes app from Windows Store seems to be getting “driver not installed” error when iPhone is connected to the PC. It seems that the Store version of iTunes (see how to download iTunes from Apple without Store) doesn’t automatically install necessary iPhone drivers (USB device driver) during its installation.

If you are also getting “driver not installed” error in iTunes for iPhone, you can manually install required iPhone drivers with ease.
We can use the Windows Update service in Windows 10 to download and install the correct iPhone drivers for Windows 10.
Method 1 of 2
Install iPhone drivers in Windows 10
Step 1: Connect your iPhone to Windows 10 PC and launch iTunes.
Step 2: When you get the “driver not installed” error, navigate to Windows 10 Settings app > Update & security > Windows Update. Click on Check for updates button to automatically download and install iPhone drivers. Windows Update will download and install two small drivers.

Once the necessary drivers are installed, you may close and then launch the iTunes app. iTunes should now detect your iPhone without the “driver not installed” error.
Method 2 of 2
Install iPhone driver in Windows 10
Step 1: Open the Device Manager by right-clicking on the Start button on the taskbar and then clicking on the Device Manager option.
Step 2: In the Device Manager window, look for Portable devices (your iPhone must be connected to your PC). Expand Portable devices entry to see Apple iPhone entry. Right-click on iPhone entry and then click Update driver option.

Step 3: In the resulting dialog, click Search automatically for updated driver software option. Windows 10 will automatically download and install the required drivers for your iPhone.
Если компьютер не распознает iPhone, iPad или iPod
Если при подключении iPhone, iPad или iPod к компьютеру с помощью кабеля USB устройство не распознается, воспользуйтесь следующими инструкциями.
Если компьютер не распознает подключенное устройство, может отобразиться неизвестная ошибка или ошибка с кодом 0xE. В этом случае выполните следующие действия, пробуя подключить устройство после каждого из них.
- Убедитесь, что устройство iOS или iPadOS разблокировано и на нем отображается экран «Домой».
- Убедитесь, что на вашем компьютере Mac или компьютере с Windows установлена последняя версия программного обеспечения. При использовании программы iTunes убедитесь, что установлена последняя ее версия.
- Убедитесь, что устройство включено.
- Если появится вопрос «Доверять этому компьютеру?», разблокируйте устройство и нажмите «Доверять».
- Отключите от компьютера все USB-аксессуары, кроме устройства. Попробуйте подключить устройство к другим портам USB. Затем попробуйте использовать другой USB-кабель Apple *.
- Перезапустите компьютер.
- Перезапуск устройства:
- iPhone
- iPad
- iPod touch
- Попробуйте подключить устройство к другому компьютеру. Если на другом компьютере наблюдается та же проблема, обратитесь в службу поддержки Apple.
Ниже представлены дополнительные инструкции по решению этой проблемы на компьютере Mac и компьютере с ОС Windows.
На компьютере Mac
- Подключите устройство iOS или iPadOS и убедитесь, что оно разблокировано и на нем отображается экран «Домой».
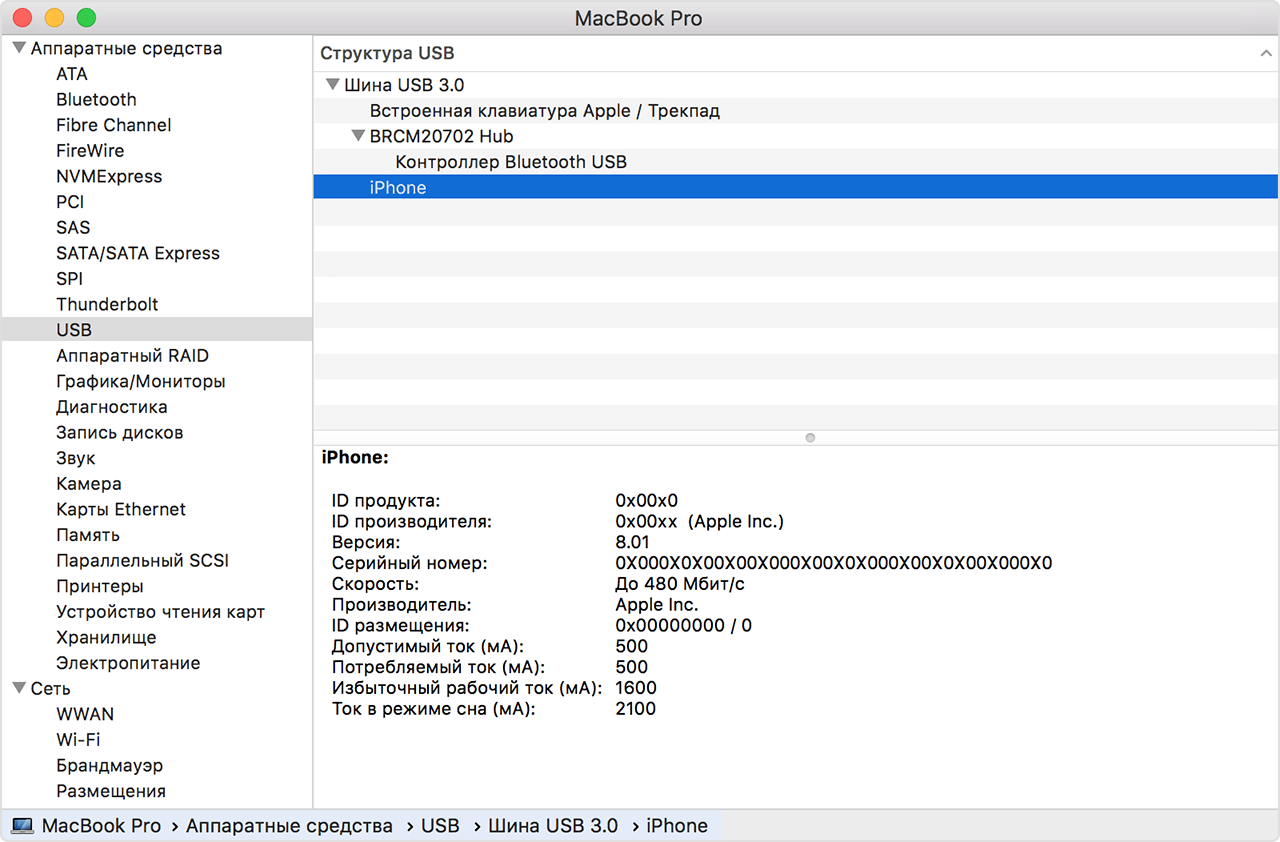
- Удерживая нажатой клавишу Option на компьютере Mac, перейдите в меню Apple и выберите пункт «Информация о системе» или «Отчет о системе».
- В списке слева выберите USB.
- Если iPhone, iPad или iPod отображается в разделе «Структура USB», установите последнюю версию macOS или последние обновления. Если ваше устройство не отображается или вам все еще нужна помощь, обратитесь в службу поддержки Apple.


На компьютере PC с ОС Windows
Инструкции отличаются в зависимости от того, загрузили ли вы iTunes из магазина Microsoft Store или с веб-сайта Apple.
Если вы загрузили iTunes из магазина Microsoft Store
Выполните следующие действия, чтобы переустановить драйвер Apple Mobile Device USB Driver.
- Отключите устройство от компьютера.
- Разблокируйте устройство iOS или iPadOS и перейдите на экран «Домой». Затем повторно подключите устройство. Если откроется программа iTunes, закройте ее.
- Нажмите и удерживайте (или щелкните правой кнопкой мыши) кнопку «Пуск», а затем выберите пункт «Диспетчер устройств».
- Найдите и разверните раздел «Портативные устройства».
- Найдите свое подключенное устройство (например, Apple iPhone), щелкните его имя правой кнопкой мыши и выберите пункт «Обновить драйвер».
- Выберите вариант «Автоматический поиск обновленных драйверов».
- Установив программное обеспечение, перейдите в раздел «Настройки» > «Обновления и безопасность» > «Центр обновления Windows» и проверьте, нет ли других доступных обновлений.
- Откройте программу iTunes.

Если вы загрузили iTunes с веб-сайта Apple
Выполните следующие действия, чтобы переустановить драйвер Apple Mobile Device USB Driver.
- Отключите устройство от компьютера.
- Разблокируйте устройство iOS или iPadOS и перейдите на экран «Домой». Затем повторно подключите устройство. Если откроется программа iTunes, закройте ее.
- Нажмите клавиши Windows и R, чтобы открыть окно «Выполнить».
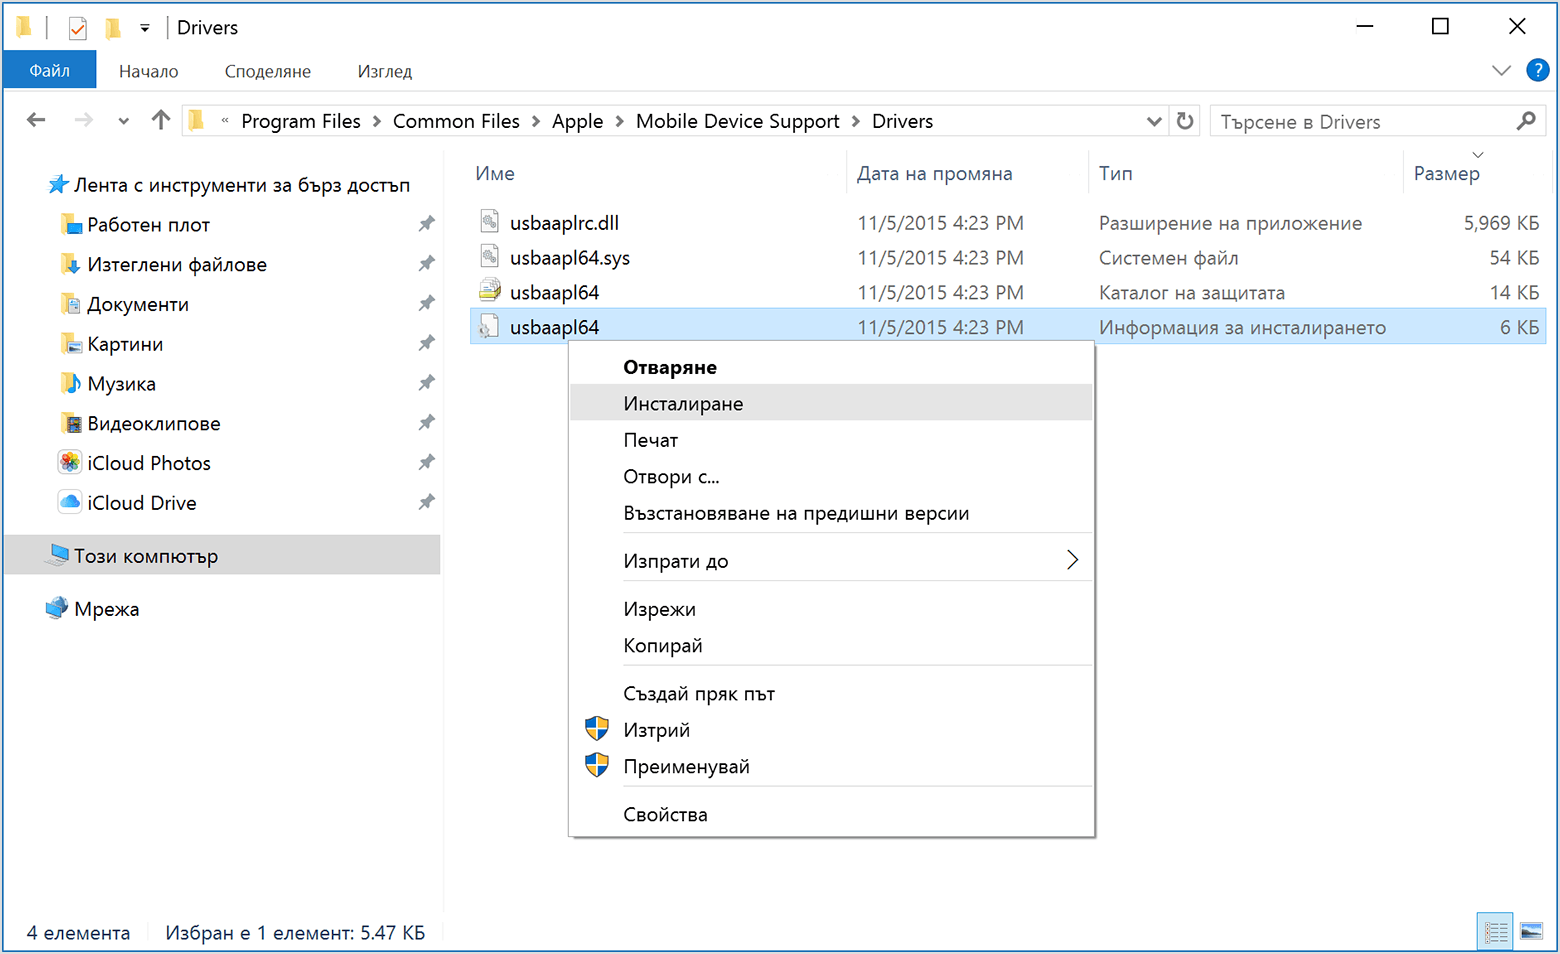
- В окне «Выполнить» введите:
%ProgramFiles%\Common Files\Apple\Mobile Device Support\Drivers - Нажмите кнопку «ОК».
- Щелкните правой кнопкой мыши файл usbaapl64.inf или usbaapl.inf и выберите вариант «Установить».
Могут отображаться другие файлы, начинающиеся с usbaapl64 или usbaapl . Установить следует файл с расширением .inf. Если вы не уверены, какой файл устанавливать, щелкните правой кнопкой пустую область в окне проводника, а затем последовательно выберите пункты «Вид» и «Таблица», чтобы отобразить типы файлов. Установить нужно файл типа «Сведения для установки». - Отсоедините устройство от компьютера, затем перезапустите компьютер.
- Повторно подключите устройство и откройте iTunes.
Если устройство по-прежнему не распознается
Проверьте в диспетчере устройств, установлен ли драйвер Apple Mobile Device USB Driver. Чтобы открыть диспетчер устройств, выполните следующие действия.
- Нажмите клавиши Windows и R, чтобы открыть окно «Выполнить».
- В окне «Выполнить» введите devmgmt.msc и нажмите кнопку «ОК». Должно появиться окно «Диспетчер устройств».
- Найдите и разверните раздел «Контроллеры USB».
- Найдите драйвер Apple Mobile Device USB Driver.
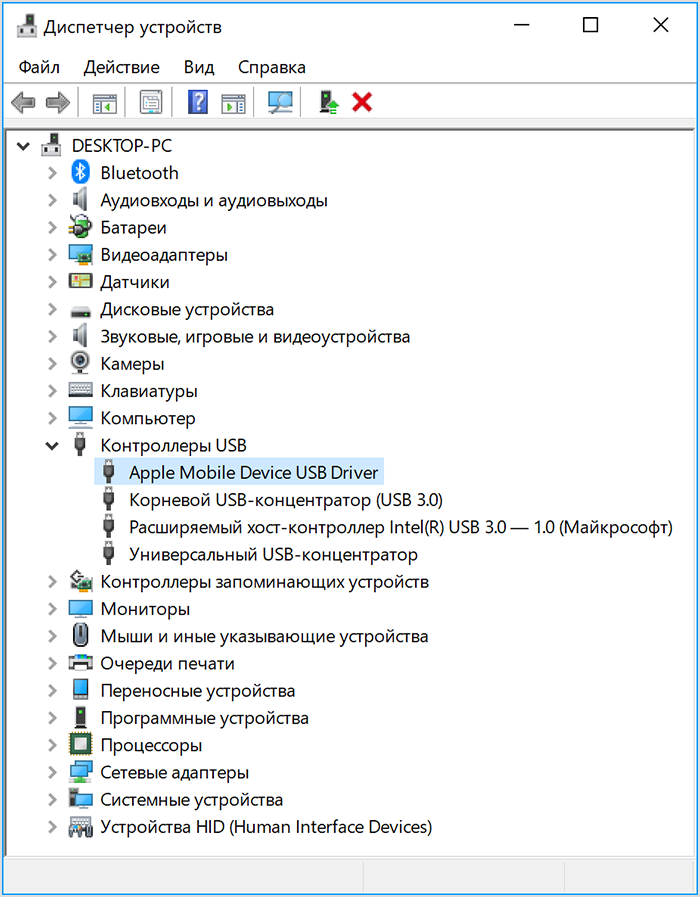
Если драйвер Apple Mobile Device USB Driver не отображается или отображается «Неизвестное устройство»:
- Подключите устройство к компьютеру с помощью другого кабеля USB.
- Подключите устройство к другому компьютеру. Если на другом компьютере наблюдается та же проблема, обратитесь в службу поддержки Apple.
Если драйвер Apple Mobile Device USB Driver отображается с символом ошибки:
Если рядом с драйвером Apple Mobile Device USB Driver отображается значок , или , выполните следующие действия.
Информация о продуктах, произведенных не компанией Apple, или о независимых веб-сайтах, неподконтрольных и не тестируемых компанией Apple, не носит рекомендательного или одобрительного характера. Компания Apple не несет никакой ответственности за выбор, функциональность и использование веб-сайтов или продукции сторонних производителей. Компания Apple также не несет ответственности за точность или достоверность данных, размещенных на веб-сайтах сторонних производителей. Обратитесь к поставщику за дополнительной информацией.
Set up and use iCloud for Windows
With iCloud for Windows, the photos, documents, and bookmarks on your PC are updated automatically on your Apple devices.
Before you begin
Make sure that you set up iCloud on your iPhone, iPad, or iPod touch or Mac and that you’re signed in with your Apple ID. Then follow the steps below to download and set up iCloud for Windows.
Want to access iCloud’s latest features? See the recommended system requirements. iCloud requires an Internet connection. iCloud might not be available in all areas and features vary. If you use a Managed Apple ID, iCloud for Windows isn’t supported.
Set up iCloud for Windows
- Download iCloud for Windows on your PC.
- Windows 10: Go to the Microsoft Store to download iCloud for Windows.
- Earlier versions of Windows*: Download iCloud for Windows from apple.com.
- If it doesn’t install automatically, go to File Explorer and open iCloud Setup.
- Restart your computer.
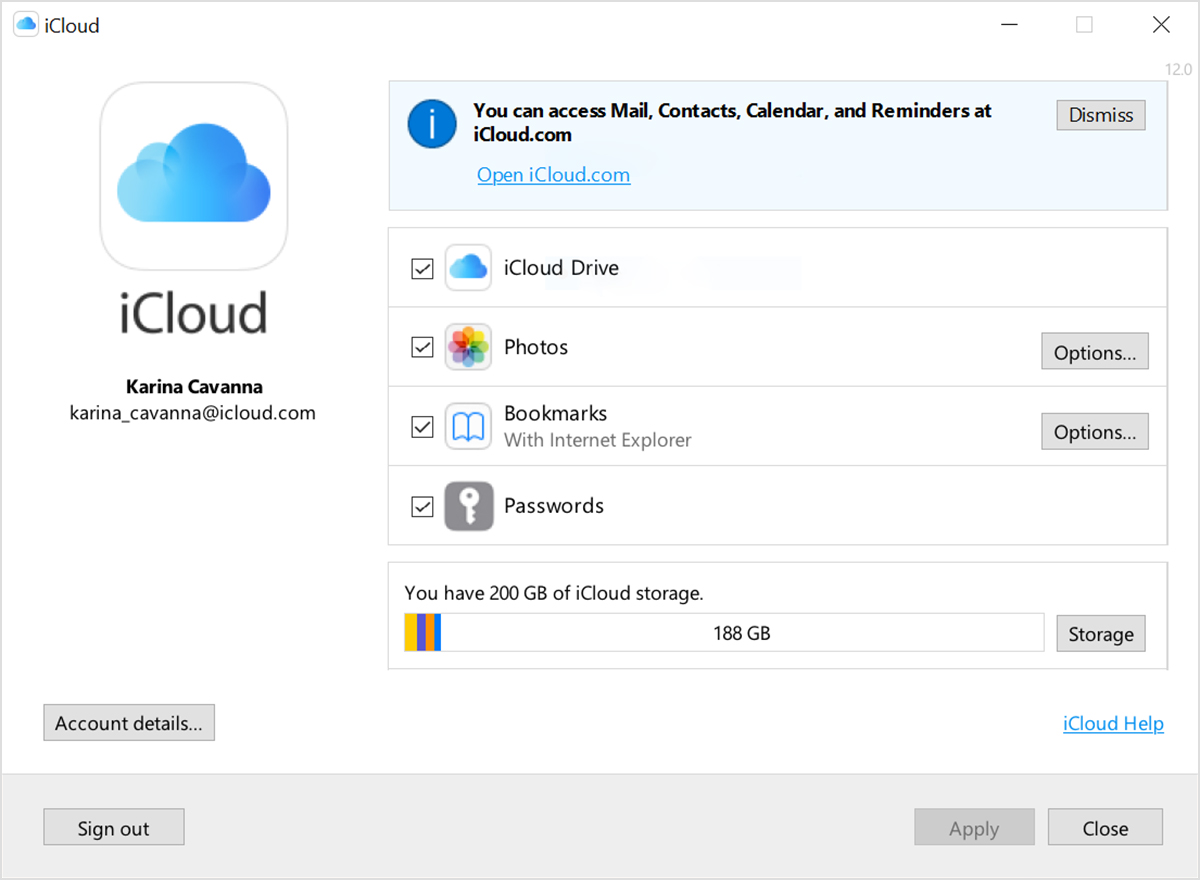
- Make sure iCloud for Windows is open. If it doesn’t open automatically, go to Start, open Apps or Programs, and open iCloud for Windows.
- Enter your Apple ID to sign in to iCloud.
- Choose the features and content that you want to keep up to date across your devices.
- Click Apply.
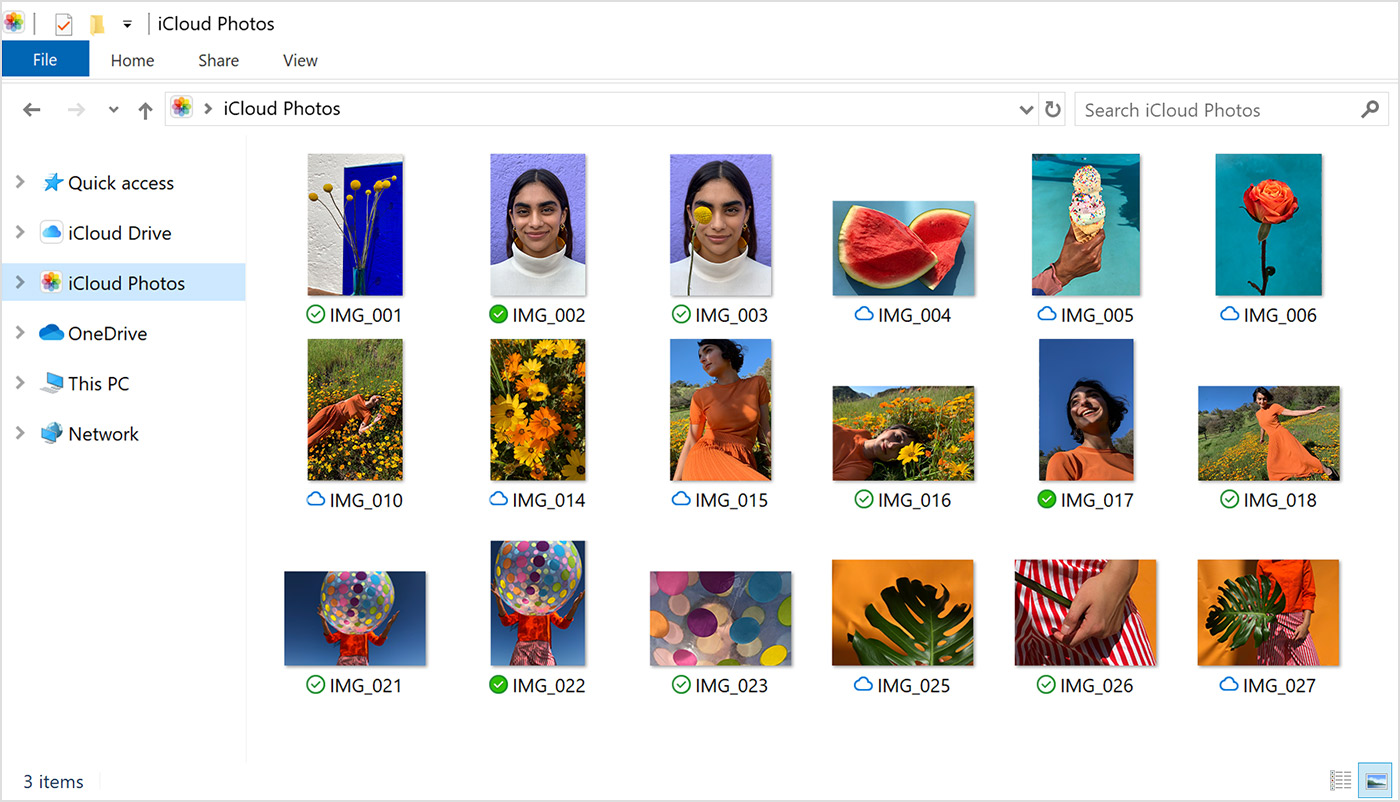
Download and share your photos
When you turn on Photos, iCloud for Windows creates a Photos folder in File Explorer called iCloud Photos. iCloud Photos uploads new photos and videos that you add to the iCloud Photos folder on your PC so you can see them in the Photos app on your iPhone, iPad, iPod touch, and Mac, and on iCloud.com. New photos and videos you take automatically download from iCloud Photos.
Share your photos
You can also share your photos. Shared Albums lets you view, share, and comment on the photos and videos you share with other people. And if you use the latest version of iCloud for Windows, you can pin photos to keep them local to your device. When you unpin them, they upload to iCloud instead.
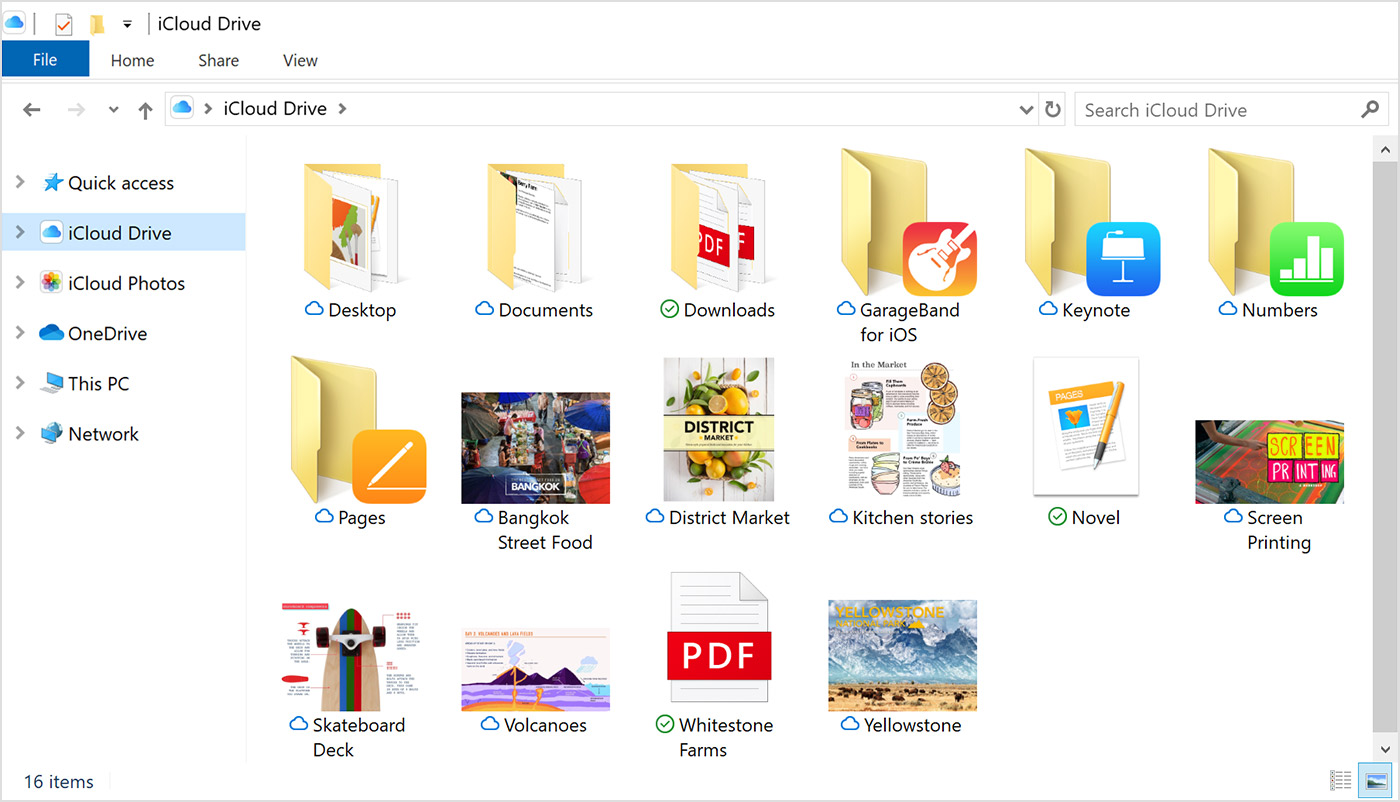
See your files and folders with iCloud Drive
When you turn on iCloud Drive, iCloud for Windows creates an iCloud Drive folder in File Explorer. You can find documents that you’ve stored in iCloud in this folder. When you create a file on your PC and save it to the iCloud Drive folder, it also appears on your other devices.
If you want to work on files with friends or colleagues, you can share individual files or create a shared folder to share a group of files. You can also pin files and folders so you can use them offline, and easily check the status of a download or shared file. In iCloud for Windows 12, you can find and recover files deleted from iCloud Drive in the past 30 days in Recently Deleted in iOS, iPadOS, or iCloud.com, in Trash in macOS, and in Recycle Bin in Windows. If you use Delete or Delete All in Recently Deleted or empty the Trash in macOS, files aren’t recoverable. If you don’t see the files you wish to restore, you can recover files deleted within the last 30 days at iCloud.com.
You can also access your iCloud Drive files and folders at iCloud.com.
If you receive an error when you try to move a file from iCloud for Windows, you might need to download the file to your Windows PC. After you download the file, try moving it again.
Keep your apps up to date
When you use iCloud on all of your devices, you can keep your Mail, Contacts, Calendars, and Tasks* updated no matter which device you’re using. Just make sure iCloud is set up on your PC, iPhone, iPad, iPod touch, or Mac using the steps below.
* On a Mac or iOS device, you see Reminders instead of Tasks.
On your PC
- Open iCloud for Windows.
- Select Mail, Contacts, Calendars, and Tasks then click Apply.
- You’ll see your iCloud Mail account in the folder pane on the left side of Microsoft Outlook 2007 through Outlook 2016.
If you sign in to iCloud using a third-party Mail app outside of iCloud for Windows, learn how to create an app-specific password to keep information up to date on your devices.


