- Install Windows 10 on your Mac with Boot Camp Assistant
- What you need to install Windows 10 on Mac
- How to install Windows 10 on Mac
- 1. Check your Secure Boot setting
- 2. Use Boot Camp Assistant to create a Windows partition
- 3. Format the Windows (BOOTCAMP) partition
- 4. Install Windows
- 5. Use the Boot Camp installer in Windows
- How to switch between Windows and macOS
- Learn more
- Установка Windows 7 на компьютере Mac с помощью boot Camp
- Аннотация
- Дополнительная информация
- Install Windows on your older Mac using Boot Camp
- What you need
- Before you begin
- Perform the installation
- Step 1: Check for software updates
- Step 2: Prepare your Mac for Windows
- Step 3: Install Windows
- Step 4: Install Boot Camp on Windows
Install Windows 10 on your Mac with Boot Camp Assistant
With Boot Camp, you can install Microsoft Windows 10 on your Mac, then switch between macOS and Windows when restarting your Mac.
What you need to install Windows 10 on Mac
- MacBook introduced in 2015 or later
- MacBook Air introduced in 2012 or later
- MacBook Pro introduced in 2012 or later
- Mac mini introduced in 2012 or later
- iMac introduced in 2012 or later 1
- iMac Pro (all models)
- Mac Pro introduced in 2013 or later
The latest macOS updates, which can include updates to Boot Camp Assistant. You will use Boot Camp Assistant to install Windows 10.
64GB or more free storage space on your Mac startup disk:
- Your Mac can have as little as 64GB of free storage space, but at least 128GB of free storage space provides the best experience. Automatic Windows updates require that much space or more.
- If you have an iMac Pro or Mac Pro with 128GB of memory (RAM) or more, your startup disk needs at least as much free storage space as your Mac has memory. 2
An external USB flash drive with a storage capacity of 16GB or more, unless you’re using a Mac that doesn’t need a flash drive to install Windows.
A 64-bit version of Windows 10 Home or Windows 10 Pro on a disk image (ISO) or other installation media. If installing Windows on your Mac for the first time, this must be a full version of Windows, not an upgrade.
- If your copy of Windows came on a USB flash drive, or you have a Windows product key and no installation disc, download a Windows 10 disk image from Microsoft.
- If your copy of Windows came on a DVD, you might need to create a disk image of that DVD.

![]()
How to install Windows 10 on Mac
To install Windows, use Boot Camp Assistant, which is included with your Mac.
1. Check your Secure Boot setting
Learn how to check your Secure Boot setting. The default Secure Boot setting is Full Security. If you changed it to No Security, change it back to Full Security before installing Windows. After installing Windows, you can use any Secure Boot setting without affecting your ability to start up from Windows.
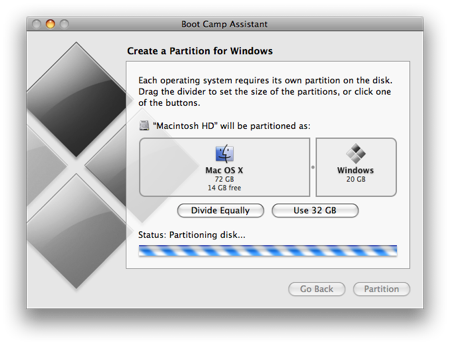
2. Use Boot Camp Assistant to create a Windows partition
Open Boot Camp Assistant, which is in the Utilities folder of your Applications folder. Follow the onscreen instructions.
- If you’re asked to insert a USB drive, plug your USB flash drive into your Mac. Boot Camp Assistant will use it to create a bootable USB drive for Windows installation.
- When Boot Camp Assistant asks you to set the size of the Windows partition, remember the minimum storage-space requirements in the previous section. Set a partition size that meets your needs, because you can’t change its size later.
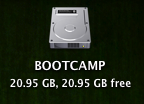
3. Format the Windows (BOOTCAMP) partition
When Boot Camp Assistant finishes, your Mac restarts to the Windows installer. If the installer asks where to install Windows, select the BOOTCAMP partition and click Format. In most cases, the installer selects and formats the BOOTCAMP partition automatically.
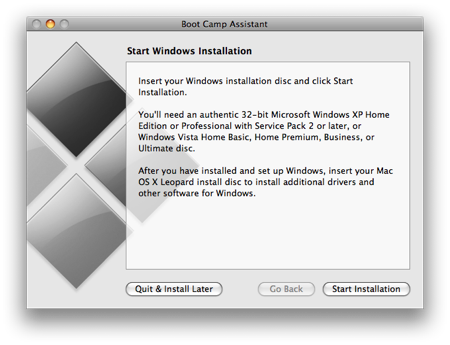
4. Install Windows
Unplug any external devices that aren’t necessary during installation. Then click Next and follow the onscreen instructions to begin installing Windows.
5. Use the Boot Camp installer in Windows
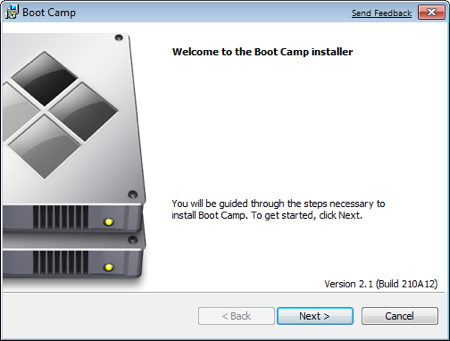
After Windows installation completes, your Mac starts up in Windows and opens a ”Welcome to the Boot Camp installer” window. Follow the onscreen instructions to install Boot Camp and Windows support software (drivers). You will be asked to restart when done.
- If the Boot Camp installer never opens, open the Boot Camp installer manually and use it to complete Boot Camp installation.
- If you have an external display connected to a Thunderbolt 3 port on your Mac, the display will be blank (black, gray, or blue) for up to 2 minutes during installation.
How to switch between Windows and macOS
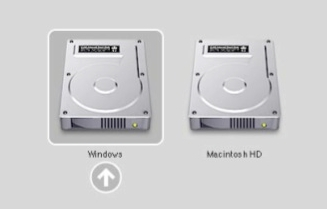
Restart, then press and hold the Option (or Alt) ⌥ key during startup to switch between Windows and macOS.
Learn more
If you have one of these Intel-based Mac models using OS X El Capitan or later, you don’t need a USB flash drive to install Windows:
- MacBook introduced in 2015 or later
- MacBook Air introduced in 2017 or later 3
- MacBook Pro introduced in 2015 or later 3
- iMac introduced in 2015 or later
- iMac Pro (all models)
- Mac Pro introduced in late 2013 or later
For more information about using Windows on your Mac, open Boot Camp Assistant and click the Open Boot Camp Help button.
1. If you’re using an iMac (Retina 5K, 27-inch, Late 2014) or iMac (27-inch, Late 2013) or iMac (27-inch, Late 2012) with a 3TB hard drive and macOS Mojave or later, learn about an alert you might see during installation.
2. For example, if your Mac has 128GB of memory, its startup disk must have at least 128GB of storage space available for Windows. To see how much memory your Mac has, choose Apple menu > About This Mac. To see how much storage space is available, click the Storage tab in the same window.
3. These Mac models were offered with 128GB hard drives as an option. Apple recommends 256GB or larger hard drives so that you can create a Boot Camp partition of at least 128GB.
Information about products not manufactured by Apple, or independent websites not controlled or tested by Apple, is provided without recommendation or endorsement. Apple assumes no responsibility with regard to the selection, performance, or use of third-party websites or products. Apple makes no representations regarding third-party website accuracy or reliability. Contact the vendor for additional information.
Установка Windows 7 на компьютере Mac с помощью boot Camp
Аннотация
Для пользователей Mac, которым также требуется компьютер на работе, дома или только с определенными приложениями, имеется решение. Используя помощник по загрузке, вы можете установить Windows 7 на компьютере Mac с Intel в рамках своего раздела. Вы будете иметь систему двойного загрузки с операционной системой Mac OS в одном из разделов и Windows в другом. Необходимые условия см. ниже, чтобы узнать, что вам нужно сделать.
Все обновления программного обеспечения, установленные на компьютере Mac
DVD-диск установки Windows 7 с ИД продукта (полная версия, а не версия для обновления)
Если у вас еще нет Windows 7, вы можете приобрести ее в Интернете в Microsoft Store.
Установочный DVD-диск Mac OS X Snow Leopard или Mac OS X Lion
Копия экземпляра Boot Camp версии 3.3 (4.0 для Mac OS X Lion)
Дополнительная информация
Чтобы установить Windows на компьютере Mac с помощью приложения Boot Camp, выполните указанные ниже действия в порядке, приведенном в списке.
Перед тем как следовать шагам в этой статье, не забудьте сделать это.
Напечатайте эту статью, чтобы использовать ее в качестве справки при установке Windows.
1. Откройте Finder и перейдите в приложение -> Utilities и дважды щелкните «Помощник по загрузке в университете».

2. Нажмите кнопку «Продолжить» в окне первоначального введения.
3. Установите размер раздела для установки Windows. Чтобы изменить размер выделенного пространства для Windows 7, щелкните небольшой разделтель между Mac OS X и Windows и перетащите его влево.
Примечание. Для установки Windows 7 требуется не менее 16 ГБ места на жестком диске, но имейте в виду, что в этом месте также потребуется обдумать все установленные приложения и сохраненные документы. в качестве отправной точки можно установить размер не менее 40 ГБ (в зависимости от количества приложений, которые вы планируете установить). Пример: Microsoft Office 2010 профессиональный требуется 3 ГБ. 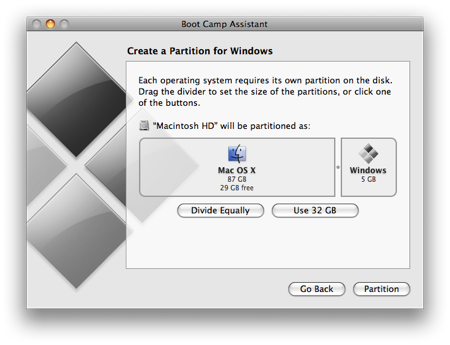
4. После того как вы определите, сколько места будет выделено для Windows 7, нажмите кнопку «Раздел» или просто нажмите кнопку «Разделить на одинаковое», чтобы одинаково отделить разделы.
5. После создания раздела на рабочем столе будет новый значок диска BOOT ПЕРЕНАБОР.
6. Затем вставьте DVD-диск Windows 7 и нажмите кнопку «Начать установку».
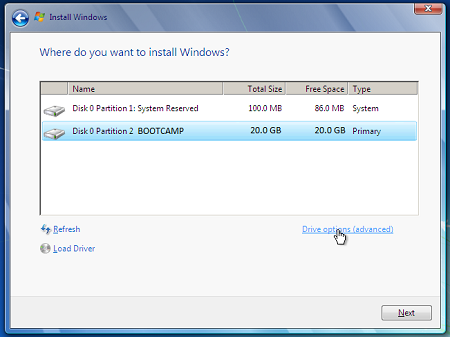
7. Компьютер Mac перезапустится и загрузится на DVD-диск Windows 7. Вам будет предложено в окне с вопросом, какой раздел вы хотите установить Windows. Выберите раздел с названием «ЗАГРУЗКА». Затем выберите «Параметры Диска» (дополнительные параметры).
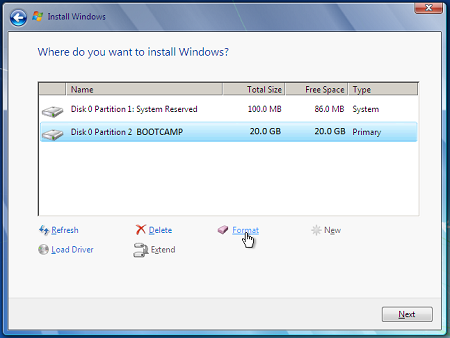
8. Не сжимая кнопку «ЗАГРУЗКА», нажмите кнопку «Формат».
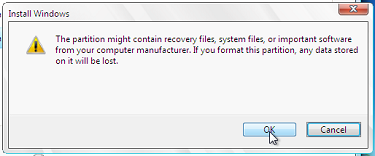
9. Нажмите кнопку «ОК», когда будете уведомлены о том, что файлы будут потеряны. Примечание. (Новый раздел не будет содержать файлов.
10. Начнется установка Windows 7. Во время установки система перезагружает компьютер, после этого потребуется удалить DVD-диск Windows 7.

11. После удаления DVD-диска с Windows 7 компьютер Mac автоматически начнет загрузку в Windows 7 и установка продолжится. Вам будет предложено выбрать язык, раскладку клавиатуры, ИД продукта и т. д. Следуйте дополнительным инструкциям, чтобы завершить установку Windows 7.
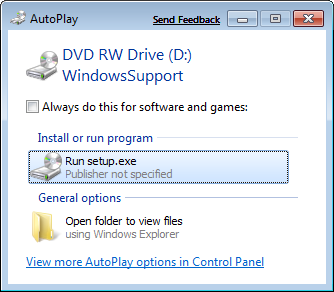
12. После завершения установки Windows вставьте DVD-диск MAC OS и выберите RunSetup.exe при запросе.
13. Нажмите кнопку «Далее», когда запустится установщик Boot Camp.
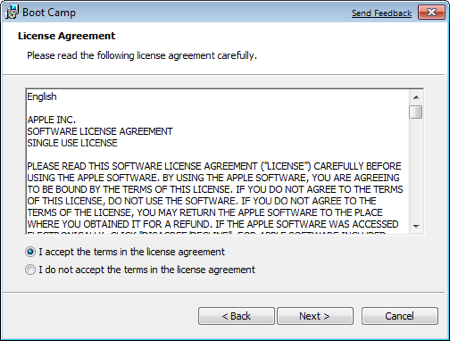
14. Выберите «Я принимаю условия лицензионного соглашения» и нажмите кнопку «Далее».
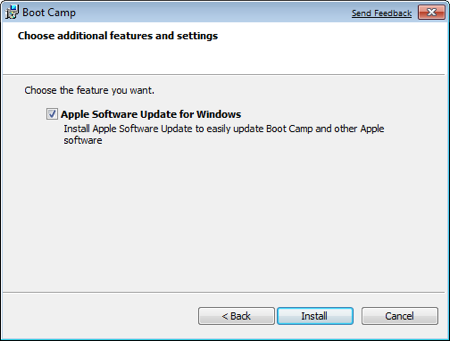
15. Убедитесь, что продукт Apple Software Update для Windows проверен, и нажмите кнопку «Установить».
16. Установщик Boot Camp установит все необходимые драйверы.
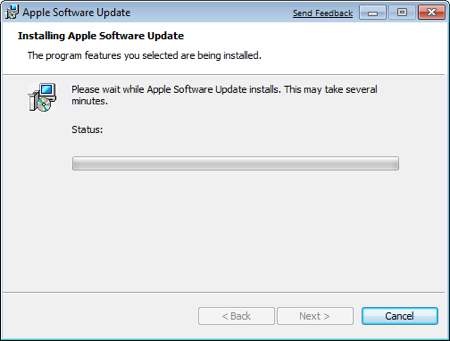
17. Уведомления будут всплывать с каждым установленным драйвером.
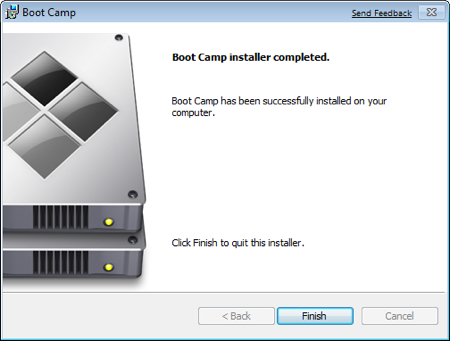
18. После завершения установки драйвера нажмите кнопку «Готово».
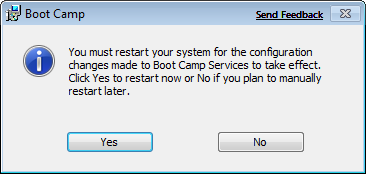
19. Вам будет предложено перезагрузить диск, удалить DVD-диск OS X и нажать кнопку «Да», чтобы перезапустить его.
20. Когда вы загрузите компьютер Mac, удерживайте клавишу ALT, чтобы выбрать операционную систему, в которую вы хотите загрузиться. (Если не нажать кнопку Windows, компьютер Mac будет по умолчанию запускаться в Mac OS.)
Посетите Microsoft Store, чтобы найти пакеты программного обеспечения или обновления для текущего программного обеспечения или найти дополнительное программное обеспечение.
Если у вас еще нет учетной записи OneDrive, см. статью «Получить учетную запись OneDrive».
Если вы хотите перенести файлы с Компьютера Mac на ПК,
см. Если вы впервые используете компьютер и хотите узнать, какие приложения работают на компьютере с Windows, см. также: Какие приложения я использую в Windows после перехода с MAC?
Install Windows on your older Mac using Boot Camp
You can use Boot Camp Assistant to install Windows 10 on your Intel-based Mac.
You need an external USB drive to install Windows on older Mac computers. To find out whether you have a Mac that requires an external USB drive, see the “Learn more” section in the Apple Support article Install Windows 10 on your Mac with Boot Camp Assistant. If your Mac is a newer model that doesn’t require a USB drive, follow the instructions in Install Windows on your newer Mac using Boot Camp instead.
What you need
The keyboard and mouse or trackpad that came with your Mac. (If they aren’t available, use a USB keyboard and mouse.)
A blank 16 GB or larger external USB 2 flash drive, formatted as MS-DOS (FAT).
To format an external USB drive as MS-DOS (FAT), use Disk Utility, located in /Applications/Utilities. In Disk Utility, choose View > Show All Devices, select the USB drive in the sidebar, then click Erase in the toolbar. In the dialog, enter a name for the drive, choose MS-DOS (FAT) from the Format pop-up menu, choose Master Boot Record from the Scheme pop-up menu, then click Erase.
A full-installation, 64-bit version of Windows 10 on a disk image (ISO file) or other installation media.
Sufficient free storage space on your startup drive. For information about the amount of free space needed, see the Apple Support Article Install Windows 10 on your Mac with Boot Camp Assistant.
Before you begin
Before you install Windows, make sure you back up important files.
You can use Time Machine or any other method to back up your files. For information about backing up files, see Back up your files with Time Machine and Ways to back up or protect your files.
Perform the installation
Do the following steps in order.
Step 1: Check for software updates
Before you install Windows, install all macOS updates.
On your Mac, log in as an administrator, quit all open apps, then log out any other users.
Choose Apple menu  > System Preferences, click Software Update, then install all available updates.
If your Mac restarts after installing an update, open Software Update again to install any additional updates.
Step 2: Prepare your Mac for Windows
Boot Camp Assistant prepares your Mac by creating a new partition for Windows named BOOTCAMP and downloading the Boot Camp support software.
Important: If you’re using a Mac notebook computer, connect it to a power source before continuing.
Connect an external USB drive or insert a flash drive into the USB port on your Mac; keep it connected or inserted while you install Windows and the Windows support software.
On your Mac, open Boot Camp Assistant  , located in /Applications/Utilities.
At the introduction screen, click Continue.
The system is checked for total available disk space. Older Time Machine snapshots and cached iCloud files are removed to make space for Boot Camp. This process may take a long time to complete (you can click the Stop button to skip this process).
At the Select Tasks step, select all the tasks, then click Continue.
At the Create Bootable USB Drive for Windows Installation step, choose the Windows ISO image and the USB drive, then click Continue.
The Windows files are copied to the USB drive. This process may take a long time to complete (you can click the Stop button to interrupt this process).
At the Create a Partition for Windows step, specify a partition size by dragging the divider between the macOS and Windows partitions. If you have multiple internal hard drives, you can select a different hard drive from the one running macOS and create a single partition on that drive to use solely for Windows.
Important: You can’t resize the partition later.
When this step is complete, the Windows installer starts.
Step 3: Install Windows
In the Windows installer, follow the onscreen instructions.
When you’re asked where to install Windows, select the BOOTCAMP partition (you may need to scroll through the list of partitions to see it), then click Next.
WARNING: Do not create or delete a partition, or select any other partition. Doing so may delete the entire contents of your macOS partition.
Continue following the onscreen instructions to finish installing Windows.
After you install the Windows software, your Mac automatically restarts using Windows.
Follow the onscreen instructions to set up Windows.
Step 4: Install Boot Camp on Windows
After installing Windows, Boot Camp drivers that support your Mac hardware start installing.
Note: If the support software doesn’t install automatically, you need to install it manually. For instructions, see the Apple Support article If the Boot Camp installer doesn’t open after using Boot Camp Assistant.
In the Boot Camp installer in Windows, follow the onscreen instructions.
Important: Do not click the Cancel button in any of the installer dialogs.
If a message appears that says the software you’re installing has not passed Windows Logo testing, click Continue Anyway.
You don’t need to respond to installer dialogs that appear only briefly during installation, but if a dialog asks you to install device software, click Install.
If nothing appears to be happening, there may be a hidden window that you must respond to. Look behind open windows.
When the installation is complete, click Finish, then click Yes to restart your Mac.
After your Mac restarts, follow the instructions for any other installers that appear.


