- Виртуализация операционных систем с помощью QEMU. Основы работы с эмулятором
- Как установить QEMU в Windows
- Виртуализация операционных систем в QEMU
- QEMU-KVM Installing Windows 10 Client
- Installing / Setup Steps
- Base Script
- OVMF Download
- Download VirtIO drivers from Red Hat
- Create a new container (disk)
- Modify the script
- Script location
- Setting up huge pages
- Using QEMU on Windows
- From OLPC
- Contents
- Getting started
- Option 1) Windows Quick Start
- Option 2) QEMU Manager for beginners
- Option 3) Piecemeal installation
- QEMU Emulator
- Accelerator for QEMU (named KQEMU)
- Download an OLPC image
- Starting the OLPC environment
Виртуализация операционных систем с помощью QEMU. Основы работы с эмулятором

Виртуализация — наиболее доступный способ запустить на одном ПК вторую операционную систему, не устанавливая ее непосредственно на жесткий диск. Вместо этого вторая ОС устанавливается на диск виртуальный, представленный специальным файлом-контейнером, созданным в гипервизоре — программе, позволяющей эмулировать работу гостевой системы в системе хостовой. Наибольшей популярностью среди домашних юзеров пользуются гипервизоры VirtualBox и VMware с мощным функционалом и наглядным GUI .
Но есть и другие, в чём-то даже более гибкие и продуктивные решения хотя и куда менее удобные в использовании. Например, QEMU — бесплатная программа с открытым исходным кодом, предназначенная для эмуляции программного обеспечения и операционных систем. Инструмент использует аппаратную виртуализацию, поддерживая два режима работы:
• Полная эмуляция — данный режим применяется для запуска операционных систем, в его рамках QEMU эмулирует физическое устройство со всеми его компонентами, встроенными и периферийными.
• Эмуляция пользовательского режима — дает возможность запускать программы, созданные для конкретной архитектуры на другой архитектуре, например, приложения ARM в x86 . Режим доступен только в хостовой системе Linux.
QEMU поддерживается эмуляция архитектуры x86 , ARM , MIPS , PowerPC , m68k , Alpha , SPARC , SH-4 , CRISv2 , MicroBlaze и это более солидный список, чем у того же Виртуалбокс.
Как установить QEMU в Windows
Скачать установочный файл эмулятора можно с официального сайта www.qemu.org/download/#windows,
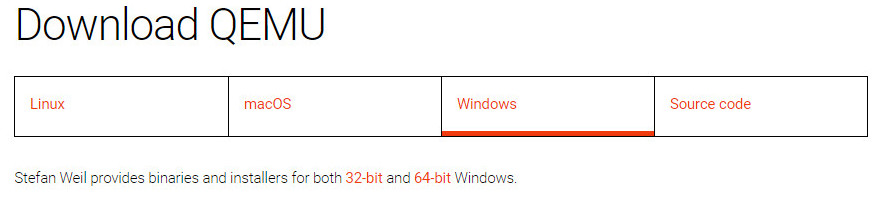
есть редакции 32-битные и 64-битные, версию выбираем последнюю.

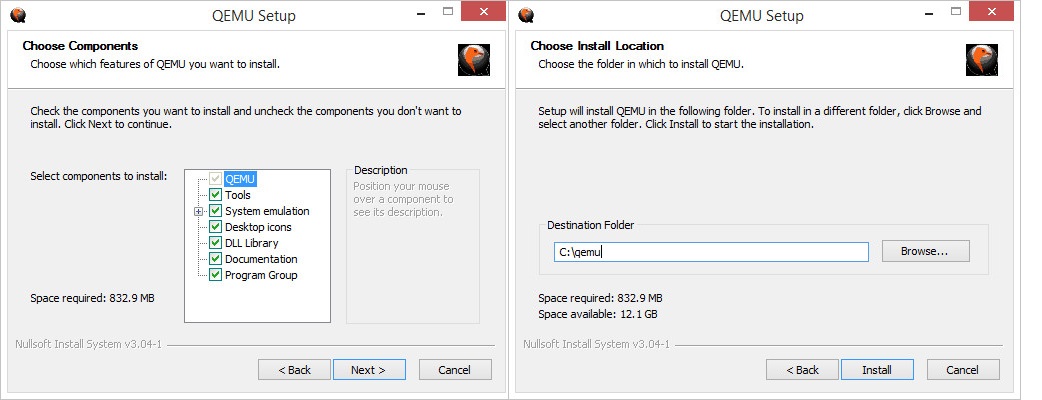
Устанавливается QEMU как обычная программа в папку Program Files\qemu , но можно выбрать и другое расположение.
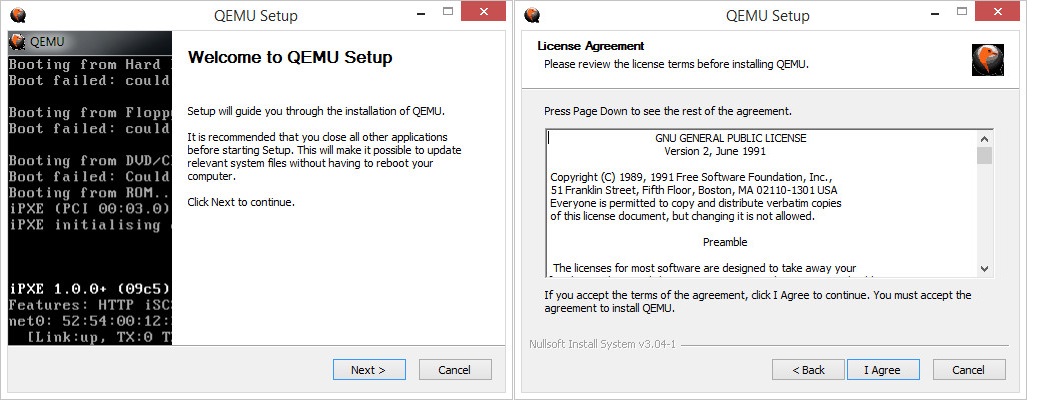
Установку выполняем с параметрами по умолчанию, ничего менять не нужно, просто жмем в окне мастера «Next».
Виртуализация операционных систем в QEMU
В отличие от VirtualBox и подобных гипервизоров, QEMU не имеет графического интерфейса, работа с ней ведется через командную строку. Команд и параметров для создания и управления виртуальными машинами много, но для начала вам нужно знать хотя бы эти шесть.
• qemu-system — задает архитектуру виртуальной машины.
• qemu-img create — создает файл виртуального IMG -диска, на который будет устанавливаться операционная система.
• -m — выделяет виртуальной ОС указанный объем оперативной памяти.
• -hda — подключает созданный виртуальный диск.
• -boot IMG — указывает, что загрузка должна производиться с виртуального диска, вместо IMG следует указать имя IMG -файла.
• cdrom — содержит путь к установочному образу ISO , эмулирует дисковод.
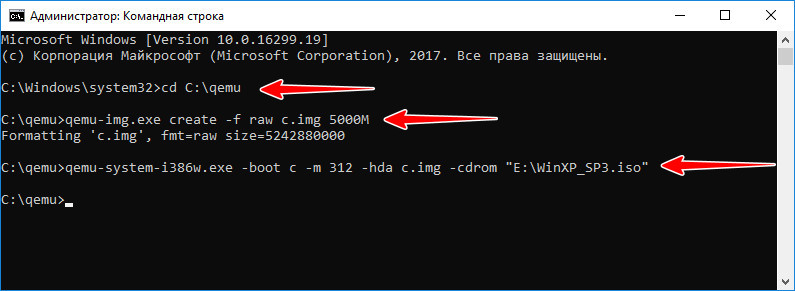
Чтобы вам стало всё немного понятнее, установим и запустим с помощью QEMU какую-нибудь операционную систему. Для примера мы выбрали Windows XP, так как она легкая и занимает на диске мало места. QEMU у нас уже установлен, открываем командную строку, переходим в каталог установки и создаем виртуальный жесткий диск следующей командой:
qemu-img.exe create -f raw c.img 5000M
Файл qemu-img.exe в эмуляторе отвечает за создание IMG -образов, с — это название образа, 5000 — размер виртуального диска в мегабайтах. По умолчанию образ будет создан в папке QEMU .
Теперь сформируем следующую команду:
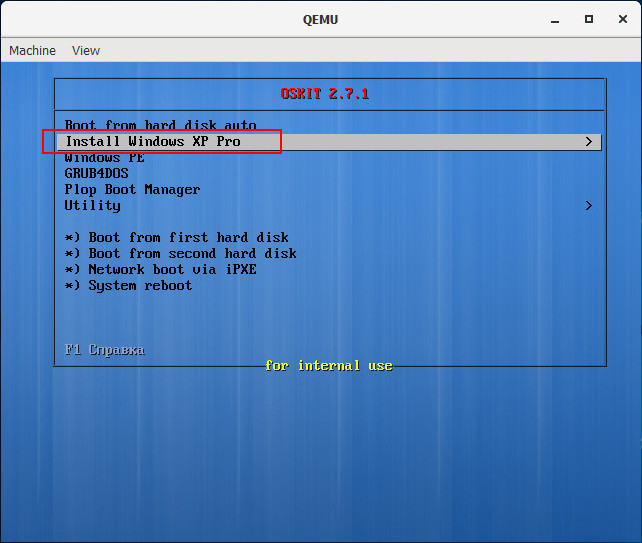
qemu-system-i386w.exe -boot c -m 350 -hda c.img -cdrom «E:\WinXP_SP3.iso»
Исполняемый файл в начале команды отвечает за создание виртуальной машины с архитектурой х86 , -boot с ключом -с сообщает, что грузиться она будет с диска, в значение параметра -hda подставляем созданный образ, а в качестве значения параметра –cdrom указываем путь к дистрибутиву Windows.
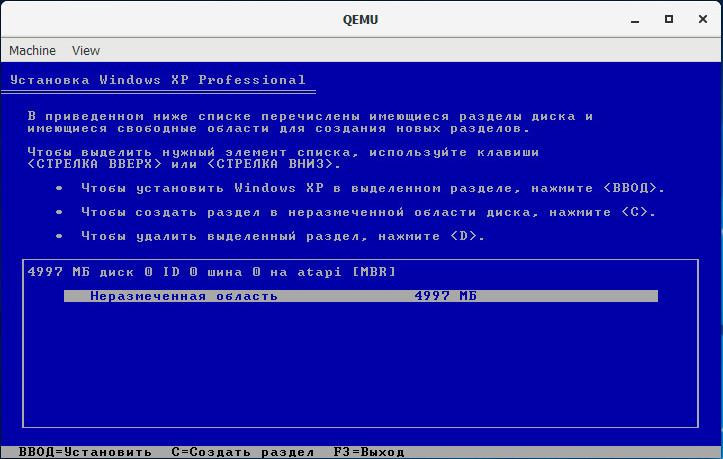
После выполнения команды появляется окошко QEMU с загрузочным меню, в котором мы выбираем установку на диск.
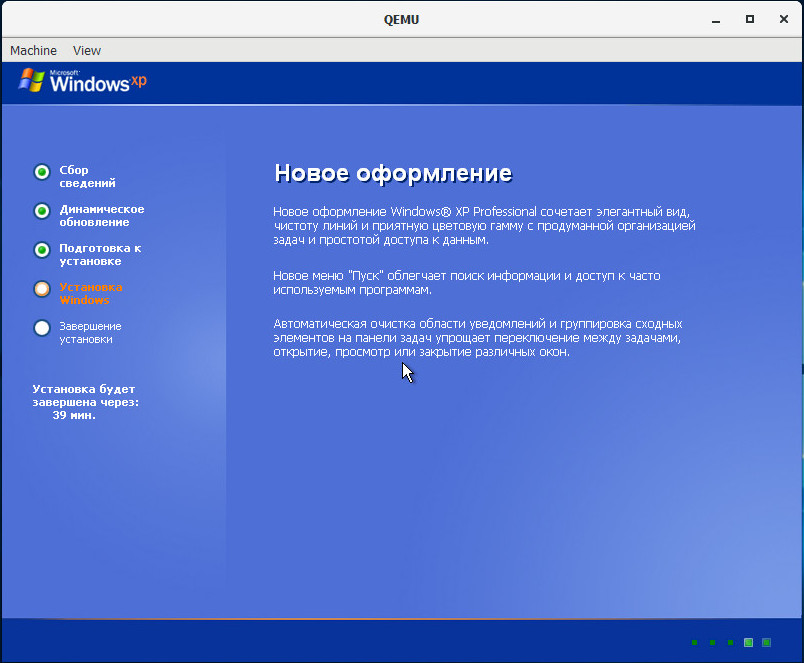
Далее проходим все этапы установки операционной системы вплоть до локальных настроек и загрузки рабочего стола.

Чтобы запустить закрытую виртуальную машину, выполните команду qemu-system-i386w.exe -hda name.img , где name — название вашего виртуального диска, чтобы удалить ставшую ненужной VM, просто удалите из каталога установки QEMU созданный IMG -образ.
Управлять QEMU можно с помощью клавиатуры и мыши, для переключения между эмулятором и хостовой машиной используйте комбинацию Ctrl + Alt + G . Запущенная с минимальными настройками ОС не будет иметь доступа к аудио- и сетевой карте, не будет также возможности обмена файлами между виртуальной и хостовой системами.
Нельзя сказать, что QEMU лучше или хуже VirtualBox либо VMware, это альтернативное средство виртуализации, имеющие как свои плюсы, так и минусы. QEMU менее удобен, требует знания документации и демонстрирует весьма небольшую производительность. Для ускорения работы в Windows требуется установка и настройка Диспетчера аппаратного ускорения HAXM, в Linux – подключение загружаемого модуля ядра KVM . С другой стороны, инструмент позволяет эмулировать работу устройств на базе разных архитектур, не поддерживаемые популярными гипервизорами.
QEMU-KVM Installing Windows 10 Client
Updated for Qemu 4.0.0 (May 2019)
Installing / Setup Steps
This is a quick guide on how to install Windows 10 on your QEMU-KVM setup. Make sure you followed the previous guide QEMU-KVM on Arch Linux Guide.
Base Script
First I will provide you with a generic script. You can use this and most likely it will cover your needs.
OVMF Download
If you have downloaded this already, you can skip this step.
We need the UEFI bios called OVMF from here. Look for the edk2.git-ovmf-x64-###.noarch.rpm file.
Download VirtIO drivers from Red Hat
Since we will be using the vfio-pci and in order for Windows to discover our (virtual) hard drive, we need to download the VirtIO drivers from Red Hat.
Choose the folder you want to download the files to and then, download stable virtio-win.iso :
and also the latest:
The “Latest virtio-win iso” has drivers for Windows 10. We are also downloading the stable version, because it might happen that the “latest” version will give you errors during installation. You have to experiment with that.
Create a new container (disk)
Modify the script
Now modify the first script to match
- location of the Windows 10 install ISO
- location of your container
- location of the VirtIO drivers ISO
- Do you want to create a bridged network? Follow this guide!
USE ABSOLUTE PATHS! NOT RELATIVE ONES! 🙂
Important Remark: Since we are using vfio-pci the virtual system drive will not be visible during installation, which is normal. To make the drive visible, you need to install the VirtIO drivers from the virtio-win.iso you downloaded earlier.
Script location
Well, basically you can save this script wherever you want as long as all paths from the above section are correct. You need make it executable with chmod +x and later run it as root.
Setting up huge pages
Hugepages is a mechanism that allows the Linux kernel to utilize the multiple page size capabilities of modern hardware architectures. Linux uses pages as the basic unit of memory, where physical memory is partitioned and accessed using the basic page unit. The default page size is 4096 Bytes in the x86 architecture.
First you need to know how much memory you will assign to all guests in total. Lets suppose that you have 16GB of ram in you system and you are allocating up to 12GB to your guests, leaving 4GB for the host. The standard huge page size is 2048kB – 2MB, so for 12GB hugepages we calculate: 12 * 1024 / 2 = 6144
First we need to check if we have the directory /dev/hugepages . If not, create it. Now, we need the right permissions to use this directory.
Add to your /etc/fstab :
Of course the gid must match that of the kvm group. The mode of 1770 allows anyone in the group to create files but not unlink or rename each other’s files. Make sure /dev/hugepages is mounted properly:
sudo umount /dev/hugepages && sudo mount /dev/hugepages
and check result:
Now we allocate the amount of needed huge pages:
and to make it permanent:
Verify that the correct amount of huge pages has been allocated:
cat /proc/meminfo | grep HugePages_Total
If it shows less than the amount we have tried to allocate, the memory is allocated by other processes already and you need to reboot your system.
Using QEMU on Windows
From OLPC
This page needs clean-up and editing for coherence, clarity, and completeness.
Contents
QEMU is a popular emulation environment for Windows and Linux. This page describes how to set it up on a Windows machine.
In order to use the provided OLPC images in a Windows computer, first install an emulator: QEMU which is an open-source processor emulator. The accelerator for QEMU named KQEMU, while not required, is highly recommended as a performance booster.
Note: people have converted some QEMU images to work with VMWare Player, but regular OLPC builds are for QEMU.
Getting started
Option 1) Windows Quick Start
Instead of downloading QEMU, KQEMU and a filesystem image separately, this all-in-one version has everything in one download. It is a 190MB download that will then use about 1.5G of your disk after it is unzipped and installed. The disk space used is approximately the same for all three options.
Option 2) QEMU Manager for beginners
- First, download this Manager for QEMU: QEMU Manager It will install QEMU as well.
- Newer (Sept 2008) OLPC builds use the 2.6.25 kernel which checks for the availability of AMD’s 3DNow extension and if the kernel does not find them it refuses to boot. More recent QEMU and KQEMU code in SVN emulates the 3DNow instructions. A newer Windows binary build is available from the OLPC forum at Nabble. (I don’t know if QEMU Manager supports the newe emulator+accelerator versions that have 3DNow support — User:Mwarren).
- Then create a new virtual machine (red plus on the toolbar).
- QEMU Manager has a menu option to install the accelerator driver.
- Then set up the virtual machine options (hammer on the toolbar) to match the following (it worked for me):
|
Press the play icon on the toolbar to start the virtual machine. With these network settings it will able to install packages by using the «yum» command. Option 3) Piecemeal installationQEMU Emulator
Accelerator for QEMU (named KQEMU)The Accelerator for QEMU (named KQEMU) is a driver allowing the QEMU PC emulator to run much faster when emulating a PC on an x86 host. The latest stable is currently kqemu-1.3.0pre11.tar.gz. For newer versions of QEMU with 3DNow support, use kqemu-1.4.0pre1.tar.gz. kqemu is also available from the same source as qemu. Is there some reason we are using the following instead? MitchellNCharity 15:11, 22 October 2007 (EDT) The kqemu release on http://www.h7.dion.ne.jp/ qemu-win/ is an installer. Whereas this release is a simple, portable folder. That’s probably why it’s preferred — BP 20th Nov 2007
You can also use an all-in-one version; see above. Download an OLPC imageTo download the latest OLPC environment (aka drive image), visit Latest Stable Build on the OS Images page and navigate to the ext3 subdirectory (this has images for the ext3 filesystem; if you want to use development tools, navigate to devel_ext3). The image you want will be named something like olpc-redhat-stream-development-build-num-date_ext3.img.bz2 After you’ve downloaded the image, you must unzip it (using a program that understands the bz2 format) and place the .img file in the same directory as QEMU (ie: C:\Program Files\Qemu). Starting the OLPC environmentBefore you launch the emulated image, we strongly recommend reading through the Getting started pages that explain how to use the OLPC/Sugar GUI environment — Sugar does not look like the Windows or Mac operating systems! Open a command prompt (aka cmd.exe) in the QEMU directory and launch qemu.exe using the appropriate image and «-L .» as first argument, and further arguments as explained on Emulating the XO/Quick Start: (At the time of writing, the arguments are as shown below, but this can change/evolve, so please check the Quick Start page for the latest recommended arguments first!) Where image_name is the newest version you have downloaded. For example: |


