- Homebrew Documentation
- Features
- Install
- Requirements
- Debian or Ubuntu
- Fedora, CentOS, or Red Hat
- 32-bit x86
- Homebrew Documentation
- macOS Requirements
- Git Remote Mirroring
- Alternative Installs
- Linux or Windows 10 Subsystem for Linux
- Untar anywhere
- Multiple installations
- Uninstallation
- How to install Brew on Ubuntu 20.04 LTS Linux
- HomeBrew installation on Ubuntu 20.04 Linux
- 1. Open a command terminal
- 2. Install Git on Ubuntu 20.04
- 3. Run Homebrew installation script
- 4. Add Homebrew to your PATH
- 5. Check Brew is working fine
- 6. Uninstall it from Linux
- Установка и использование LinuxBrew на сервере Linux
- Зачем нужен LinuxBrew?
- Как работает LinuxBrew?
- Подготовка системы к установке LinuxBrew
- Подготовка Debian/Ubuntu
- Подготовка CentOS/RedHat
- Установка LinuxBrew
- 1: Клонирование LinuxBrew
- 2: Обновление переменных окружения
- 3: Тестирование установки
- Установка пакетов при помощи LinuxBrew
- Поиск пакетов
- Установка пакетов
- Добавление существующих репозиториев HomeBrew
- Обновление репозиториев и пакетов
- Создание пользовательских и личных репозиториев
- Formulas в локальных файлах
- Formulas в репозиториях GitHub
- Примечания
- Дополнительные ссылки
Homebrew Documentation
The Homebrew package manager may be used on Linux and Windows Subsystem for Linux (WSL). Homebrew was formerly referred to as Linuxbrew when running on Linux or WSL. It can be installed in your home directory, in which case it does not use sudo. Homebrew does not use any libraries provided by your host system, except glibc and gcc if they are new enough. Homebrew can install its own current versions of glibc and gcc for older distributions of Linux.
Features, installation instructions and requirements are described below. Terminology (e.g. the difference between a Cellar, Tap, Cask and so forth) is explained in the documentation.
Features
- Can install software to your home directory and so does not require sudo
- Install software not packaged by your host distribution
- Install up-to-date versions of software when your host distribution is old
- Use the same package manager to manage your macOS, Linux, and Windows systems
Install
Instructions for a supported install of Homebrew on Linux are on the homepage.
The installation script installs Homebrew to /home/linuxbrew/.linuxbrew using sudo if possible and in your home directory at
/.linuxbrew otherwise. Homebrew does not use sudo after installation. Using /home/linuxbrew/.linuxbrew allows the use of more binary packages (bottles) than installing in your personal home directory.
The prefix /home/linuxbrew/.linuxbrew was chosen so that users without admin access can ask an admin to create a linuxbrew role account and still benefit from precompiled binaries. If you do not yourself have admin privileges, consider asking your admin staff to create a linuxbrew role account for you with home directory /home/linuxbrew .
Follow the Next steps instructions to add Homebrew to your PATH and to your bash shell profile script, either
/.profile on Debian/Ubuntu or
/.bash_profile on CentOS/Fedora/Red Hat.
You’re done! Try installing a package:
If you’re using an older distribution of Linux, installing your first package will also install a recent version of glibc and gcc. Use brew doctor to troubleshoot common issues.
Requirements
- GCC 4.7.0 or newer
- Linux 2.6.32 or newer
- Glibc 2.13 or newer
- 64-bit x86_64 CPU
Paste at a terminal prompt:
Debian or Ubuntu
Fedora, CentOS, or Red Hat
Homebrew can run on 32-bit ARM (Raspberry Pi and others) and 64-bit ARM (AArch64), but no binary packages (bottles) are available. Support for ARM is on a best-effort basis. Pull requests are welcome to improve the experience on ARM platforms.
You may need to install your own Ruby using your system package manager, a PPA, or rbenv/ruby-build as we no longer distribute a Homebrew Portable Ruby for ARM.
32-bit x86
Homebrew does not currently support 32-bit x86 platforms. It would be possible for Homebrew to work on 32-bit x86 platforms with some effort. An interested and dedicated person could maintain a fork of Homebrew to develop support for 32-bit x86.
Источник
Homebrew Documentation
Instructions for a supported install of Homebrew are on the homepage.
This script installs Homebrew to its preferred prefix ( /usr/local for macOS Intel, /opt/homebrew for Apple Silicon and /home/linuxbrew/.linuxbrew for Linux) so that you don’t need sudo when you brew install . It is a careful script; it can be run even if you have stuff installed in the preferred prefix already. It tells you exactly what it will do before it does it too. You have to confirm everything it will do before it starts.
macOS Requirements
- A 64-bit Intel CPU or Apple Silicon CPU 1
- macOS Mojave (10.14) (or higher) 2
- Command Line Tools (CLT) for Xcode: xcode-select —install , developer.apple.com/downloads or Xcode3
- The Bourne-again shell for installation (i.e. bash ) 4
Git Remote Mirroring
You can set HOMEBREW_BREW_GIT_REMOTE and/or HOMEBREW_CORE_GIT_REMOTE in your shell environment to use geolocalized Git mirrors to speed up Homebrew’s installation with this script and, after installation, brew update .
The default Git remote will be used if the corresponding environment variable is unset.
Alternative Installs
Linux or Windows 10 Subsystem for Linux
Untar anywhere
Just extract (or git clone ) Homebrew wherever you want. Just avoid:
- Directories with names that contain spaces. Homebrew itself can handle spaces, but many build scripts cannot.
- /tmp subdirectories because Homebrew gets upset.
- /sw and /opt/local because build scripts get confused when Homebrew is there instead of Fink or MacPorts, respectively.
However do yourself a favour and use the installer to install to the default prefix. Some things may not build when installed elsewhere. One of the reasons Homebrew just works relative to the competition is because we recommend installing here. Pick another prefix at your peril!
Multiple installations
Create a Homebrew installation wherever you extract the tarball. Whichever brew command is called is where the packages will be installed. You can use this as you see fit, e.g. a system set of libs in the default prefix and tweaked formulae for development in
Uninstallation
Uninstallation is documented in the FAQ.
1 For 32-bit or PPC support see Tigerbrew.
2 10.14 or higher is recommended. 10.9–10.13 are supported on a best-effort basis. For 10.4-10.6 see Tigerbrew.
3 Most formulae require a compiler. A handful require a full Xcode installation. You can install Xcode, the CLT, or both; Homebrew supports all three configurations. Downloading Xcode may require an Apple Developer account on older versions of Mac OS X. Sign up for free here.
Источник
How to install Brew on Ubuntu 20.04 LTS Linux
Homebrew is one of the popular package managers for Mac OS X but can be installed on Linux as well to download and install various packages. Homebrew Cask extends Homebrew with support for quick installation of applications like Google Chrome, VLC, and more.
On Linux, it is known as Linuxbrew. On Ubuntu Linux, we already have an APT package manager with a wide range of applications and other packages to install, then what is the need for Linuxbrew?
What is the difference between APT and Homebrew or Linuxbrew?
1. Both HomeBrew and APT’s main goal is the same that is the installation of various packages using the command line. However, on one hand, APT is the native and well-integrated manager of Debian-based systems including Ubuntu, HomerBrew is a third-party package manager that the user can install manually.
2. Difference in the command syntax, if a user is already familiar with the brew command line on macOS and new to Ubuntu then he or she can use it to install programs without learning new command hooks. However, if you are a user of Ubuntu or Debian, then for sure you don’t need to install it.
3. Homebrew maintains a separate user-owned directory, thus no need to run it with sudo to install applications.
4. Where apt-get is generally designed to overwrite previous versions; in the brew, it compiles packages and saves them according to its version in subdirectories. This means we can have multiple versions of a package on the same machine at the same time, however, only one of them will get symlinked into your main Homebrew hierarchy.
5. APT cleanup or uninstall older packages automatically with the update, whereas, in Homebrew, a user needs to run the brew cleanup command.
HomeBrew installation on Ubuntu 20.04 Linux
1. Open a command terminal
Run terminal and then first, issue an update command-
2. Install Git on Ubuntu 20.04
For setting up LinuxBrew on Ubuntu 20.04 or 18.04, we need to install GIT on our system, here is the command for that…
3. Run Homebrew installation script
The official website of Brew offers a pre-build script to install download and install Homebrew using the command line on any available Linux such as CentOS, RHEL, OpenSUSE, Linux Mint, Kali, MX Linux, POP!OS and others.
Here is the command, just run it-
4. Add Homebrew to your PATH
To run the brew command after installation, we need to add it in our system path…
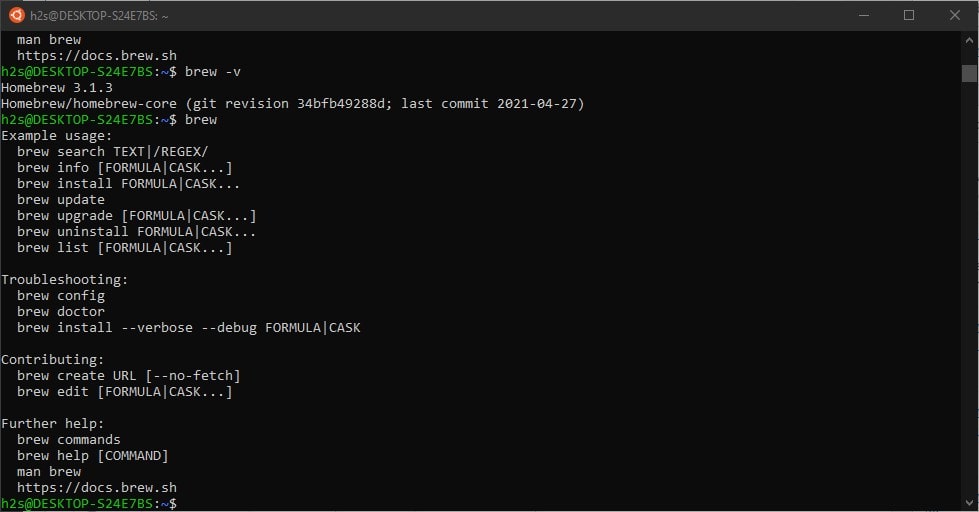
5. Check Brew is working fine
To ensure everything is working correctly to use brew, we can run its command-
It may give the warning to install GCC and to remove that simply install it using brew-
6. Uninstall it from Linux
If you want to remove Homebrew, then here is the brew uninstallation script, also available on GitHub.
Источник
Установка и использование LinuxBrew на сервере Linux
LinuxBrew – это ответвление популярного менеджера пакетов Mac OS X по имени HomeBrew для систем Linux.
LinuxBrew – программное обеспечение для управления пакетами, позволяющее устанавливать пакеты из исходников на основе стандартных инструментов управления пакетами (apt/deb в системах Debian/Ubuntu yum/rpm в CentOS/RedHat).
Зачем нужен LinuxBrew?
Первоначально HomeBrew был разработан для системы Mac OS X (которая не имеет стандартной системы управления пакетами с открытым исходным кодом). Впоследствии HomeBrew вытеснил другие инструменты управления пакетами, такие как MacPorts и Fink. По сути, LinuxBrew – это HomeBrew, адаптированный для Linux.
Большинство дистрибутивов Linux оборудовано хорошей системой управления пакетами (apt, yum, и т.п.), однако:
- Репозитории, как правило, содержат несколько устаревшие версии пакетов;
- Многие пакеты с открытым исходным кодом не доступны в стандартных репозиториях (например, популярные инструменты биоинформатики).
В дополнение к пакетам из стандартного репозитория дистрибутива LinuxBrew предоставляет репозиторий наборов команд для установки программного обеспечения (пакеты устанавливаются из исходников и компилируются на локальной машине).
LinuxBrew позволяет без труда собрать свой собственный репозиторий (т.е. список открытых пакетов с учетом потребностей пользователя).
LinuxBrew устанавливает программное обеспечение в указанный пользователем каталог (не глобально), не требуя привилегий sudo.
LinuxBrew (и HomeBrew) легко взаимодействует с GitHub, что позволяет использовать установочные наборы команд коллективно.
Как видите, репозитории LinuxBrew – это быстрый метод установки определённых пакетов и версий на стандартную машину Linux.
Как работает LinuxBrew?
Проще говоря, LinuxBrew загружает файл tar.gz и запускает команду
./configure && make && make install
или же другую команду, которая установит пакет.
LinuxBrew Formula – это Ruby-скрипт, который определяет местонахождение файла tar.gz, способ сборки и способ установки пакета.
Файл formula может быть так же прост, как hmmer.rb:
или так же сложен, как emacs.rb.
После создания файла formula установка пакета сводится к одной команде:
$ brew install FORMULA
Подготовка системы к установке LinuxBrew
Подготовка Debian/Ubuntu
Чтобы подготовить окружение Debian/Ubuntu к установке LinuxBrew, запустите команды:
$ sudo apt-get update
$ sudo apt-get upgrade -y
$ sudo sudo apt-get install -y build-essential make cmake scons curl git
ruby autoconf automake autoconf-archive
gettext libtool flex bison
libbz2-dev libcurl4-openssl-dev
libexpat-dev libncurses-dev
Подготовка CentOS/RedHat
В системах на основе CentOS/RedHat запустите:
$ sudo yum update -y
$ sudo yum groupinstall -y «Development Tools»
$ sudo yum install -y
autoconf automake19 libtool gettext
git scons cmake flex bison
libcurl-devel curl
ncurses-devel ruby bzip2-devel expat-devel
Установка LinuxBrew
Для установки LinuxBrew нужно просто клонировать репозиторий программы.
1: Клонирование LinuxBrew
Чтобы не захламлять систему, клонируйте LinuxBrew в скрытый каталог в домашнем каталоге пользователя:
$ git clone https://github.com/Homebrew/linuxbrew.git
Примечание: Обычный каталог тоже подойдёт.
2: Обновление переменных окружения
Затем нужно добавить LinuxBrew в переменные среды пользователя.
/.bashrc внесите такие строки:
# Until LinuxBrew is fixed, the following is required.
# See: https://github.com/Homebrew/linuxbrew/issues/47
export PKG_CONFIG_PATH=/usr/local/lib/pkgconfig:/usr/local/lib64/pkgconfig:/usr/lib64/pkgconfig:/usr/lib/pkgconfig:/usr/lib/x86_64-linux-gnu/pkgconfig:/usr/lib64/pkgconfig:/usr/share/pkgconfig:$PKG_CONFIG_PATH
## Setup linux brew
export LINUXBREWHOME=$HOME/.linuxbrew
export PATH=$LINUXBREWHOME/bin:$PATH
export MANPATH=$LINUXBREWHOME/man:$MANPATH
export PKG_CONFIG_PATH=$LINUXBREWHOME/lib64/pkgconfig:$LINUXBREWHOME/lib/pkgconfig:$PKG_CONFIG_PATH
export LD_LIBRARY_PATH=$LINUXBREWHOME/lib64:$LINUXBREWHOME/lib:$LD_LIBRARY_PATH
Примечание: При установке LinuxBrew в другой каталог измените путь в LINUXBREWHOME.
3: Тестирование установки
Чтобы убедиться, что установка прошла успешно, выйдите из системы и войдите снова. Оболочка обновится, и будет использовать новые настройки.
Чтобы проверить эти настройки, используйте:
$ which brew
/home/ubuntu/.linuxbrew/bin/brew
$ echo $PKG_CONFIG_PATH
/home/ubuntu/.linuxbrew/lib64/pkgconfig:/home/ubuntu/.linuxbrew/lib/pkgconfig:/usr/local/lib/pkgconfig:/usr/local/lib64/pkgconfig:/usr/lib64/pkgconfig:/usr/lib/pkgconfig:/usr/lib/x86_64-linux-gnu/pkgconfig:/usr/lib64/pkgconfig:/usr/share/pkgconfig:
Установка пакетов при помощи LinuxBrew
Поиск пакетов
Чтобы узнать, какие пакеты доступны, введите brew search.
Чтобы найти пакет по имени, введите brew search+имя_пакета; например, чтобы найти пакеты, в названии которых содержится слово WORD, нужно ввести:
brew search WORD
Еще один пример поиска пакета:
$ brew search xml
blahtexml libnxml libxml2 xml-coreutils xml2 xmlrpc-c
html-xml-utils libwbxml libxmlsec1 xml-security-c xmlcatmgr xmlsh
libmxml libxml++ tinyxml xml-tooling-c xmlformat xmlstarlet
Установка пакетов
Чтобы установить пакет, запустите:
brew install PACKAGE
Например, чтобы установить jq, процессор JSON, нужно ввести:
$ brew install jq
==> Downloading http://stedolan.github.io/jq/download/source/jq-1.3.tar.gz
==> ./configure
==> make
/home/ubuntu/.linuxbrew/Cellar/jq/1.3: 7 files, 256K, built in 10 seconds
$ which jq
/home/ubuntu/.linuxbrew/bin/jq
$ jq —version
jq version 1.3
Как видите, LinuxBrew – очень полезный инструмент: несмотря на то, что jq можно найти в последних репозиториях Ubuntu, содержащаяся в них версия программы устарела (1.2). Debian Stable и Testing вообще не предоставляют jq. LinuxBrew позволяет установить самую последнюю версию пакета (1.3). Кроме того, LinuxBrew устанавливает программу согласно пути, который не будет конфликтовать с стандартной локацией в системе.
Добавление существующих репозиториев HomeBrew
Репозитории HomeBrew/LinuxBrew называются taps. Это обычные репозитории GitHub, содержащие Ruby-скрипты – так называемые формулы (Formulas). Несколько общих репозиториев можно найти здесь.
Для примера попробуйте добавить репозитории homebrew-science, содержащий множество научных программ с открытым исходным кодом, и HomeBrew-Games:
$ brew tap homebrew/science
Cloning into ‘/home/ubuntu/.linuxbrew/Library/Taps/homebrew-science’.
Tapped 237 formula
$ brew tap homebrew/games
Cloning into ‘/home/ubuntu/.linuxbrew/Library/Taps/homebrew-games’.
Tapped 57 formula
Просмотрите доступные tap-ы:
$ brew tap
homebrew/science
homebrew/games
Установите любой пакет из этих репозиториев:
$ brew install gnu-go
==> Downloading http://ftpmirror.gnu.org/gnugo/gnugo-3.8.tar.gz
#################################################################
==> ./configure —prefix=/home/ubuntu/.linuxbrew/Cellar/gnu-go/3.8 —with-readline=/usr/lib
==> make install
/home/ubuntu/.linuxbrew/Cellar/gnu-go/3.8: 9 files, 7.0M, built in 60 seconds
Обновление репозиториев и пакетов
Чтобы загрузить обновления для Formulas, запустите:
Чтобы обновить пакеты (если есть доступные обновления), используйте:
$ brew upgrade PACKAGE
Создание пользовательских и личных репозиториев
TAP (или репозиторий) в HomeBrew – это просто набор так называемых Formulas (Ruby-скриптов, хранящихся в локальных файлах или в репозиториях GitHub).
Formulas в локальных файлах
Чтобы установить formula из локального файла, запустите:
$ brew install /full/path/to/file.rb
Это полезно при создании новой formula и устранении неполадок.
Formulas в репозиториях GitHub
Чтобы создать новый TAP-репозиторий в GitHub, создайте обычный новый репозиторий GitHub и назовите его:
Имя любого TAP-репозитория должно начинаться с homebrew-; NAME – любое имя репозитория.
Например: пользователь GitHub по имени agordon создаёт репозиторий HomeBrew по имени gordon; полный URL выглядит так:
Чтобы использовать этот репозиторий:
$ brew tap agordon/gordon
Cloning into ‘/home/ubuntu/.linuxbrew/Library/Taps/agordon-gordon’.
Warning: Could not tap agordon/gordon/libestr over Homebrew/homebrew/libestr
Warning: Could not tap agordon/gordon/coreutils over Homebrew/homebrew/coreutils
Tapped 12 formula
Примечания
Команда brew tap использовала имя пользователя agordon и суффикс репозитория gordon (суффикс homebrew-gordon) и вывела адрес доступа на github.
Formula-скрипты в пользовательских репозиториях могут конфликтовать со скриптами в официальных репозиториях HomeBrew, но это абсолютно нормальное поведение.
Чтобы установить не конфликтующие пакеты из пользовательского репозитория, запустите:
$ brew install libjson
Чтобы установитьь пакеты из определённых tap-ов, введите:
$ brew install agordon/gordon/coreutils
Дополнительные ссылки
Примечание: Читая о HomeBrew, помните, что эта программа разработана для Mac OS X. Хотя LinuxBrew и HomeBrew имеют много общего, в LinuxBrew встречаются черты, характерные только для Linux.
Источник


