- Какую версию chromedriver установить?
- Скачать ChromeDriver для Linux, Windows и Mac
- Установка ChromeDriver под Linux, Windows и Mac
- How to Setup Selenium with ChromeDriver on Ubuntu 20.04 & 18.04
- Step 1 – Prerequisites
- Step 2 – Install Google Chrome
- Step 3 – Installing ChromeDriver
- Step 4 – Download Required Jar Files
- Step 5 – Start Chrome via Selenium Server
- Step 6 – Sample Java Program (Optional)
- Related Posts
- Deploy Angular App to Firebase with Github Actions
- How To Install Google Chrome on Ubuntu 20.04
- How To Install and Configure Ansible on Debian 10
- 35 Comments
- mikesmullin / chromedriver.sh
- This comment has been minimized.
- mikesmullin commented May 8, 2012
- This comment has been minimized.
- tommeier commented Jul 15, 2014
- This comment has been minimized.
- gingebot commented Oct 22, 2014
- This comment has been minimized.
- Creativekalyan commented Feb 26, 2015
- This comment has been minimized.
- lucasea777 commented Dec 28, 2015
- This comment has been minimized.
- FelikZ commented Apr 5, 2016
- How to Setup Selenium with ChromeDriver on Debian 10/9/8
- Step 1 – Prerequisites
- Step 2 – Install Google Chrome
- Step 3 – Install ChromeDriver
- Step 4 – Download Required Jar Files
- Step 5 – Start Chrome via Selenium Server
- Step 6 – Sample Java Program (Optional)

Для запуска тестов Selenium в Google Chrome, помимо самого браузера Chrome, должен быть установлен ChromeDriver. Установить ChromeDriver очень просто, так как он находится в свободном доступе в Интернете. Загрузите архив в зависимости от операционной системы, разархивируйте его и поместите исполняемый файл chromedriver в нужную директорию.
Какую версию chromedriver установить?
Мы должны установить именно ту версия которая была бы совместима с установленным Google Chrome на нашем ПК или VDS. В случае, если версии не совпадают, то мы получим данную ошибку:
selenium.common.exceptions.SessionNotCreatedException: Message: session not created: This version of ChromeDriver only supports Chrome version 81
Введите в адресную строку Google Chrome данный путь:
У вас появится вот такое окно:
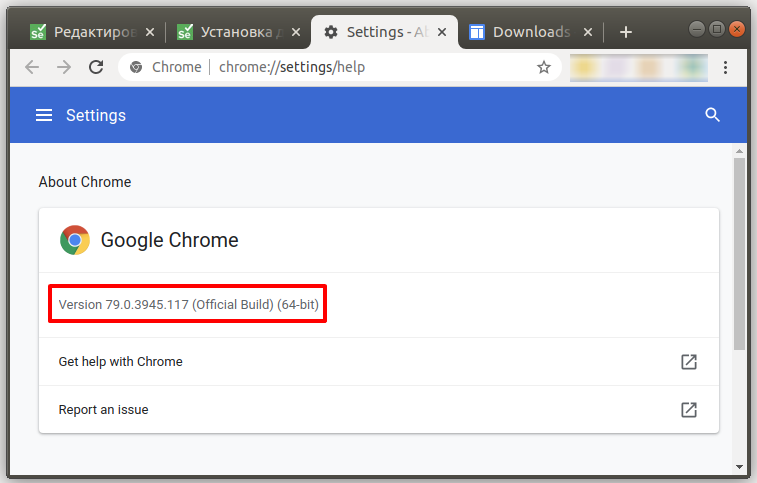
Рисунок 1 — Узнаем версию браузера Google Chrome
Скачать ChromeDriver для Linux, Windows и Mac
На данный момент актуальная версия драйвера 81.0.40 хотя у меня установлен более старый Google Chrome и последняя версия мне не подойдет. Как видно на рисунке выше, мне нужна версия 79.0.39 у вас может быть другая версия, нужно её скачать.
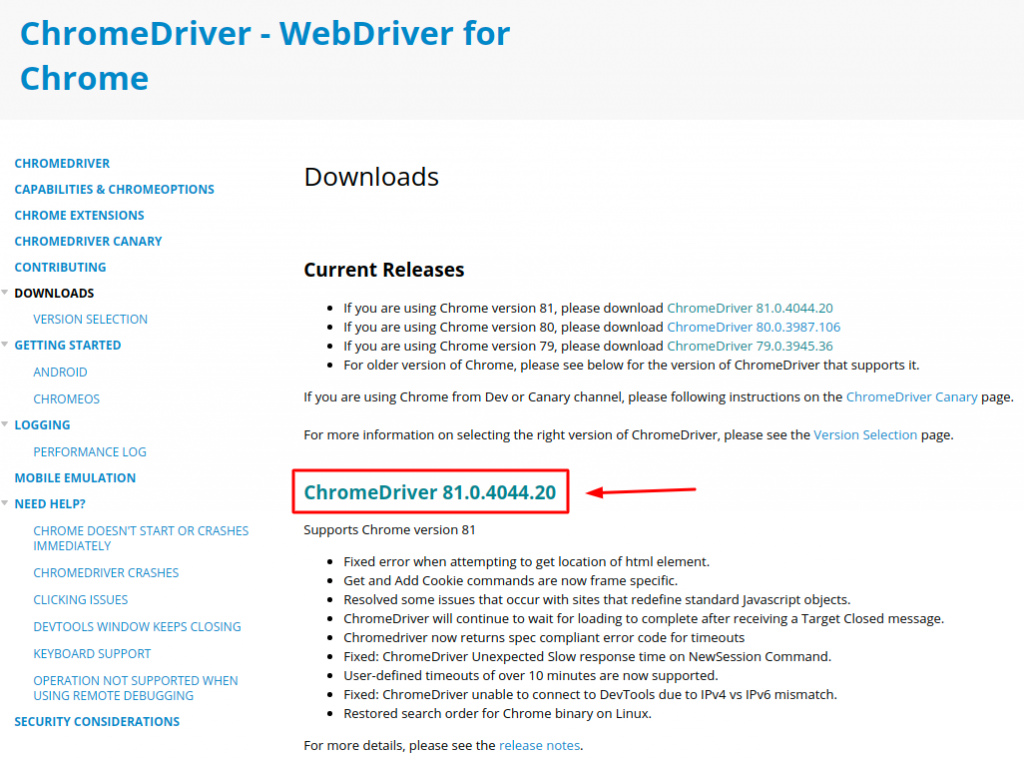
Рисунок 2 — Официальный сайт Google для загрузки драйвера chromedriver
На момент прочтения этой статьи версия может быть другой. Всегда выбирайте более новую версию, чтобы не поймать старые баги которые уже давно исправили в новой версии. НО! Помните, что вам нужно обновить и свой браузер Google Chrome если вы хотите работать с новой версией ChromeDriver.
Установка ChromeDriver под Linux, Windows и Mac
- Заходим на сайт https://chromedriver.storage.googleapis.com/index.html?path=79.0.3945.36/ (Проверьте сайт с Рис. 2 на обновления, тут версия: 79.0.3945);
- Скачиваем архив под вашу операционную систему;
- Распаковываем файл и запоминаем где находится файл chromedriver или chromedriver.exe (Windows).
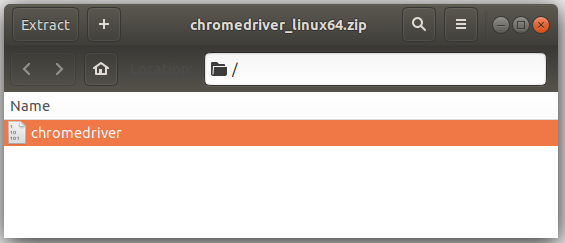
Рисунок 3 — Скаченный архив с ChromeDriver
Если у вас Linux дистрибутив или Mac, вам нужно дать файлу chromedriver нужные права на выполнения. Открываем терминал и вводим команды одна за другой.
Источник
How to Setup Selenium with ChromeDriver on Ubuntu 20.04 & 18.04
This tutorial will help you to set up Selenium with ChromeDriver on Ubuntu, and LinuxMint systems. This tutorial also includes an example of a Java program that uses a Selenium standalone server and ChromeDriver and runs a sample test case.
Step 1 – Prerequisites
Execute the following commands to install the required packages on your system. Here Xvfb (X virtual framebuffer) is an in-memory display server for a UNIX-like operating system (e.g., Linux). It implements the X11 display server protocol without any display. This is helpful for CLI applications like CI services.
Also, install Java on your system. Let’s install Oracle Java 8 on your system or use below command to install OpenJDK.
Step 2 – Install Google Chrome
Now install Latest Google chrome package on your system using the below list commands. Google chrome headless feature opens multipe doors for the automation.
Step 3 – Installing ChromeDriver
You are also required to set up ChromeDriver on your system. ChromeDriver is a standalone server which implements WebDriver’s wire protocol for Chromium. The WebDriver is an open-source tool for automated testing of web apps across multiple browsers.
Find out the Google chrome version installed on your system.
Next, visit the Chromedriver download page and download the matching version of chromedriver on your system.
In my case, Google chrome 94 is running on my system. So download the following file. You must make sure to download the correct version of a file:
You can find the latest ChromeDriver on its official download page. Now execute below commands to configure ChromeDriver on your system.
Step 4 – Download Required Jar Files
The Selenium Server is required to run Remote Selenium WebDrivers. You need to download the Selenium standalone server jar file using the below commands or visit here to find the latest version of Jar file.
Also download the testng-6.8.7.jar file to your system.
Step 5 – Start Chrome via Selenium Server
Your server setup is ready. Start the Chrome via standalone selenium server using Xvfb utility.
Run Chrome via Selenium Server
Use -debug option at end of command to start server in debug mode.
You can also Start Headless ChromeDriver by typing the below command on the terminal.
Your Selenium server is now running with Chrome. Use this server to run your test cases written in Selenium using the Google Chrome web browser. The next step is an optional step and doesn’t depend on Step 5.
Step 6 – Sample Java Program (Optional)
This is an optional step. It describes running a single test case using Selenium standalone server and ChromeDriver. Let’s create a Java program using Selenium server and Chrome Driver. This Java program will open a specified website URL and check if a defined string is present on the webpage or not.
Create a Java program by editing a file in text editor.
Add the below content to the file.
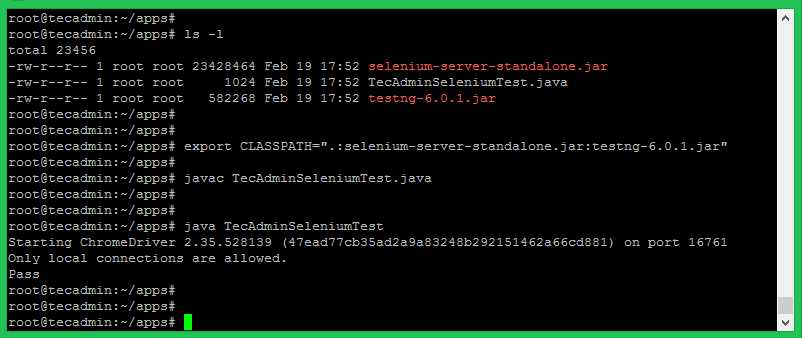
You can change the URL “https://google.com” with any other URL of your choice, Then also change the search string like “I’m Feeling Lucky” used in the above Java program. Save your java program and execute it. First, you need to set the Java CLASSPATH environment variable including the selenium-server-standalone.jar and testng-6.8.7.jar. Then compile the java program and run it.
You will see results like below. If the defined search string is found, You will get the message “Pass” and if the string is not found on the webpage, you will get the “Fail” message on the screen.
Related Posts
Deploy Angular App to Firebase with Github Actions
How To Install Google Chrome on Ubuntu 20.04
How To Install and Configure Ansible on Debian 10
35 Comments

This command is incorrect:
sudo echo «deb [arch=amd64] http://dl.google.com/linux/chrome/deb/ stable main» >> /etc/apt/sources.list.d/google-chrome.list
It uses sudo which means it’s designed for non-root accounts, but the way it’s written the redirection happens before sudo or echo are run, which means it’s run as the current user, resulting in a “Permission denied” error. That command would only work if it’s run by root, but then you wouldn’t need sudo.
For it to work for non-root accounts, the entire command has to be wrapped in a shell that is invoked with sudo:
sudo bash -c «echo ‘deb [arch=amd64] http://dl.google.com/linux/chrome/deb/ stable main’ >> /etc/apt/sources.list.d/google-chrome.list»
Its not working yet
I run this cmd ——– xvfb-run java -Dwebdriver.chrome.driver=/usr/bin/chromedriver -jar selenium-server-standalone.jar
I got this ——Error: Unable to access jarfile selenium-server-standalone.jar
Use Version of selenium-server -standalone jar files.
For eg: xvfb-run java -Dwebdriver.chrome.dr iver=/usr/bin/chromedriver -jar selenium-server-standalone-3.141.59.jar
its working 🙂 thnx man
I don’t see browser running when I execute below command
xvfb-run java -Dwebdriver.chrome.driver=/usr/bin/chromedriver -jar selenium-server-standalone3.13.0.jar
Users your inputs please..

Browser will open, once you run the test case. In the given example, remove “chromeOptions.addArguments(“–headless”);” from script to launch a web browser.
xvfb-run java -Dwebdriver.chrome.driver=/usr/bin/chromedriver -jar selenium-server-standalone.jar
=>
xvfb-run java -Dwebdriver.chrome.driver=/usr/bin/chromedriver -jar selenium-server-standalone-3.13.0.jar
Thanks for your post.
Thanks for Post
very nice tutorial . Thanks
Input
xvfb-run java -Dwebdriver.chrome.driver=/usr/bin/chromedriver -jar selenium-server-standalone-3.141.59.jar
Output
Command ‘xvfb-run’ not found, but can be installed with:
apt install xvfb
Input
apt install xvfd
Output
E: Unable to find xvfd package
Very sorry. I’ve found my mistake – d
thank you so much! I use this tutorial for python3 with selenium google driver
I am executing my automation scripts on oneops cloud application. To execute these automation scripts we need to have chrome driver. In the oneops application we have Linux64 bit OS is available. For this OS, i downloaded the relevant chrome driver and placed in a specific path. In my automation script I gave this specific path. I developed a jar file with all my automation scripts using looper\jenkins. Now I am executing this jar file in the putty(linux) machine. However an error message chromedriver is not present in the specified path is displaying though the driver is present in the specified path.
This chrome driver for Linux is of file type (not .exe ) and placed this driver in a path.
I developed these automation scripts using selenium testng.
Please let me know why this error message of chrome driver not present is displaying.
Also if any one knows how to install chrome driver in oneops cloud application for Linux OS, please do let me know.
Regards
K.Radhakrishna Reddy
Hello! Thanks for the great article. However I am quite stuck with the error below.
PHP Fatal error: Uncaught PHPUnit_Extensions_Selenium2TestCase_WebDriverException: Expected browser binary location, but unable to find binary in default location, no ‘moz:firefoxOpti
ons.binary’ capability provided, and no binary flag set on the command line
I got both geckodriver and chromedriver on usr/bin/* .
Источник
mikesmullin / chromedriver.sh
| sudo apt-get install unzip ; |
| wget -O /tmp/chromedriver.zip http://chromedriver.googlecode.com/files/chromedriver_linux64_19.0.1068.0.zip && sudo unzip /tmp/chromedriver.zip chromedriver -d /usr/local/bin/ ; |
This comment has been minimized.
Copy link Quote reply
mikesmullin commented May 8, 2012
This comment has been minimized.
Copy link Quote reply
tommeier commented Jul 15, 2014
This comment has been minimized.
Copy link Quote reply
gingebot commented Oct 22, 2014
This comment has been minimized.
Copy link Quote reply
Creativekalyan commented Feb 26, 2015
We have installed Successfully
Capybara.register_driver :chrome do |app| client = Selenium::WebDriver::Remote::Http::Default.new Capybara::Selenium::Driver.new(app, :browser => :chrome, :http_client => client) end
Note : Change the chrome driver version according to your operating system type like 32 bit or 64 bit.
This comment has been minimized.
Copy link Quote reply
lucasea777 commented Dec 28, 2015
I think this should install the latest release:
This comment has been minimized.
Copy link Quote reply
FelikZ commented Apr 5, 2016
chromedriver: error while loading shared libraries: libnss3.so: cannot open shared object file: No such file or directory
chromedriver: error while loading shared libraries: libgconf-2.so.4: cannot open shared object file: No such file or directory
Источник
How to Setup Selenium with ChromeDriver on Debian 10/9/8
This tutorial will help you to setup Selenium with ChromeDriver on Debian 9 and Debian 8. This tutorial also includes an example of a Java program which uses Selenium standalone server and ChromeDriver and runs a sample test case.
Xvfb (X virtual framebuffer) is an in-memory display server for a UNIX-like operating system (e.g., Linux). It implements the X11 display server protocol without any display. This is helpful for CLI applications like CI service.
Step 1 – Prerequisites
Login to your Debian system as sudo privileged user and execute the following commands to install required packages on your system.
Also, install Java on your system. Use below command to install OpenJDK on your system, If you like install Oracle Java 8 on your Debian system.
Step 2 – Install Google Chrome
Now install Latest Google chrome on your Debian system using commands below. Google chrome headless feature opens multipe doors for the automation.
Step 3 – Install ChromeDriver
ChromeDriver is a standalone server which implements WebDriver’s wire protocol for Chromium. The WebDriver is an open source tool for automated testing of web apps across multiple browsers.
You can find the latest ChromeDriver on its official download page. Now execute below commands to configure ChromeDriver on your system.
Step 4 – Download Required Jar Files
The Selenium Server is required to run Remote Selenium WebDrivers. You need to download the Selenium standalone server jar file using the below commands or visit here to find the latest version of Jar file.
Also, download the testng-6.8.7.jar file to your system.
Step 5 – Start Chrome via Selenium Server
Your server setup is ready. Start the Chrome via standalone selenium server using Xvfb utility.
Run Chrome via Selenium Server
Use -debug option at end of command to start server in debug mode.
You can also Start Headless ChromeDriver by typing the below command on terminal.
Your Selenium server is now running with Chrome. Use this server to run your test cases written in Selenium using Google Chrome web browser. Next step is an optional step and doesn’t depend on Step 5.
Step 6 – Sample Java Program (Optional)
This is an optional step. It describes running a single test case using Selenium standalone server and ChromeDriver. Let’s create a Java program using the Selenium server and Chrome Driver. This Java program will open a specified website URL and check if defined string presents on the webpage or not.
Create a Java program by editing a file in text editor.
Источник


