- How to Manually Install, Update, and Uninstall Fonts on Linux
- Install Fonts on Linux
- Step 1 : Pull the fonts to your system
- Step 2 : Unpack the font archive
- Step 3 : Install the fonts
- Step 4 : Clear and regenerate your font cache
- Step 5 : Verify the installation
- Step 6 : Cleanup
- All Together Now
- Uninstall Fonts on Linux
- Step 1 : Identify the font binary paths
- Step 2: Remove the font binaries
- Step 3: Clear and regenerate the font cache
- Install fonts on Linux – Debian, Ubuntu, Kali, Mint – Microsoft TrueType core and many more
- The basic – Microsoft TrueType core Fonts
- Install instructions:
- Output — Click to expand
- More ways to install fonts
- Output — Click to expand
- Output — Click to expand
- Configuring Fonts on Linux
- Downloading and installing a font
- Conclusion:
- How to Install New Fonts in Ubuntu and Other Linux Distributions
- Installing a new font in Ubuntu Linux
- Step 1: Get fonts
- Step 2: Install the new fonts
- Install several fonts at once in Linux
- Step 1: Create .fonts directory in your home directory
- Step 2: Put fonts files in the .fonts directory
- Alternative: Use Font Manager for managing fonts in Ubuntu and other Linux
How to Manually Install, Update, and Uninstall Fonts on Linux


The management of fonts that are not packaged in Linux distributions can be performed with a handful of command line tasks. While this takes a bit more effort than font management with a GUI font manager or package manager application, the steps are simple, and an understanding of them will allow you to install and use the many unpackaged fonts that are available out there.
This article demonstrates a command line approach to install desktop fonts (i.e., the *.otf and *.ttf build varieties), clear and regenerate your font cache, and verify your font installation. I provide an example shell script that pulls all of the steps together into a single command for those who want to use it as a basis for a custom installation + upgrade script. In the final section, I demonstrate how to locate and uninstall fonts that you don’t need.
We will use our Hack fonts as released in font binary format through a Github repository to demonstrate the entire process. These steps assume that font files are accessible through HTTP GET requests and come packaged in a gzipped tar archive. Feel free to modify the paths in each step to install any set of fonts that meet these criteria.
Install Fonts on Linux
Step 1 : Pull the fonts to your system
To pull a font archive from a publicly accessible server with a HTTP GET request, navigate to a directory of your choice and use cURL:
Step 2 : Unpack the font archive
Unpack the gzipped tar archive with tar :
For the Hack fonts, this results in an unpacked directory path, ttf . The fonts are contained in the root of the directory. Archives from other typeface projects may result in a different unpacked path structure. If you are installing a different set of fonts, review the font paths before you move on to the next step.
Step 3 : Install the fonts
On Linux systems, font binaries are generally installed in either the system font directory on the path /usr/share/fonts/ or in a user font directory that is frequently on one of the following paths:
/.local/share/fonts/ or /usr/local/share/fonts . We’ll use the
/.local/share/fonts/ path in this example. If the directory does not exist, create it with the following command:
Move your font binaries to the destination directory with mv :
Step 4 : Clear and regenerate your font cache
Next, clear and regenerate your font cache with the following command:
You will see a stream of text as the font cache is created. This can be a lengthy body of text if you have a large number of fonts installed on your system. If you examine the text closely, you should see that your new font installs were identified during this process.
Step 5 : Verify the installation
Confirm that the fonts are installed by displaying the paths and style definitions with the fc-list executable filtered on the font family name with grep :
On my system, the following text is displayed:
The fonts are now installed and ready for use.
Step 6 : Cleanup
The archive file and unpacked directory are no longer necessary. Let’s remove them:
All Together Now
We provide a shell script for Hack font installs that pulls these steps together into a single command for our Linux users.
The command to manually install version 3.003 of our fonts looks like this:
To upgrade the fonts, users increment the version number in the command as new releases are pushed to the Github repository.
A Github gist of the script source follows. If you followed along above you will notice that the commands are identical to the examples in the steps that we just reviewed.
- Step 1 is on line 42
- Step 2 is on line 47
- Step 3 is on lines 61–71
- Step 4 is on line 81
- Step 5 is on line 85
- Step 6 is on lines 58 & 75
The script is MIT licensed and can be modified by typeface developers and users to support simple initial installs and upgrades for other projects that release in a similar way.
Uninstall Fonts on Linux
The process to uninstall fonts requires identification of the installation paths, removal of the font binaries, and regeneration of the font cache. The font removal step is the only new task that you need to learn if you went through the installation steps in the section above. Be aware that the removal of font binaries with rm step eliminates the files permanently. Please consider backups if they are not readily accessible in the future and you might have a need for them again!
Step 1 : Identify the font binary paths
Use the fc-list executable with grep to identify the paths to the installed fonts by family name:
Modify the grep search term to identify other font families.
Step 2: Remove the font binaries
Use the rm executable to remove the installed font binaries on the paths that you identified with the command in Step 1. This permanently deletes the files. Use caution (and backup copies somewhere!) if the files are not readily accessible should you need them again.
If you used the installation steps above to install the Hack fonts, the following command will remove the fonts:
Step 3: Clear and regenerate the font cache
Then regenerate your font cache:
And that is a manual font management round trip on the Linux command line. Enjoy the many new typeface options that are available to you on your Linux box!
I would like to thank Paride Legovini for his technical review and feedback on this article. His input was very helpful and improved the tutorial.
Your feedback is extremely helpful to us. If you identify any errors or have suggestions for improvements to the approach that was used in this article, please submit a new issue report on our Github repository.
Источник
Install fonts on Linux – Debian, Ubuntu, Kali, Mint – Microsoft TrueType core and many more
Installing fonts is important for those who are multilingual or want to spice up their screen. Many websites uses different fonts and without having to install fonts on Linux, you wont see those, you will see a flat boring default font. I will also show how to reconfigure your fontconfig so that it looks better on your CRT or LCD screen.
This posts shows how you can install fonts and configure them on the following Linux Operating systems:
- Debian Linux
- Ubuntu Linux
- Linux Mint
- Kali Linux
- Any Debian or Ubuntu Variant such as Elementary OS
The basic – Microsoft TrueType core Fonts
This package allows for easy installation of the Microsoft True Type Core Fonts for the Web including:
You will need an Internet connection to download these fonts if you don’t already have them.
NOTE: the package ttf-liberation contains free variants of the Times, Arial and Courier fonts. It’s better to use those instead unless you specifically need one of the other fonts from this package.
Install instructions:
First of all let’s check if we even have those fonts in our repositories. I use Kali Linux which is a variant of Debian Linux. If you’re using Kali, you need to add the default official repositories.
Let’s do an apt-cache search:
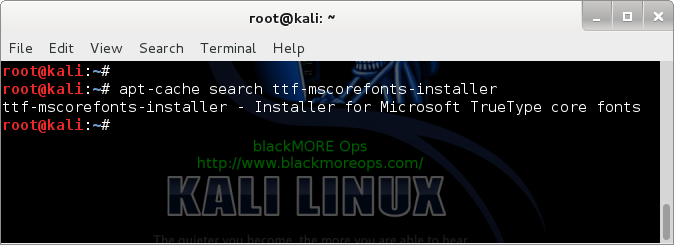
That means we are good to go. If not, follow the link above to add official repositories for Kali Linux (or if you’re using Debian Linux or Ubuntu Linux (or even Linux Mint variants), go and add official repositories for that.)
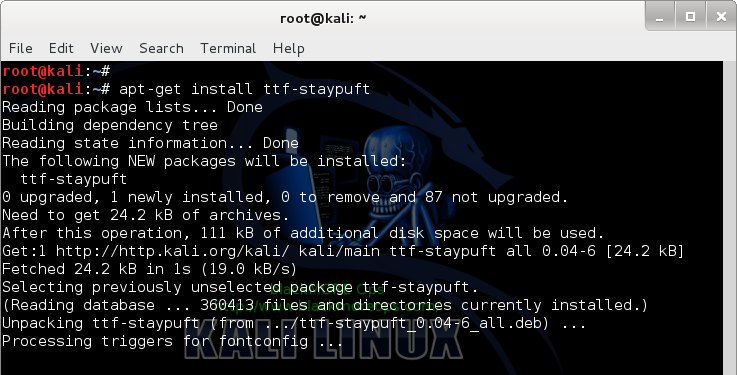
Now install Microsoft TrueType core using a single command:
Output — Click to expand
Note: If you’re behind a proxy server or TOR network, this install might not work, it seems you must be directly connected to Internet.
Similar font package you can also install
Here’s a list of other fonts that you can install, follow is a list of package names, that means you can use
to install these
More ways to install fonts
Sometimes you download .ttf file (a font file) and you want to install it directly. In that case, copy the font file to one of the following directory.
The fonts can be copied in one of this directories:
- /usr/share/fonts
- /usr/share/X11/fonts
- /usr/local/share/fonts
Here’s how the directories work.
If you want the fonts for everyone on the system (i.e. in a multiuser environment) then put them on /usr/share/fonts.
If you only want the fonts for yourself, then put them on
.fonts directory of your home folder.
Once you’ve copied the files in correct places, issue the following command to which will read and cache all installed fonts from these directories.
Output — Click to expand
Sample output below:
Output — Click to expand
Configuring Fonts on Linux
Now if you want to reconfigure or configure hows fonts are displayed on your system, you use the following command:
It will present you with a series of options where you select what you want.
The first option is if you want Native, Autohinter or None tuning for your fonts.
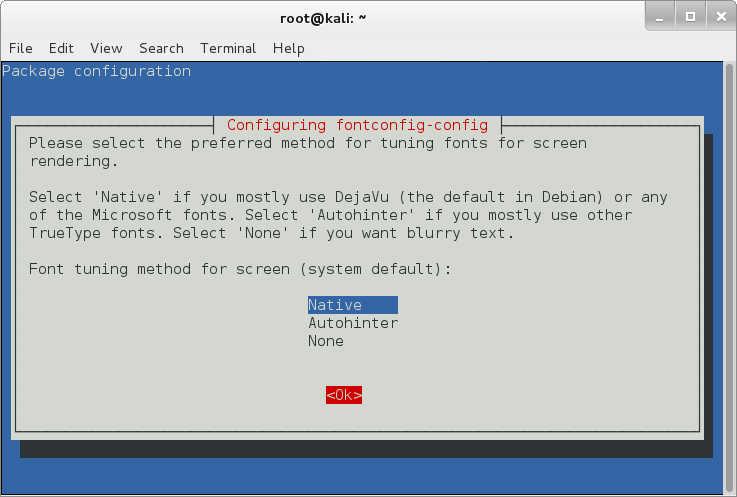
I’ve selected Native on the above screen and pressed Ok.
On the next screen, it will ask you whether you want to enable subpixel rendering for screen.
![]()
Obviously we want that, it makes fonts look a lot better on flat (LCD) screen, at the sametime if you’re using a CRT screen, it might break a few things. So automatic is the way to go. (in my personal case, I should’ve chosed Always and I am using a LCD screen, the choice is yours to make). Press Ok to move to the next screen.
The last screen was asking me whether I want to enable bitmapped fonts by default. I selected Yes … (duh! I wasn’t actually sure, but heck, I can come back anytime and run the dpkg reconfigure command to fix any problems. So why not? )
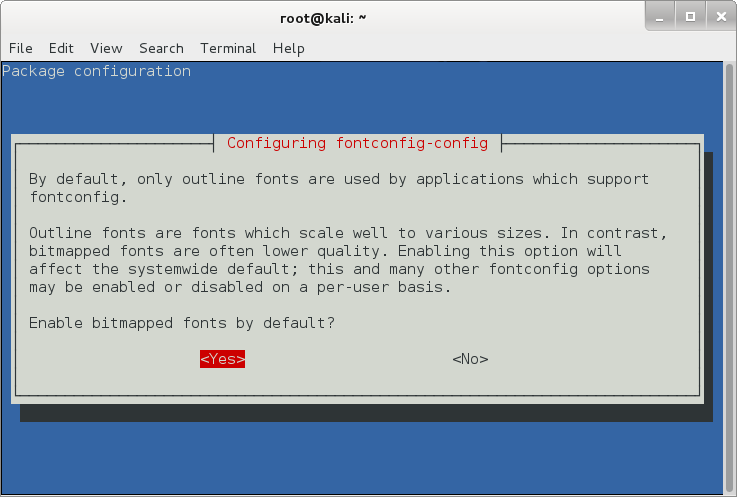
Choose your option and press Enter.
Do fonts on your screen looks better now?
Downloading and installing a font
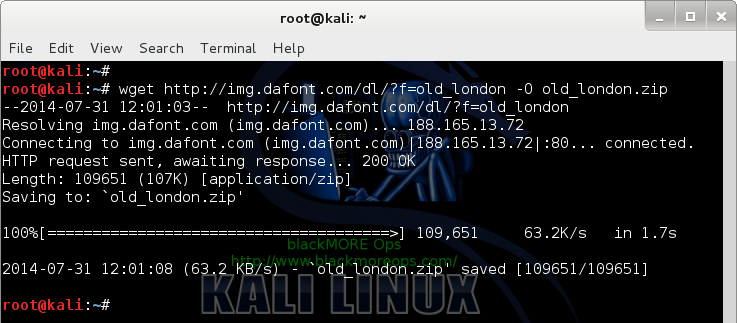
During my search I came across this great website that contains free fonts.http://www.dafont.com/
So I decided I want to download a Gothic Font for fun.
Please note that I used -O old_london.zip file as the output name. It’s because the website doesn’t provide a direct link to the file.
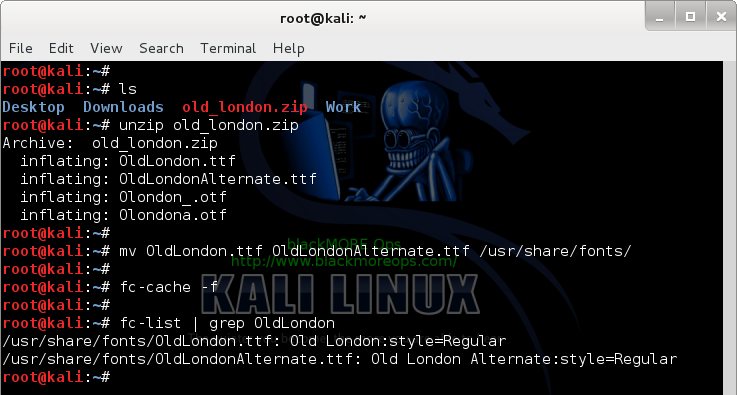
Uncompress the file:
Move the font files (*.ttf) to /usr/share/fonts folder.
Rebuild your font cache.
Confirm that the files exists in font cache now.
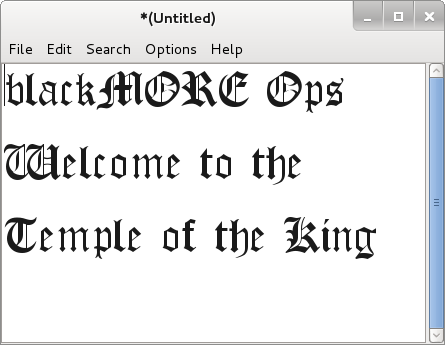
So now that we have fonts and all, lets type to see how it really looks like:
Conclusion:
The best take from this post would be installing new fonts. I think this solves font config for any Linux distributions. Enjoy and try out some interesting fonts. Thanks for reading. Please share.
Источник
How to Install New Fonts in Ubuntu and Other Linux Distributions
Last updated February 1, 2021 By Abhishek Prakash 30 Comments
Ubuntu does come with a bunch of fonts installed by default in it. But at times you might not be satisfied with the available fonts.
If that’s the case, you can easily install additional fonts in Ubuntu, or any other Linux system such as Linux Mint.
In this tutorial, I’ll show you:
- How to install a font in Linux
- How to install multiple fonts at once
- How to use a GUI tool for managing fonts in Ubuntu-based distributions
Installing a new font in Ubuntu Linux
The fonts usually come in True Type (TTF) or Open Type (OTF) file formats. You can use either of them in Linux.
Step 1: Get fonts
First, download fonts of your choice. You can get some free fonts on Google Fonts website.
Download Google Fonts
Step 2: Install the new fonts
The downloaded fonts are usually in a zipped file. Extract the zip file in Linux by right-clicking and selecting extract.
Now go to this extracted folder and look for .ttf (TrueType Fonts) or .otf (openType Fonts) files.
Whichever it may be, just double-click on the font file. It will open it in Font Viewer application. In here, you can see the option to install the font in the top-right corner:
You won’t really see anything being installed as you see when installing a software. Couple of seconds later, you’ll see the status has been changed to “Installed“. No prizes for guessing that the font has been now installed.
Once installed, you can see the newly installed fonts in any application that uses fonts such as GIMP, Pinta etc.
Install several fonts at once in Linux
No, it is not a typo. This is an alternative to step 2 that I mentioned above. Imagine you have 20 new fonts to install. Installing all these fonts, one by one, by double-clicking on them is cumbersome and inconvenient. Don’t you think so?
To install several fonts at once in Ubuntu, all you need to do is to create .fonts directory, if it doesn’t exist already, in your Home directory. And extract or copy paste all those TTF or OTF files in this directory.
Step 1: Create .fonts directory in your home directory
Go to your Home directory in File manager. Press Ctrl+H to show hidden files in Ubuntu. Right click to make a new folder and name it .fonts. That dot at the beginning is important. In Linux, if you put dot ahead of the file name, it hides the file from normal view.
Step 2: Put fonts files in the .fonts directory
Copy your fonts files and paste those in the .fonts directory that you have created in the previous step. You don’t need to do anything else. These fonts will now be available for you.
Install Multiple Fonts Linux
Alternative: Use Font Manager for managing fonts in Ubuntu and other Linux
Alternatively, you can install Font Manager application and manage fonts using a GUI application. This tool also allows you to delete an existing font.
Please check your distribution’s package manager and see if Font Manager is available to install.
On Ubuntu and Debian-based distributions, you can use the apt command to install it:
Once installed, look for Font Manager in the system menu and start it:
Open the Font Manager. You can see installed fonts and option to install new fonts, remove existing fonts etc here. It’s quite a versatile tool for managing fonts in your Linux system.
To remove Font Manager, use the command below:
I hope this quick helped you to install fonts in Ubuntu and other Linux systems. Do let me know if you have questions or suggestions.
Like what you read? Please share it with others.
Источник


