- Installing linux server ubuntu
- 2. Requirements
- 3. Boot from install media
- 4. Choose your language
- 5. Choose the correct keyboard layout
- 6. Choose your install
- 7. Networking
- 8. Configure storage
- 9. Select a device
- 10. Confirm partitions
- 11. Confirm changes
- 12. Set up a Profile
- 13. Install software
- 14. Installation complete
- 15. What next?
- Finding help
- Basic installation
- Preparing to Install
- System requirements
- Server and Desktop Differences
- Backing Up
- Preparing install media
- Booting the installer
- Using the installer
- Установка Linux Ubuntu Server 20.04. Подробная инструкция для начинающих
- Пошаговая установка Linux Ubuntu Server 20.04
- Шаг 1 – Скачивание установочного образа
- Шаг 2 – Создание установочного носителя
- Шаг 3 – Загрузка с установочного носителя
- Шаг 4 – Выбор языка
- Шаг 5 – Обновление программы установки
- Шаг 6 – Выбор раскладки клавиатуры
- Шаг 7 – Настройка сети
- Шаг 8 – Настройка прокси-сервера
- Шаг 9 – Настройка сервера обновлений
- Шаг 10 – Разметка диска
- Шаг 11 – Настройка учетной записи
- Шаг 12 – Настройка OpenSSH сервера
- Шаг 13 – Выбор компонентов сервера
- Шаг 14 – Начало установки Ubuntu Server
- Шаг 15 – Завершение процесса установки
Installing linux server ubuntu
Ubuntu Server is a variant of the standard Ubuntu you already know, tailored for networks and services. It’s just as capable of running a simple file server as it is operating within a 50,000 node cloud.
Unlike the installation of Ubuntu Desktop, Ubuntu Server does not include a graphical installation program. Instead, it uses a text menu-based process. If you’d rather install the desktop version, take a look at our Install Ubuntu desktop tutorial.
This guide will provide an overview of the installation from either a DVD or a USB flash drive.
For a more detailed guide on Ubuntu Server’s capabilities and its configuration, take a look at our the Community Ubuntu Server documentation.
2. Requirements
You’ll need to consider the following before starting the installation:
- Ensure you have at least 2GB of free storage space.
- Have access to either a DVD or a USB flash drive containing the version of Ubuntu Server you want to install.
- If you’re going to install Ubuntu Server alongside data you wish to keep, ensure you have a recent backup.
See the server guide pages for more specific details on hardware requirements. We also have several tutorials that explain how to create an Ubuntu DVD or USB flash drive.
3. Boot from install media
To trigger the installation process, perform the following:
- Put the Ubuntu DVD into your DVD drive (or insert the USB stick or other install media).
- Restart your computer.
After a few moments, you should see messages like those shown below on the screen…

Most computers will automatically boot from USB or DVD, though in some cases this is disabled to improve boot times. If you don’t see the boot message and the “Welcome” screen which should appear after it, you will need to set your computer to boot from the install media.
There should be an on-screen message when the computer starts telling you what key to press for settings or a boot menu. Depending on the manufacturer, this could be Escape , F2 , F10 or F12 . Simply restart your computer and hold down this key until the boot menu appears, then select the drive with the Ubuntu install media.
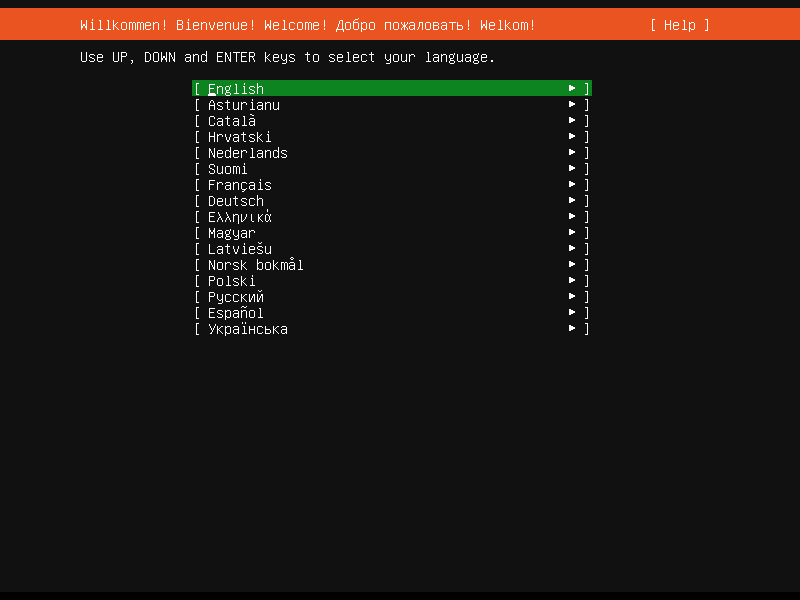
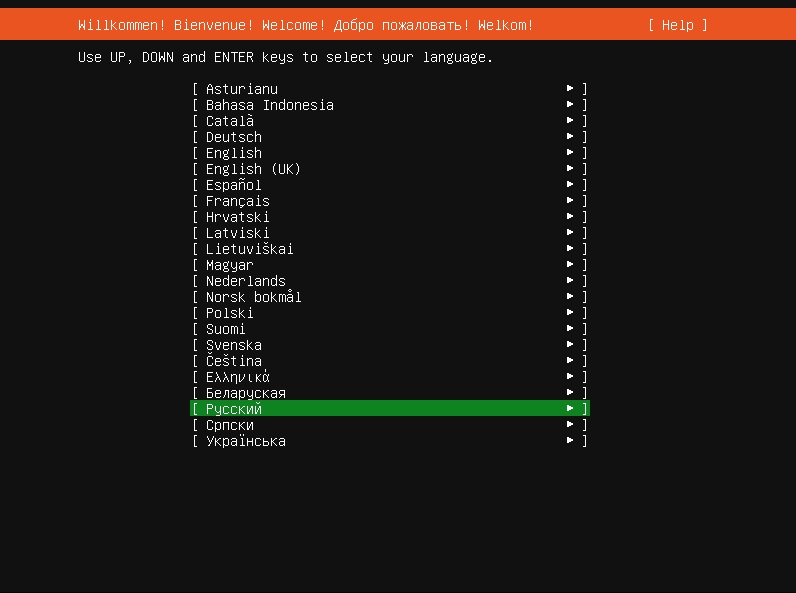
4. Choose your language
After the boot messages appear, a ‘Language’ menu will be displayed.

As the message suggests, use the Up , Down and Enter keys to navigate through the menu and select the language you wish to use.
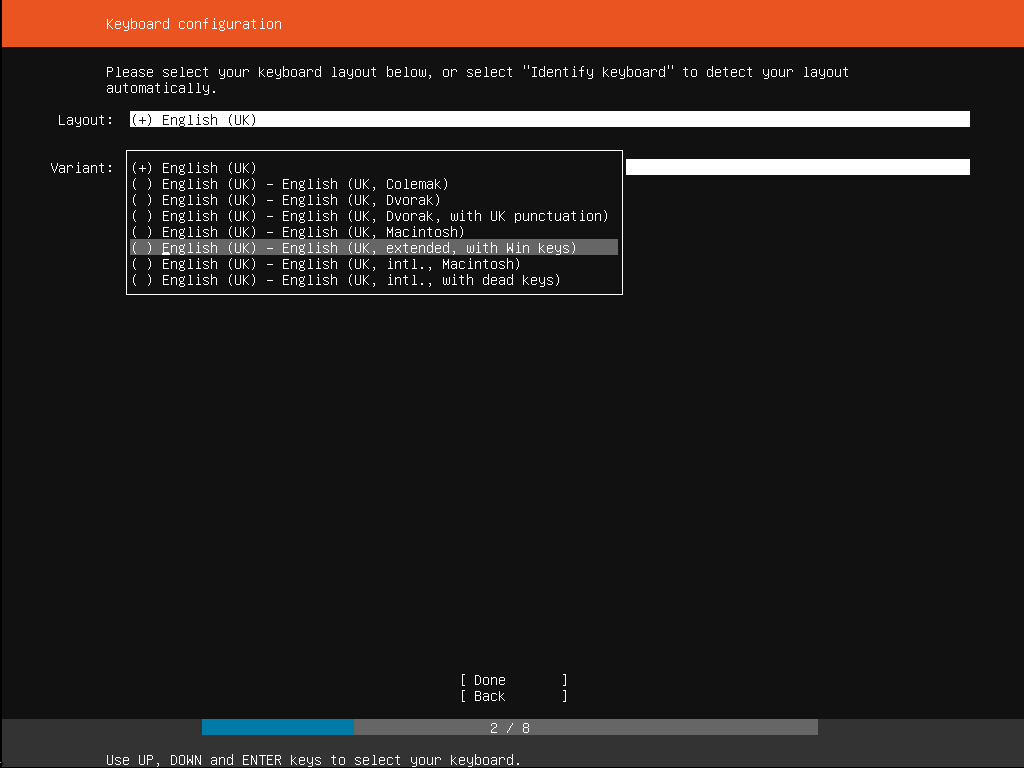
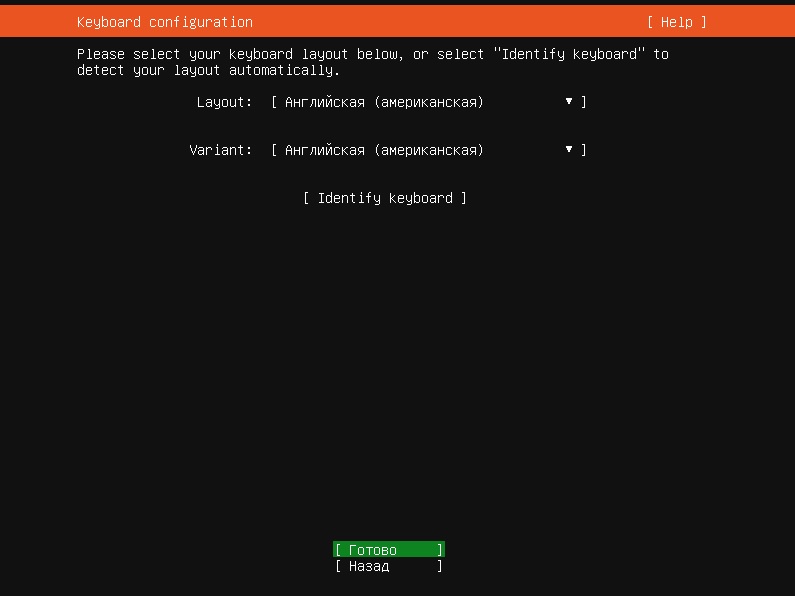
5. Choose the correct keyboard layout
Before you need to type anything in, the installer will next display a menu asking you to select your keyboard layout and, if applicable, the variant.

If you don’t know which particular variant you want, just go with the default — when Ubuntu Server has been installed you can test and change your preferences more easily if necessary.
6. Choose your install
Now we are ready to select what you want to install. There are three options in the menu:
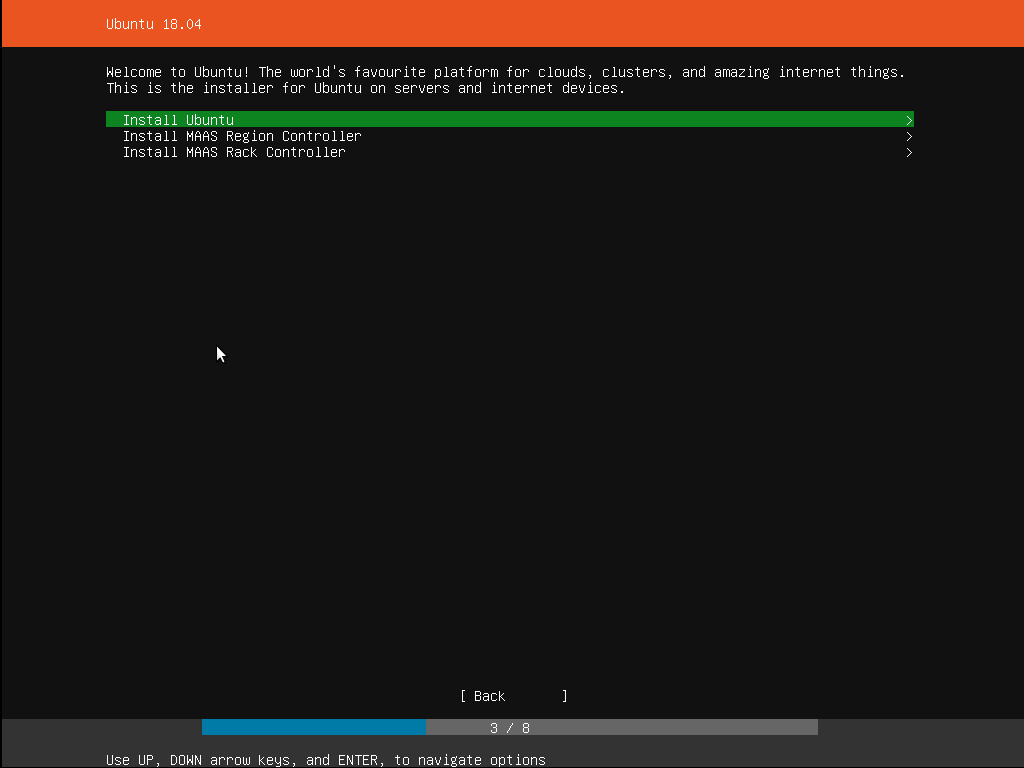
The bottom two options are used for installing specific components of a Metal As A Service (MAAS) install. If you are installing MAAS, you should check out the MAAS documentation for more information on this! The rest of this tutorial assumes you select the first option, Install Ubuntu .
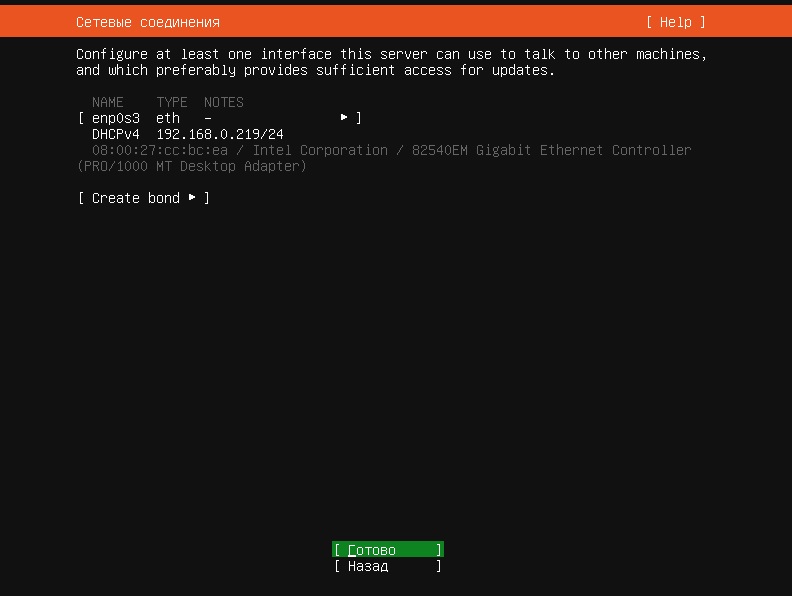
7. Networking
The installer will automatically detect and try to configure any network connections via DHCP.

This is usually automatic and you will not have to enter anything on this screen, it is for information only.
If no network is found, the installer can continue anyway, it just won’t be able to check for updates. You can always configure networking after installation.
8. Configure storage
The next step is to configure storage. The recommended install is to have an entire disk or partition set aside for running Ubuntu.

If you need to set up a more complicated system, the manual option will allow you to select and reorganise partitions on any connected drives.
Note that Ubuntu no longer requires a separate partition for swap space, nor will the automated install create one.
9. Select a device
This menu will allow you to select a disk from the ones detected on the system.

To help identification, the drives will be listed using their system ID. Use the arrow keys and enter to select the disk you wish to use.
10. Confirm partitions
With the target drive selected, the installer will calculate what partitions to create and present this information…
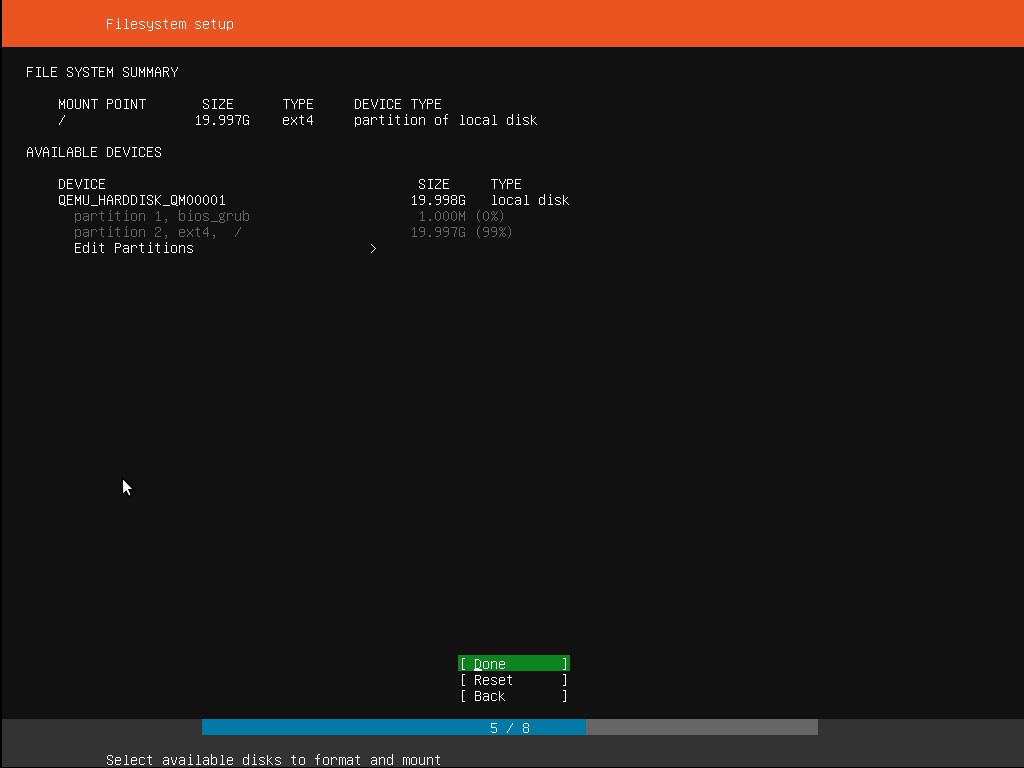
If this isn’t what you expected to see (e.g., you have selected the wrong drive), you should use the arrow keys and enter to select Back from the options at the bottom of the screen. This will take you back to the previous menu where you can select a different drive.
It is also possible to manually change the partitions here, by selecting Edit Partitions . Obviously you should only select this if you are familiar with how partitions work.
When you are happy with the disk layout displayed, select Done to continue.
11. Confirm changes
Before the installer makes any destructive changes, it will show this final confirmation step. Double check that everything looks good here and you aren’t about to reformat the wrong device!

There is no “Undo” for this step, once you confirm the changes, the indicated devices will be overwritten and any contents may be lost
12. Set up a Profile
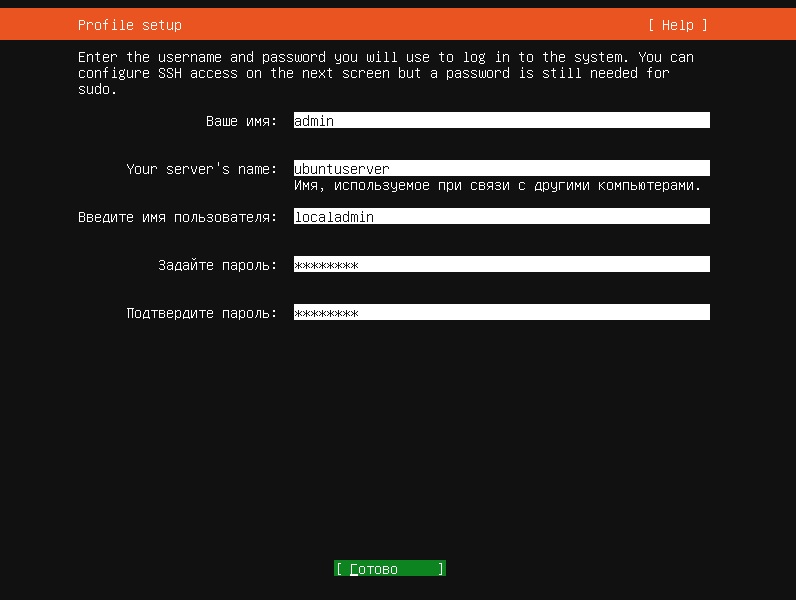
The software is now being installed on the disk, but there is some more information the installer needs. Ubuntu Server needs to have at least one known user for the system, and a hostname. The user also needs a password.

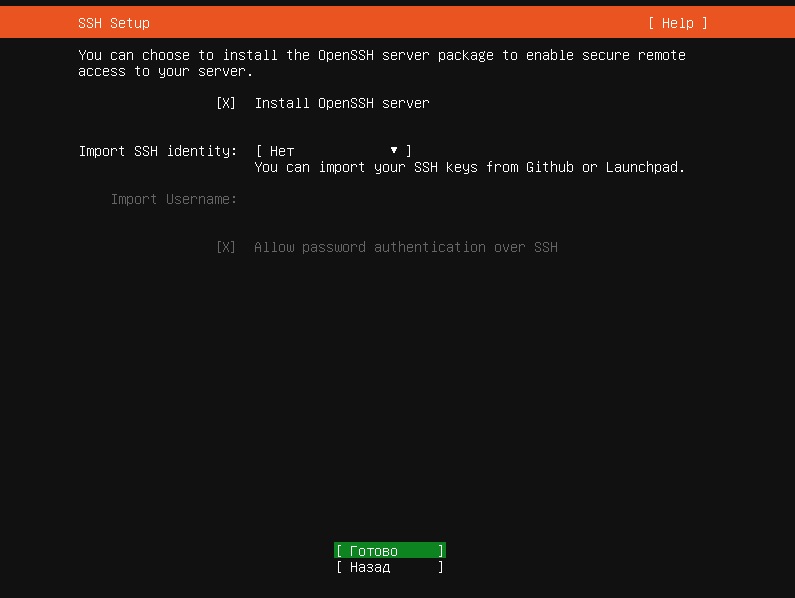
There is also a field for importing SSH keys, either from Launchpad, Ubuntu One or Github. You simply need to enter the username and the installer will fetch the relevant keys and install them on the system ready for use (e.g. secure SSH login to the server).
13. Install software
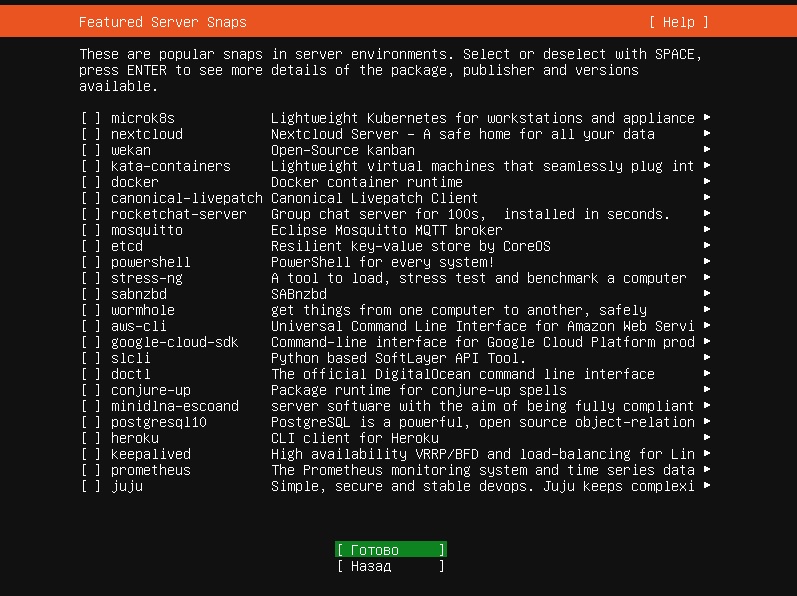
Once you have finished entering the required information, the screen will now show the progress of the installer. Ubuntu Server now installs a concise set of useful software required for servers. This cuts down on the install and setup time dramatically. Of course, after the install is finished, you can install any additional software you may need.

14. Installation complete
When the install is complete, you will see a message like this on the screen.

Remember to remove the install media, and then press enter to reboot and start the server. Welcome to Ubuntu!
15. What next?
With Ubuntu Server installed, you can now carry on and build that file-server or multi-node cluster we mentioned!
If you are new to Ubuntu Server, we’d recommend reading the Server Guide.
You can also check out the latest on Ubuntu Server, and what others are using it for on the Ubuntu Server pages.
Finding help
The Ubuntu community, for both desktop and server, is one of the friendliest and most well populated you can find. That means if you get stuck, someone has probably already seen and solved the same problem.
Try asking for help in one of the following places:
Alternatively, if you need commercial support for your server deployments, take a look at Ubuntu Advantage.
Источник
Basic installation
This chapter provides an overview of installing Ubuntu 20.04 Server Edition. There is more detailed documentation on other installer topics.
Preparing to Install
This section explains various aspects to consider before starting the installation.
System requirements
Ubuntu 20.04 Server Edition provides a common, minimalist base for a variety of server applications, such as file/print services, web hosting, email hosting, etc. This version supports four 64-bit architectures:
- amd64 (Intel/AMD 64-bit)
- arm64 (64-bit ARM)
- ppc64el (POWER8 and POWER9)
- s390x (IBM Z and LinuxONE)
The recommended system requirements are:
- CPU: 1 gigahertz or better
- RAM: 1 gigabyte or more
- Disk: a minimum of 2.5 gigabytes
Server and Desktop Differences
The Ubuntu Server Edition and the Ubuntu Desktop Edition use the same apt repositories, making it just as easy to install a server application on the Desktop Edition as on the Server Edition.
One major difference is that the graphical environment used for the Desktop Edition is not installed for the Server. This includes the graphics server itself, the graphical utilities and applications, and the various user-supporting services needed by desktop users.
Backing Up
Before installing Ubuntu Server Edition you should make sure all data on the system is backed up.
If this is not the first time an operating system has been installed on your computer, it is likely you will need to re-partition your disk to make room for Ubuntu.
Any time you partition your disk, you should be prepared to lose everything on the disk should you make a mistake or something goes wrong during partitioning. The programs used in installation are quite reliable, most have seen years of use, but they also perform destructive actions.
Preparing install media
There are platform specific step-by-step examples for s390x LPAR, z/VM and ppc64el installations.
For amd64, download the install image from https://releases.ubuntu.com/20.04/.
There are many ways to boot the installer but the simplest and commonest way is to create a bootable USB stick to boot the system to be installed with (tutorials for other operating systems are also available).
Booting the installer
Plug the USB stick into the system to be installed and start it.
Most computers will automatically boot from USB or DVD, though in some cases this is disabled to improve boot times. If you don’t see the boot message and the “Welcome” screen which should appear after it, you will need to set your computer to boot from the install media.
There should be an on-screen message when the computer starts telling you what key to press for settings or a boot menu. Depending on the manufacturer, this could be Escape , F2 , F10 or F12 . Simply restart your computer and hold down this key until the boot menu appears, then select the drive with the Ubuntu install media.
After a few moments, the installer will start in its language selection screen.
Using the installer
The installer is designed to be easy to use and have sensible defaults so for a first install you can mostly just accept the defaults for the most straightforward install:
- Choose your language
- Update the installer (if offered)
- Select your keyboard layout
- Do not configure networking (the installer attempts to configure wired network interfaces via DHCP, but you can continue without networking if this fails)
- Do not configure a proxy or custom mirror unless you have to in your network
- For storage, leave “use an entire disk” checked, and choose a disk to install to, then select “Done” on the configuration screen and confirm the install
- Enter a username, hostname and password
- Just select Done on the SSH and snap screens
- You will now see log messages as the install is completed
- Select restart when this is complete, and log in using the username and password provided
There is more detailed documentation on all these options.
Источник
Установка Linux Ubuntu Server 20.04. Подробная инструкция для начинающих
Приветствую Вас на сайте Info-Comp.ru! В данном материале представлено подробное описание процесса установки операционной системы Linux Ubuntu Server 20.04.
Ubuntu Server 20.04 – серверная версия операционной системы Linux Ubuntu с долгосрочной поддержкой (LTS).
Пошаговая установка Linux Ubuntu Server 20.04
Начать пользоваться Linux Ubuntu Server можно несколькими способами, в данной статье будет рассмотрен способ, который подразумевает самостоятельную установку дистрибутива на сервер.
Сейчас мы рассмотрим все шаги, которые необходимо выполнить, чтобы установить Linux Ubuntu Server 20.04, установка будет производиться на сервер с поддержкой UEFI.
Заметка! Процесс установки обычной версии Ubuntu подробно рассмотрен в статье – Установка Linux Ubuntu 20.04.
Шаг 1 – Скачивание установочного образа
Первое, что нам нужно сделать – это скачать установочный образ Ubuntu Server. Для этого переходим в раздел «Download» на официальном сайте Ubuntu.
Затем, так как мы хотим самостоятельно установить Ubuntu, нам нужно выбрать 3-й вариант (Option 3), который позволяет скачать ISO файл, и нажать кнопку «Download Ubuntu Server 20.04.1 LTS».
Вот прямые ссылки на скачивание Linux Ubuntu Server 20.04.1:
В итоге у Вас должен загрузиться ISO файл ubuntu-20.04.1-live-server-amd64.iso размером около 900 мегабайт.
Шаг 2 – Создание установочного носителя
Если Вы будете устанавливать Ubuntu Server на виртуальную машину, то Вам достаточно примонтировать скаченный ISO файл в гипервизоре, однако если Вы будете устанавливать Ubuntu Server на физический сервер, то Вам необходимо будет создать загрузочный установочный носитель, например, USB флешку, с которой Вы сможете загрузиться и выполнить установку Ubuntu Server.
Создать загрузочную флешку в Windows можно с помощью программы Rufus или Ventoy:
Шаг 3 – Загрузка с установочного носителя
Затем, после того как загрузочный установочный носитель Вы подготовите, необходимо загрузить сервер с этого носителя, т.е. загрузиться с него.
Чтобы это сделать, необходимо:
- Выключить сервер, будь то физический или в гипервизоре;
- Подключить загрузочное устройство к серверу, например, вставить флешку в порт, в случае с физическим сервером, или, как уже было отмечено, примонтировать ISO файл в гипервизоре;
- Запустить сервер или виртуальную машину и при включении вызвать загрузочное меню, например, клавишей F2, или F8, или F11 или той, которая используется у Вас;
- В загрузочном меню выбрать нужное устройство для загрузки.
В итоге Вы загрузитесь с установочного носителя, запустится программа установки.
Шаг 4 – Выбор языка
Сначала выбираем язык, который будет использоваться в процессе установки данной программой, по умолчанию выбран английский язык, однако программа установки поддерживает много языков, в том числе и русский.
Все действия в процессе установки выполняются с помощью клавиатуры, в данном случае используем клавиши «Стрелочки», а для выбора и перехода к следующему шагу, клавишу Enter (Ввод).
Шаг 5 – Обновление программы установки
Далее, в случае, если сервер уже подключен к сети, программа установки проверит обновления и, если они есть, предложит нам обновиться.
Если сети на данном этапе нет, или нет обновлений, то данное окно не появится.
Для обновления программы установки выбираем пункт «Update to ne Installer», если не хотим обновлять программу установки, то пункт «Продолжить без обновления».
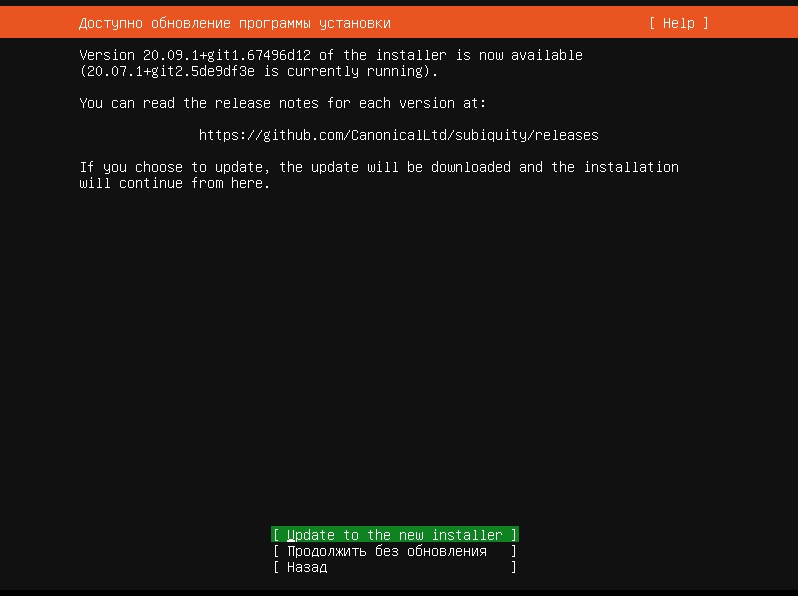
Стоит отметить, что после обновления программы установки процесс сразу перейдет к следующему шагу, однако, язык программы установки, который мы выбирали на предыдущем шаге, сбросится на настройки по умолчанию, поэтому, если мы хотим использовать в процессе установки язык, отличный от того, который предлагается по умолчанию, нам придётся вернуться назад, т.е. нажать кнопку «Назад», и снова выбрать нужный нам язык.
Шаг 6 – Выбор раскладки клавиатуры
В случае необходимости мы можем изменить раскладку клавиатуры.
Шаг 7 – Настройка сети
Затем будут следовать настройки сетевого соединения.
Сетевые интерфейсы, которые программа установки обнаружит, по умолчанию будут настроены на DHCP, поэтому если у Вас сервер будет получать сетевые настройки от DHCP сервера, то здесь Вы сразу можете нажать «Готово».
Однако, если Вам нужно задать определенные сетевые настройки (статические адреса), то Вы также стрелочками выбираете нужный интерфейс и нажимаете Enter.
В случае настройки протокола IPv4, выбирайте пункт «Edit IPv4» и нажимайте ввод.
Далее выбираете параметр «IPv4 Method», в частности для указания своих настроек выбираем пункт «Вручную».
После этого откроется окно для ввода сетевых настроек.
Указываем: подсеть, IP адрес, шлюз, сервер имен. После ввода всех настроек нажимаем «Сохранить».
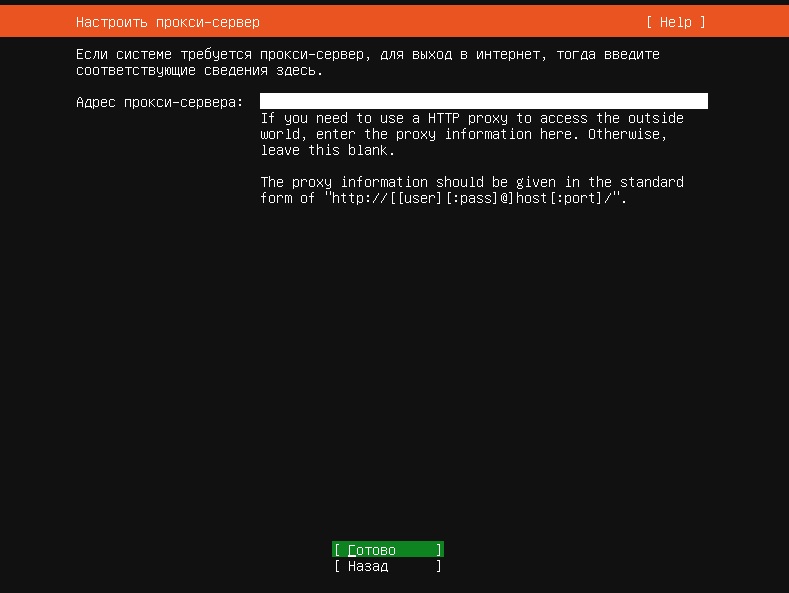
Шаг 8 – Настройка прокси-сервера
Если для соединения с интернетом Вы используете прокси-сервер, то после настройки сетевого интерфейса Вы можете настроить соответствующие параметры.
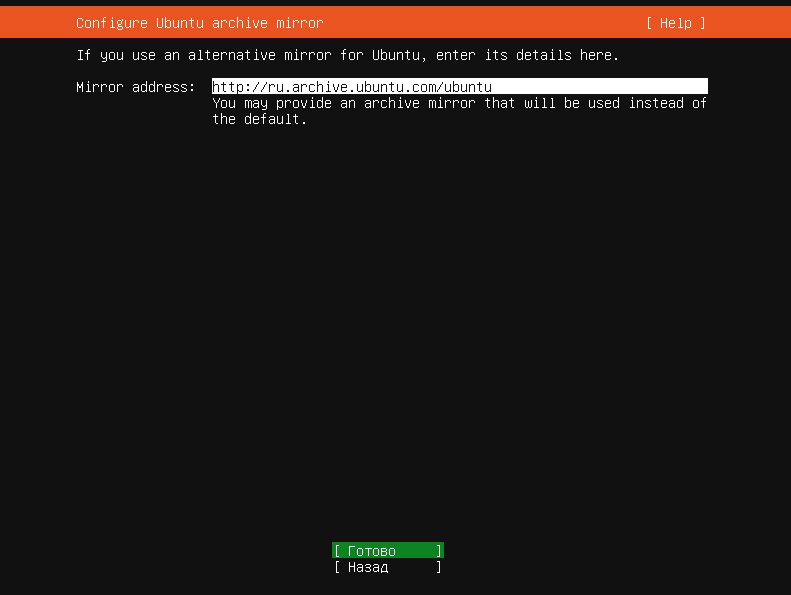
Шаг 9 – Настройка сервера обновлений
Если Вы хотите использовать альтернативный сервер обновлений, то здесь Вы можете указать его адрес.
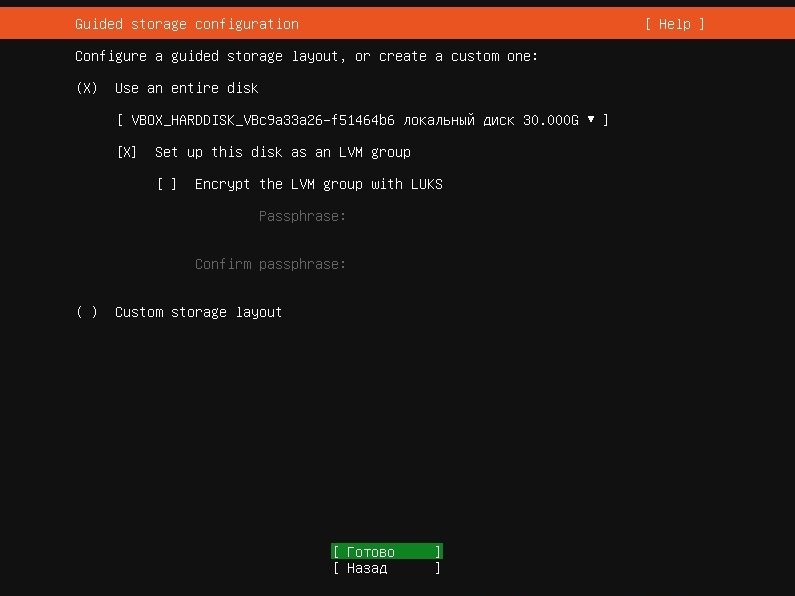
Шаг 10 – Разметка диска
На данном шаге необходимо выполнить разметку диска, программа установки по умолчанию предлагает использовать автоматически сформированную, так сказать стандартную разметку, она предполагает создание необходимого загрузочного раздела, в случае с UEFI, EFI раздела, создание корневого раздела и настройку LVM, и всего этого вполне достаточно для сервера с базовой настройкой (какие-то дополнительные разделы, например, раздел home, в большинстве случаев не требуются).
Если у Вас нет оснований использовать другую не стандартную разметку, то оставляйте все по умолчанию и нажимайте «Готово».
Если Вы хотите выполнить разметку вручную, отметьте пункт «Custom storage layout» и также нажимайте «Готово».
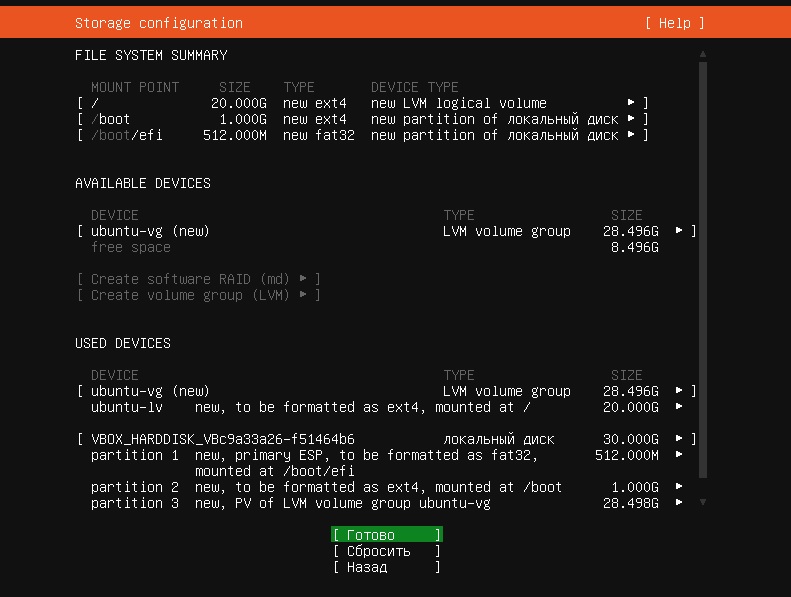
Далее, программа установки отобразит автоматически сформированную разметку.
Нажимаем «Готово» для продолжения.
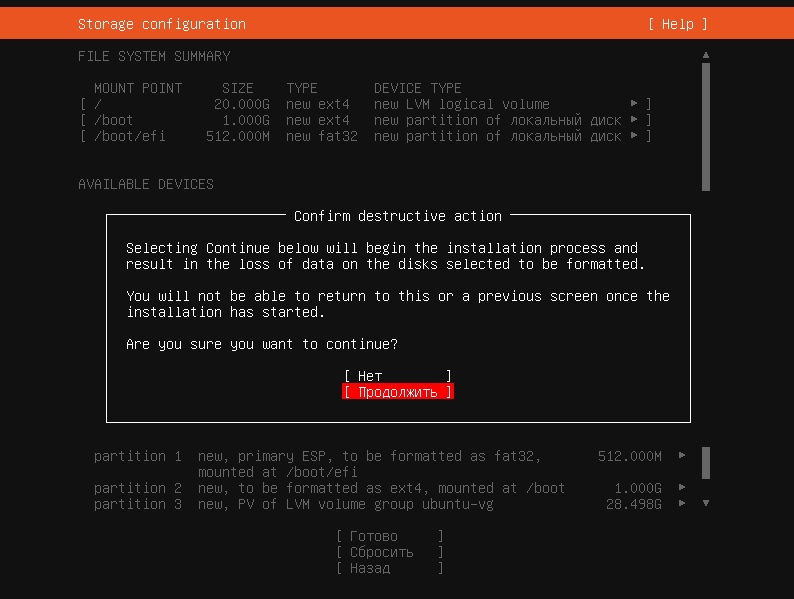
Программа установки запросит подтверждение действий, нажимаем «Продолжить».
Шаг 11 – Настройка учетной записи
Теперь нам нужно настроить учетную запись, под которой мы будем работать в Ubuntu Server. Заполняем форму, т.е. вводим свое имя, имя компьютера, имя пользователя и пароль с подтверждением.
Шаг 12 – Настройка OpenSSH сервера
Если мы хотим подключаться к Ubuntu Server удаленно по сети с помощью OpenSSH сервера, то на данном шаге отмечаем пункт «Install OpenSSH Server», в результате OpenSSH сервер будет установлен в процессе установки операционной системы Ubuntu Server.
Шаг 13 – Выбор компонентов сервера
На данном шаге мы можем отметить компоненты, которые мы будем использовать на сервере, в результате отмеченные компоненты будут установлены в процессе установки операционной системы Ubuntu Server.
Шаг 14 – Начало установки Ubuntu Server
После чего начнется процесс установки, он продлится буквально несколько минут. Мы при этом можем наблюдать все действия, которые выполняет программа установки. Для более детального анализа действий Вы можете нажать на кнопку «View full log».
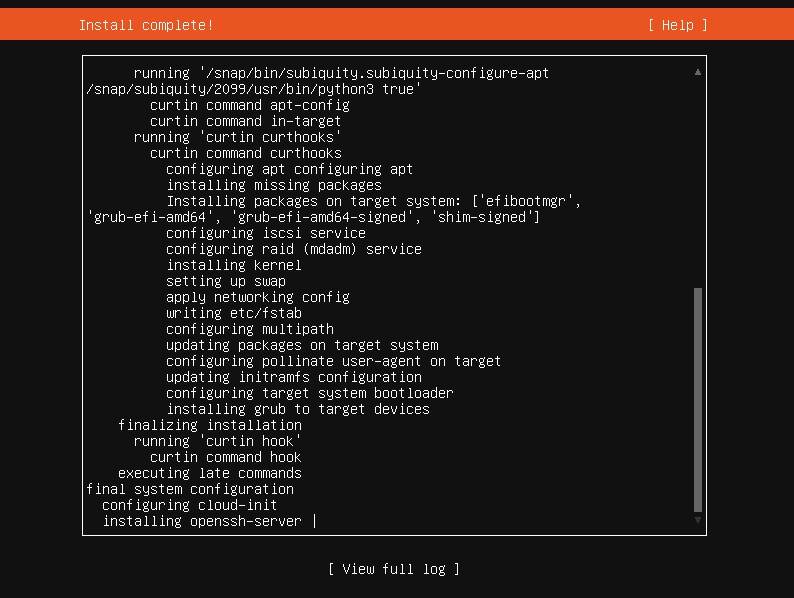
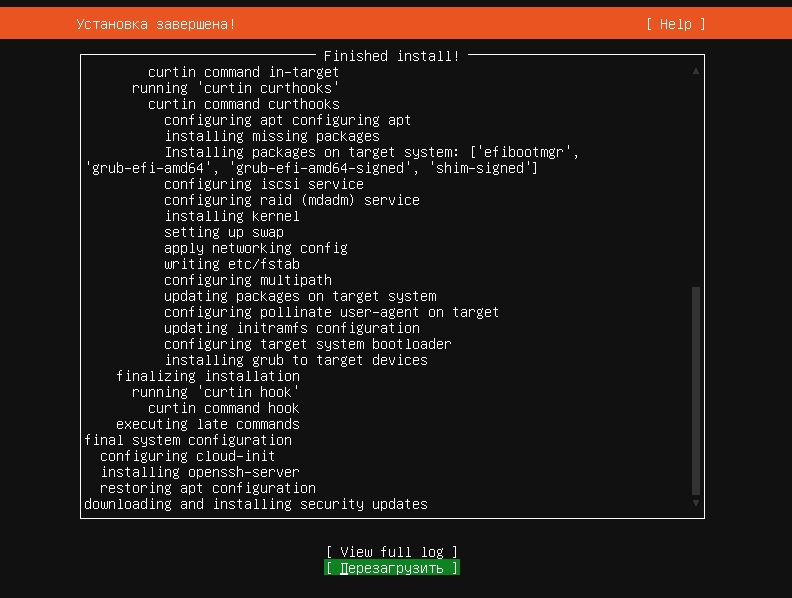
Шаг 15 – Завершение процесса установки
Когда появится сообщение о том, что установка завершена, нажимаем на кнопку «Перезагрузить».
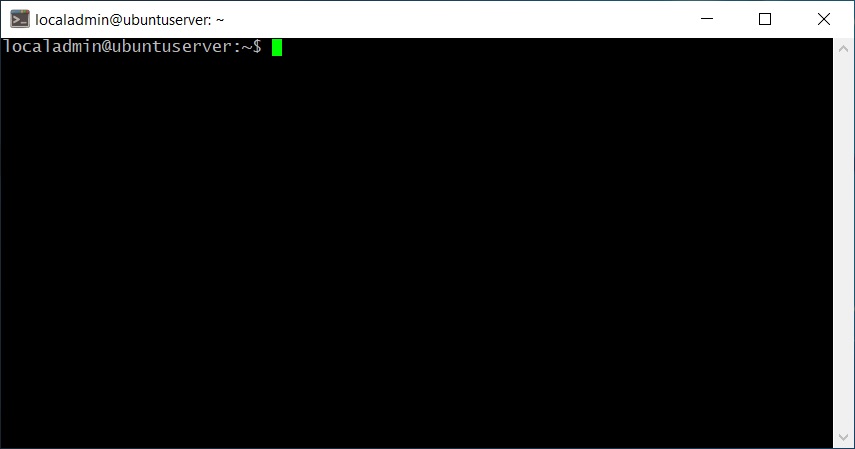
После перезагрузки можно пользоваться новой системой. Для удаленного подключения к серверу можно использовать утилиту PuTTY.
Операционную систему Linux Ubuntu Server 20.04 мы установили, на сегодня это все, надеюсь, материал был Вам полезен, пока!
Источник


